ArticleUpdated: June 17, 2026
Review of the most popular Zbrush brushes
In short
What popular brushes are used in Zbrush: the technique of digital sculpting, tricks of working in the program from the curator of the "Skills Up" courses in 3D graphics.
Skills Up School
Online school of drawing and CG
User: Want to know how the workflow in digital sculpting, specifically in the ZBrush program, works? Then read the detailed material about brushes by the curator of 3D graphics courses, Sergey Lyubashin. Yes, yes, 3D also has brushes ;)
The material will be useful to those who have already started working in ZBrush — Sergey reveals some tricks when working with brushes. These tricks we marked with the word “lifehack”.
Digital sculpting resembles working with plasticine or clay, with the only difference being that instead of real material you have an image on the monitor, and instead of real tools — a set of brushes in the program. But the digital piece of “clay” can also be crumpled, deformed, given выпуклости, вдавленности, patterns and sculpted into the desired shapes. First, I'll tell you about the most popular brushes in ZBrush.
 Lifehack: If you set a large brush diameter and small Z intencity, then angles on soft shapes will be obtained, so you can make more stylized shapes and make the transitions contrasting.

Brushes that are most often used in work:
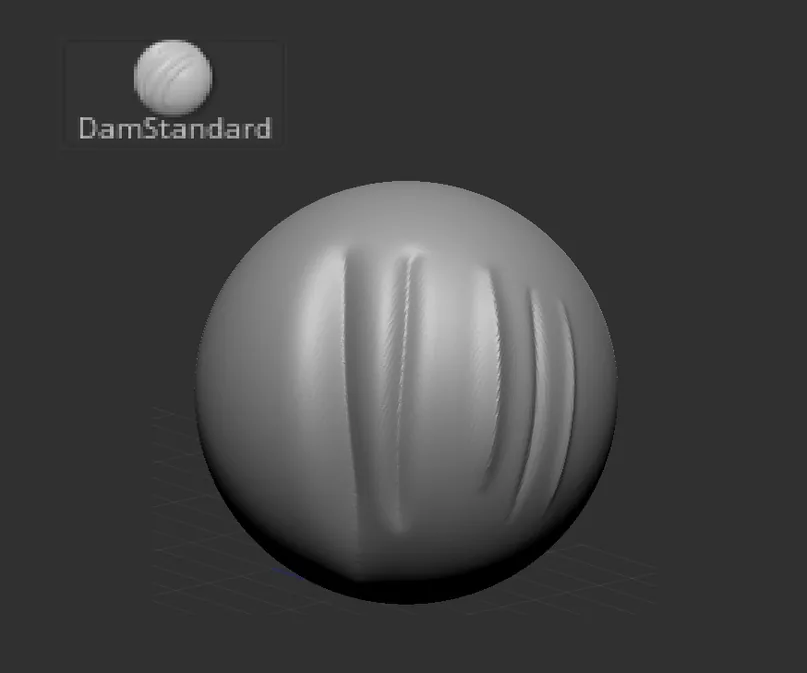
Brush Dam Standart
A brush that creates an internal angle with a soft transition to the shape. Without the Alt button pressed, it makes an internal angle, and with Alt — an external angle. Suitable for folds, wrinkles, hair sketches.
Lifehack: If you set a large brush diameter and small Z intencity, then angles on soft shapes will be obtained, so you can make more stylized shapes and make the transitions contrasting.
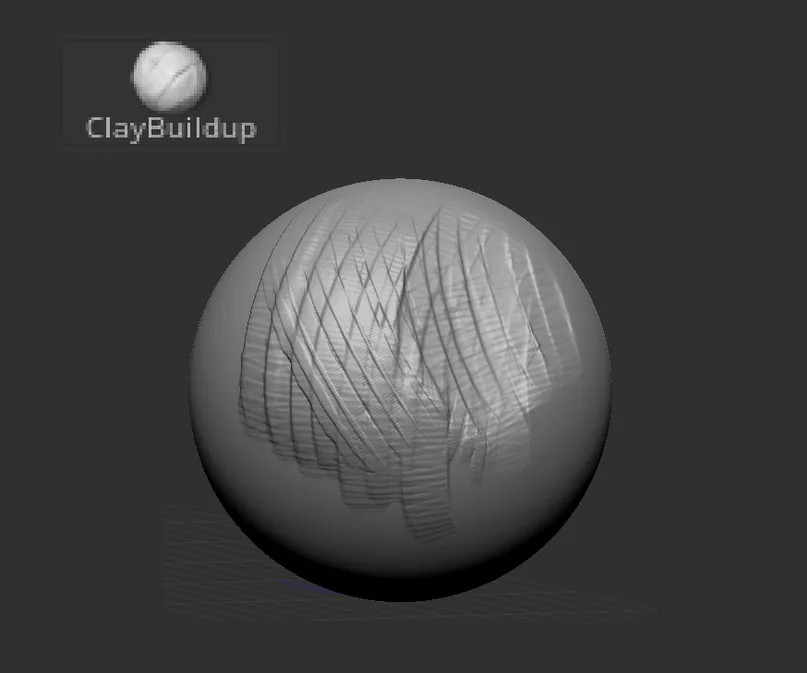
Brush Clay Buildup
Represents real clay: you kind of add or remove “clay” on your object. Without the Alt button pressed, it builds up the shape, with Alt — it “cuts” the shape. I often use this brush. Suitable for sketches. It is also very convenient to make speed sculpts with this brush.
Brush Standart
An ordinary soft brush, I rarely use it without settings. I often use it to apply alphas (alpha is a kind of “stencil”, an image that can be transferred to your object). To apply the alpha, select the alpha in the brush settings, switch Stroke to Drag Rect. Be sure to adjust the RF and MidValue parameters (they are in Alpha/modify, I advise you to transfer them to your interface) and apply the alphas. With the alt key held down, of course, the shape will be “cut out”.
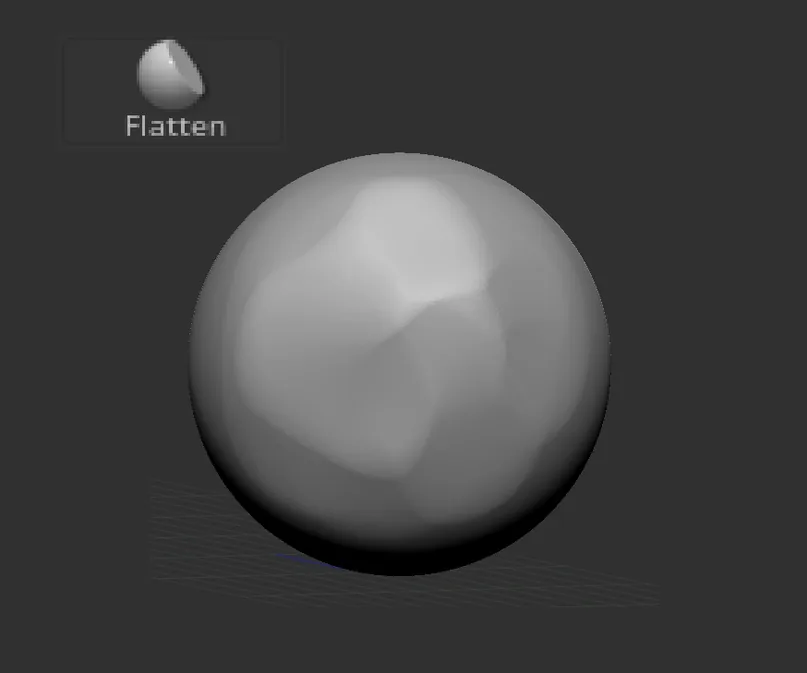
Brush Flatten
The older brother of hPolish (see below). Easily cuts corners, crumples the shape more. Gives a soft edge. The brush is good for both creating chamfers and speed sculpts — for example, as an alternative for smoothing.
Brush Move / Move Topology
Related courses
All courses
from 3 400 ₽
-80%
Introduction to ZBrush
17 000 ₽3 400 ₽
Learn more

Free
Бесплатный курс «Погружение в магию 2D-художников»
Enroll

Free
Бесплатный курс «Основы портрета»
Enroll
Both brushes are very important, I use them all the time. Essentially, they both move the part of the geometry that falls into the brush's influence area. Move topology, unlike Move, ignores geometry that is not connected to the one the brush started working on.
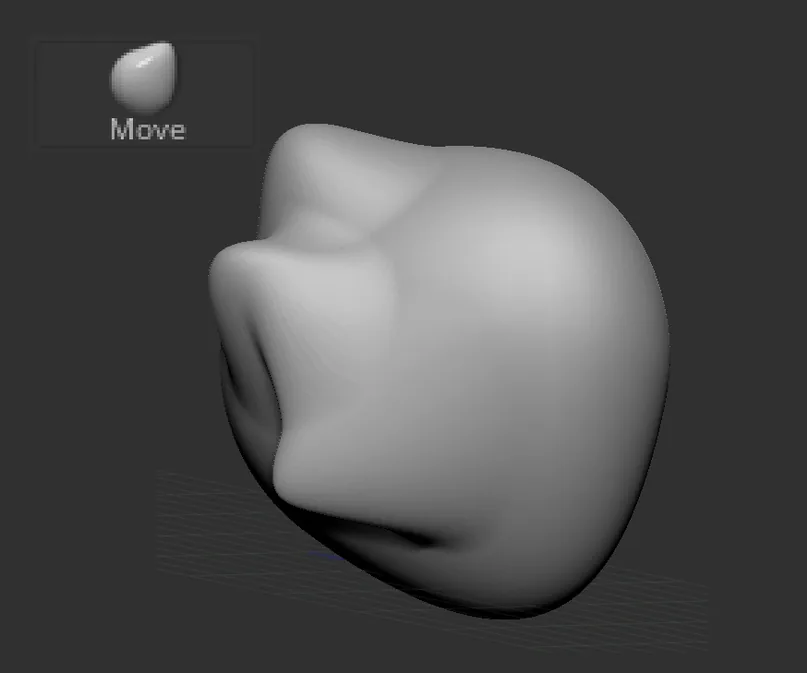 Lifehack: To better understand how Move Topology works, I advise you to try it on the “spring” primitive. With the Alt key held down, it moves the geometry relative to the surface (outward or inward).
 Lifehack: Please note that this brush can сильно вытянуть полигоны, if you make long “horns”, so I advise you to use it in dynamesh mode. And after creating these forms, recalculate the grid. This brush will also be useful for sharpening shapes, for example, leaves on trees: for this I advise you to lower its Z Intencity to 90-80.
Lifehack: To better understand how Move Topology works, I advise you to try it on the “spring” primitive. With the Alt key held down, it moves the geometry relative to the surface (outward or inward).
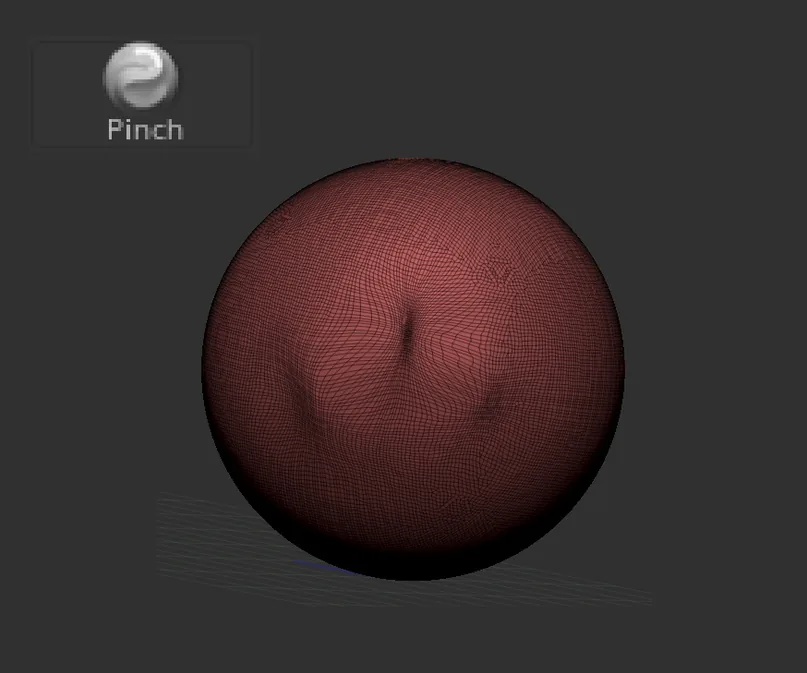
Brush Pinch
Acts like a black hole and pulls all the geometry into the center of the brush. Convenient for working, for example, with branches, as it can make the desired areas thinner.
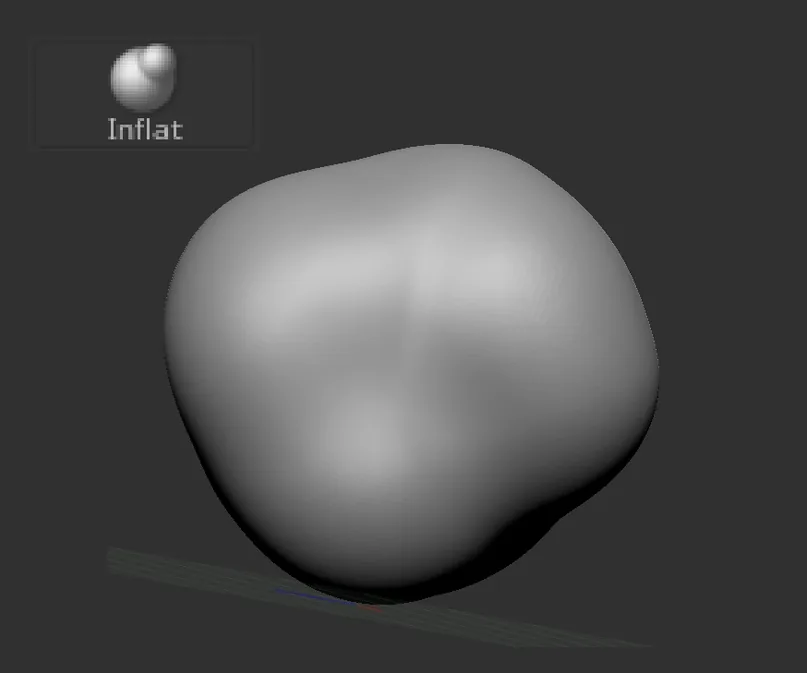
Brush Inflat
The twin brother of the Pinch brush — inflates, thickens the geometry. With the Alt key held down, it “deflates the shape” or turns it inside out.
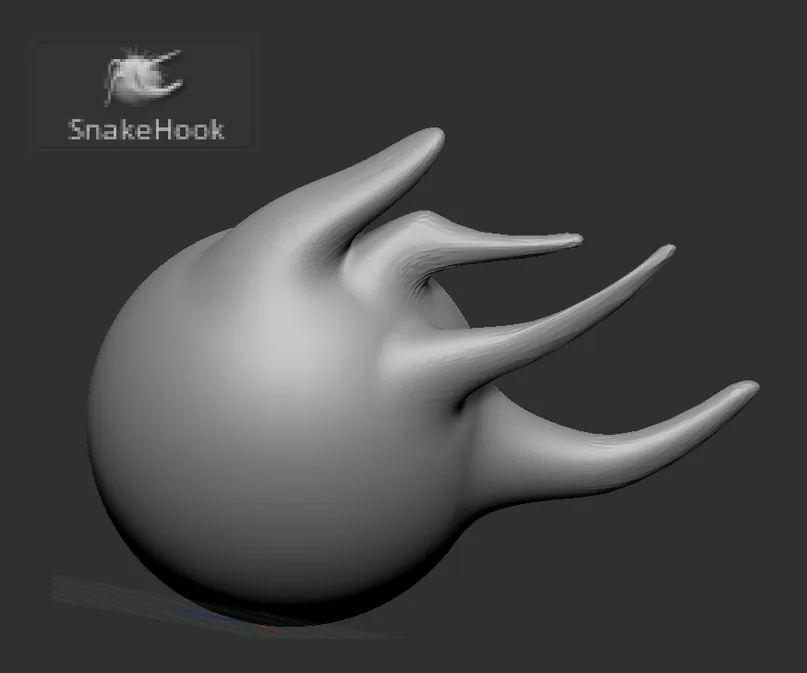
Brush SnakeHook
Something like Move, but leaves a trail of geometry behind. Convenient for creating horns, teeth, sketching hair.
Lifehack: Please note that this brush can сильно вытянуть полигоны, if you make long “horns”, so I advise you to use it in dynamesh mode. And after creating these forms, recalculate the grid. This brush will also be useful for sharpening shapes, for example, leaves on trees: for this I advise you to lower its Z Intencity to 90-80.
Additional brushes — for those who have already got the hang of the classics and want new knowledge:
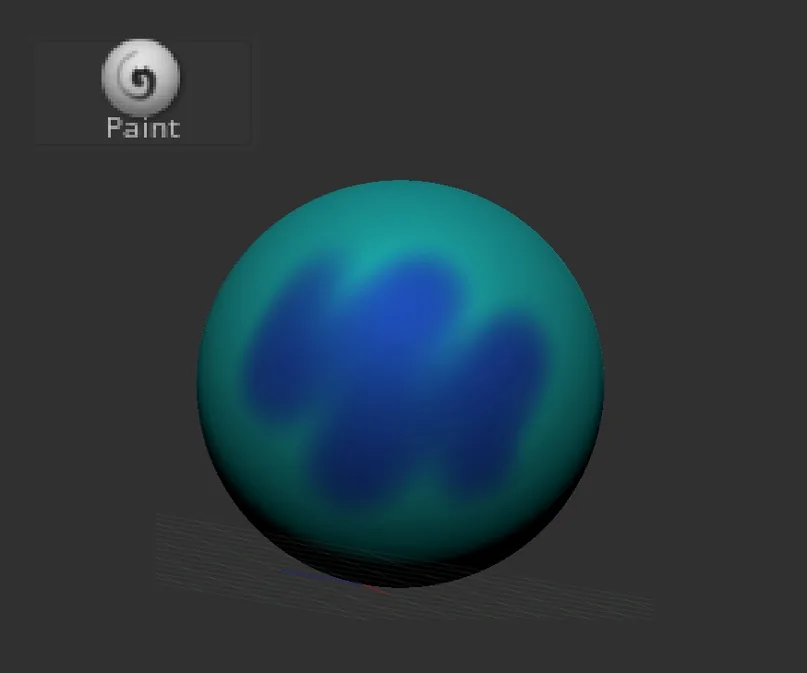
Brush Paint
A brush for poly-painting. That is, for coloring the geometry directly in ZBrush. To use it, just turn on the painting mode on the subtool (brush icon), choose a color and voila, you can paint) Painting is not a texture, technically it is the color of the vertex. Alternative name — Vertex Color or Vertex Paint.
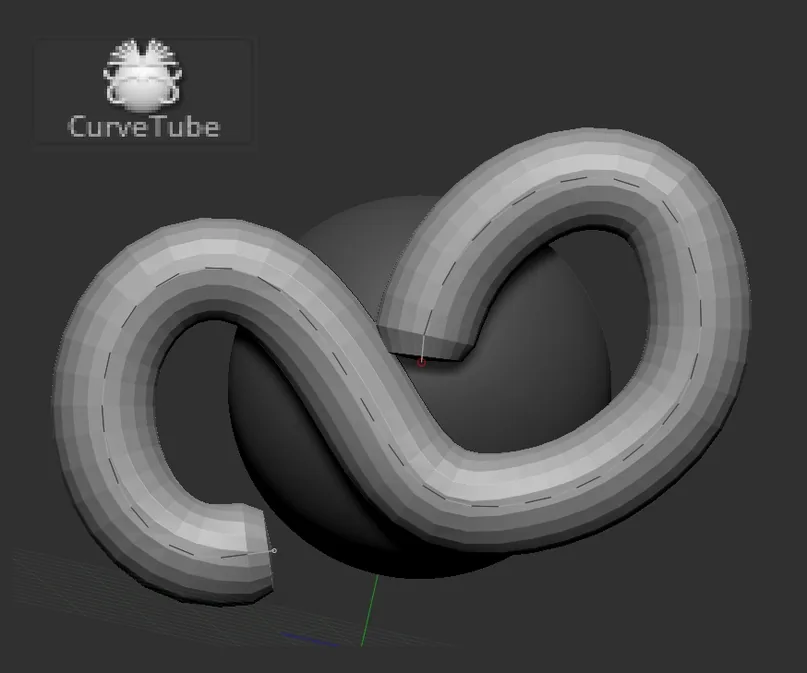
Brush CurveTube / CurveTubeSnap
Many people do not use it because they do not understand its logic. I advise you to get used to it, after that it will seem simpler than the ZSpheres tool) It is convenient to do anything with it: from wires for cybermen, to 5 minute sketches of human body plastics. So with its help it is convenient to make a blank for the character. The thickness can be adjusted by the size of the brush and its flattening by the Z Intencity parameter.
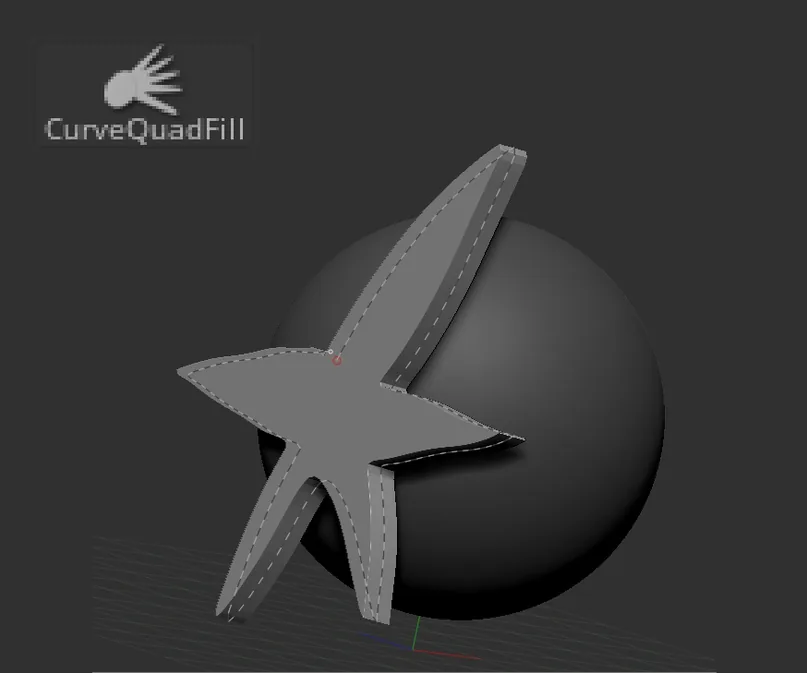
Brush CurveQuadFill / CurveTriFill
Brushes with which you can quickly make planes of the desired shape. The difference between these two brushes is what geometry is obtained on the surfaces.
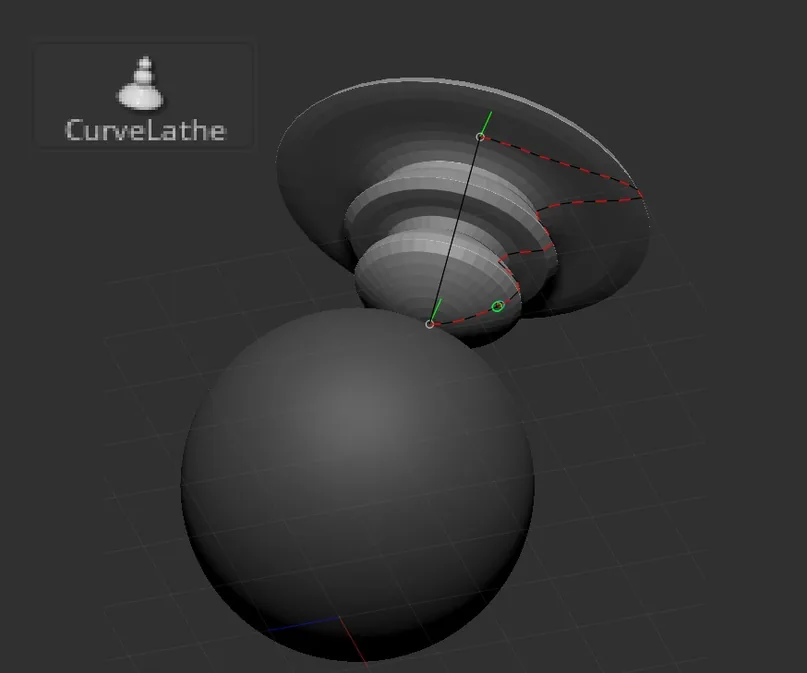
Brush CurveLathe
Creating rotation objects with one stylus movement. The axis of rotation here becomes a straight line from the beginning of the line to its end. It is worth practicing a little to understand how this brush works.
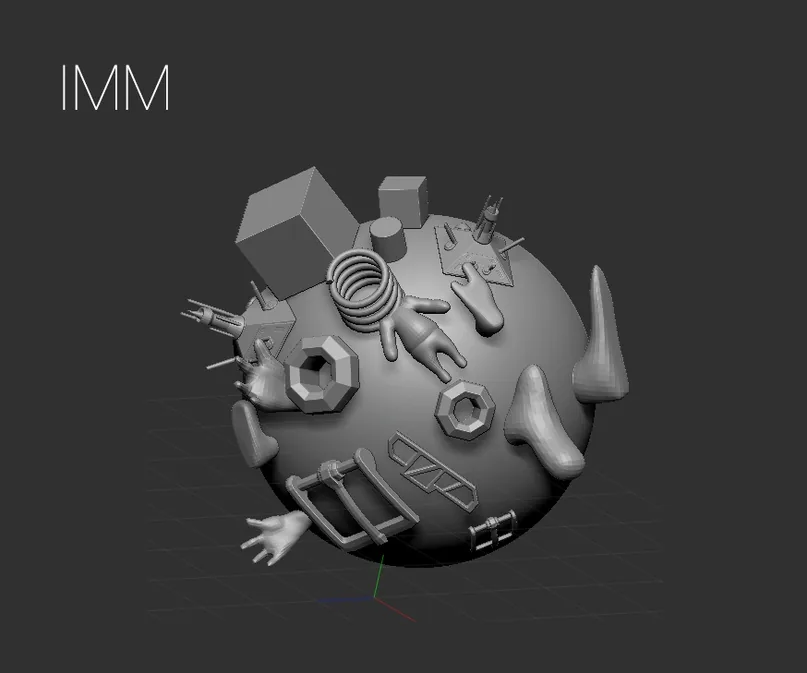
Brush IMM
The most powerful and cunning brushes in ZBrush. As you can see, there are many brushes in the program that have IMM in the name. They all work in the same way: they grow new geometry on the current subtool. They do not work with subtools that have divider levels. But they can be used on any other subtool, they lie on any visible shape. Also, IMM can be made yourself. Just make the desired geometry, rotate it in the viewport with the “growth point” to the background and press brush/create/create insert mesh brush. And to add new geometry to the same brush, this brush must be selected and in the dialog box select append.
A few facts about brushes in ZBrush:
- Almost all brushes are affected by the force of pressing the pen on the tablet.
- There are standard brushes for which hot keys have already been prepared:
- With Shift held down, the “Smoothing” brush is turned on. With Ctrl pressed, the masking brush appears, if you hold down Alt, the brush removes the mask.
- With Ctrl+Alt held down, the select brush is turned on, which can hide part of the geometry — for example, in order to separate it into another subtool.
- All brushes have an alternative mode: if you hold down Alt, the action will change to the opposite (as a rule). For example, if the brush builds up the shape, then with the Alt key held down it will cut the shape.
Related materials

Article
Free brushes for ZBrush: brush sets
September 18, 2023
Article
8 tips for beginners in Zbrush
September 18, 2023

Article
All about brushes in digital drawing
February 13, 2025

Article
Concept artist: overview of the profession
April 2, 2024

Article
Step-by-step guide to modeling in ZBrush. Part 2
September 18, 2023

Tutorial
Zbrush lesson for beginners
December 23, 2024
News
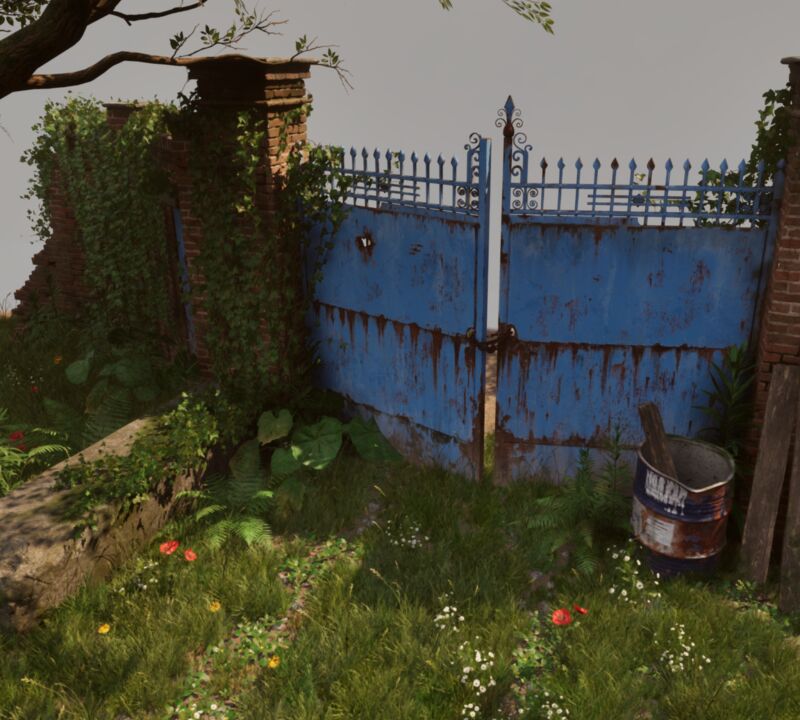
Проектирование диорамы реалистичных ржавых ворот с помощью ZBrush и Unreal Engine
June 10, 2026