ArticleUpdated: July 2, 2026
All about brushes in digital drawing
In short
Brushes for Photoshop will help to create realistic textures, stylish strokes and complex effects. We analyze types of brushes and the best free packs from artists.
2D artist
Once Konstantin Korovin was painting a study of a small street not far from Montmartre. A passerby approached him and began to watch his work. Then he asked what interesting thing he was doing, what these beautiful images were born from the artist, and how he managed to depict them so лихо. The artist, surprised, began to talk about the street, the sky, because after all, it was obvious. Then the passerby clarified that he really liked the study of the cityscape, but he was asking about another cardboard that lay next to the palette. Korovin looked down and replied: "Ah, this is a piece of cardboard that I use to wipe my brushes and palette knife." But then he thought, and it's true, because the texture turned out to be good, it should be used! All this is actually just an invented story, and we made it up. And how beautiful it all turned out, right? But really, texture is a wonderful technique :)
And today we will talk about живописные techniques in digital graphics, about how to work with texture brushes. How to convey a variety of textures and materials, what brushes to use for different effects, and what techniques will help in the work. They will be useful for both more stylized graphics and more realistic ones, they can be used with photo bash, in stages, concepts, illustrations.
 Create a unique style. Original and unusual brushes can create a unique style. Often artists develop a certain technique that sets them apart from other artists. These can be contrasting sharp strokes with a ярко выраженной texture combined with a certain rich color palette.
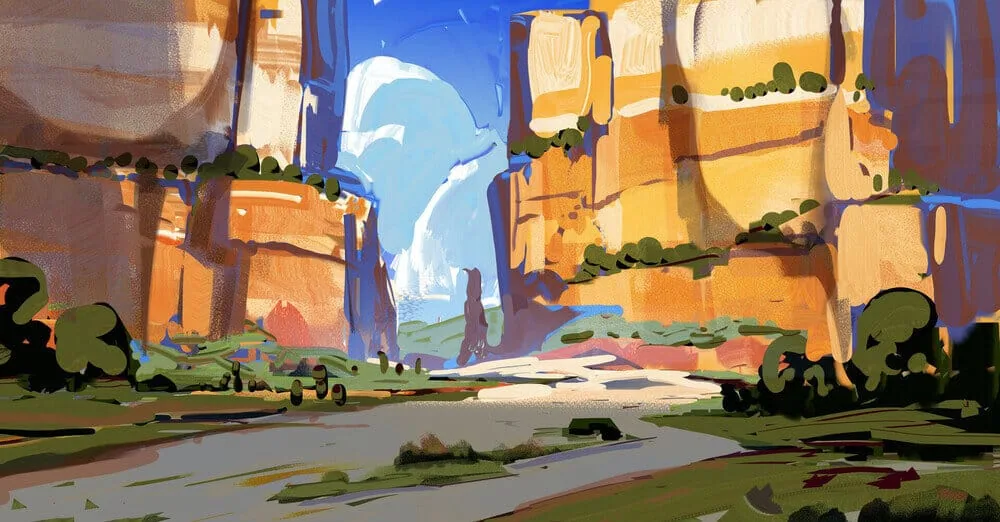
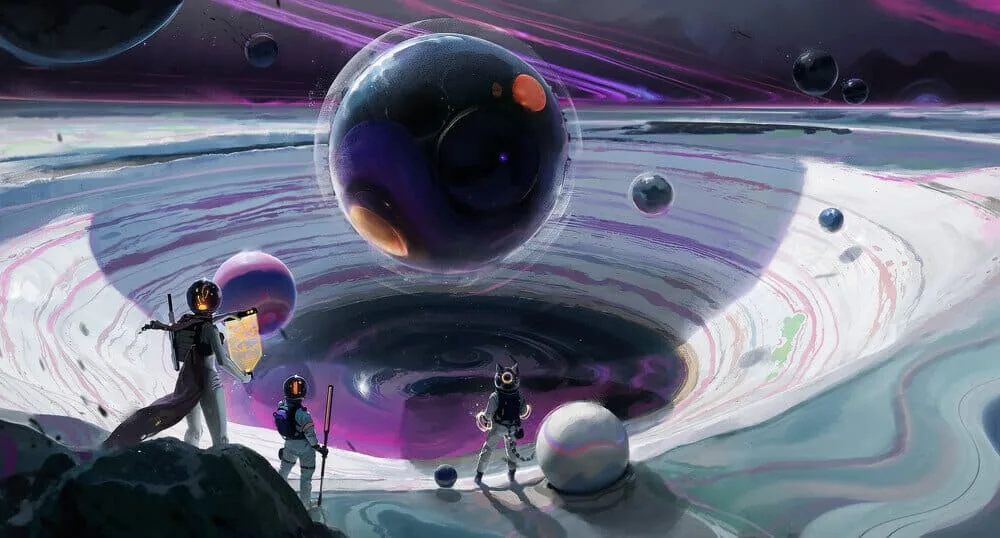 Imitate materials. Brushes can depict textures of different objects. It can be wood, metal, grass and foliage, minerals. Their combination will help to create a deep space of the landscape, rich in details in a short time. After all, brushes leave ready-made silhouettes. Artist Amir Zand uses a similar life hack.
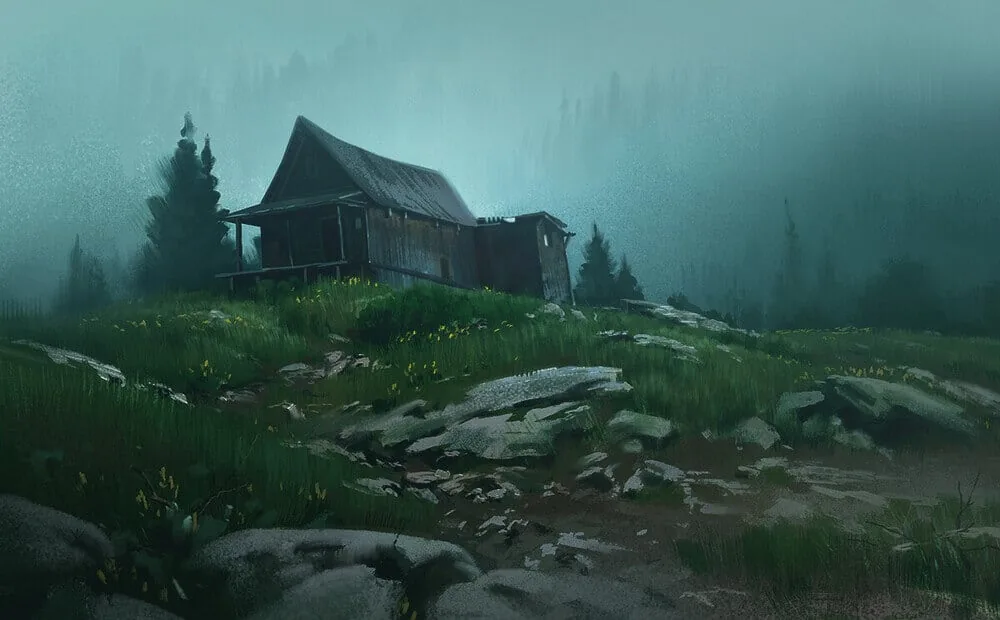
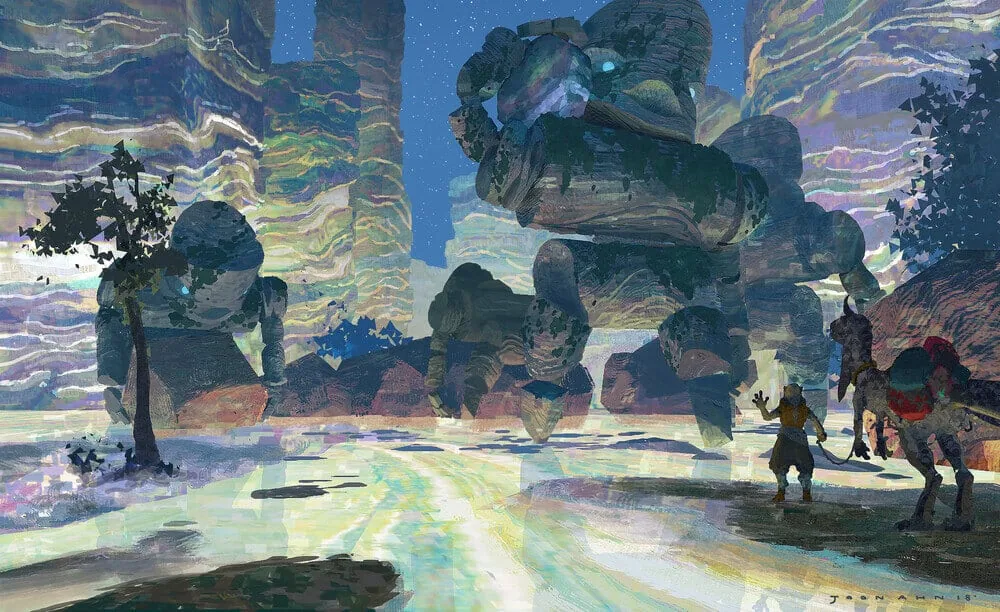
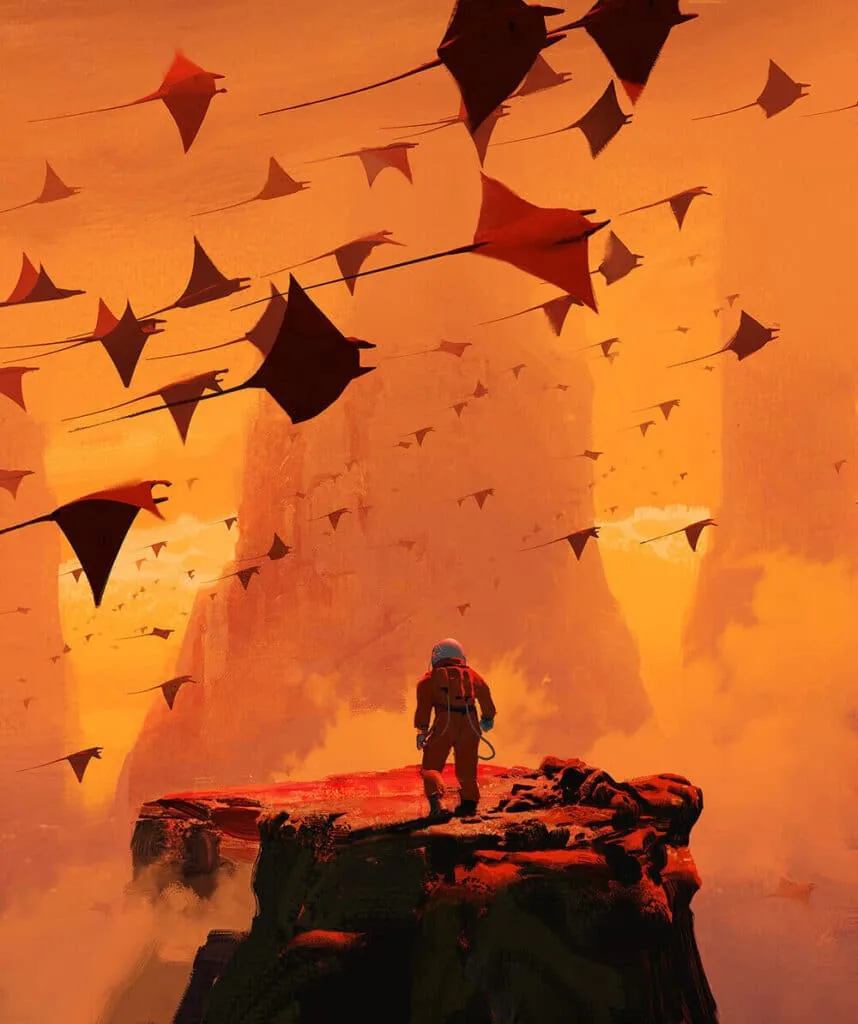
 Create a bright, effective illustration.Thanks to different textures, the image creates a response in the viewer's soul. Simple smooth and round brushes can not always achieve the desired effect: incomplete color, a rich combination of shades, or catchy and expressive strokes. Ordinary brushes will have to be drawn by hand, while texture brushes can leave the spot you need, with a silhouette similar to a bush, grass thickets or a volumetric stone, as in Lorenzo Lanfranconi's gloomy landscape.
 This immediately adds variety and at the same time allows you to get rid of the fear of a white sheet and the feeling of "how to make the first stroke?" It also provides a color base from which you will further develop the work. Usually later this layer organically fits into the following layers and remains slightly visible.
 For a more diverse background, try combining several brushes and adding scatter and color dynamics settings.
Apply strokes boldly and carelessly.
For a more diverse background, try combining several brushes and adding scatter and color dynamics settings.
Apply strokes boldly and carelessly.
Brushes for drawing in Photoshop
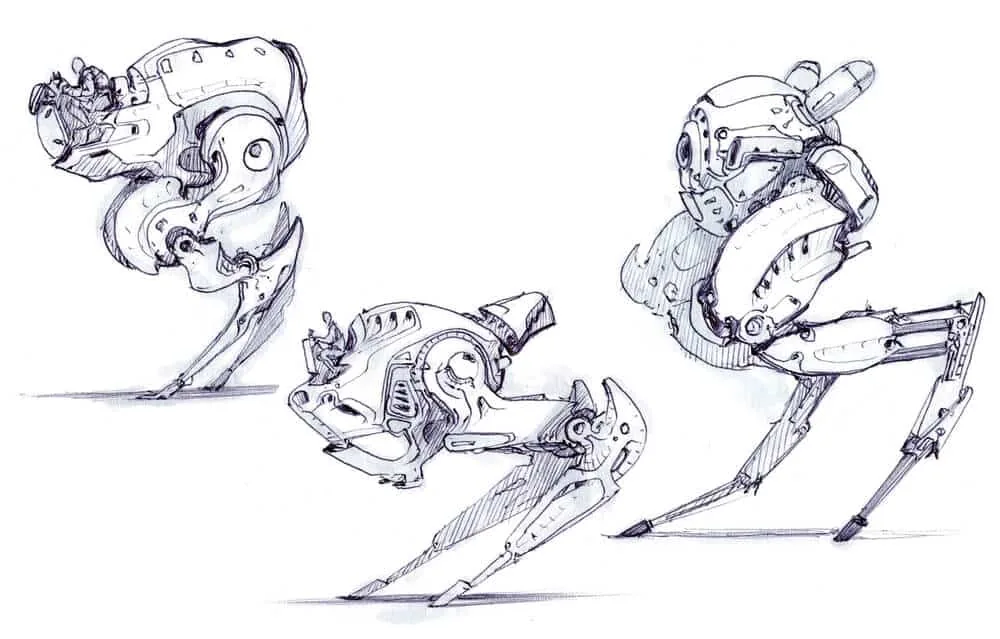
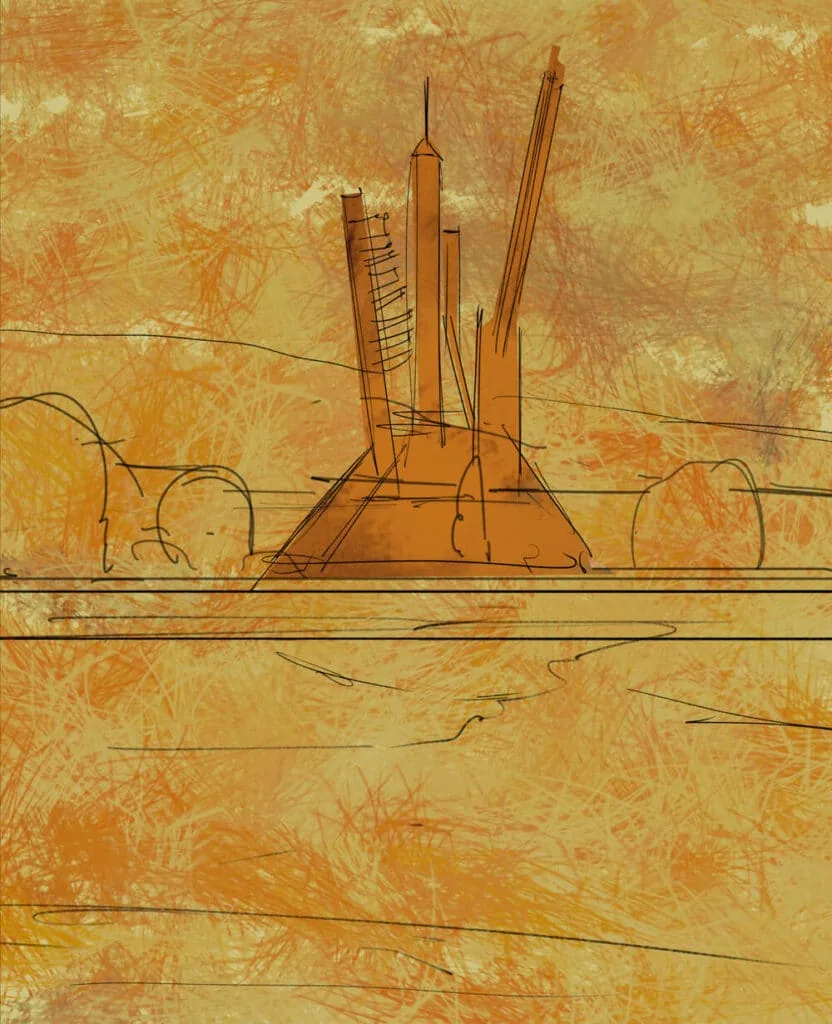
There are different types of images: in some places the render is very smooth and even, so that you can't even see the color transitions between each other, and in some places, on the contrary, the strokes are so sharp and clear, as if a can of paint had been thrown onto the canvas. And all this is not accidental. There are several emotional, stylistic and technical tasks: To depict an idea. You've probably already come across this term - concept art. Artists from this field not only come up with beautiful images, but also demonstrate the design and functions of the invented object. Then texture brushes can interfere with the idea, more calm texture brushes are used. Sometimes a couple of lines and hatching are enough to draw an idea and not overload it. We recommend a useful article: Digital painting in Photoshop
Create a unique style. Original and unusual brushes can create a unique style. Often artists develop a certain technique that sets them apart from other artists. These can be contrasting sharp strokes with a ярко выраженной texture combined with a certain rich color palette.
Imitate materials. Brushes can depict textures of different objects. It can be wood, metal, grass and foliage, minerals. Their combination will help to create a deep space of the landscape, rich in details in a short time. After all, brushes leave ready-made silhouettes. Artist Amir Zand uses a similar life hack.
Create a bright, effective illustration.Thanks to different textures, the image creates a response in the viewer's soul. Simple smooth and round brushes can not always achieve the desired effect: incomplete color, a rich combination of shades, or catchy and expressive strokes. Ordinary brushes will have to be drawn by hand, while texture brushes can leave the spot you need, with a silhouette similar to a bush, grass thickets or a volumetric stone, as in Lorenzo Lanfranconi's gloomy landscape.
Types of brushes in drawing
Depending on the tasks, brushes can be divided into several subtypes. And we cannot limit ourselves to brushes for graphics and drawing, because in the digital sphere they are used together. Therefore, we have divided their types into 3 subtypes:- Painterly. Such brushes imitate real brushes made of different pile (bristles, squirrels, kolonok or their mixtures with synthetics). They also imitate their configurations, so you can meet more square prints, rounded or long drop-shaped, similar to calligraphic ones.
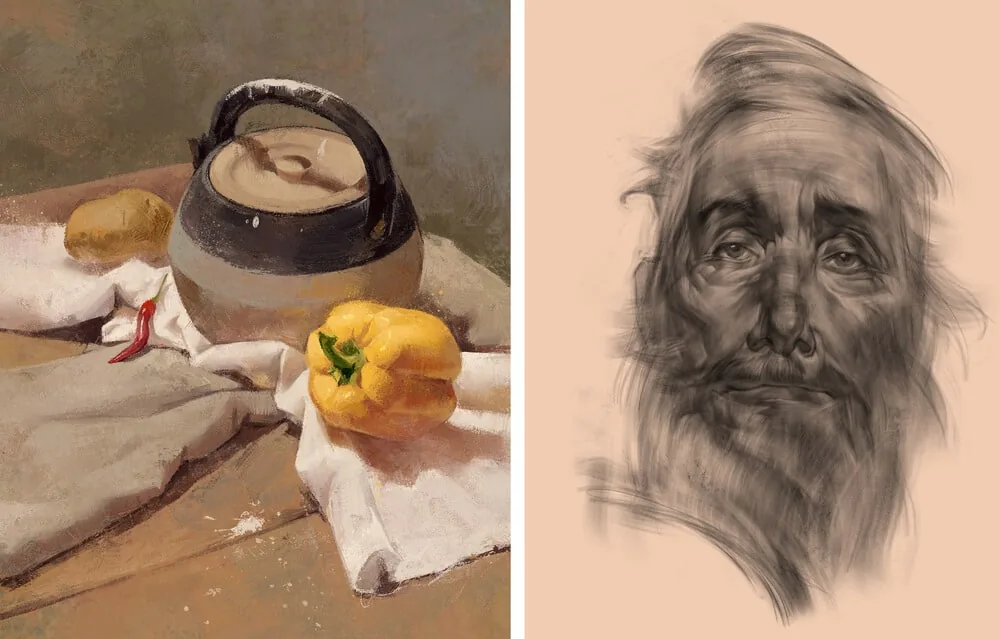
- Graphic. These brushes are made like the materials we are used to for drawing (graphite pencils, charcoal, sauce, sanguine or pastel crayons). Compare the two works of our curators: Marina Peregud's still life is painted with brushes that imitate oil brushes, and Anton Korostov's copy is drawn with a charcoal brush.
- Imitating the texture of surrounding objects. Such brushes are created based on photographs and convey cracks, roughness, inclusions, porosity, fibers and other features of materials. And now let's take a closer look at how all these brushes are created and used in practice, what tricks are needed for this.
How and for what brushes are used
Texture base
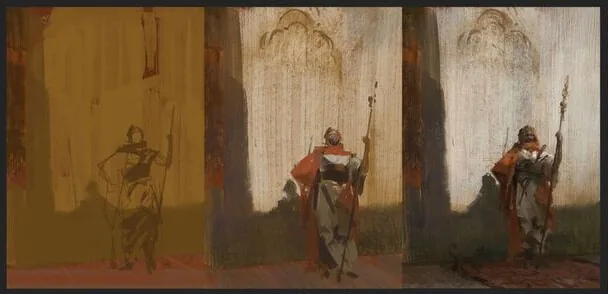
This technique came from traditional painting, and became very popular among digital artists. Start working with a textured underpainting. Often a contrasting color and a wide texture brush are used for this, but you can make an underpainting in a calm neutral color of the future work.
This immediately adds variety and at the same time allows you to get rid of the fear of a white sheet and the feeling of "how to make the first stroke?" It also provides a color base from which you will further develop the work. Usually later this layer organically fits into the following layers and remains slightly visible.
For a more diverse background, try combining several brushes and adding scatter and color dynamics settings.
Apply strokes boldly and carelessly.
Color dynamics
Related courses
All courses
from 3 900 ₽
-57%
Book illustration: The first page page
9 000 ₽3 900 ₽
Learn more

from 12 000 ₽
-20%
Векторная иллюстрация для начинающих
15 000 ₽12 000 ₽
Learn more

from 4 500 ₽
-55%
Character Concept: My First Hero
10 000 ₽4 500 ₽
Learn more
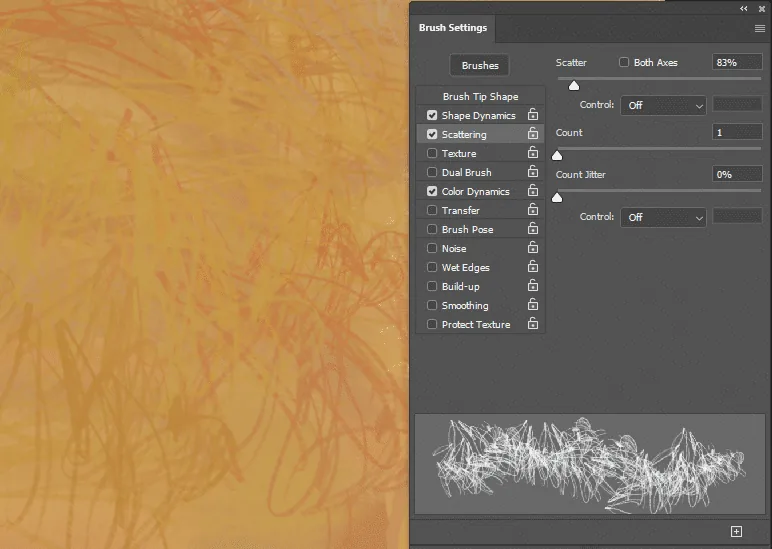
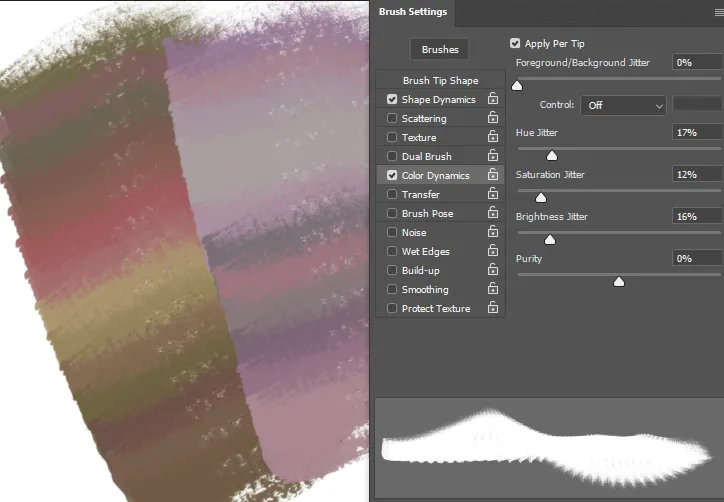
 A very important parameter when working with texture brushes. It allows you to add color variety inside the stroke. This will be especially useful for quickly sketching the main colors on large homogeneous surfaces, such as the sky, the surface of water, grass, trees, the surface of rocks, etc. And make them diverse and picturesque.
This parameter can be enabled in the brush settings color dynamics: hue, saturation, jitter.
A very important parameter when working with texture brushes. It allows you to add color variety inside the stroke. This will be especially useful for quickly sketching the main colors on large homogeneous surfaces, such as the sky, the surface of water, grass, trees, the surface of rocks, etc. And make them diverse and picturesque.
This parameter can be enabled in the brush settings color dynamics: hue, saturation, jitter.
"Mold" the shape with strokes
This technique also comes from traditional painting, it can be seen both in classical old masters and in modern artists. Direct the strokes along the movement of the shape, as if you were sculpting it. This will make the strokes more structured, add movement, direction, and help convey volume.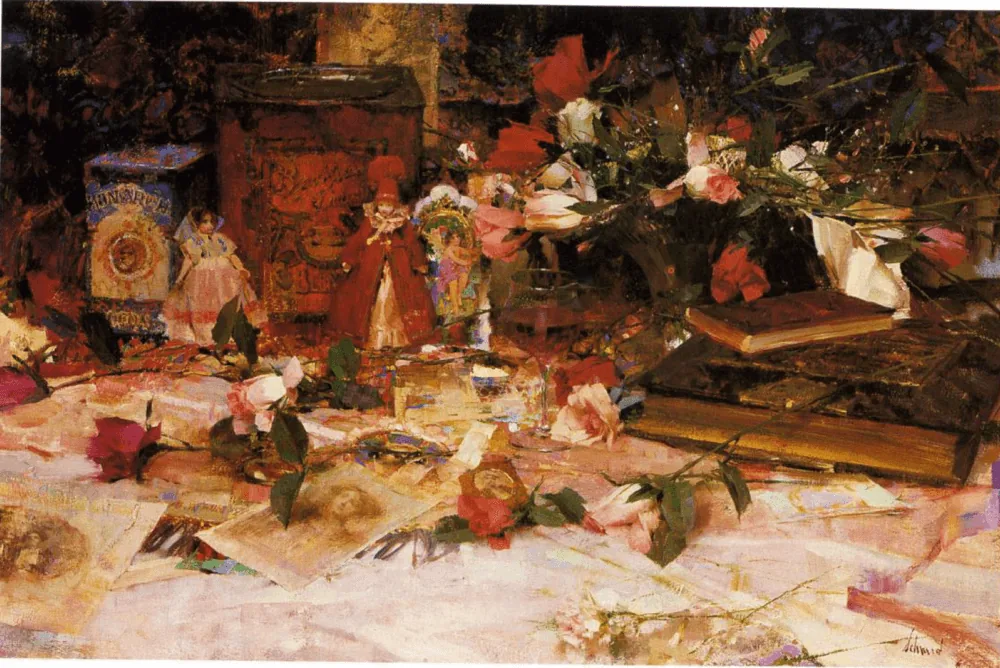 Pay attention to the direction of the strokes on the surfaces of objects: on books each face is emphasized in shape by longitudinal strokes, rose leaves are crumpled with strokes, doll dresses resemble cones in structure. But in places going into the distance into a dark haze, multi-directional strokes are used, making it seem like a large dark fog without shape and volume.
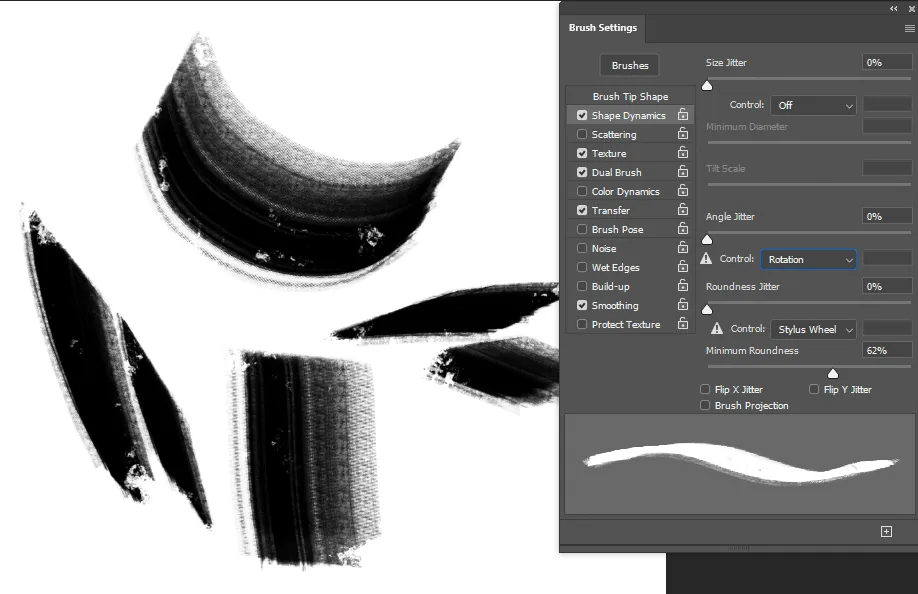
 To make it more convenient to use this technique, you can adjust the rotation of the brush sample along the pen movement. If your pen is sensitive to rotation - put Rotation in Angle Jitter (works only on some Wacom styluses), or Pen Tilt to control this parameter by tilting the pen (for most styluses that are sensitive to pressure and tilt). The Pen Direction parameter will give a similar effect if your pen reacts only to pressure. Experiment with these settings to see which ones you find more convenient to use.
Mixer Brush
Another tool for working with textures that greatly complements and enriches the work with ordinary texture brushes. Plus, it allows you to speed up the work and add color and effects. A bit like the process of drawing with real paints, when the colors that are already on the canvas mix with each other.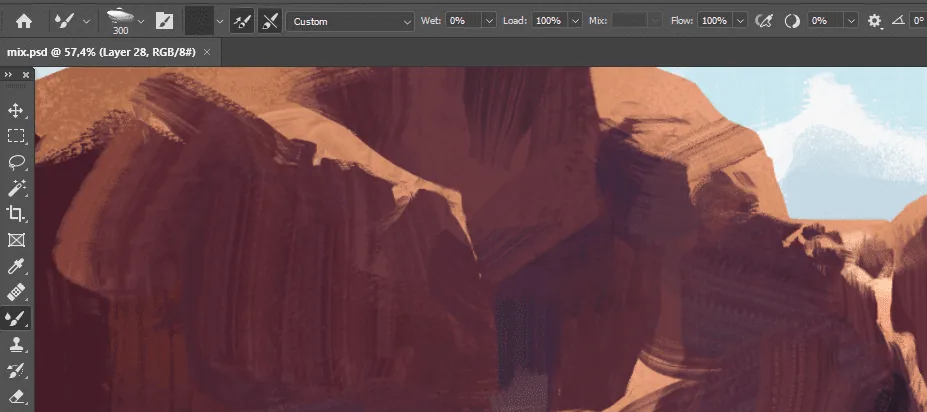 Unlike ordinary brushes, when a certain color is selected from the palette, when working with the mixer brush you select a certain area of the canvas that includes several colors and textures, and draw with these materials. And thus the strokes immediately become more saturated and textured.

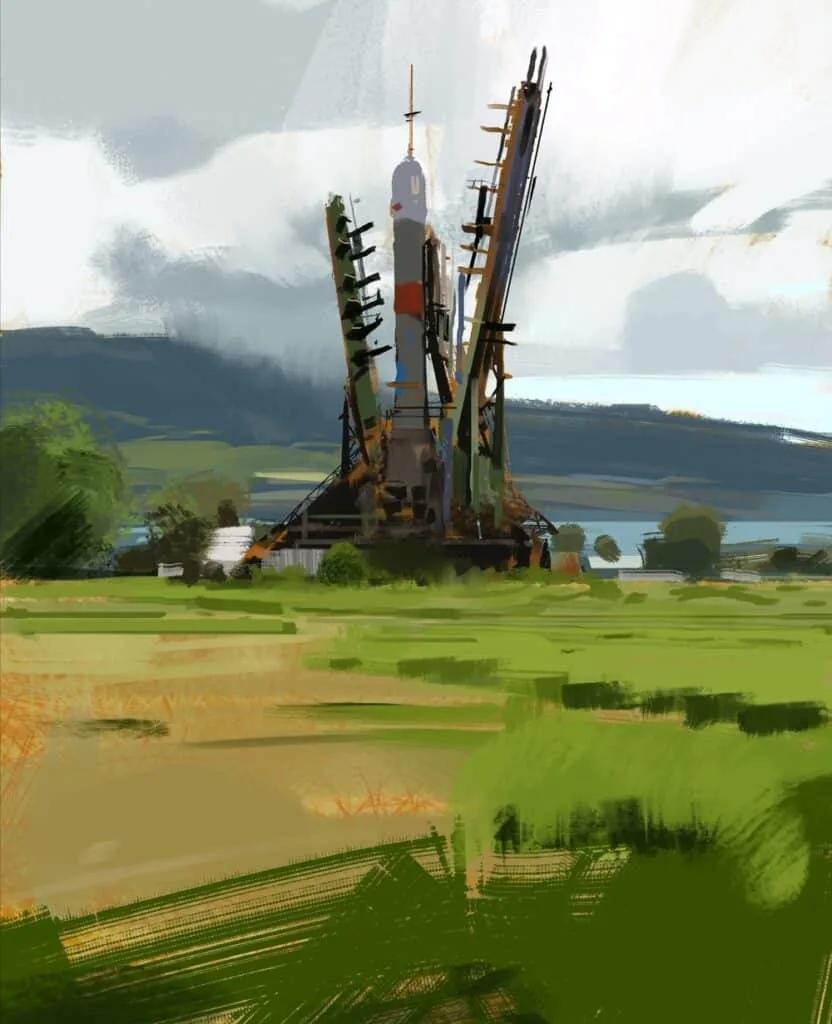
Texture smudge tool
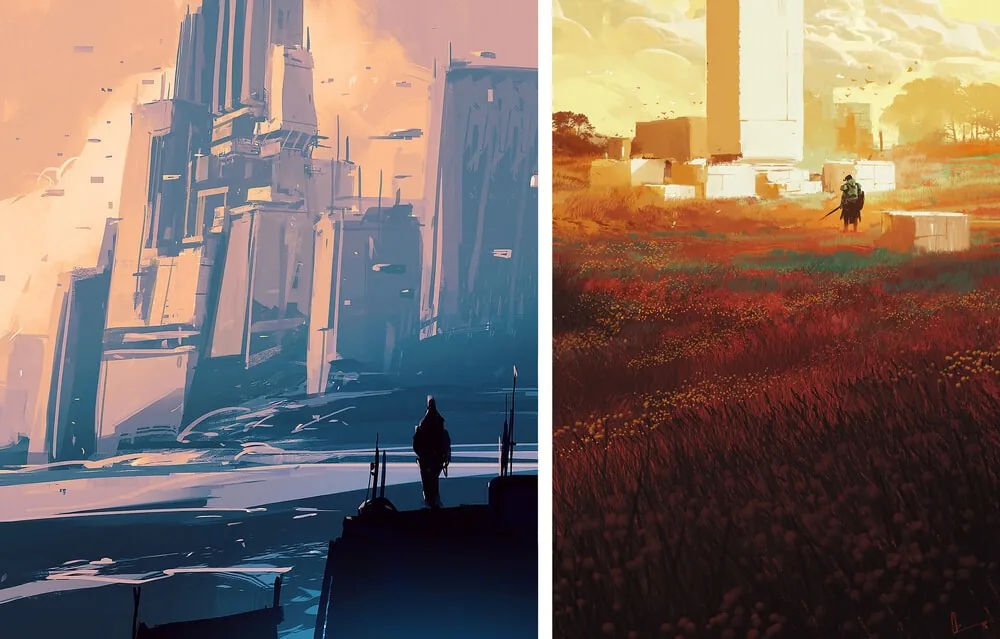
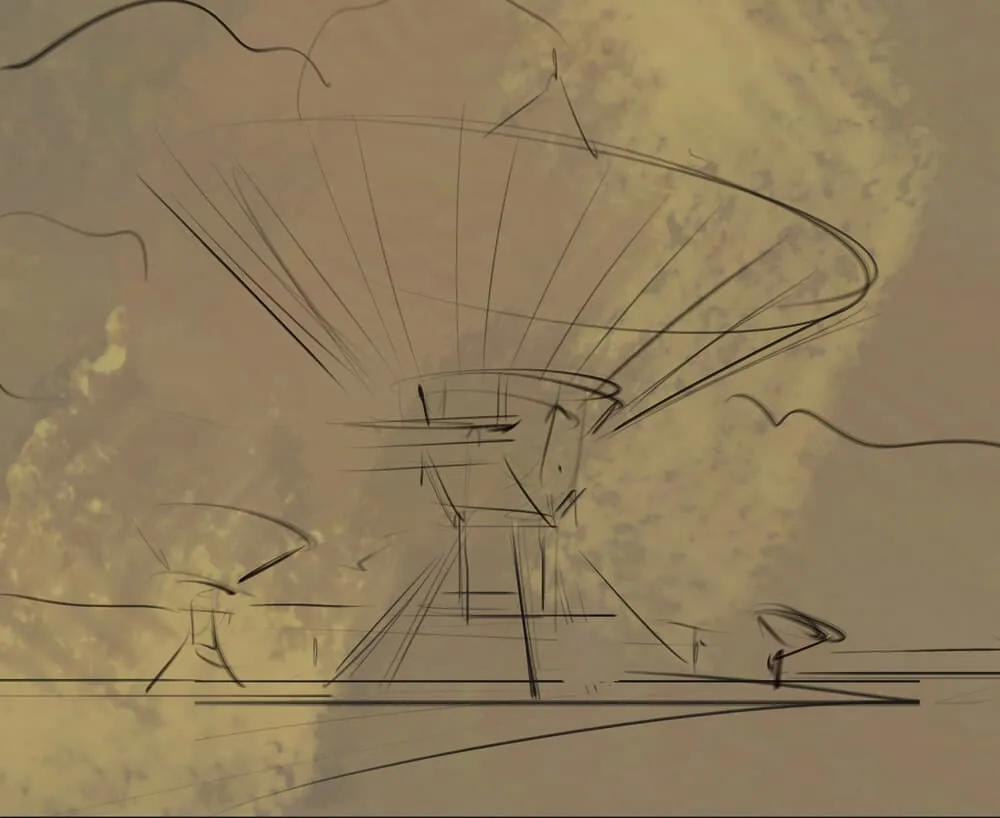
Also a tool that complements the previous ones. In traditional painting, much attention is paid to the analysis of touches, hard and soft boundaries of spots. In digital graphics, the hard/soft edges technique is also used to add air and movement to the picture, to connect individual spots with each other, and others, on the contrary, to contrastingly emphasize.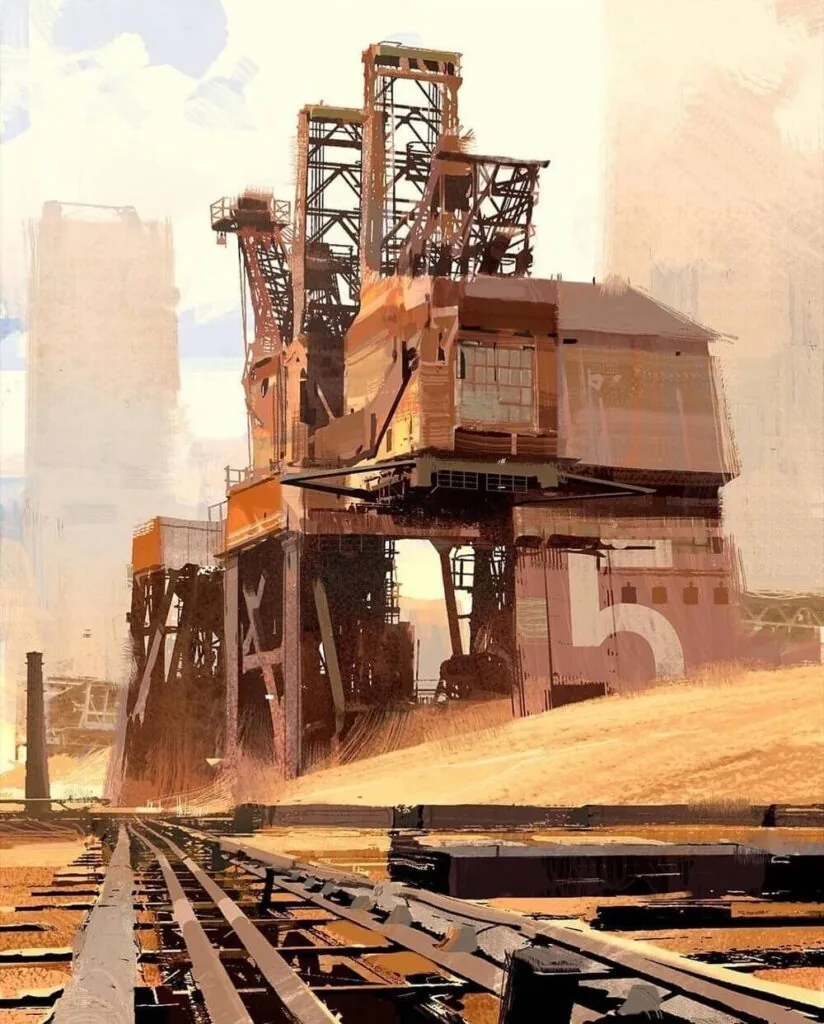 Pay attention, part of the edges of the hangar and metal structures are slightly blurred, the edges seem to dissolve in the sand haze. Thanks to this, we read the plan well.
The smudge tool with a texture brush allows you to write off parts of the work, combine strokes, add atmosphere.
Experiment with different types of brushes for this, softer ones or more like bristles can give a very diverse effect.
Pay attention, part of the edges of the hangar and metal structures are slightly blurred, the edges seem to dissolve in the sand haze. Thanks to this, we read the plan well.
The smudge tool with a texture brush allows you to write off parts of the work, combine strokes, add atmosphere.
Experiment with different types of brushes for this, softer ones or more like bristles can give a very diverse effect.
Texture eraser
The usual round eraser does not go well with the work of texture brushes. Therefore, a texture can also be used for it. This will make the silhouettes of color spots more picturesque and expressiveSpecial brushes for the most common materials and textures
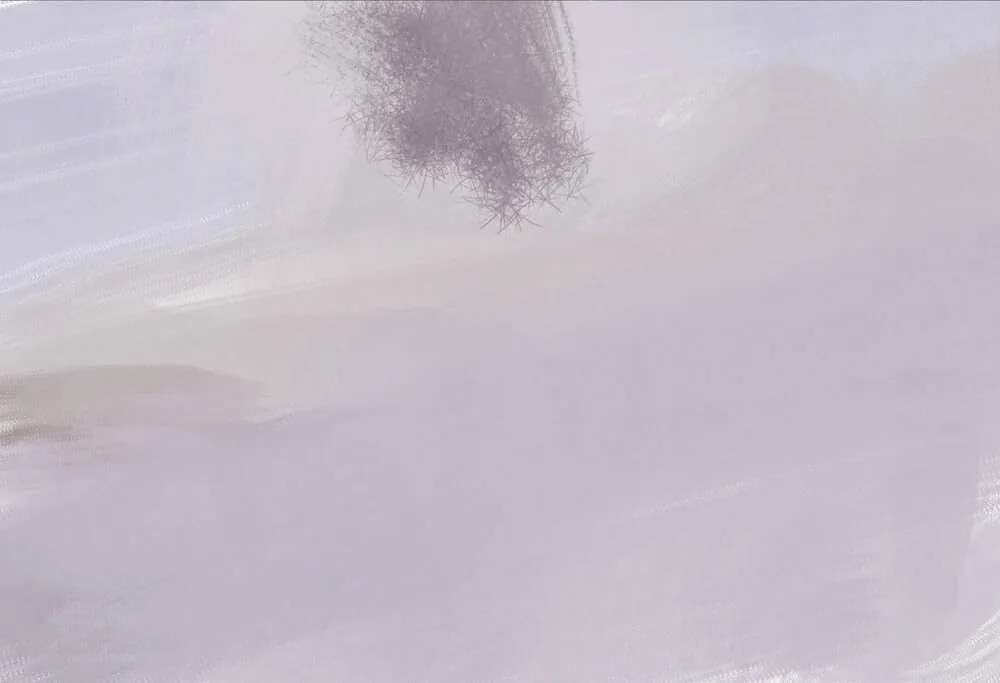
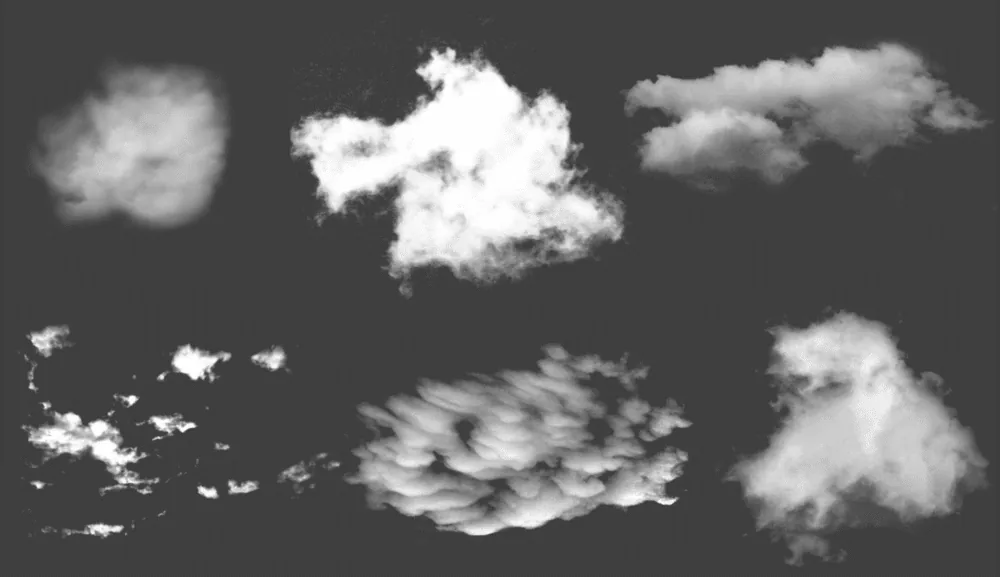
Brushes for clouds
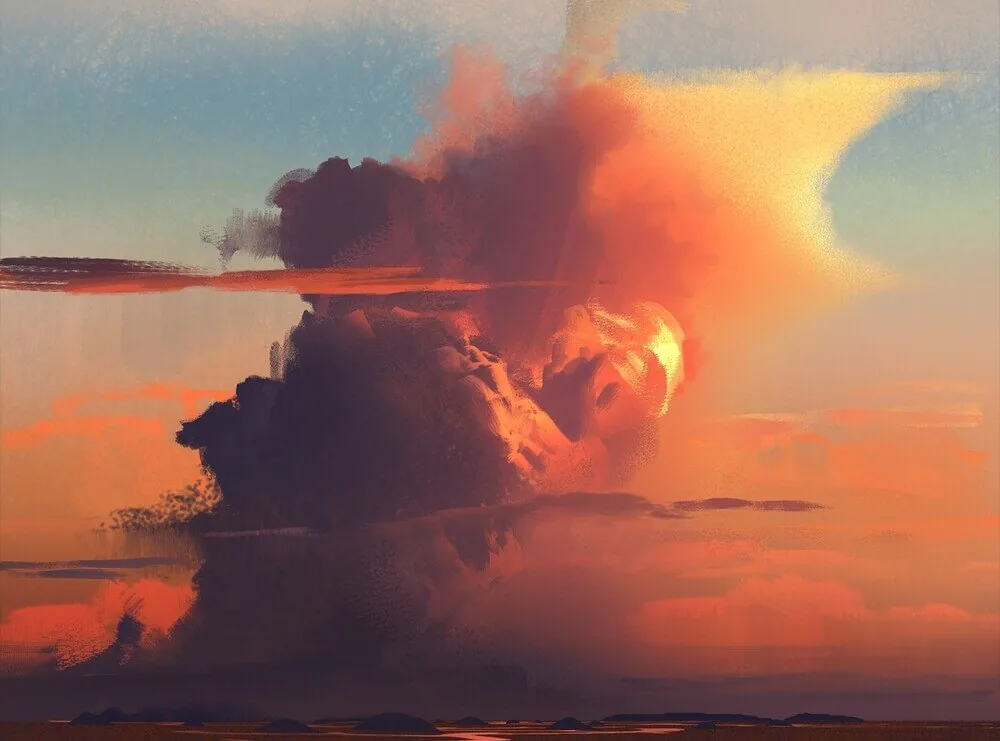
 In fact, they can be used for a variety of cases: fog, smoke, atmospheric haze, tree crowns, ground surface, dust, dirt and even light breaking through the foliage). Usually it is useful to have several cloud brushes: for denser clouds, light transparent clouds, feathery ones, etc. They can be found in the arsenal of different artists, and they are also easy to make yourself from png photos with a transparent background.
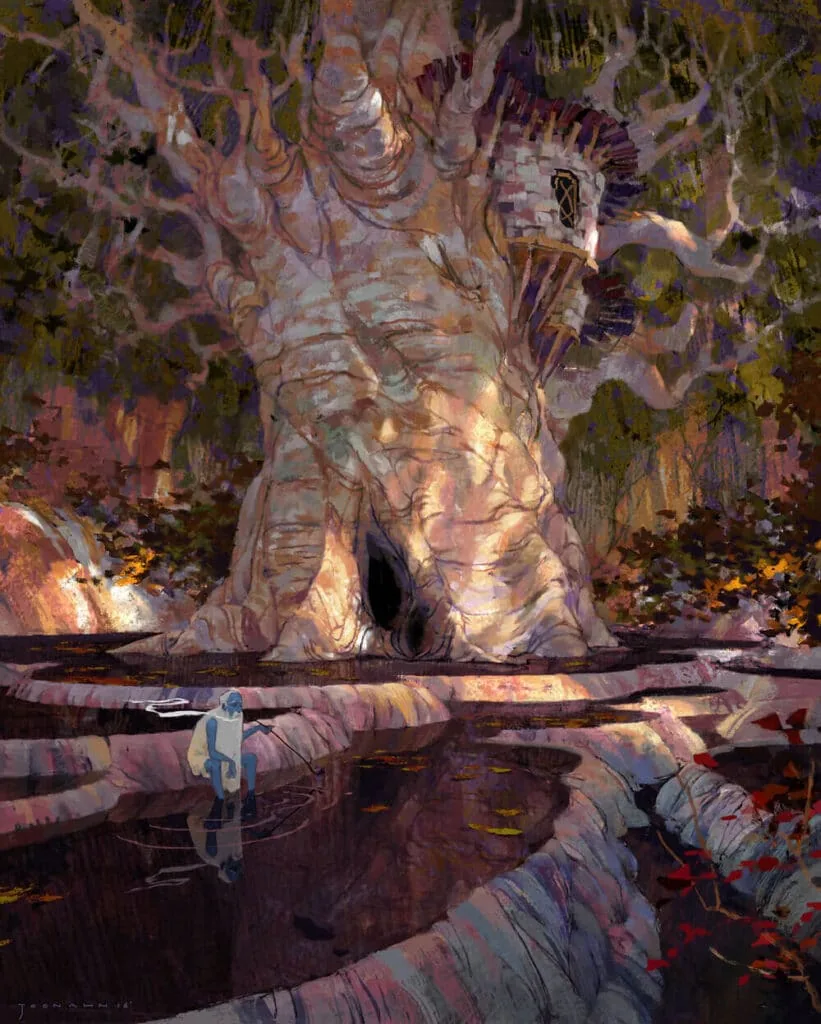
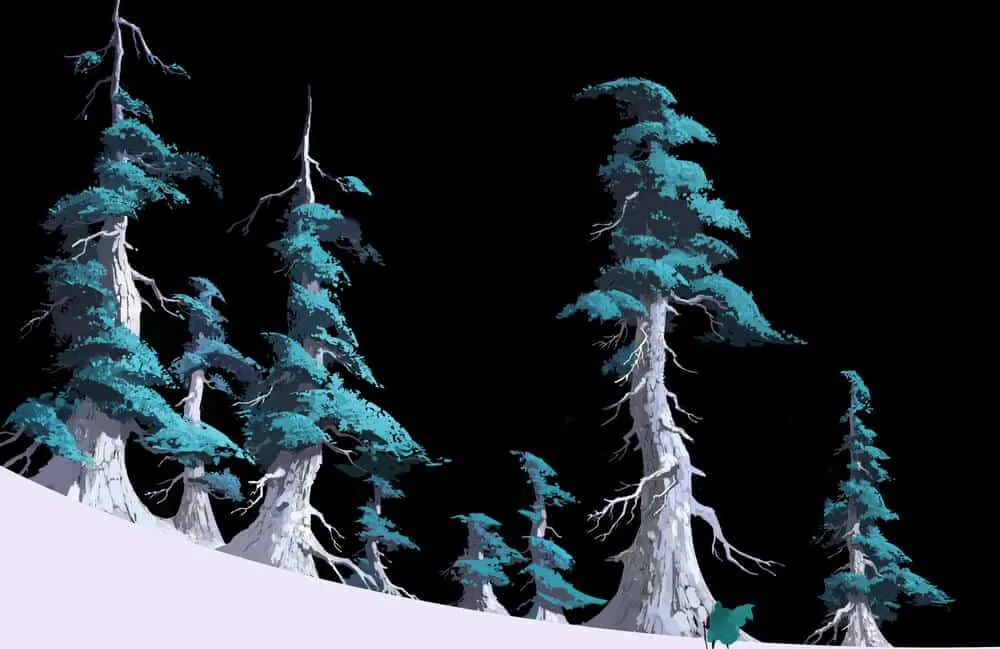
Brushes for trees
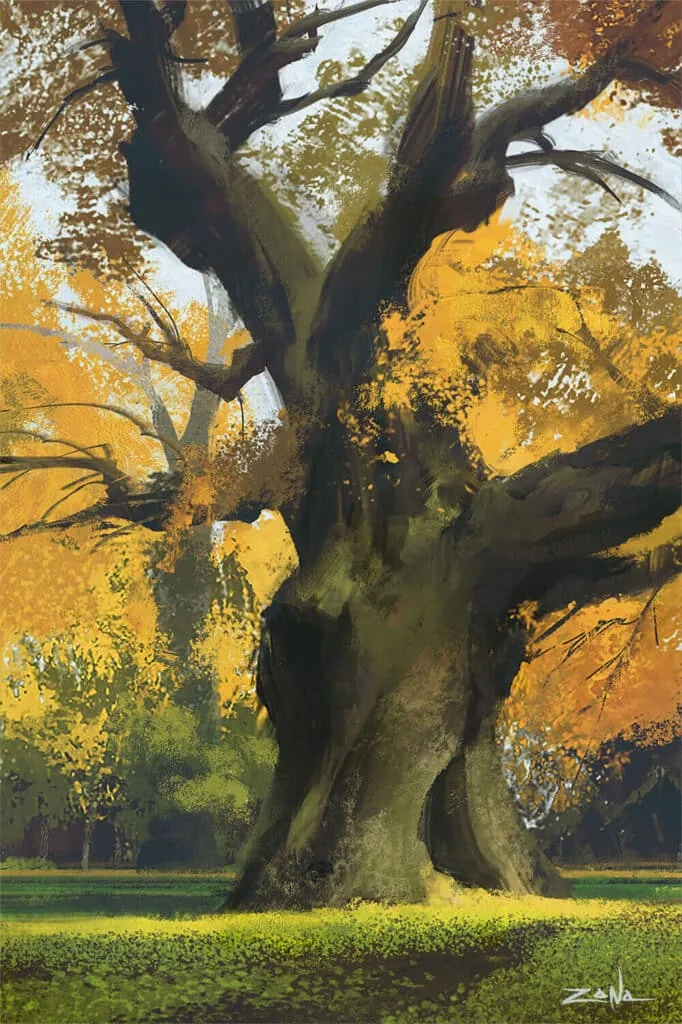 Such brushes resemble the silhouettes of branches, tree crowns, individual leaves or dry trunks. As a rule, they work more interestingly when several types of textures are combined and layered, creating diverse color and texture transitions. Also, brushes for individual objects can be made independently based on the silhouettes from photo references. Or use textures similar to foliage and bark.
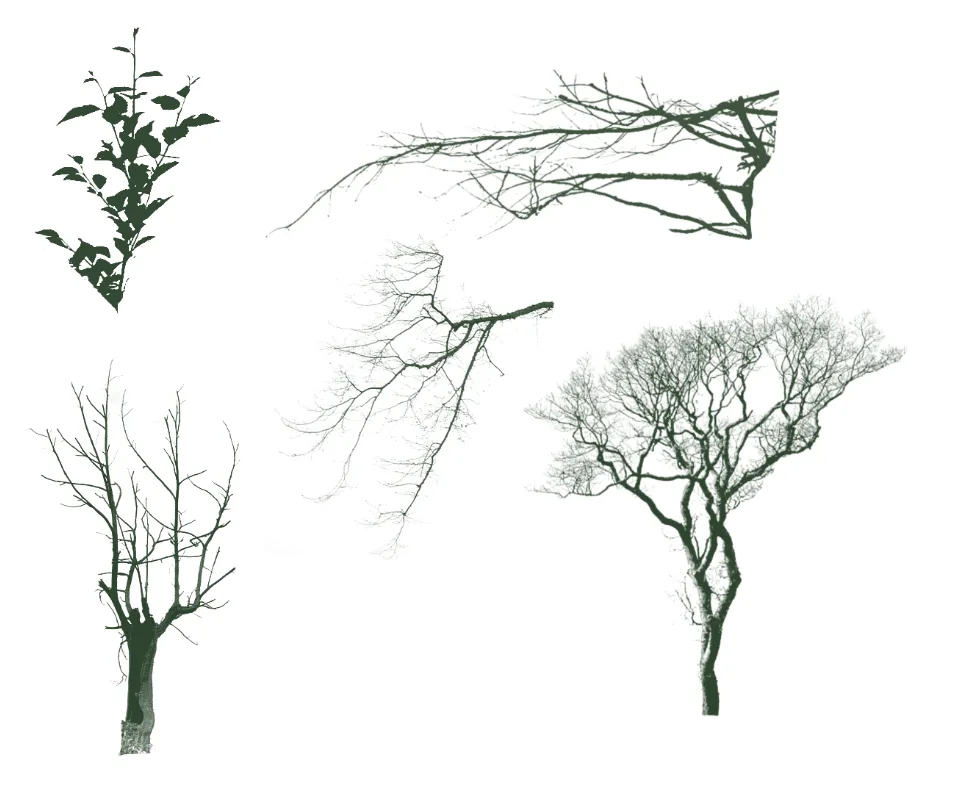
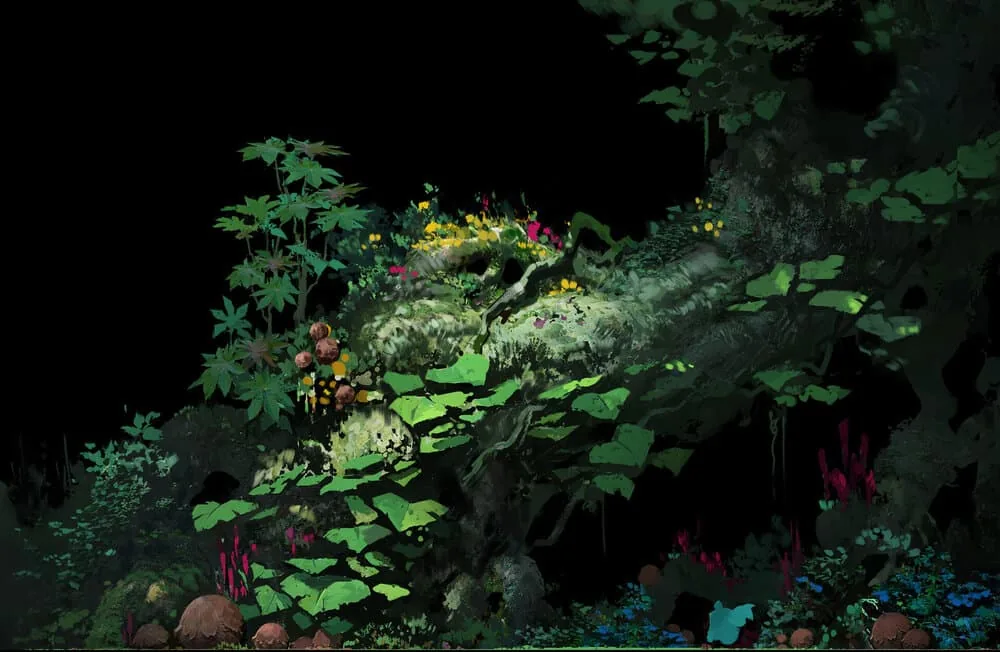
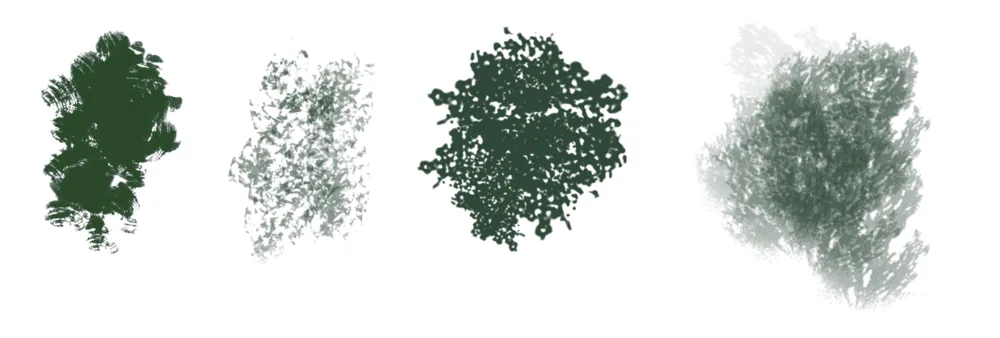 Wonderful prints are obtained from the silhouettes of branches and plants, as well as their parts. Their combinations and layers together create detailed pictures of stumps overgrown with moss and small plants, stumps, stones, dense or sparse undergrowth. But that's not all, because you can move away and capture a larger frame, with trees in full height, earth and sky. By the way, in our course on Illustration we separately pay attention to the topic of textures and their application within the framework of the theme of nature, urban space, still life, portrait and interior. Everywhere there are their own tricks and nuances, it is always useful to know about them and be savvy in such a difficult area.
Brushes for hair and fur
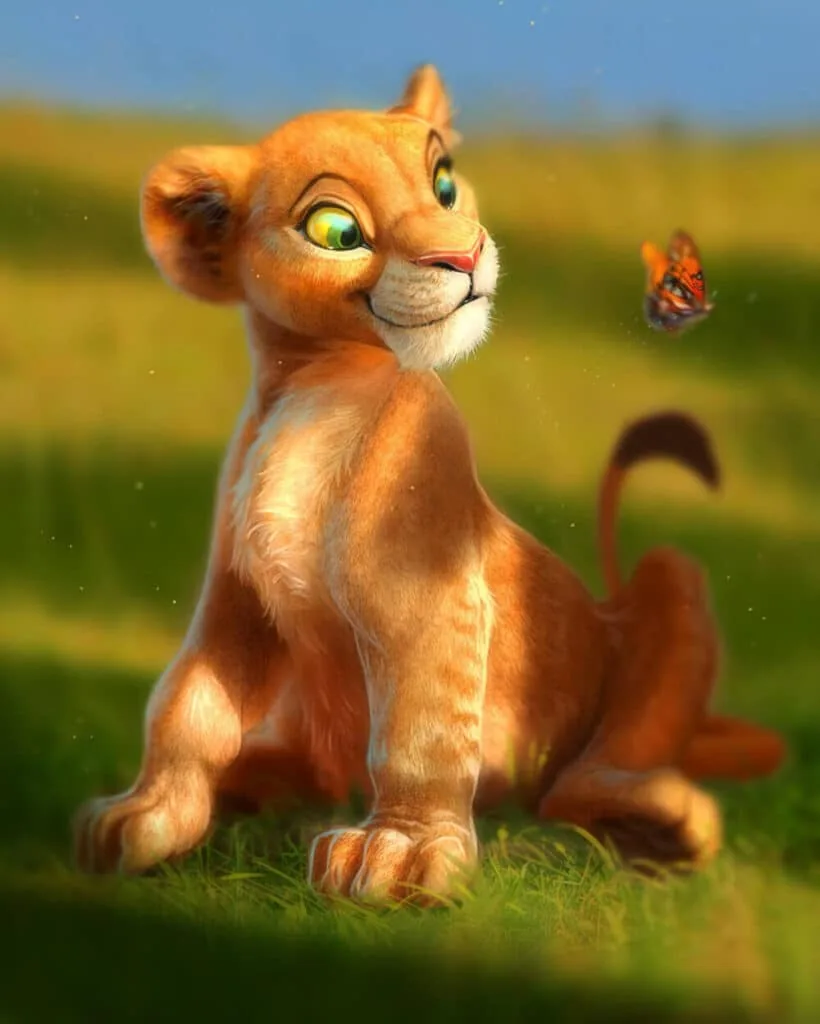
You can also draw fur with a variety of brushes. The imprint of such brushes simulates several hairs or whole locks. They are needed so that you do not draw each individual villus and do not spend hours on it. It is much faster and more efficient to use brushes that imitate hairs. For example, the tiger of artist Aaron Blaise was created using similar techniques. You can consider broader and more generalized pile, while some hairs and antennae are very thin and detailed.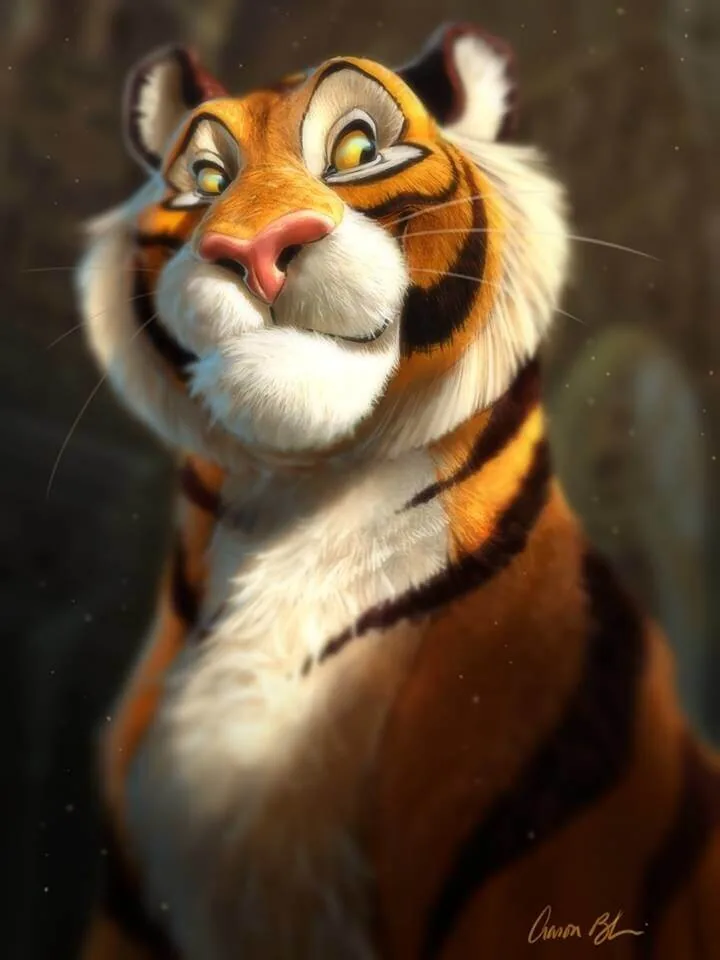
Using transformation tools when working on texture by shape
When texture brushes are used to convey the fur of a monkey or fish scales or the skin of an African elephant, it is necessary that the texture lies in the volume. Otherwise, the creature or object will live separately from the texture and the viewer will not believe in them. Then, together with the brushes, you can use the tools for warp, distort, perspective transformation. Look how the artist Aaron Blaise bends the skin texture on the character's cheek.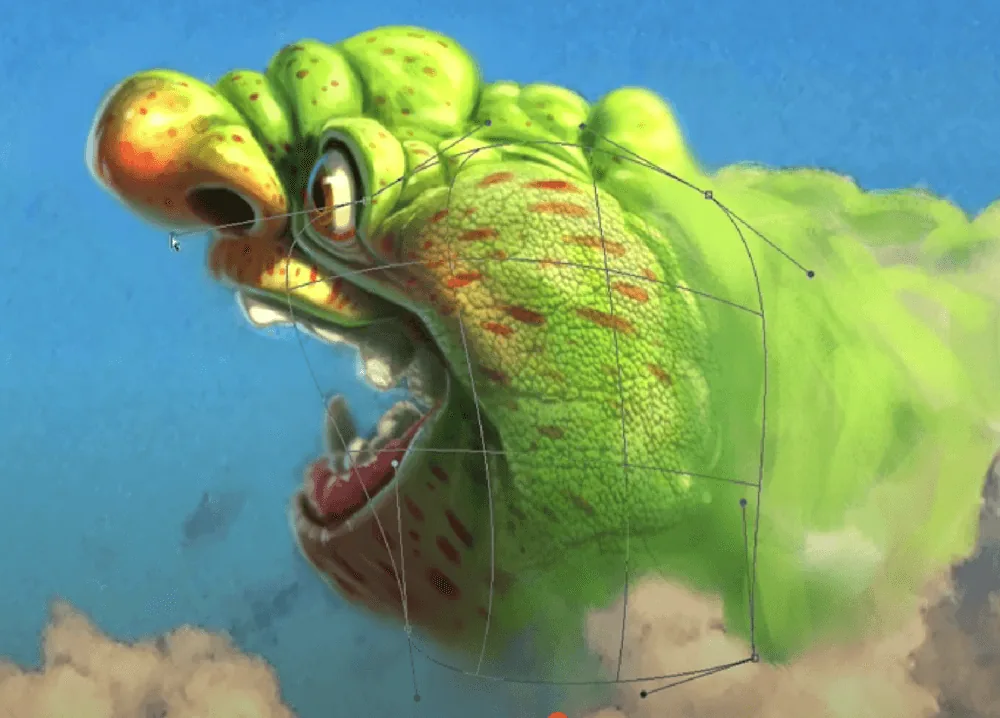
Free brushes from famous artists
Often artists share their brush packs and you can easily find many selections for a variety of styles. Well, we decided to help you with this and not refer you to other channels and sites and share our brush sets from Skills Up School. These sets are great for sketches, long drawings and digital painting: Skills Up School packs: CG Painting And we also share sets from the founder of our school, Azat Nurgaleev. These brushes are suitable for Procreate lovers. Try them обязательно, you can draw juicy still lifes, stunning landscapes and luxurious figures with them: Nikko_Rull_SoftAzat Pencil_6B_Azat_Soft And we also collected for you several packs from famous artists: Jama Jurabaev, Eytan Zana, Jeremy Fenske We hope that these tips will help you add new techniques to your work. And if you want to practice more in digital painting techniques, working with landscapes, portraits and still lifes, come to the courses on Digital painting. We will tell you and teach you not only techniques with texture brushes, but also other skills useful for an artist: the laws of proportions and composition, anatomy, color theory, techniques of chiaroscuro modeling and other wonderful tricks. Experiment with techniques, draw more and remember: who does not draw, does not drink champagne!Related materials

Article
Frontal perspective in drawing
October 1, 2025
Article
Where is applied drawing used?
September 18, 2023

Article
Statics and dynamics in drawing: creating mood and movement
March 24, 2025

Article
Stylization in drawing
January 27, 2025
Article
Texture and finish in the drawing
November 15, 2024

Tutorial
Color in digital painting
February 13, 2025

News
Эта 3D-модель Спайдер-Гвен почти похожа на 2D-цифровую иллюстрацию
May 15, 2026