Frontal perspective in drawing
Frontal perspective helps to convey depth and volume in the drawing. Let's analyze the rules of construction using the example of a cube and an interior.
Almost everyone who just starts learning drawing notices the same problem: their images look too simplified and "flat". Objects seem to be glued to a sheet of paper and do not give the impression of being three-dimensional. There is no depth, and the drawing loses credibility. The reason for this lies not in the lack of talent, but in the незнании laws of perspective - a fundamental tool, without which it is impossible to correctly convey the three-dimensional world on a flat surface.
Perspective is a system of rules that allows an artist to show how objects change shape and size depending on how far they are from the viewer. It helps to see that objects that are closer appear larger, and those that are farther away appear smaller. Lines that are parallel in reality can converge in a drawing, creating the illusion of space and depth. Thanks to these principles, an artist is able to depict anything: city streets, rooms and buildings, landscapes, as well as complex mechanisms and technical objects.
In this material, we will подробно разберём frontal perspective - one of the simplest and most convenient ways to build space on a sheet. We will look at how to correctly build objects so that they look convincing, and what mistakes beginners most often make. You will also find step-by-step instructions and practical exercises that will help you consolidate the theory in practice and develop confidence in conveying depth.
If your goal is to create drawings that look professional and "come to life" right on paper, then understanding frontal perspective with one vanishing point will become an important foundation for further growth.
The principle of frontal perspective
Frontal perspective is a way of depicting in which the front face of an object retains its proportions, and the sides going deep gradually decrease and converge at one point on the horizon line.
For example, imagine a cube or a building. If we look at the object straight from the front, we see the facade without distortion: verticals remain vertical, horizontals remain horizontal. However, the sides will “shrink” and go to one point in the distance.
The farther an object is from the viewer, the smaller it seems. This effect is especially noticeable when considering a street: houses on both sides of the road gradually decrease and converge in the distance. This is the visual law that frontal perspective describes.
Artists often use it to depict facades of buildings, architectural objects, interiors, as well as any scenes where it is necessary to convey the depth of space. This is a convenient and quick way of construction that is suitable for both beginners and experienced artists.
Now let's move on to the step-by-step construction of frontal perspective on the example of a cube and a room.
Cube in frontal perspective
Stage 1. Preparation
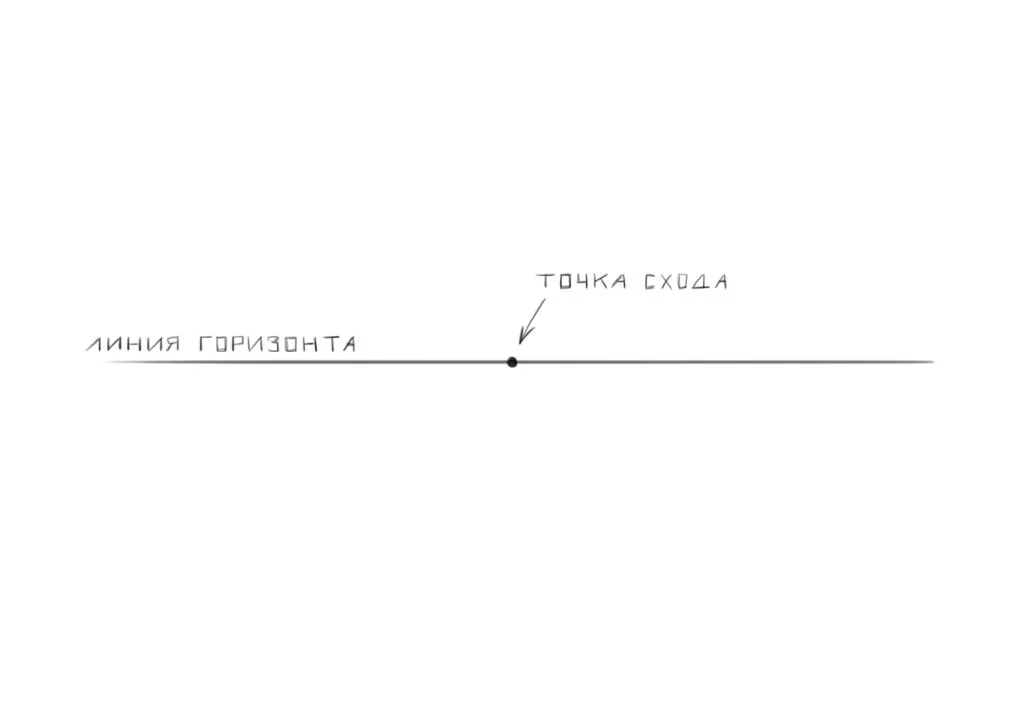
Take a sheet of paper, place it horizontally and prepare a pencil. Draw a horizon line in the middle of the sheet - it will determine the eye level. On this line, mark the vanishing point where the depth lines will go.
Related courses
All courses
Book illustration: The first page page
9 000 ₽3 900 ₽

Векторная иллюстрация для начинающих
15 000 ₽12 000 ₽

Character Concept: My First Hero
10 000 ₽4 500 ₽
Stage 2. Building the frontal side
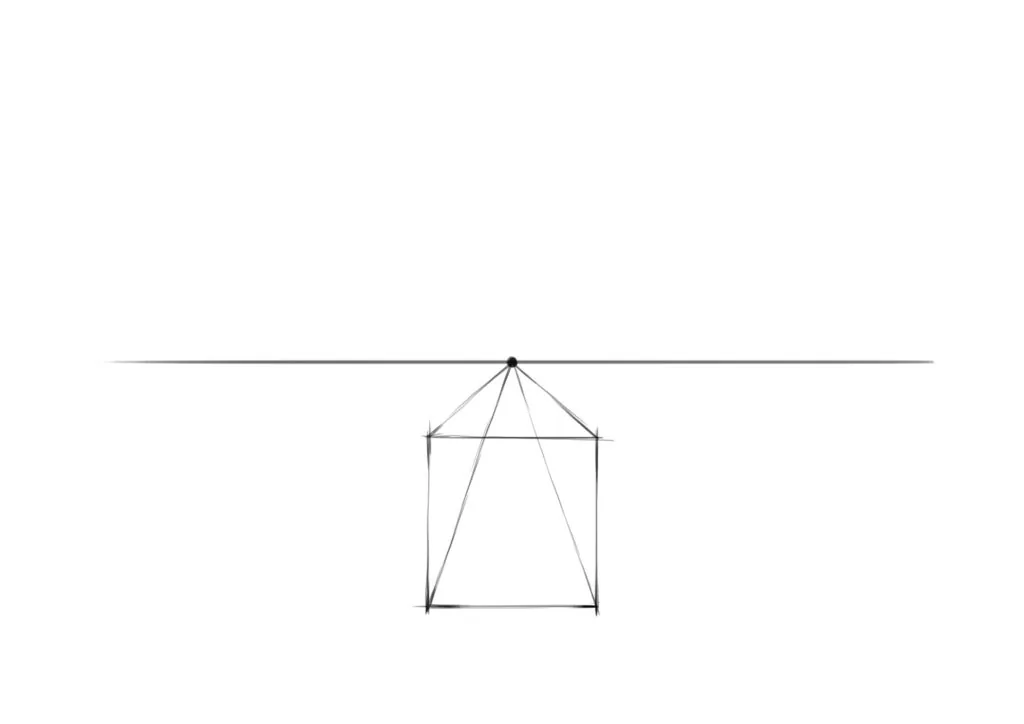
Below the horizon line, draw a square - this will be the front face of the cube. It retains the correct proportions because it is located frontally.

Stage 3. Adding depth
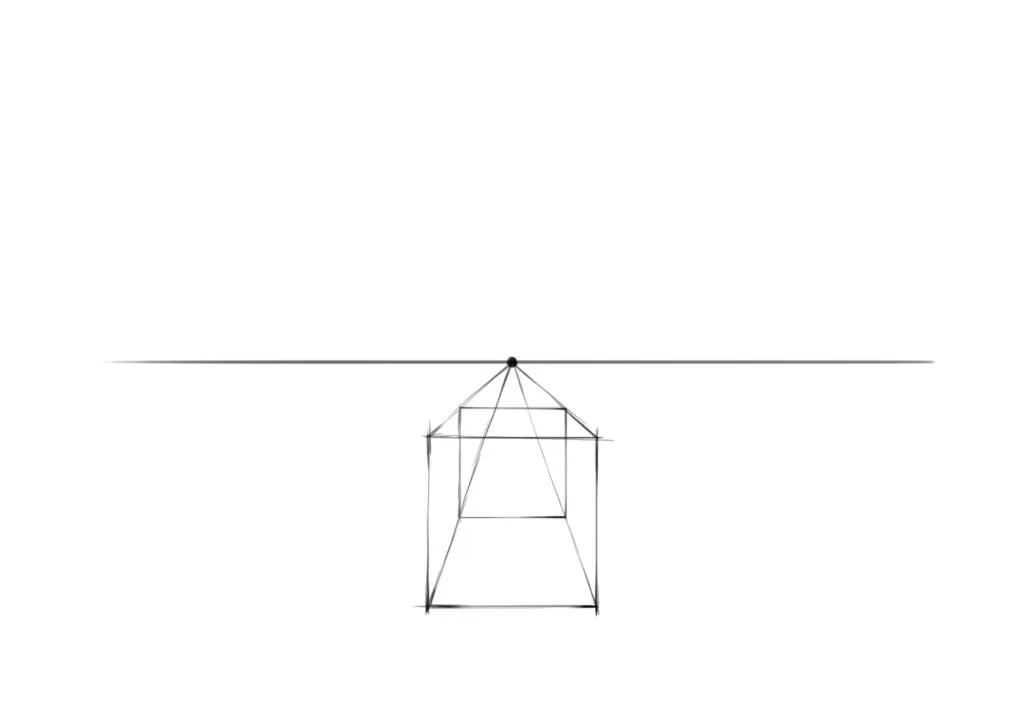
Draw lines from the corners of the square to the vanishing point on the horizon line. These lines determine the direction of the side faces. On the resulting guides, mark the depth of the cube - the distance to which it will go into space. Connect the marked points to complete the construction.
Stage 4. Completing the construction
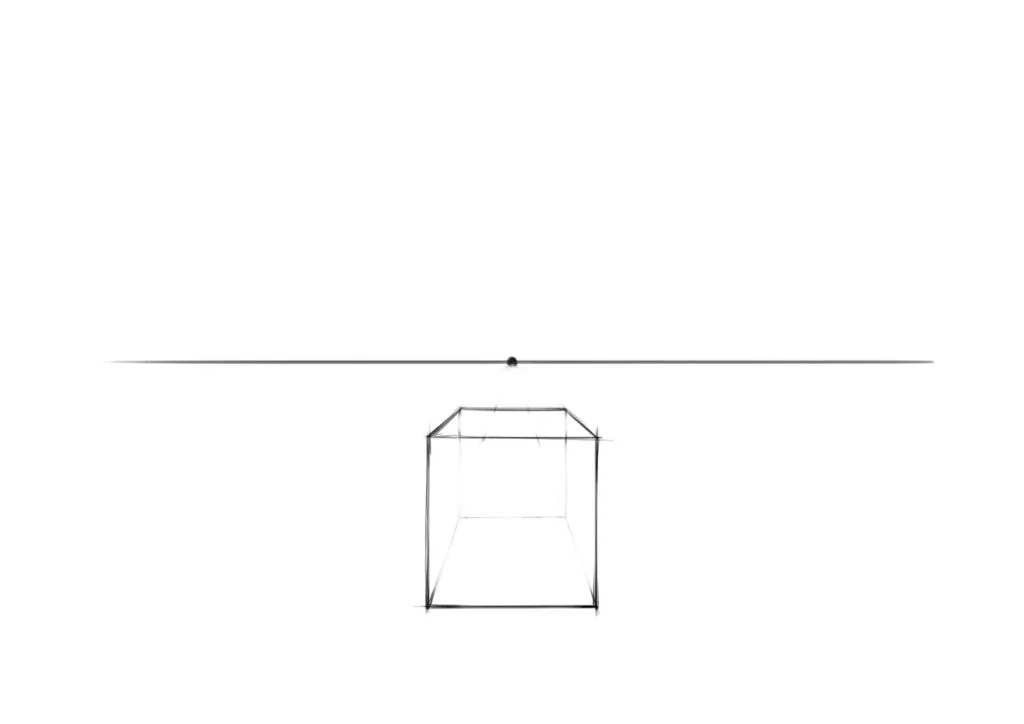
Remove all auxiliary lines that are no longer needed, and leave only the visible edges of the cube. To make the drawing look more convincing, add hatching or shadows, emphasizing the volume of the shape.
Interior of a room in frontal perspective
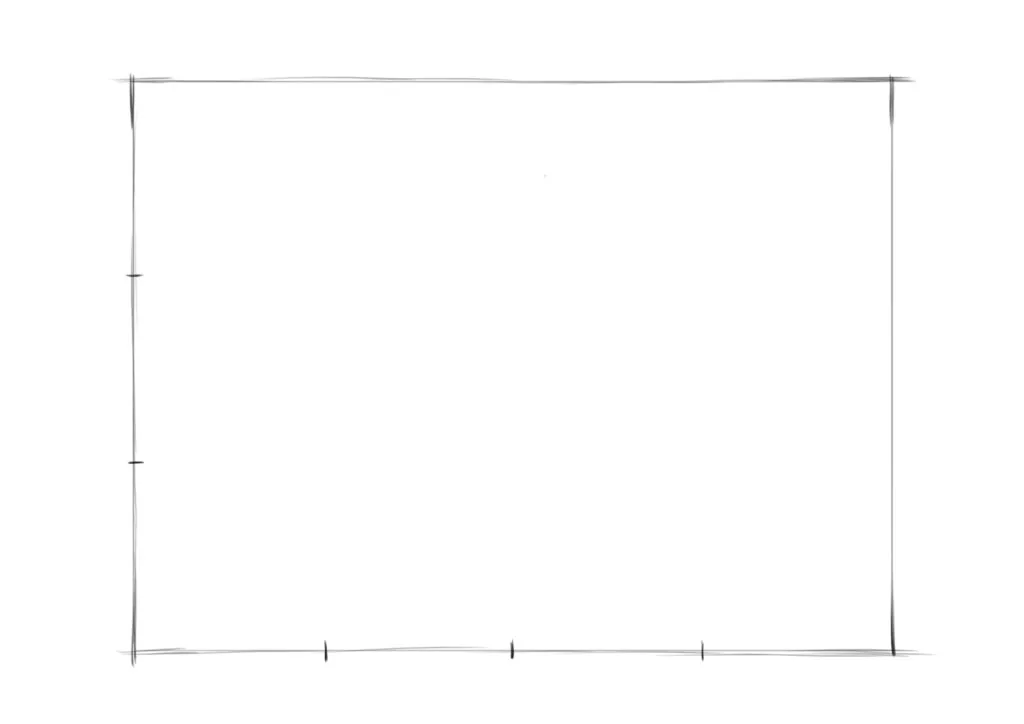
Stage 1. Preparation
Turn the sheet horizontally. Draw a rectangle with proportions: three parts in height and four parts in width. It will symbolize the front wall of the room, conditionally equal to 3×4 meters.
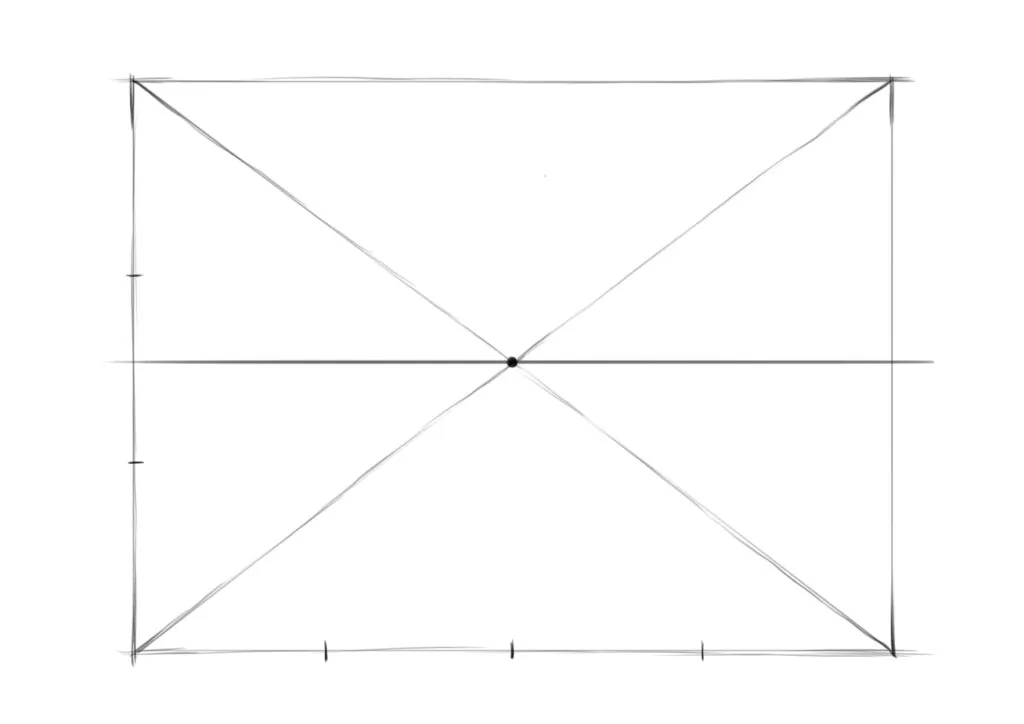
Stage 2. Building the side walls
Draw a horizontal horizon line in the middle of the sheet. In the center of this line, mark the vanishing point. Draw lines from the corners of the rectangle to the vanishing point - they will designate the side walls of the room.
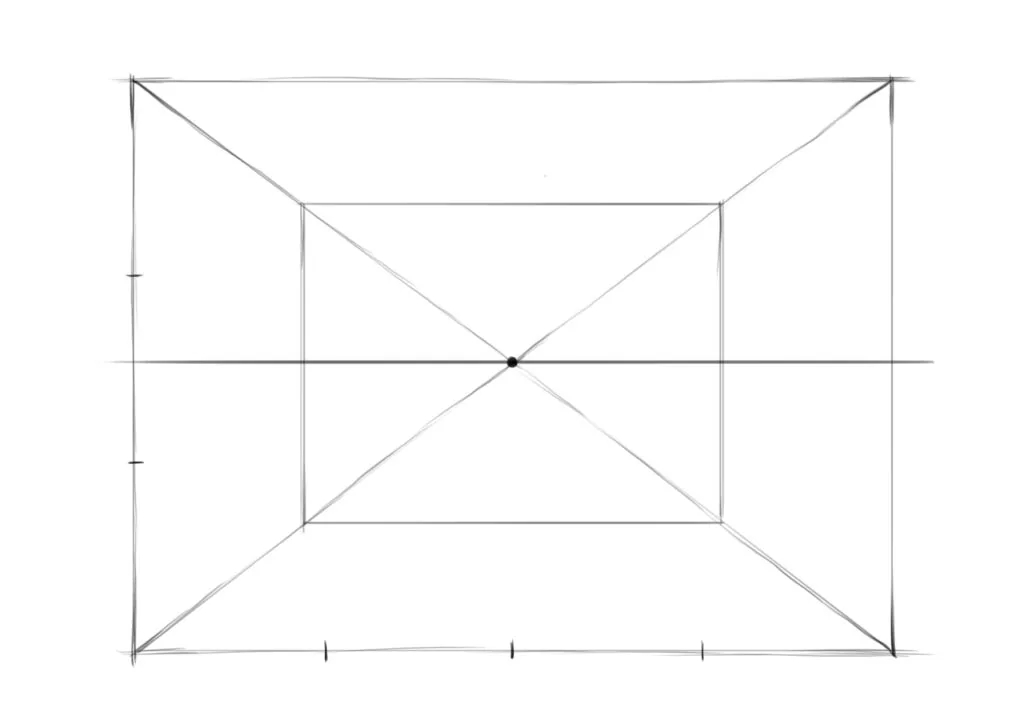
Stage 3. Creating the back wall
Determine the depth of the room by making marks on the guides going to the vanishing point. Connect these marks with vertical and horizontal lines - you will get the back wall, as well as the outlines of the floor and ceiling.
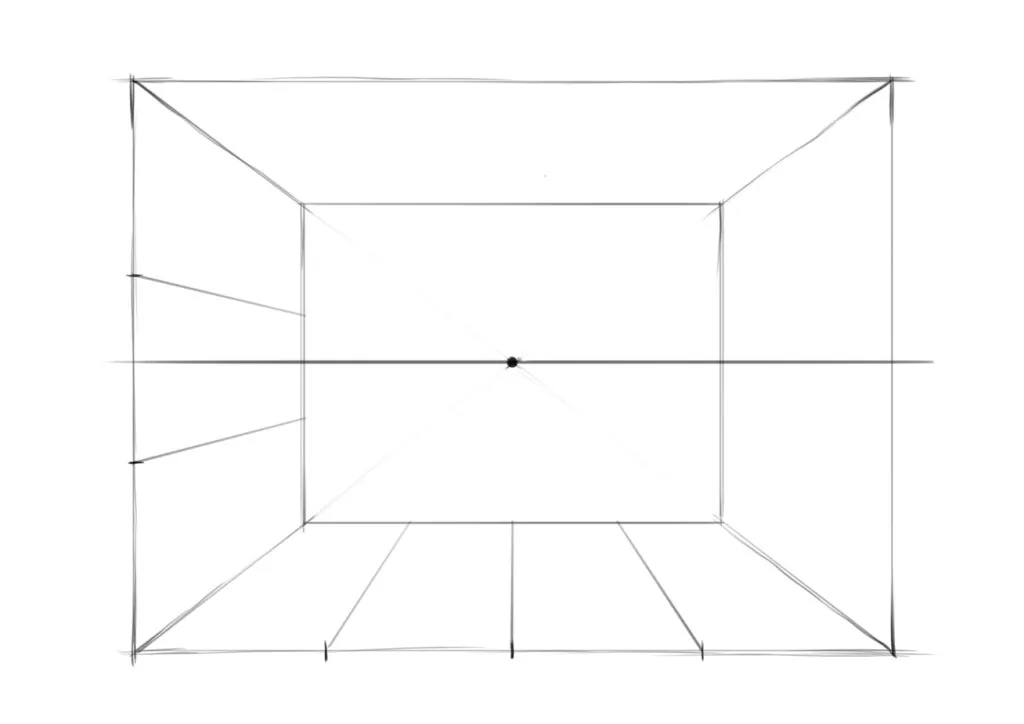
Stage 4. Depth lines
Divide the side walls and floor into equal sections - for example, one meter each. Draw lines to the vanishing point from these marks. You can erase the extra segments that fall on the back wall.
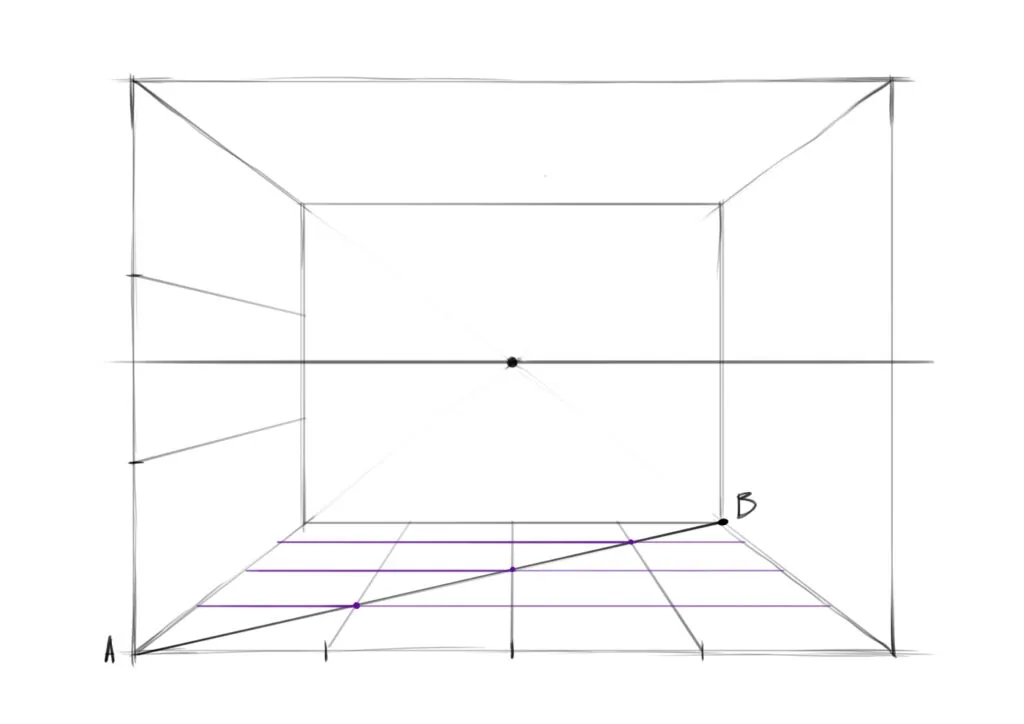
Stage 5. Dividing the depth into meters
Draw a diagonal on the floor from the nearest corner to the opposite far one. At the points of intersection of this diagonal with the depth lines, draw horizontal lines from the wall to the wall. This will create a grid in which each segment will be equal to one meter.
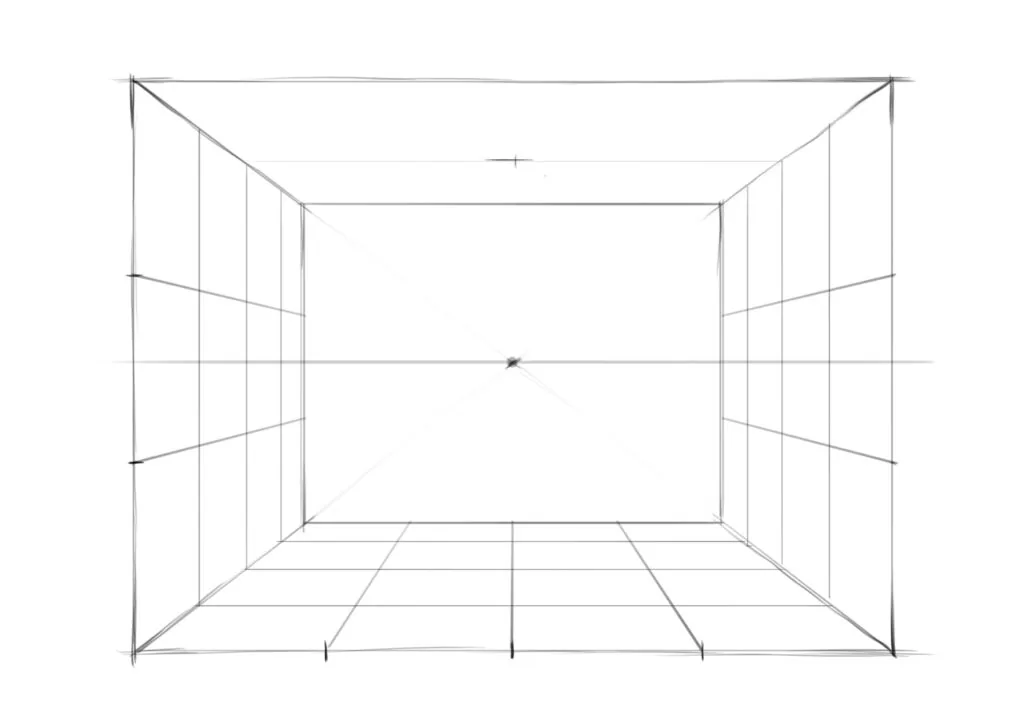
Stage 6. Scale grid
Continue building the grid on the walls and ceiling. Such a marking will allow you to correctly place furniture and interior items in perspective and with the right scale.
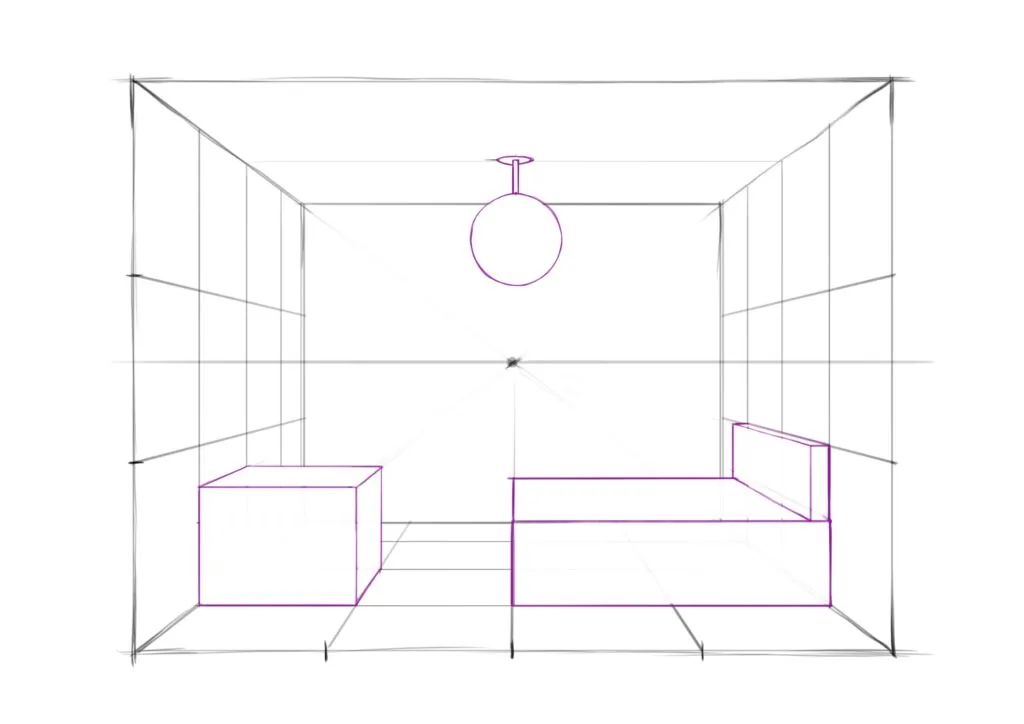
Stage 7. Adding furniture
Draw simplified forms of furniture: for example, a bed and a table opposite. Thanks to the grid, you can easily determine their sizes and correct location. You can add additional elements - a chandelier, a closet or other items. First draw them through, like a frame, and then remove the extra lines.
Stage 8. Completion
Erase all auxiliary constructions, leaving only the main contours of the room and furniture. To make the interior look more convincing, add shadows, texture and, if desired, color. This will give the drawing completeness and realism.
Frontal perspective with one vanishing point is a basic skill that helps начинающие artists learn to convey depth. The main thing is to carefully ensure that all lines going into space converge at one point.
The more often you perform such constructions, the faster you will begin to feel the proportions and confidently depict three-dimensional shapes. Over time, this skill will become a natural part of your artistic process, and your drawings will acquire credibility and expressiveness.
Video on the topic
Architectural sketching. Basics of perspective
To consolidate the material, you can watch an excerpt from a lecture on the basics of perspective. The video наглядно shows the principles discussed in the article. This format will help you better understand the constructions and see their application in architectural sketching.
Related materials

Linear perspective: what it is and why it is needed

Texture and finish in the drawing

Statics and dynamics in drawing: creating mood and movement

All about brushes in digital drawing

Stylization in drawing

Chiaroscuro in drawing
