TutorialUpdated: July 2, 2026
Zbrush lesson for beginners
In short
Learn how to start working in ZBrush with our simple tutorial for beginners. Step-by-step guidance, useful tips and basic digital sculpting techniques.
Skills Up School
Online school of drawing and CG
If you have always dreamed of sculpting, but clay and plaster are not to your liking, then ZBrush is your спасительный ticket to the world of digital sculpting. This is a program that allows you to create stunning 3D models, literally "molding" them from virtual material. Let's figure out what ZBrush is, why it has become a standard in the industry, and how to take the first steps in this amazing tool.
 Author — Sergey Lyubashin
Author — Sergey Lyubashin
What is ZBrush and what makes it special?
ZBrush is powerful software for digital sculpting and texturing, created by Pixologic. It has become a real standard in the 3D graphics industry thanks to its unique technology for working with polygons and the intuitive "molding" process. What makes ZBrush stand out:- Sculpting like in real life: Imagine working with clay, only without the mess.
- Detailing: The program allows you to work with millions of polygons, creating мельчайшие details such as skin pores or fabric texture.
- Tools for creativity: A huge number of brushes, masks, and modifiers.
Where is ZBrush used?
1. Gaming industry
In creating game graphics, ZBrush is an irreplaceable tool. Sculpting has been used in almost every model you can see in most 3D games.- Characters: Do you want to create a dragon with textured skin or a realistic human? It all starts with ZBrush.
- Environment: Game-level objects, including stones, ground, and plants, are created using the variety of brushes and Alpha available in ZBrush.
2. Film industry
From Gollum in "The Lord of the Rings" to the giants in "Jurassic World," ZBrush has become an indispensable tool for creating characters and environments.- Creating realistic creatures: ZBrush allows you to model skin textures, hair, and even teeth with incredible accuracy.
- Detailing: Working with polygons at a level that is unattainable in other programs.
3. Jewelry and industrial design
ZBrush is actively used in the development of jewelry and complex industrial products.- Jewelry models: The program allows you to skillfully work out the elements of jewelry.
- Prototypes: Engineers use ZBrush to create prototypes of complex shapes.
Why is ZBrush the choice of professionals?
1. Unique DynaMesh technology
It allows you to constantly modify the model by adding or removing volume without losing quality.2. Support for millions of polygons
You can work out the details to the level of skin pores or fabric folds while maintaining performance.3. Intuitive interface
Although ZBrush may seem complicated at first glance, the process of working with brushes and masks quickly becomes intuitive. Motivation: Don't be afraid of the interface! All professionals were beginners and got lost in the buttons at first too.Rendering and integration
Related courses
All courses
from 3 400 ₽
-80%
Introduction to ZBrush
17 000 ₽3 400 ₽
Learn more

Free
Бесплатный курс «Погружение в магию 2D-художников»
Enroll

Free
Бесплатный курс «Основы портрета»
Enroll
Integration with other programs
It is easy to export models from ZBrush to programs like Maya, Blender, Cinema 4D, and others for further refinement and animation.Rendering in ZBrush:
- BPR (Best Preview Render): Allows you to visualize textures and lighting directly in the program.
- Support for external renderers: Models from ZBrush can be exported to V-Ray, Arnold, and other rendering systems to achieve photorealistic images.
A simple lesson for beginners in ZBrush: Frog in a donut
Asya, the customer care manager, is in touch. Were you surprised? It so happened that I have already taken several Skills Up courses in 3D direction, and I would like to share with you the contagious motivation to engage in three-dimensional graphics! Today we will dive into the functionality of the ZBrush program together. We will create a cute little frog, comfortably nestled in a donut. Yes, that's right!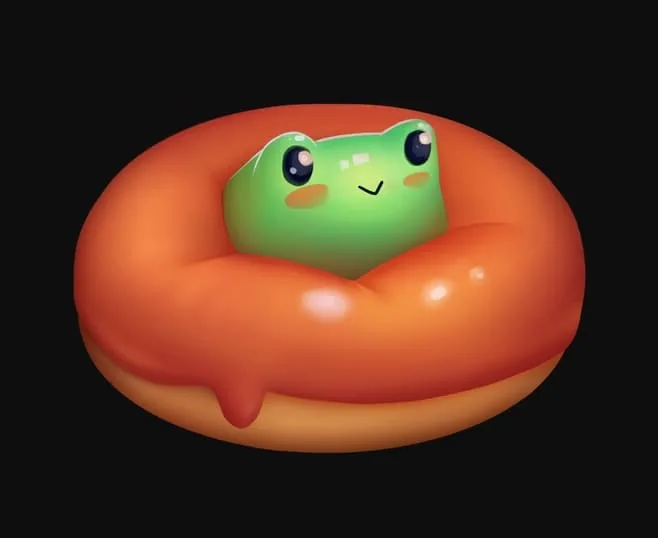 This lesson is inspired by the concept of the artist Eliza Kudrya. We will not only learn the basics of sculpting but also try to color our frog. Everything is simple, interesting, and fun! Let's go!
First preparations
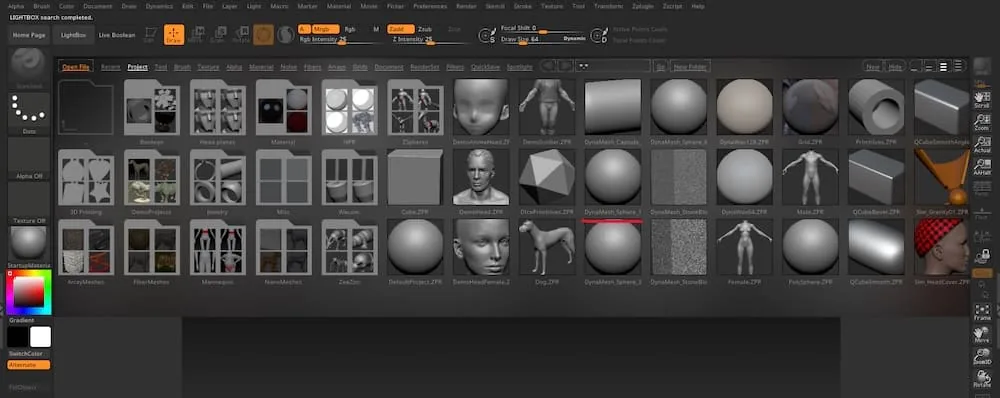 Open ZBrush. You are greeted by the LightBox window — a library of preset projects. Find the DynaMesh_Sphere_128 project and double-click on it to open it. Before you is a workspace with a perfect ball to start with.
- Disable perspective (Persp, button on the right). This is optional, but it helps to accurately assess the proportions.
- Enable symmetry (key X) — so the changes will be automatically duplicated on both sides of the model.
Creating the donut base
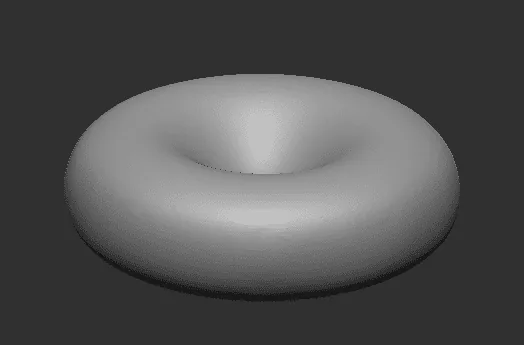
- Activate the Gizmo tool (press W). An interface with axes will appear.
- Grab the green parallelepiped on Gizmo and pull it down to flatten the ball along the Z axis. This is the donut blank.
- Exit the transformation mode using the Q key.
- Using the Move brush (can be turned on at B-M-V), we make a depression in the center of the ball, creating the characteristic hole of the donut.
Making the glaze
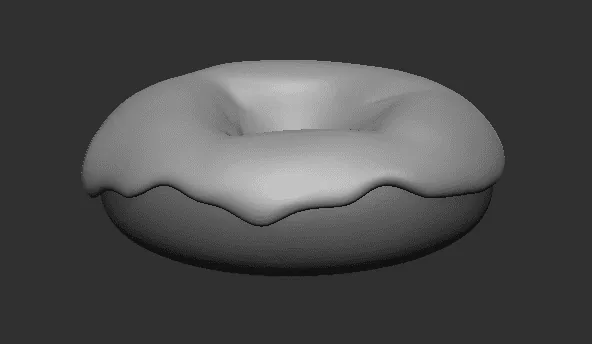
- First, enable radial symmetry: go to the Transform menu and press R. Now the symmetry will work around the center.
- Use the Flatten brush to slightly smooth the edges of the donut.
- Disable symmetry (key X). Using the MaskLasso tool, select the top part of the donut.
- Find Extract in the Subtool menu on the right. Press Extract for a preview, adjust the thickness of the glaze with the Thickness slider. When you are satisfied, press Accept.
Adding the frog
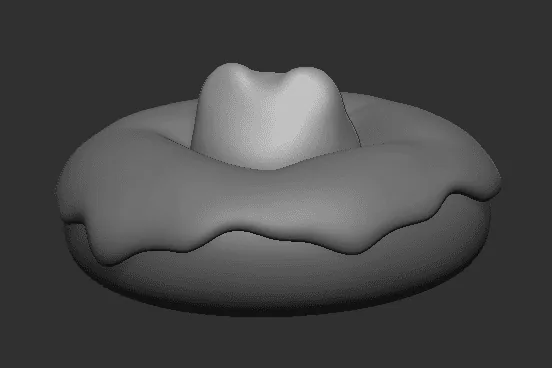
- Through Append in the Subtool menu, add a sphere (Sphere3D) — this is our future frog.
- Move the ball to the top of the donut using Gizmo.
- Enable DynaMesh and symmetry (key X). Mold "ears" for the eyes using the Move, Flatten, and Smooth brushes.
Eyes for the frog
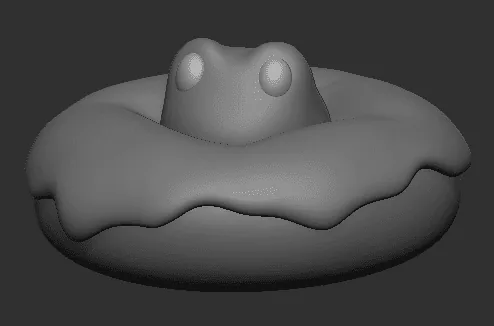
- Add another sphere for the eye. Using Mirror (in the Deformation menu), create a second eye symmetrically.
- Enable symmetry on X. The symmetry should be on axis X, if not, correct it in the symmetry menu.
- Use the Move brush to give the eyes an oval shape and slightly shift them to the sides.
Coloring the frog (PolyPaint)
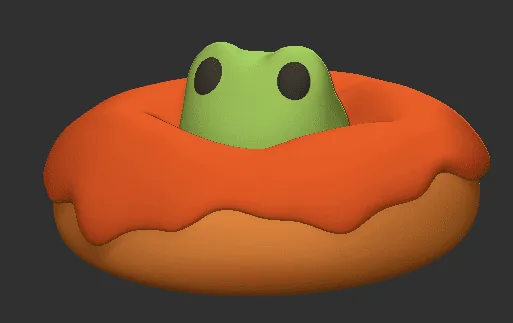 Now let's add colors!
- Choose a color for each object in the palette (menu on the left).
- Enable Mrgb in the brush settings and apply the color and material to the object through Color > FillObject.
- For drawing, use the Paint brush. Add soft shadows, highlights, and blush. Don't forget to draw a smiling mouth!
Final result
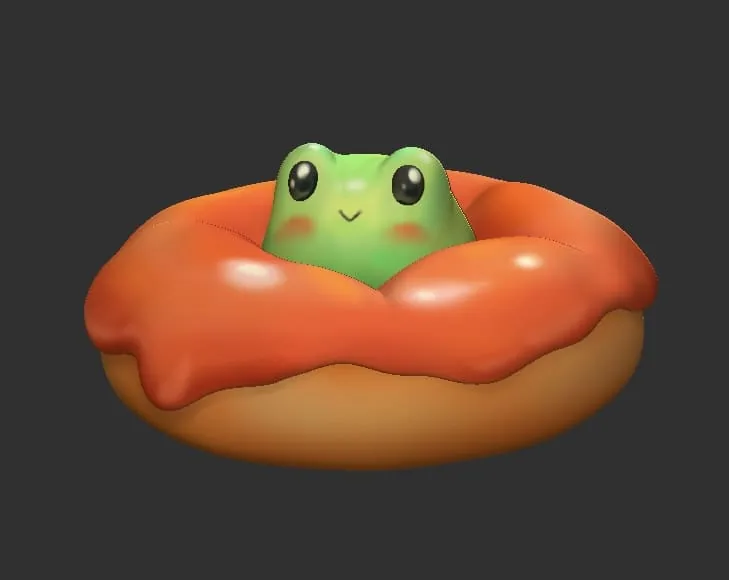 Our little frog is ready! Don't forget to save the project (Save As button) and show off the results on social networks or to friends. This is a great start to mastering ZBrush!
Even if your frog is a little crooked — this is your first step into the amazing world of 3D. Keep practicing, and soon your works will become real masterpieces!
Our little frog is ready! Don't forget to save the project (Save As button) and show off the results on social networks or to friends. This is a great start to mastering ZBrush!
Even if your frog is a little crooked — this is your first step into the amazing world of 3D. Keep practicing, and soon your works will become real masterpieces!
ZBrush video lesson
You can consolidate the basic knowledge of the program and practice sculpting on the course «Introduction to ZBrush». And if you feel the zeal to study the complete pipeline for creating 3D models with optimization for use in game engines, we recommend «3D Graphics Basic» — during it you will also be able to learn more techniques for creating impressive sculpts!Related materials

Tutorial
Sculpting lessons in ZBrush for beginners: creating a 3D snowman model
September 18, 2023
Article
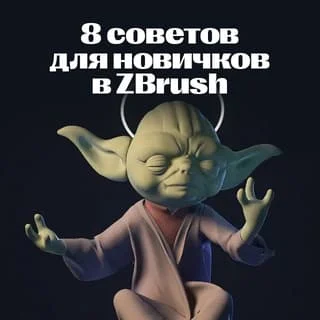
8 tips for beginners in Zbrush
September 18, 2023

Tutorial
Sculpting lessons in ZBrush for beginners: rendering a 3D snowman model
September 18, 2023

Tutorial
Blender 3D lessons for beginners
December 27, 2024

Tutorial
How to learn to draw on a tablet. Tips and lessons for beginners
December 31, 2023

Article
5 tips for a budding environmental artist
September 18, 2023

News
Создание реалистичного бинокля для начинающих с помощью ZBrush и Substance 3D
August 18, 2025