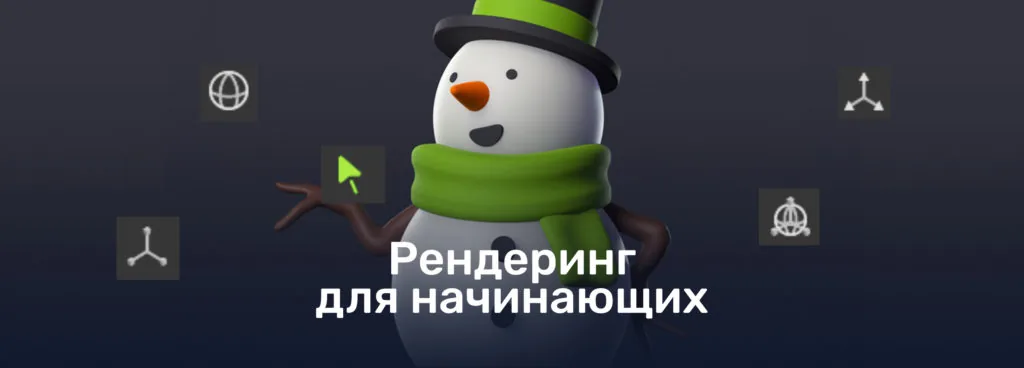
Sculpting lessons in ZBrush for beginners: rendering a 3D snowman model
Learning to sculpt in ZBrush: rendering a 3D snowman model. Continuation of the modeling guide from the "Skills Up School" curator.
This article is a continuation of the guide on modeling prepared by artist and Skills Up School curator Darya Baydukova.
Do you want more practice and character tutorials? Sign up for free online speedsculpting classes, which take place at Skills Up School from December 21 to January 22.
We made a snowman in ZBrush, now we open Marmoset Toolbag 4 and start rendering following the detailed instructions.
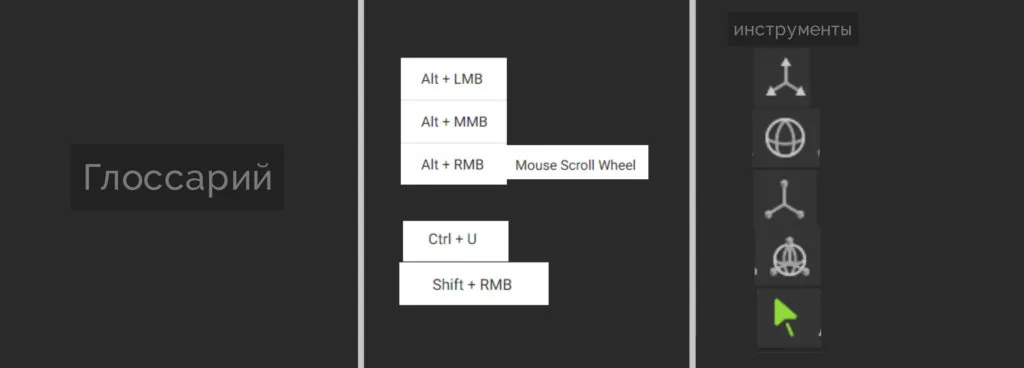
Glossary
Scene — the workspace where the model is located.
Navigation
Alt+left mouse button — scene rotation
Alt+scroll wheel — scene movement
Alt+right mouse button (scrolling the mouse wheel) — zoom in/out
Ctrl+U — show all light sources and cameras
Shift+right mouse button (right/left) — SKY light rotation
Tools
W — Translate
E — Rotate
R — Scale
T — Transform
Q — Select (also reset transforming tools)
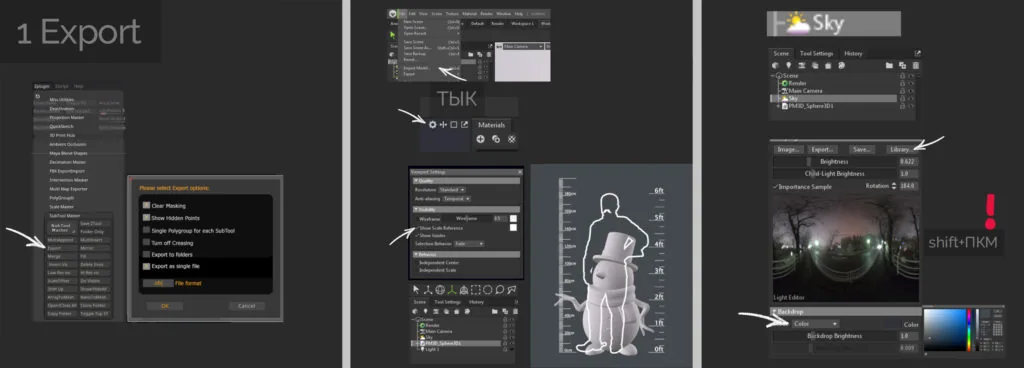
Stage 1. Export
We export our model in ZBrush in Obj format:
- In the Zplugin menu — SubTool Master — Export. In the pop-up menu, check the selected items and click OK;
- Open Marmoset Toolbag 4. In the File tab, look for Import model or simply drag the file from the folder directly into the program;
- When the model is loaded, first of all we need to check its size. To do this, in the top part of the scene, next to the Materials tab, click on the gear and check the Show Scale Reference box.
A magnificent man with a mustache will appear! Based on him, we select our model using the Select (Q) tool and increase the Scale (R) — pull the yellow square.
Related courses
All courses
Introduction to ZBrush
17 000 ₽3 400 ₽

Бесплатный курс «Погружение в магию 2D-художников»

Бесплатный курс «Основы портрета»
Save the project.
Stage 2. Sky and Light
For better quality light and shadows, it is advisable to select the Full Quality setting (top right in the scene).
Sky
- In the library, you can choose the Sky that suits you in terms of light and slightly reduce its brightness (Brightness);
- In the Backdrop tab, change the Sky display: Mode — Color. You can also change the color to your liking.
Using Shift+right mouse button (right/left across the scene), you can rotate the light relative to the model.
Light
- To add a new light source, click on the light bulb in the Scene tab. Each new light source appears in the place where we are looking at our model;
- Using Alt+left mouse button, we rotate the scene to the desired position and add a light bulb — we need three pieces;
- We adjust each of the sources to the position we need using the Rotate (E) tool.
To see all our light sources, use the Ctrl+U key combination.
The Diameter parameter is responsible for the softness of the shadows and scattering. The Brightness parameter is responsible for brightness.
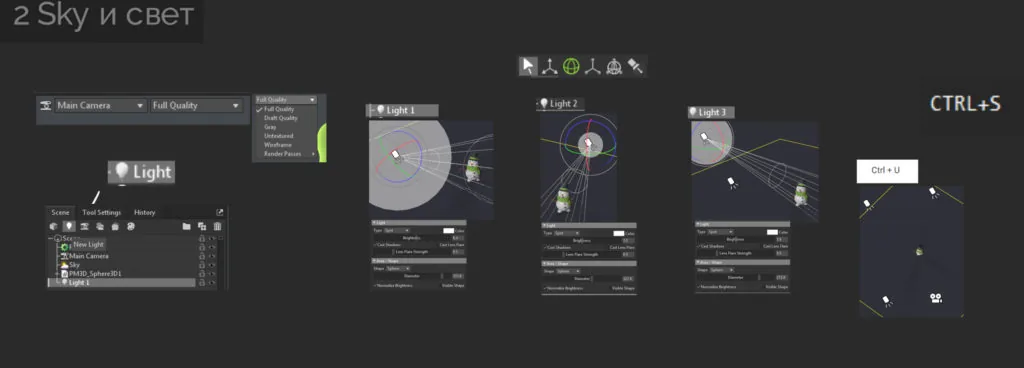
Light 1
Fill light illuminating our model entirely — usually the most diffuse light source. Located directly opposite or slightly to the side of the model.
Light 2 and Light 3
Backlight. Its task is to emphasize the breaks in the shape and create a light contour of the model. Located behind or strongly to the side of the model.
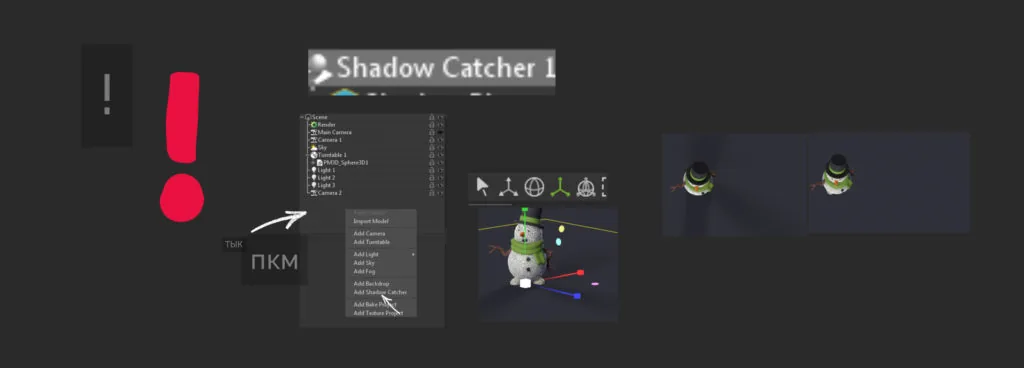
Shadow Catcher
You can add a conditional floor to the scene so that the snowman does not levitate, but it is clear that he is standing. Shadow Catcher creates shadows that the object casts. Add them by right-clicking in an empty space in the Scene tab and selecting Add Shadow Catcher from the menu. You can increase the area of the shadows cast using Scale(R).
Stage 3. Materials
We can add as many different materials as we like from the library and experiment with them, but since our snowman does not have a UV-unfolding, we will set the materials ourselves.
Add a new material by clicking on the + in the Materials tab, and rename it so that we understand what it refers to. Apply the material to the desired element by simply dragging it.
Material responsible for elements of clothing, eyes, buttons, nose:
- Since they are painted, we need to enable color display. In the Albedo tab on the left, select Vertex color;
- In the Microsurface tab, move Roughness (translated as roughness). At maximum values, the material is completely glossy and, accordingly, completely matte.
Branch hands:
- If the original color does not fit, we can easily change it.
To do this, in the Albedo tab on the left, select Albedo and click on Colour
in the opened menu;
- Slightly twist Roughness.
The snowman himself:
- Enable Vertex color and move Roughness;
- Since snow is not a dense material, like gypsum, for example, part of the light passes through it and part is reflected. Because of this, the shadows and highlights on the material look different. Therefore, in the Transmission tab, select Subsurface Scattering.
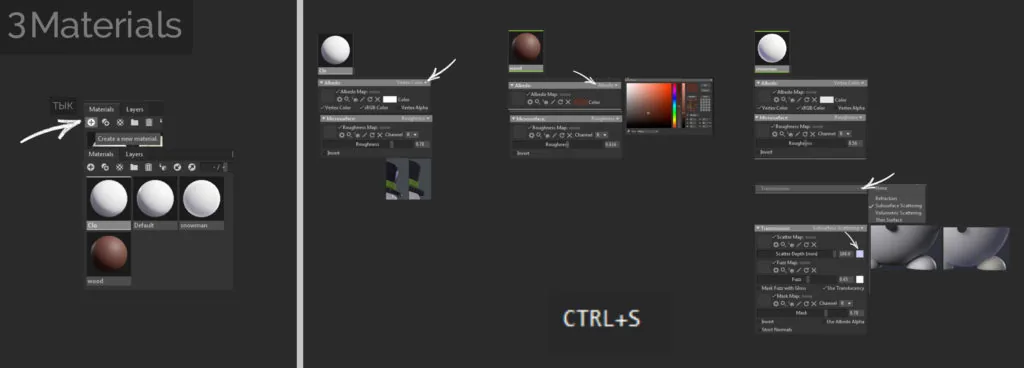
When you render a character, in order for his ears to show through the light, you will need this:
Scatter Depth — how deeply the light penetrates and scatters (change its color to a cold shade);
Fuzz — reflex;
Mask — intensity.
Stage 4. Camera and Render
- In the camera settings, you do not need to change anything, only in the Post Effect — Color tab you can slightly increase the Saturation (saturation);
- In the render settings in the Lighting — Ray Tracing tab, enable the Use Ray Tracing parameter — all in order for our light and shadows to become more realistic;
- In order to see at what resolution our model will be rendered, you need to enable Safe Frame in the Camera menu (Lens tab). You can change the sizes in the Render menu (Output — Image)
So, the light is set, the materials are configured, all the parameters are set. In the Render menu, look for the Render Cameras tab and check that the camera we have been setting all the time is there — it should be selected in the scene.
Look for the Output — Image tab — Select the save path — Check the format (PNG). Click on Render Image.
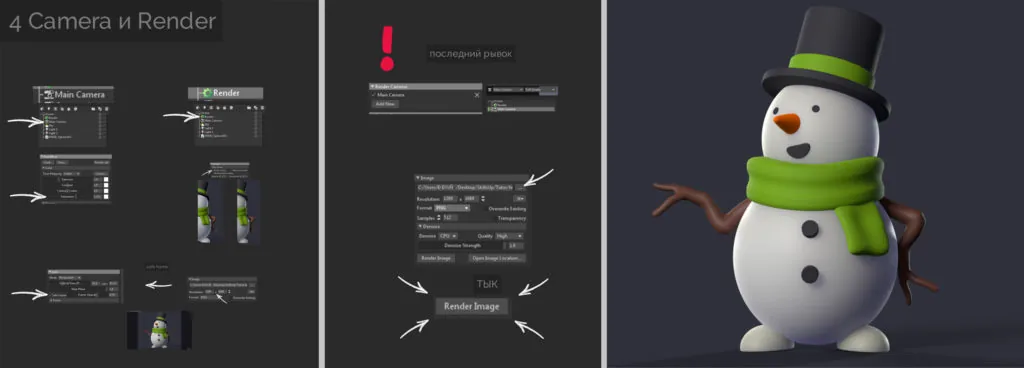
Your snowman is beautiful! You are beautiful!
Find out more about free online speedsculpting classes for beginners
Related materials

Sculpting lessons in ZBrush for beginners: creating a 3D snowman model
Sketching for beginners

Blender 3D lessons for beginners

Zbrush lesson for beginners

How to learn to draw on a tablet. Tips and lessons for beginners

Step-by-step guide to modeling in ZBrush. Part 1