TutorialUpdated: July 2, 2026
Step-by-step lesson on VFX or visual effects
In short
In this lesson, we will show how to draw VFX, or visual effects — these are special effects in games and movies: explosions, lasers, sparks, etc.
2D artist (illustrator)
Bum-badabum! In this tutorial, we will show you how to draw VFX, or visual effects — these are **special effects in games and movies:** explosions, lasers, sparks, smoke, firewalls, and many other things.
 Usually, **they are made on game engines** using a particle system. The particle system has an emitter that emits pictures and models into the air.
 But before inserting a special effect into a game or movie, you need to see how it will look — and **here 2D artists come into play.** By the way, such effects are also widely used in illustrations!
 **The secondary part** is slightly less active, it should complement the main part and support the idea. Here it is — the dome and the ring.
 **The tertiary part** includes sparks and smoke.
 So, let's draw! We make all the main parts on different layers to make them more convenient to edit.
 **We look for the shape of smoke rings:** it is important not to be too small here.
Now there are details left — small particles next to large shapes. Dust should not attract much attention, so we draw it semi-transparent so that it dissolves in the air.
**We look for the shape of smoke rings:** it is important not to be too small here.
Now there are details left — small particles next to large shapes. Dust should not attract much attention, so we draw it semi-transparent so that it dissolves in the air.
 **We draw sparkles** from the center. The basis of our explosion is ready!
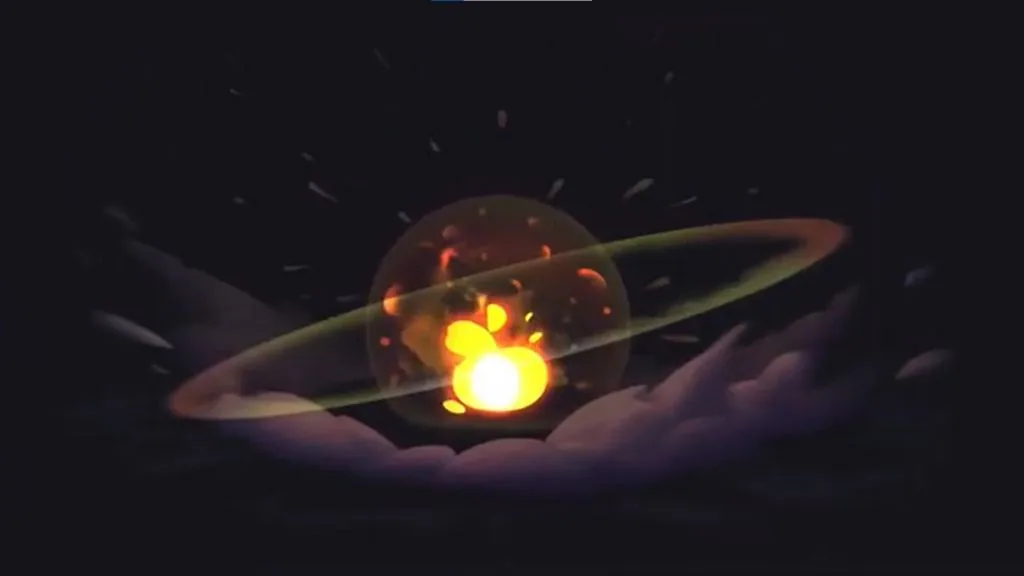
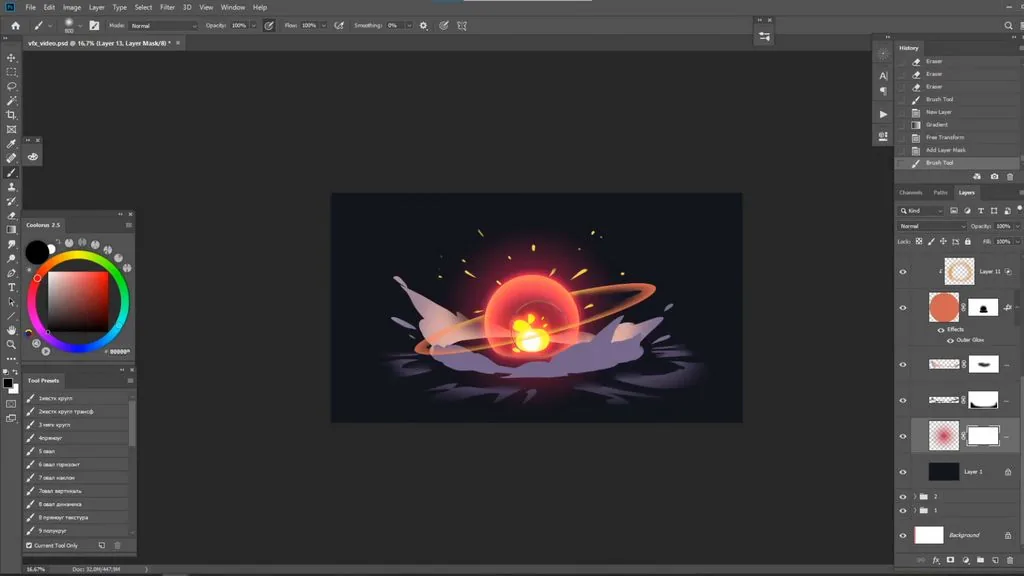
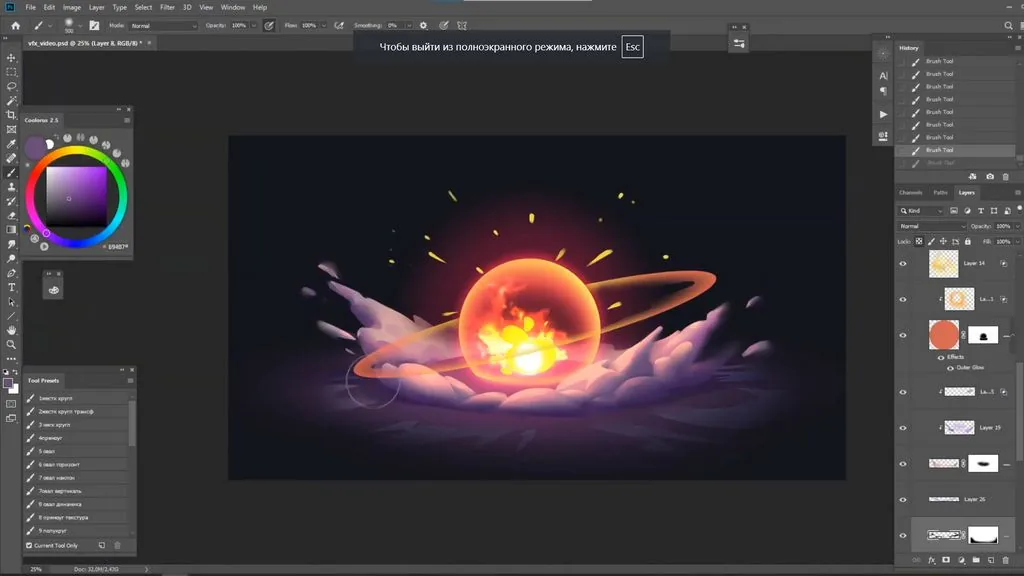
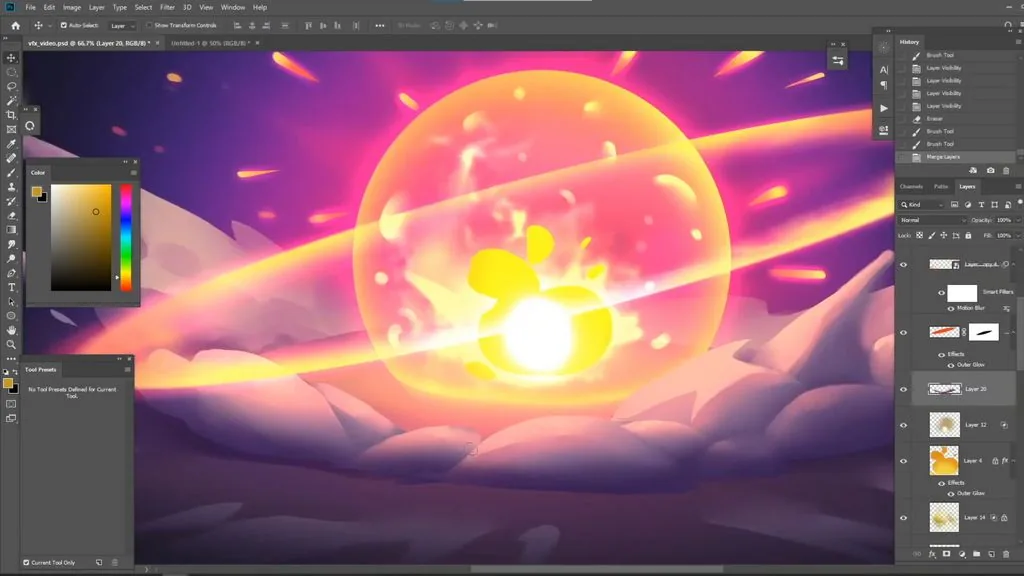
 We move on to basic gradients and glows. We highlight the dome through the **Color Dodge mode.**
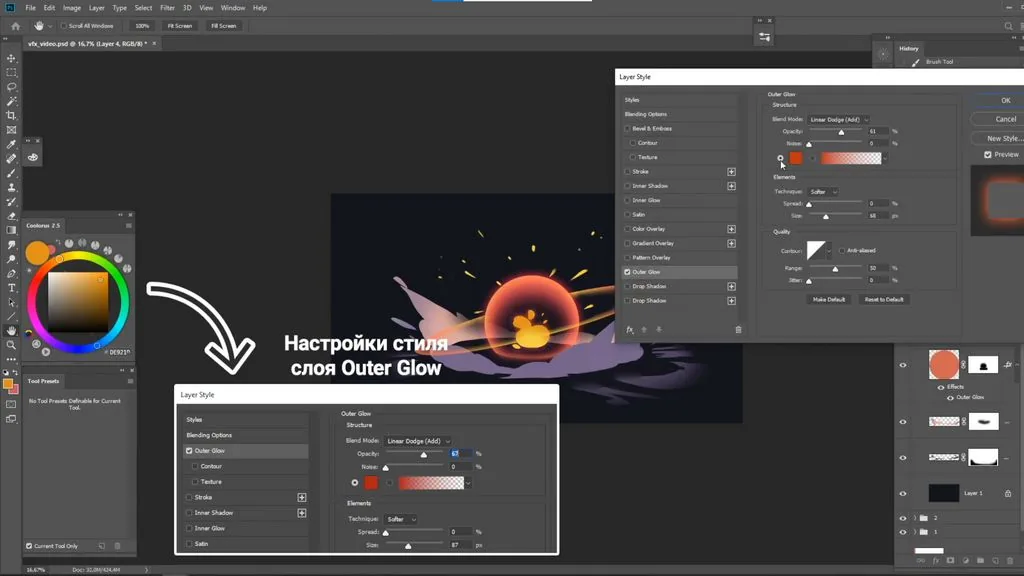
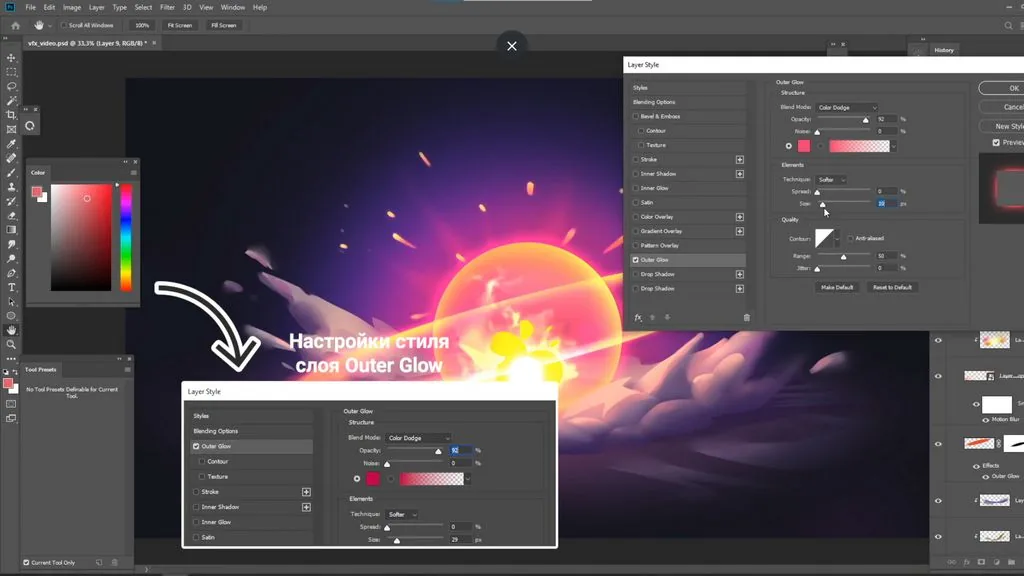
 **And we add external glow to the light and the dome** through the Autre Glo layer mode.
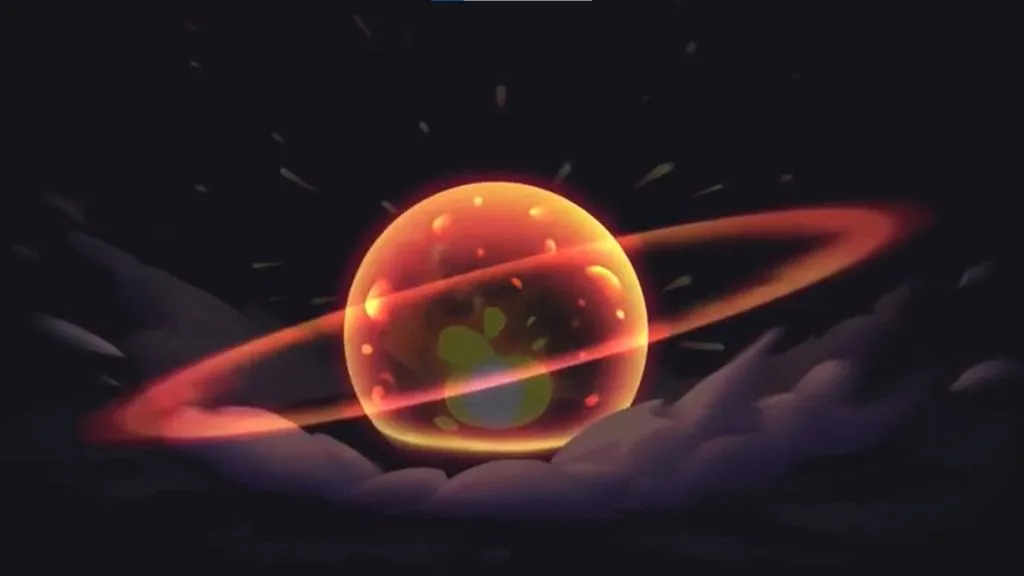
 We make the light brighter through **Color Dodge,** making sure that the lightest place is in the middle, and add a red gradient from the dome.
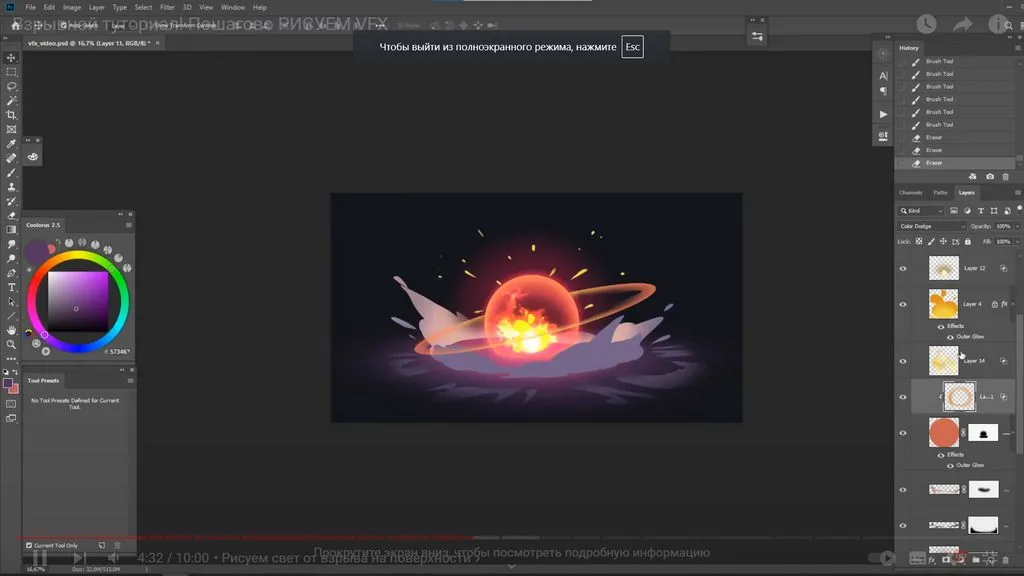
 We take our miracle brush and **draw fire.**
 **We show the light from the explosion** on the surface — it is convenient if you flatten a round soft base brush — so that it becomes more horizontal.
 Then we add more brightness to the dome through **Color Dodge.**
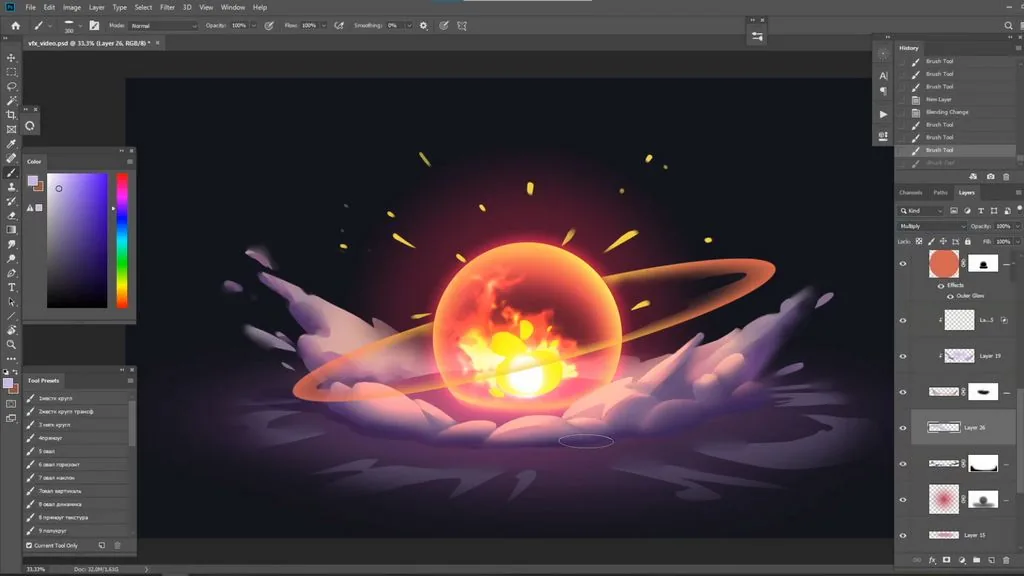
The next stage is **the volume of smoke.** We advise you to use **Multiply** for shadows, **Color Dodge** for light and the lasso to create a neat volume.
Then we add more brightness to the dome through **Color Dodge.**
The next stage is **the volume of smoke.** We advise you to use **Multiply** for shadows, **Color Dodge** for light and the lasso to create a neat volume.
 After the light and shadows are намечены, we can add highlights and middle tones, soften some moments with the **«Finger»** tool.
**We add a shadow under the smoke** to show its materiality.
We finalize large elements with the finger and a soft brush.
After the light and shadows are намечены, we can add highlights and middle tones, soften some moments with the **«Finger»** tool.
**We add a shadow under the smoke** to show its materiality.
We finalize large elements with the finger and a soft brush.
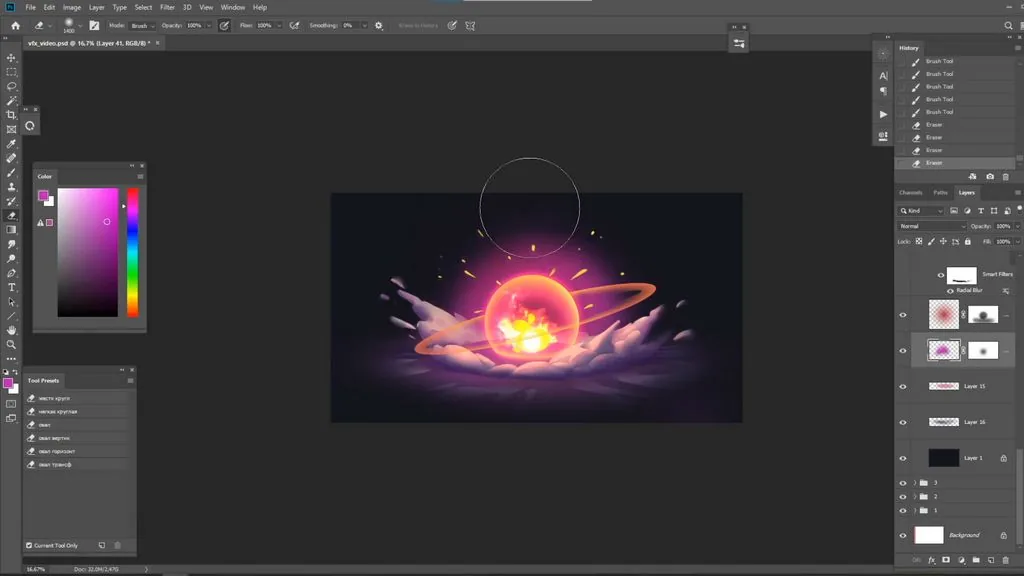
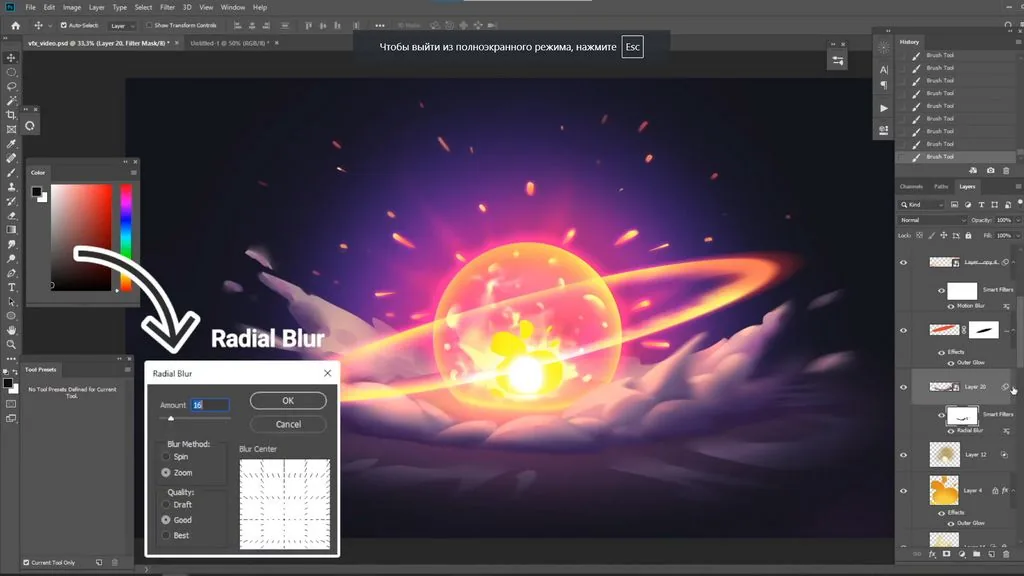
 Now **we will deal with fine smoke:** we darken it a little at the bottom, convert it to a smart object and put Radial Blur in such a way that it smears the smoke to the sides of the explosion. A smart object is convenient because we can always click on the filter under the layer and adjust it by mask or by the blur strength.
 For greater persuasiveness of the explosion, we will make several gradients behind and under it with a soft brush. It is important to consider that the farther the gradient, the paler and colder it is, and the closer it is, the brighter and warmer it is.
 **We will make rays coming from the center of the explosion** an additional accent. You can save effort by drawing one ray and then making several copies of different sizes.
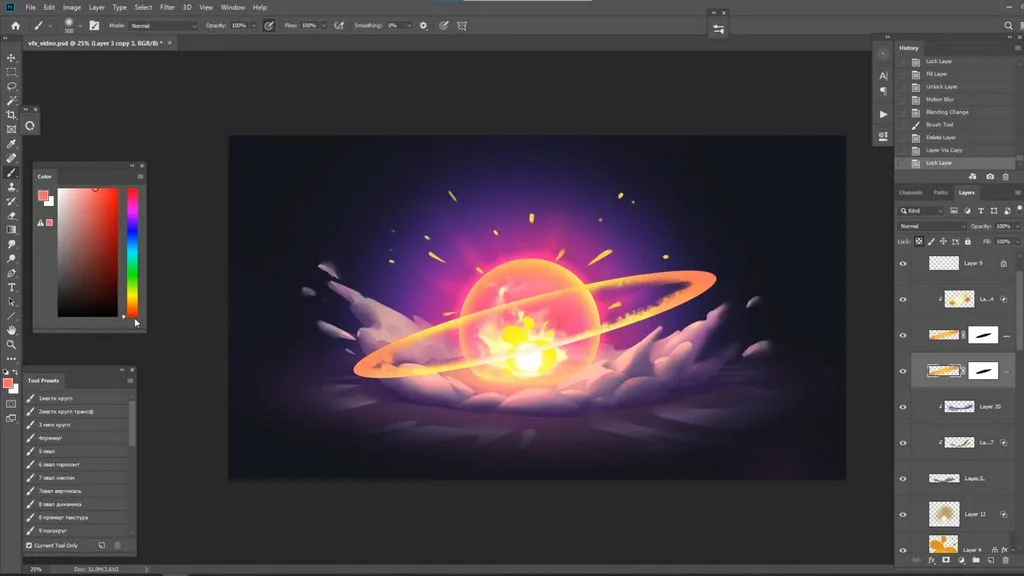
**We move on to the ring:** we can go through the layer mask along the edge of the ring with a fire brush for a more interesting silhouette. On top through the **Color Dodge** layer, we make a bright gradient in the middle.
**We will make rays coming from the center of the explosion** an additional accent. You can save effort by drawing one ray and then making several copies of different sizes.
**We move on to the ring:** we can go through the layer mask along the edge of the ring with a fire brush for a more interesting silhouette. On top through the **Color Dodge** layer, we make a bright gradient in the middle.
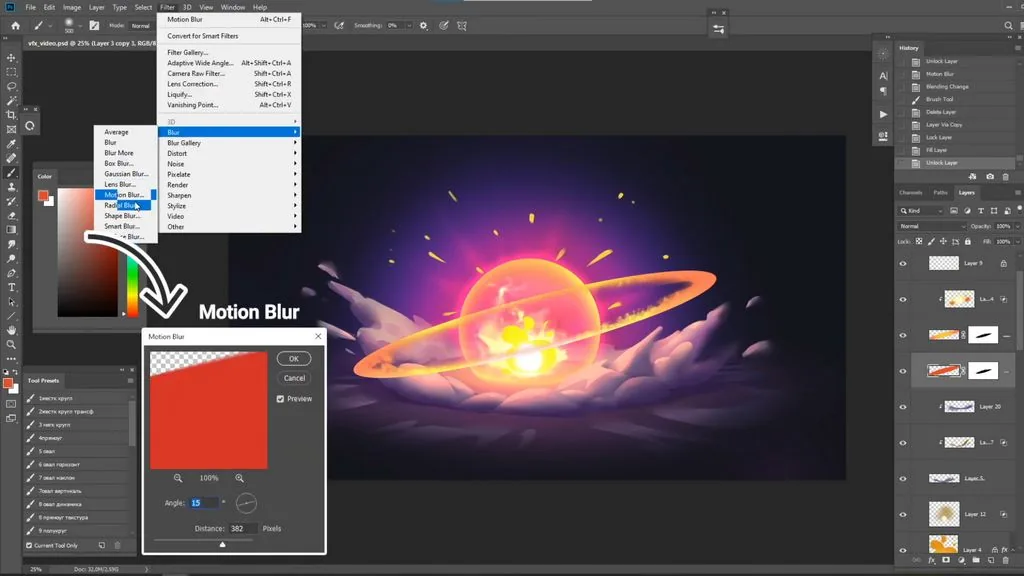
 Now we duplicate the ring, fill it with bright orange and blur it through **Motion Blur.** We change the overlay to **Color Dodge** and add external glow through the layer style.
 **We draw shins:** we show that they have a main brighter part and an orange tail, and then we add glow through Outer Glow and draw small sparks around.
 We add several sparks inside the dome in the **Color Dodge** mode.
 The final touch is **to add dynamics to the smoke!** To do this, we combine all the smoke layers, convert them to a smart object. We select Radial Blur and slightly erase the blur through the mask filter so that the smoke is clearer in the center and more blurred at the edges.
 Well, did you get a special effect? Show your results on social networks and be sure to tag us, Skills Up School ❤️
**Material prepared by the video lesson of concept artist Evgenia Chernova**
Well, did you get a special effect? Show your results on social networks and be sure to tag us, Skills Up School ❤️
**Material prepared by the video lesson of concept artist Evgenia Chernova**
Usually, **they are made on game engines** using a particle system. The particle system has an emitter that emits pictures and models into the air.
But before inserting a special effect into a game or movie, you need to see how it will look — and **here 2D artists come into play.** By the way, such effects are also widely used in illustrations!
Three parts of a special effect
Usually a special effect contains three parts: **the main, secondary and tertiary.** **The main part** should attract the most attention, usually it is the brightest. We will have the core of the explosion as the main part.
**The secondary part** is slightly less active, it should complement the main part and support the idea. Here it is — the dome and the ring.
**The tertiary part** includes sparks and smoke.
So, let's draw! We make all the main parts on different layers to make them more convenient to edit.
Drawing a special effect
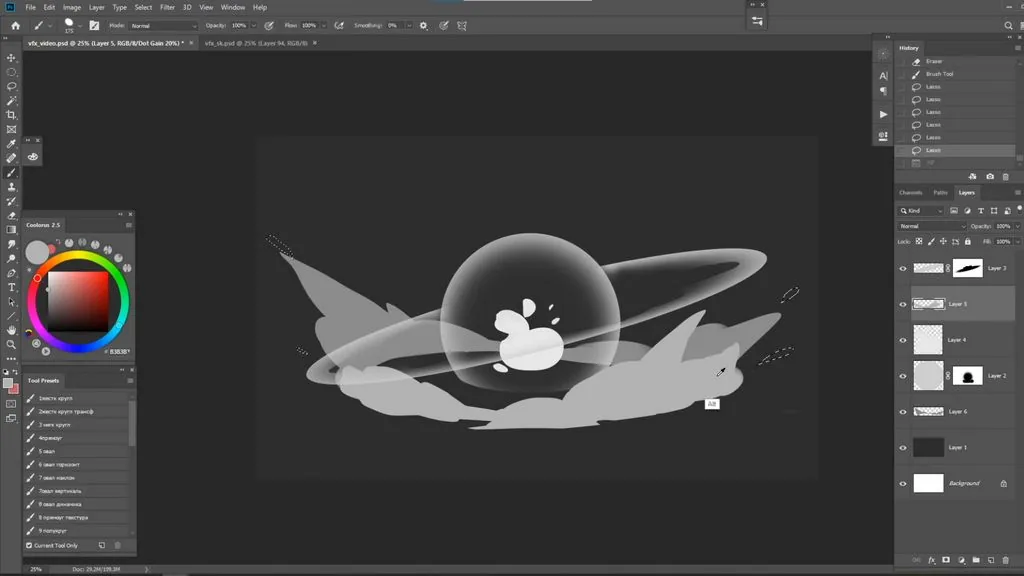
First, **we draw in b/w,** using a round selection and the lasso. **Let's start with the ring** — the shock wave from the explosion. We make the inner edges more ragged for dynamics, and then add brightness to the main part inside the ball.
**We look for the shape of smoke rings:** it is important not to be too small here.
Now there are details left — small particles next to large shapes. Dust should not attract much attention, so we draw it semi-transparent so that it dissolves in the air.
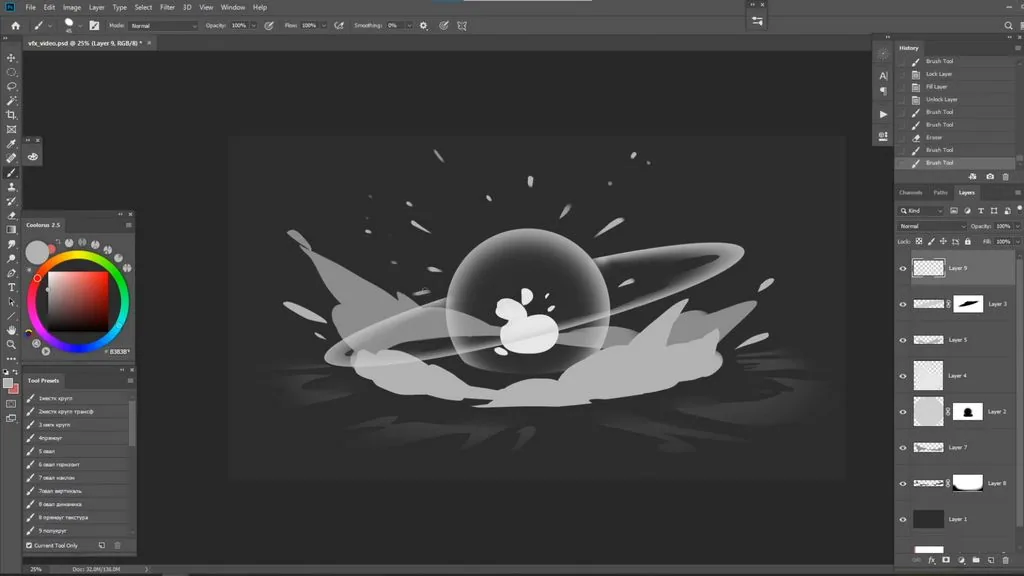
**We draw sparkles** from the center. The basis of our explosion is ready!
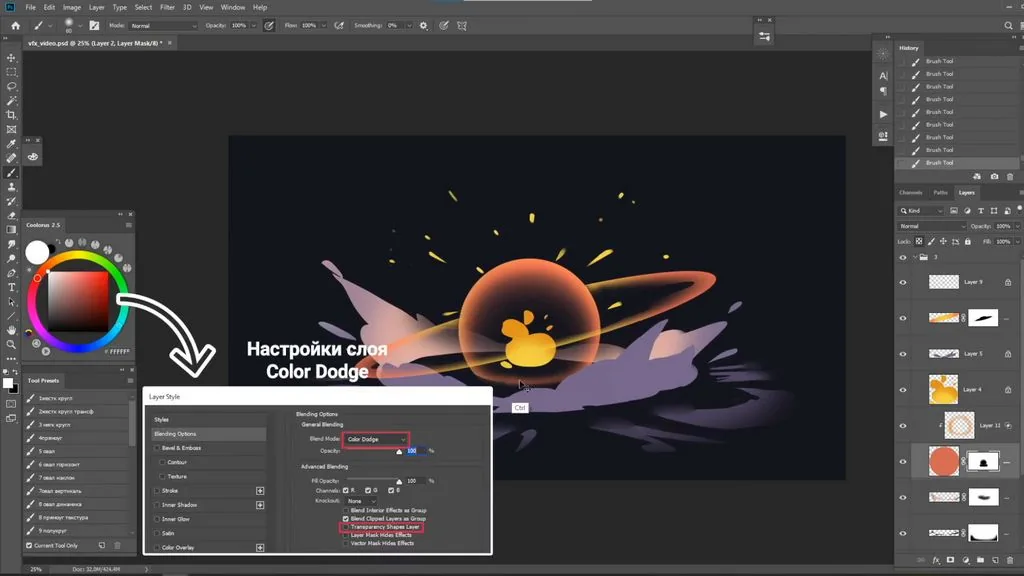
We move on to basic gradients and glows. We highlight the dome through the **Color Dodge mode.**
**And we add external glow to the light and the dome** through the Autre Glo layer mode.
We make the light brighter through **Color Dodge,** making sure that the lightest place is in the middle, and add a red gradient from the dome.
We take our miracle brush and **draw fire.**
**We show the light from the explosion** on the surface — it is convenient if you flatten a round soft base brush — so that it becomes more horizontal.
Then we add more brightness to the dome through **Color Dodge.**
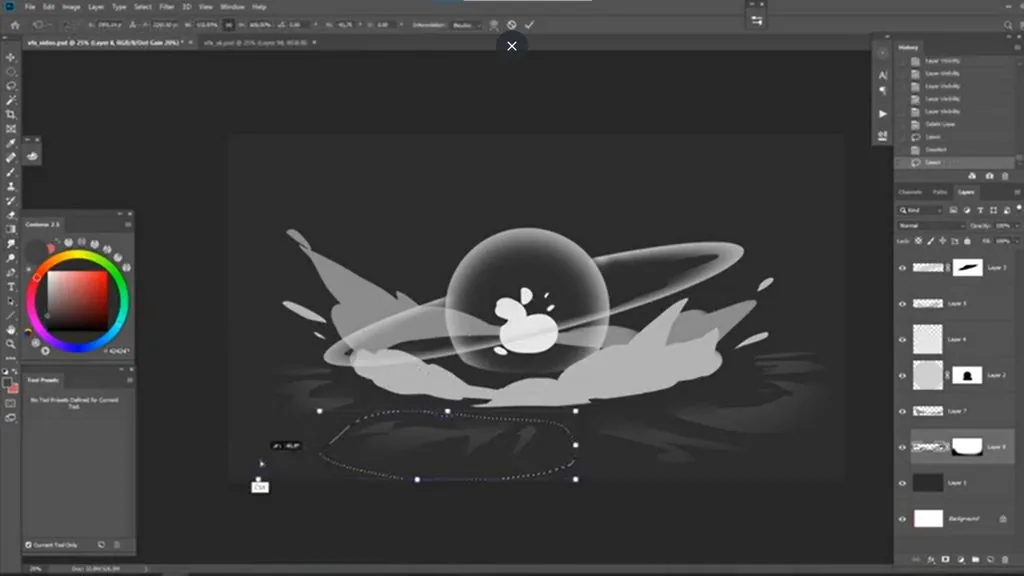
The next stage is **the volume of smoke.** We advise you to use **Multiply** for shadows, **Color Dodge** for light and the lasso to create a neat volume.
After the light and shadows are намечены, we can add highlights and middle tones, soften some moments with the **«Finger»** tool.
**We add a shadow under the smoke** to show its materiality.
We finalize large elements with the finger and a soft brush.
Now **we will deal with fine smoke:** we darken it a little at the bottom, convert it to a smart object and put Radial Blur in such a way that it smears the smoke to the sides of the explosion. A smart object is convenient because we can always click on the filter under the layer and adjust it by mask or by the blur strength.
For greater persuasiveness of the explosion, we will make several gradients behind and under it with a soft brush. It is important to consider that the farther the gradient, the paler and colder it is, and the closer it is, the brighter and warmer it is.
**We will make rays coming from the center of the explosion** an additional accent. You can save effort by drawing one ray and then making several copies of different sizes.
**We move on to the ring:** we can go through the layer mask along the edge of the ring with a fire brush for a more interesting silhouette. On top through the **Color Dodge** layer, we make a bright gradient in the middle.
Now we duplicate the ring, fill it with bright orange and blur it through **Motion Blur.** We change the overlay to **Color Dodge** and add external glow through the layer style.
**We draw shins:** we show that they have a main brighter part and an orange tail, and then we add glow through Outer Glow and draw small sparks around.
We add several sparks inside the dome in the **Color Dodge** mode.
The final touch is **to add dynamics to the smoke!** To do this, we combine all the smoke layers, convert them to a smart object. We select Radial Blur and slightly erase the blur through the mask filter so that the smoke is clearer in the center and more blurred at the edges.
Well, did you get a special effect? Show your results on social networks and be sure to tag us, Skills Up School ❤️
**Material prepared by the video lesson of concept artist Evgenia Chernova**
Video lesson with detailed steps
Related courses
All courses
from 3 900 ₽
-57%
Book illustration: The first page page
9 000 ₽3 900 ₽
Learn more

from 12 000 ₽
-20%
Векторная иллюстрация для начинающих
15 000 ₽12 000 ₽
Learn more

from 4 500 ₽
-55%
Character Concept: My First Hero
10 000 ₽4 500 ₽
Learn more
Related materials

Tutorial
How to draw silhouettes: basics, tricks and step-by-step lesson
January 30, 2025
Article
Drawing faces of people of different ages
December 26, 2023

Tutorial
How to draw a crystal. Step-by-step guide for artists
March 24, 2025

Tutorial
Blender 3D lessons for beginners
December 27, 2024

Tutorial
Zbrush lesson for beginners
December 23, 2024

Article
Step-by-step guide to modeling in ZBrush. Part 1
September 18, 2023
News
Старший специалист по освещению ILM о вызовах в визуальных эффектах, создании освещения для голограмм в фильме «Трансформеры: Один» и начале карьеры в индустрии
June 23, 2026