
We open a series of articles with a guide to the interface of 3Ds Max – a program for polygonal 3D modeling, animation and rendering.
This guide will be useful for beginners to tridashniki and those who model in other programs, but want to learn new software.
You can learn to model from scratch
in an online 3D Basic course
at Skills Up School. The course is aimed at mastering the basic principles and techniques of 3D modeling applicable to the game industry.
The 3Ds Max interface is made up of blocks:
- Main Menu.
- Main Toolbar.
- Projection windows.
- Command Panel.
- Track bar, aka Time Slider.
- A panel for entering commands of the built-in 3Ds Max language – MaxScript.
- Object coordinates panel.
- Animation Control Panel.
- Navigation panel – allows you to control scenes in all projection windows: zoom in, zoom out and rotate objects.
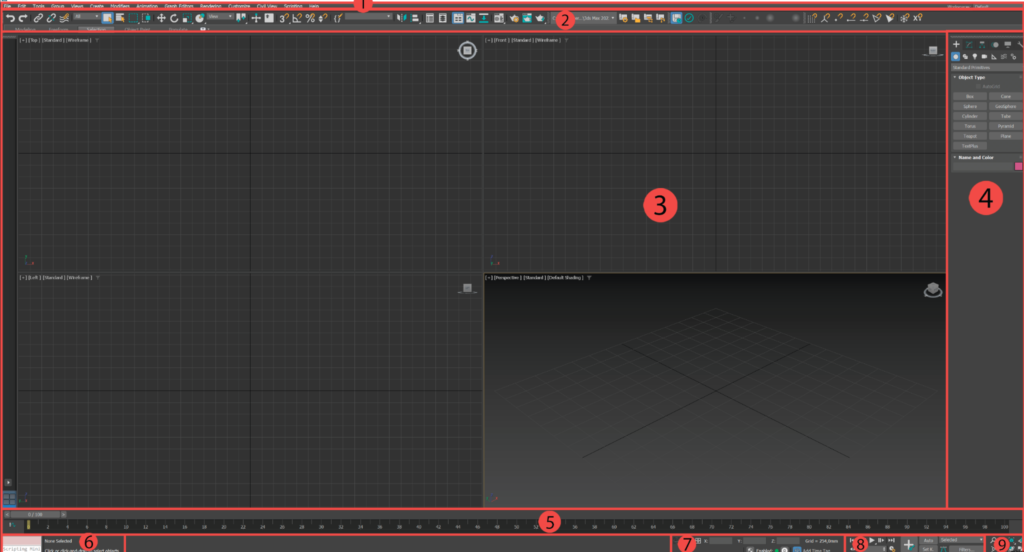
In the first part of the tutorial, we will look at the “Main Toolbar” and “Projection Windows” blocks.
Main Toolbar (Main Toolbar)
The main toolbar can be found under the main menu – here you can find buttons for quick access to the most popular, according to the developers, functions of the program. If you put the mouse pointer over the desired button, a tooltip will appear with a description of the button’s functions:

Panels in 3Ds Max, as in any other modern 3D package or graphics editor, can be moved and docked anywhere in the interface, allowing for customization.
To manage panels – to show or hide them – right-click on an empty space in the main panel. A context menu will appear:
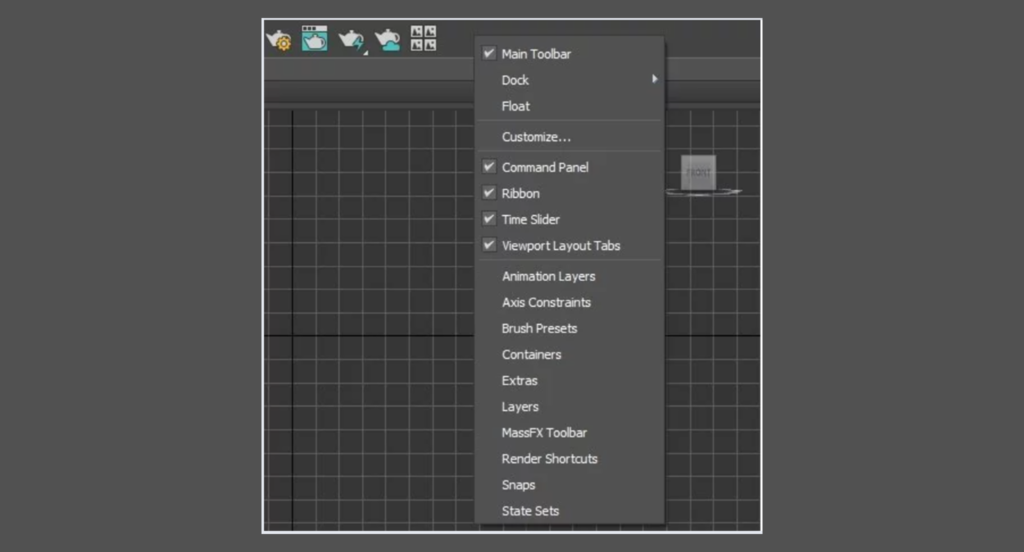
Check marks indicate active panels in the interface. If you accidentally disable the Main Toolbar, simply right-click on the Main Menu Bar – a context menu will appear where you can select Main Toolbar and return the Main Toolbar display to the interface.
3Ds Max also allows you to customize elements of these panels or create new, unique panels with the tools you want.
You can create a new panel in two ways:
1. Right-click on the main toolbar and select Customize from the drop-down menu.

2. From the main menu, select Customize – Customize User Interface:

Next, select the Toolbars tab in the window that opens:

To create a new toolbar, click the New button and in the window that opens, enter a name for the toolbar, such as New Tools:

After confirmation, the created panel will be available in the program workspace:
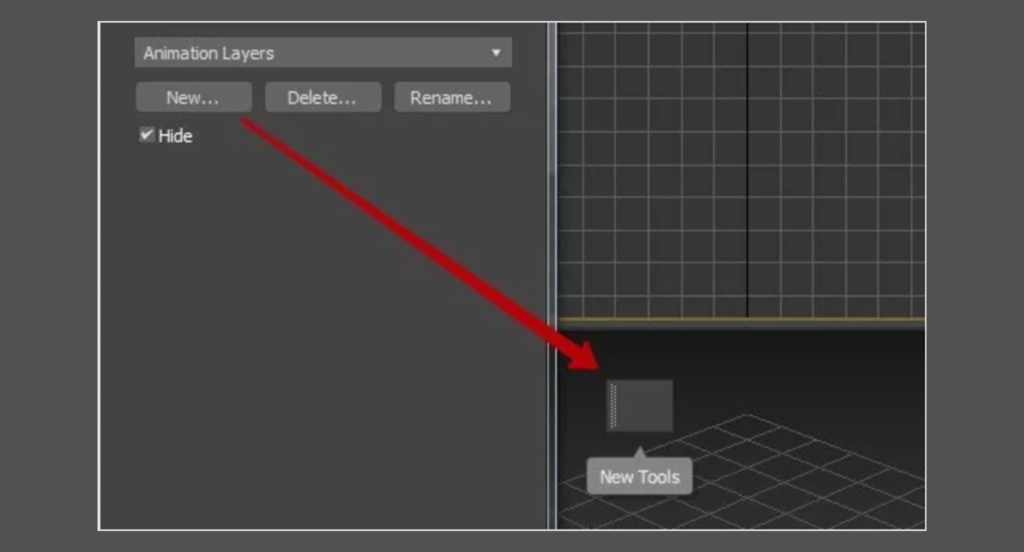
Now populate this panel with the tools you need, which you can choose from this list:

Projection windows
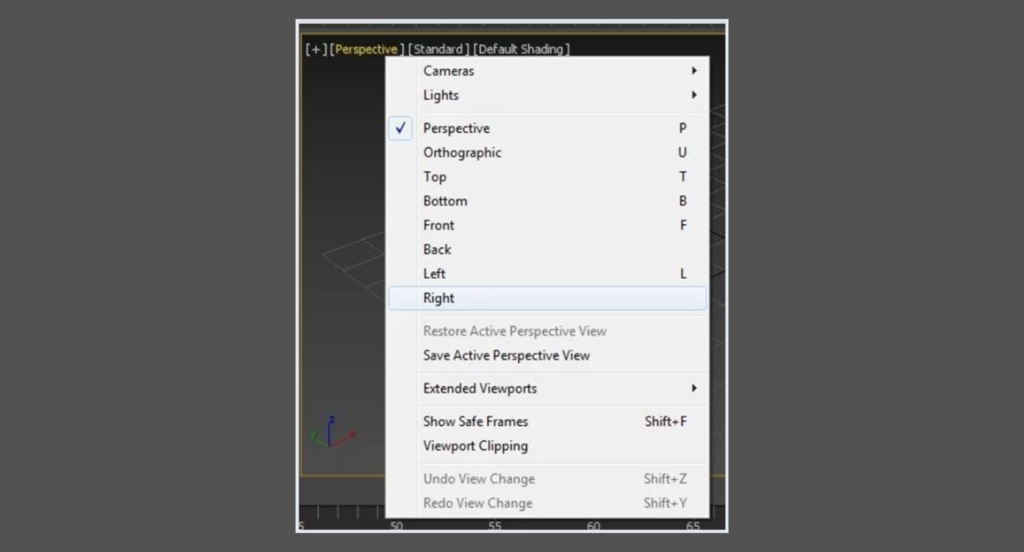
The projection windows occupy most of the program interface. A total of four projection views are available: Top, Front, Left, and Perspective. In the context menu you can select any desired type of projection.
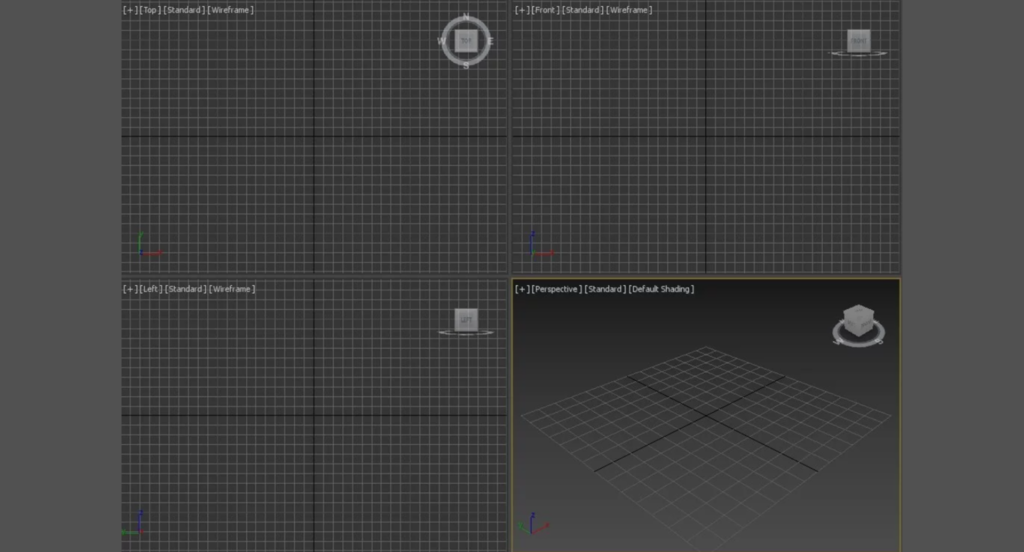
Opposite each projection selection point there are hotkeys, which significantly save time during modeling:
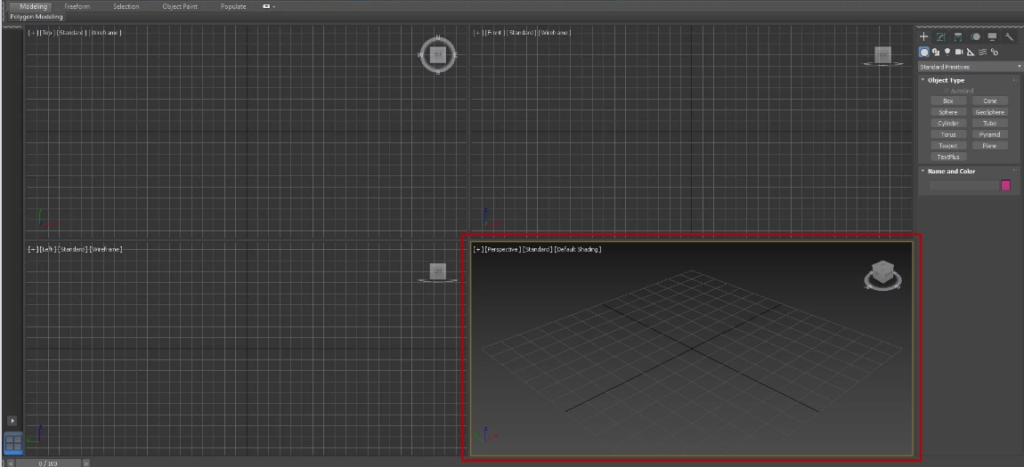
The active projection window is highlighted with a yellow frame so that users understand which projection is currently active:
For convenience of working on an object or a scene, the active window can be expanded to the full screen – just press Alt+W on the keyboard:
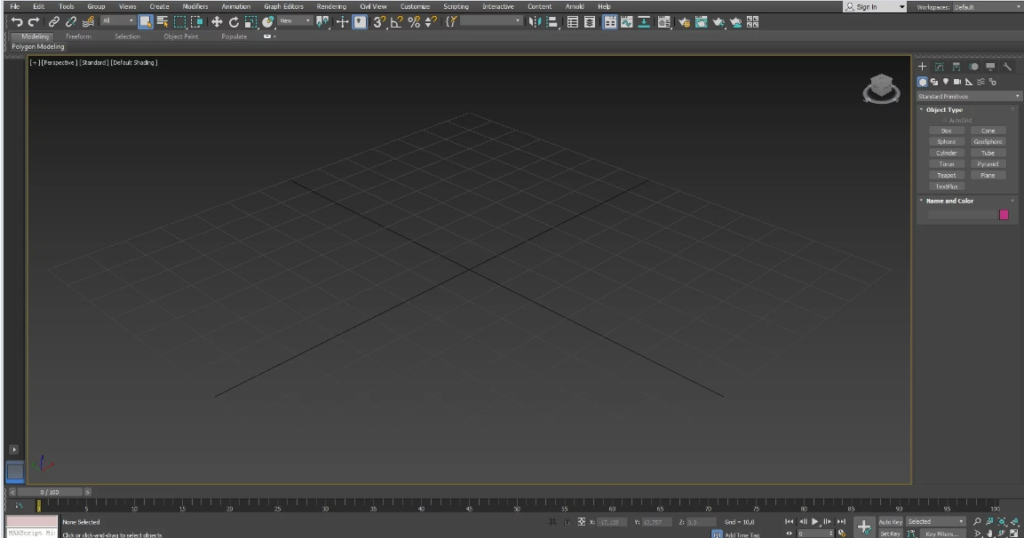
Pressing these keys again will return the window layout to its previous state.
Note the 3D cube in the right corner of the screen – this is the ViewCube, aka view cube, which allows you to change the projection:

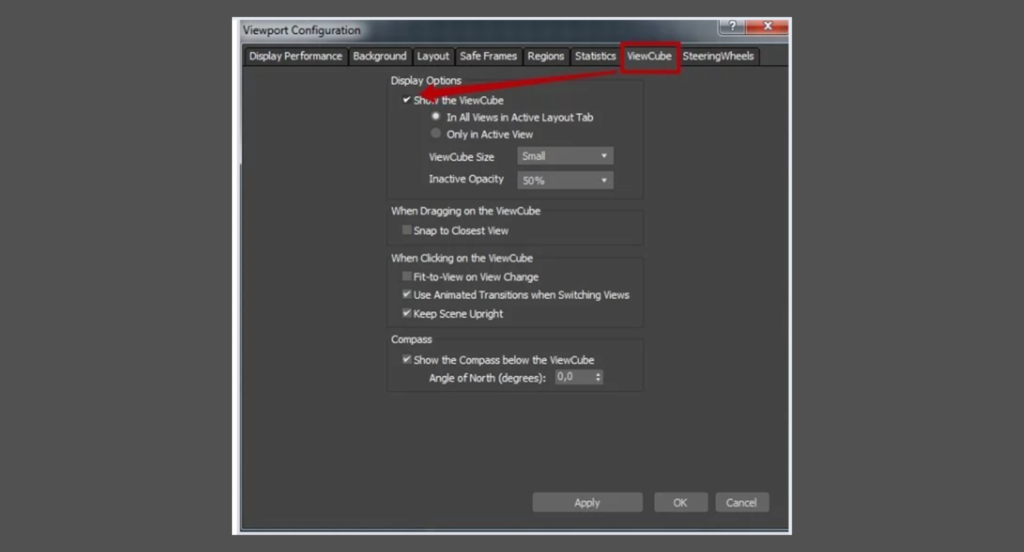
If you decide to remove ViewCube (for example, you accidentally touch it while working), you can do it in the following way: in the projection window in the upper left corner click on the plus sign, a context menu will appear. There select Configure Viewports, then in the opened window select the ViewCube tab and uncheck the Show The ViewCube checkbox:
The special Viewport Layout Tabs panel is located in the lower left corner of the program interface by default. It is responsible for the varied layout of the projection windows.
Four identical windows are considered the standard, but the developer offers a choice of preset templates. If any of the windows is more important to the user than the others, you can choose a layout with one large and three small windows and a convenient location for the main window:

You can remove or display the Viewport Layout Tabs panel, if necessary, in the same place as any other panel – in the context menu.
In the second part of the 3Ds Max manual in Russian, we will tell you about the rest of the interface blocks. Subscribe so you don’t miss out!
In addition to
online 3D graphics course
Skills Up School has offline modeling training in Moscow and St. Petersburg. If you’ve missed the lamplight atmosphere of the community and socializing in non-Zoom, read the course details and sign up:
