Dealing with the 3Ds Max interface. Command panel and other main panels of the program
This is the second part of the manual on working with the 3Ds Max interface: description of the command and other main tool panels. Step-by-step instruction.

This is the second part of the guide on working with the 3Ds Max interface. You can read the first part of the guide — about the main toolbar and projection windows — here.
The 3Ds Max interface consists of blocks:
- Main menu.
- Main toolbar.
- Projection windows.
- Command panel.
- Time scale in the Russian interface, also known as Track bar or Time Slider.
- Object coordinates panel.
- Animation control panel.
- Projection window navigation panel.
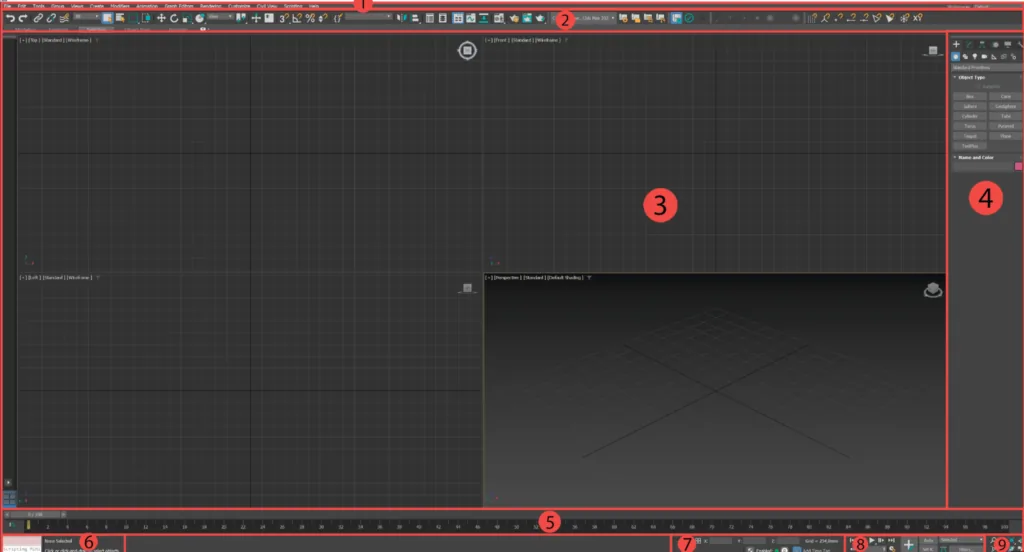
Let's look at the blocks "Command panel", "Time scale", "Object coordinates panel", "Animation control panel" and "Projection window navigation panel".
3D Basic online course at Skills Up School
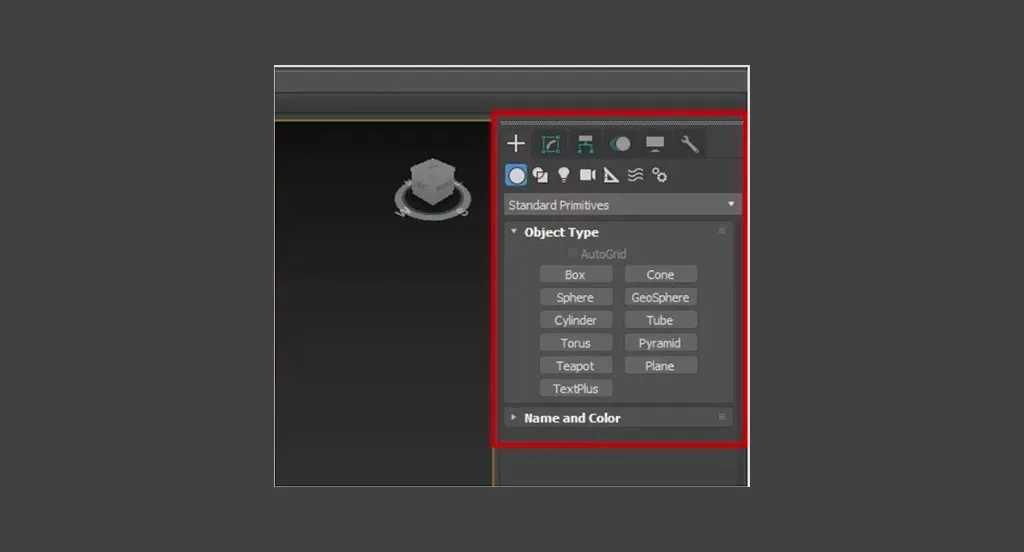
Command panel
The command panel is located to the right of the projection windows by default. It is needed for creating objects, modifying them and performing further actions on objects. It contains six tabs — Create, Modify, Hierarchy, Motion, Display, Utilities. Each tab has additional tabs and scrolls with settings.
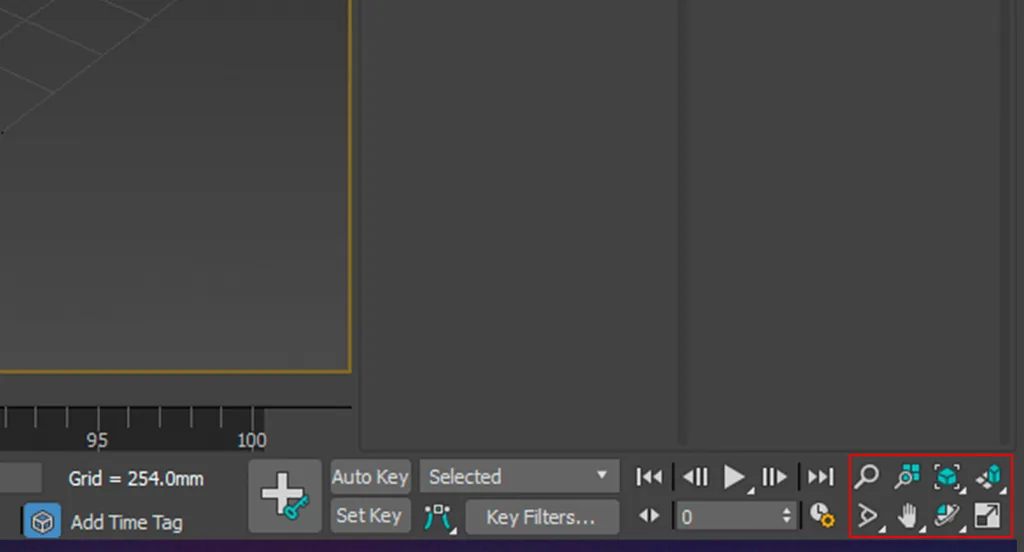
Track bar, aka Time Slider (time scale)
Panel for working with animation — for setting key frames and tracking timing. It is located at the bottom of the 3Ds Max interface.

Related courses
All courses
Book illustration: The first page page
9 000 ₽3 900 ₽

Character Concept: My First Hero
10 000 ₽4 500 ₽

My first drawing
5 000 ₽2 500 ₽
As a rule, this panel is not needed during regular work with objects, especially at the beginning of learning the program. It becomes necessary at the final stages of the project when you need to demonstrate the animation of the object's movement in the scene, for which cameras are first set up.
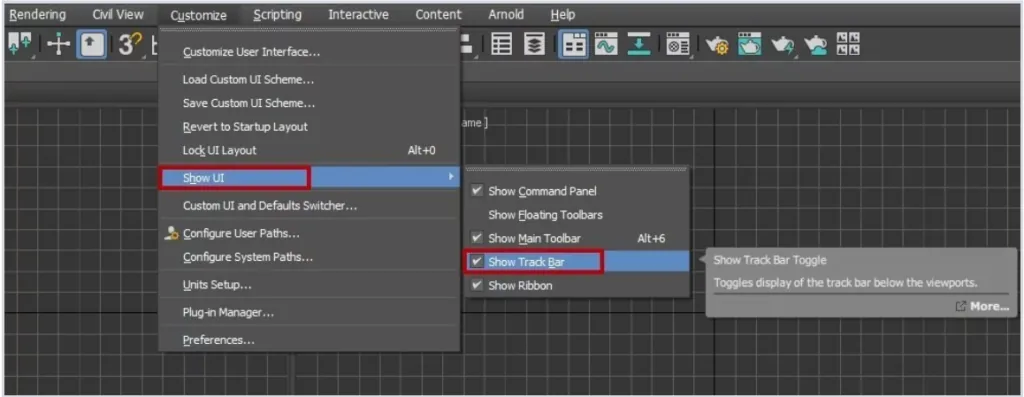
If, for example, you are working not on a large monitor, but on a laptop, then this panel can significantly reduce the usable workspace. To hide it, go to the main menu, select Customize — Show UI and uncheck the Show Track Bar option.
You can also detach this panel from the bottom of the interface and click the cross in the upper right corner.
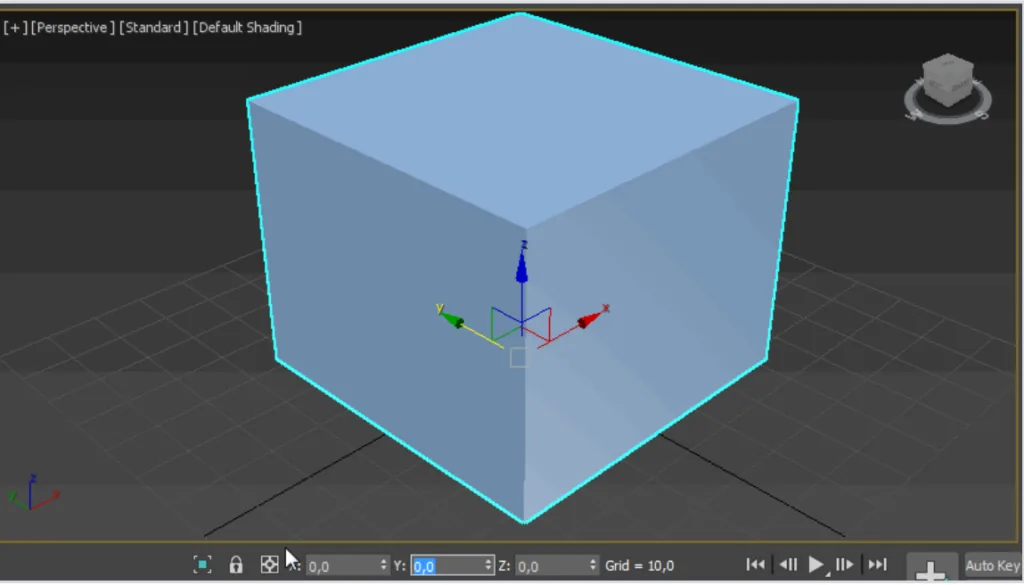
Object coordinates panel and units of measurement
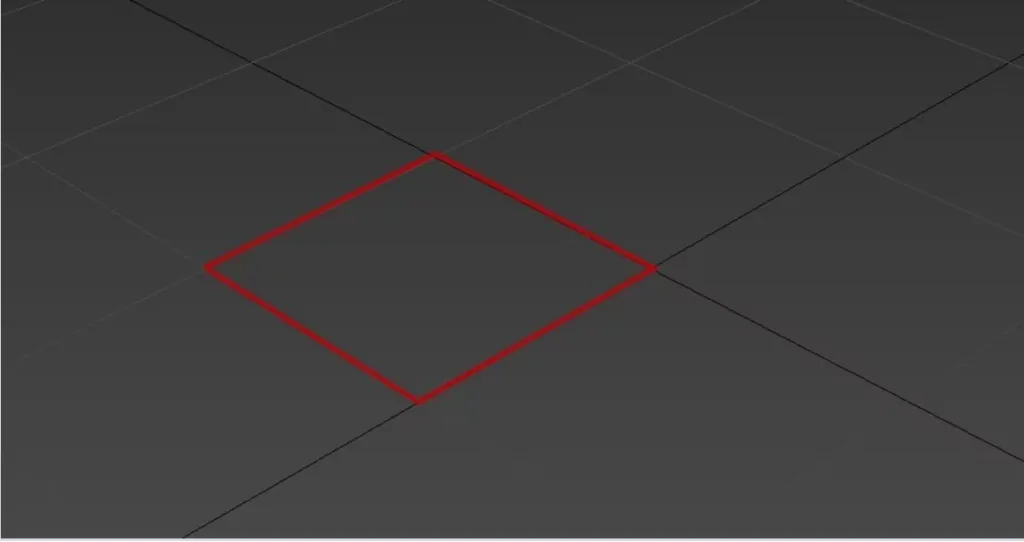
A very useful panel for controlling the coordinates of an object and tracking the units of measurement of the coordinate grid. For example, we need to move the cube from where it is to a place with coordinates 0 on all axes. This is done like this:
An equally useful item is Grid (units of measurement). It is located next to the coordinate fields and indicates what the coordinate grid step is, that is, one of its squares.
If you are working on a project where real values in specific units, for example, in millimeters, are important, then be sure to set these values before starting work. Otherwise, you will have to adjust and scale the scene.
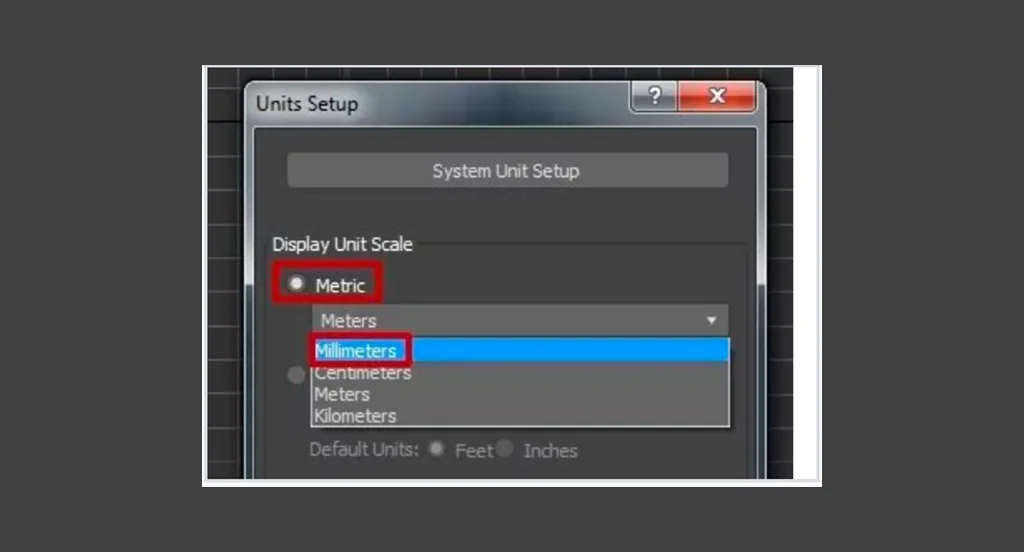
Go to the main menu, select the already familiar Customize — Unit Setup.

In the window that opens, select the Metric system (Metric), and millimeters in the drop-down list.
Then click on the System Unit Setup button, which is located in the same window a little higher, and also select millimeters.
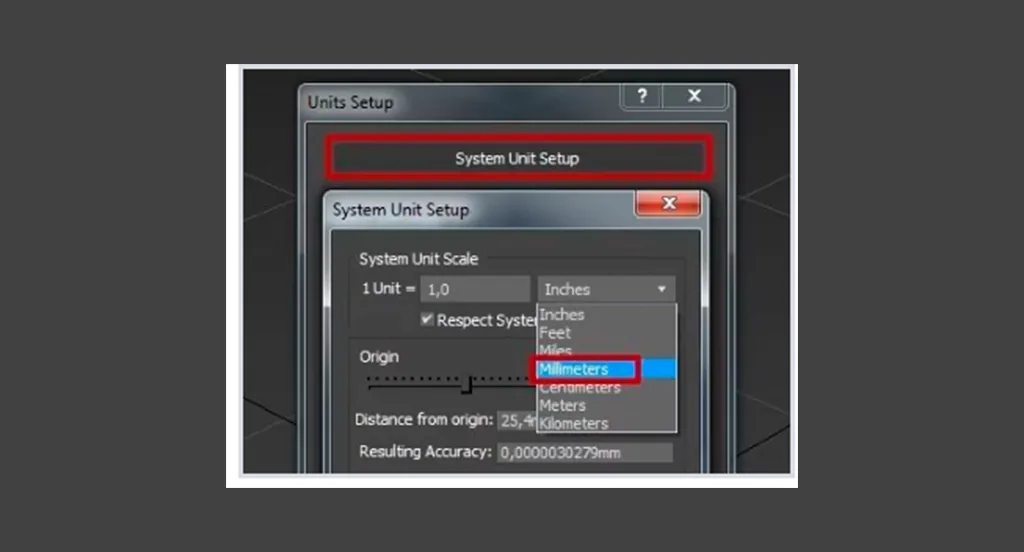
Now the grid has a step of 10 mm. Proceed with other units of measurement in the same way.
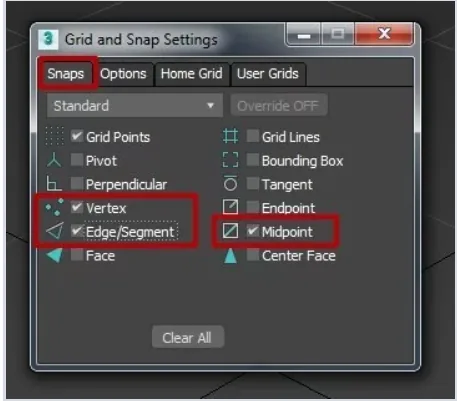
Since we've talked about units of measurement, let's also set up snaps.
Snaps are needed for maximum accuracy of docking objects relative to each other, for the accuracy of building new scenes according to the grid step and so on. Snaps come in several types — 2, 2.5, 3. Choose any of them — it doesn't matter for now, and we'll look at the difference in practice later.
You can find snaps on the main toolbar under the main menu panel.
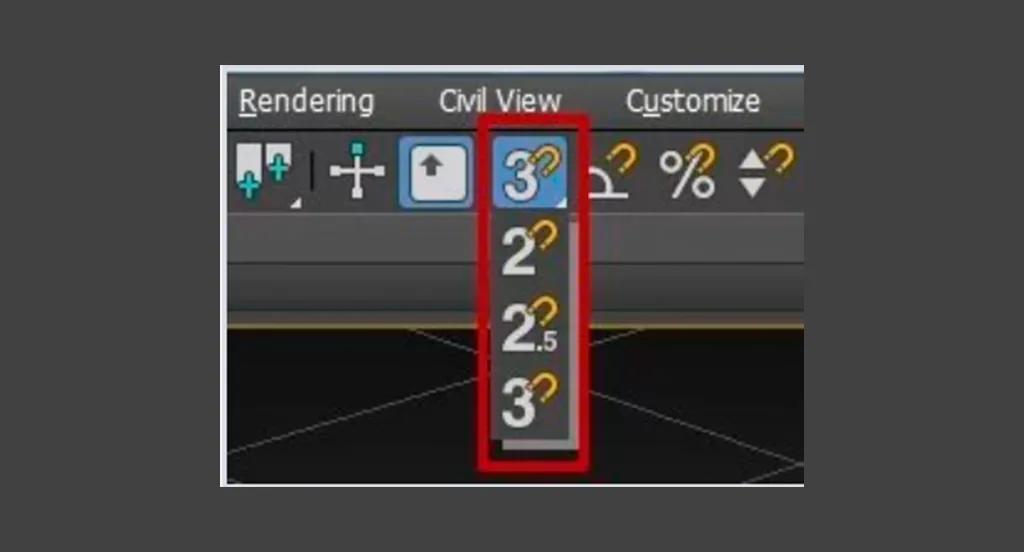
To select a type of snap, click on the snap icon with the left mouse button and, holding it, click on the desired type.
To set up the snap, right-click on the icon — a settings window will appear, and you will mark the necessary snaps in it. I have highlighted three main — Vertex (Vertex), Edge (Edge), Midpoint (Midpoint).
Animation control panel
The panel is responsible for setting up, creating and controlling animation.

Main functions of this panel: viewing animation, going to the next and previous frames, going to a specific frame, adding key frames, setting the smoothness of animation, filters and so on.
Projection window navigation panel
Allows to manage scenes in all projection windows — to приближать, отдалять, rotate objects — and to manage the display of projection windows — to collapse and expand active windows.
We have looked at the main panels of the 3Ds Max program interface in Russian, found out how to create and set them up.
You can learn modeling from scratch in courses on 3D graphics at Skills Up School. The courses are aimed at mastering the basic principles and techniques of 3D modeling applicable in the gaming industry.
The online course lasts three months.
You can still sign up for offline semester courses! Schedule and details — on our website.
Or write to managers in Telegram, they will be happy to answer all your questions, select the appropriate course and offer the most favorable payment options (for example, interest-free installments).
Related materials

Understanding the 3Ds Max interface. Main toolbar, projection windows
Sketching for beginners

Как небольшая команда разработчиков создала Net.Attack(), игру-рогалик с элементами программирования

Frontal perspective in drawing

Statics and dynamics in drawing: creating mood and movement
