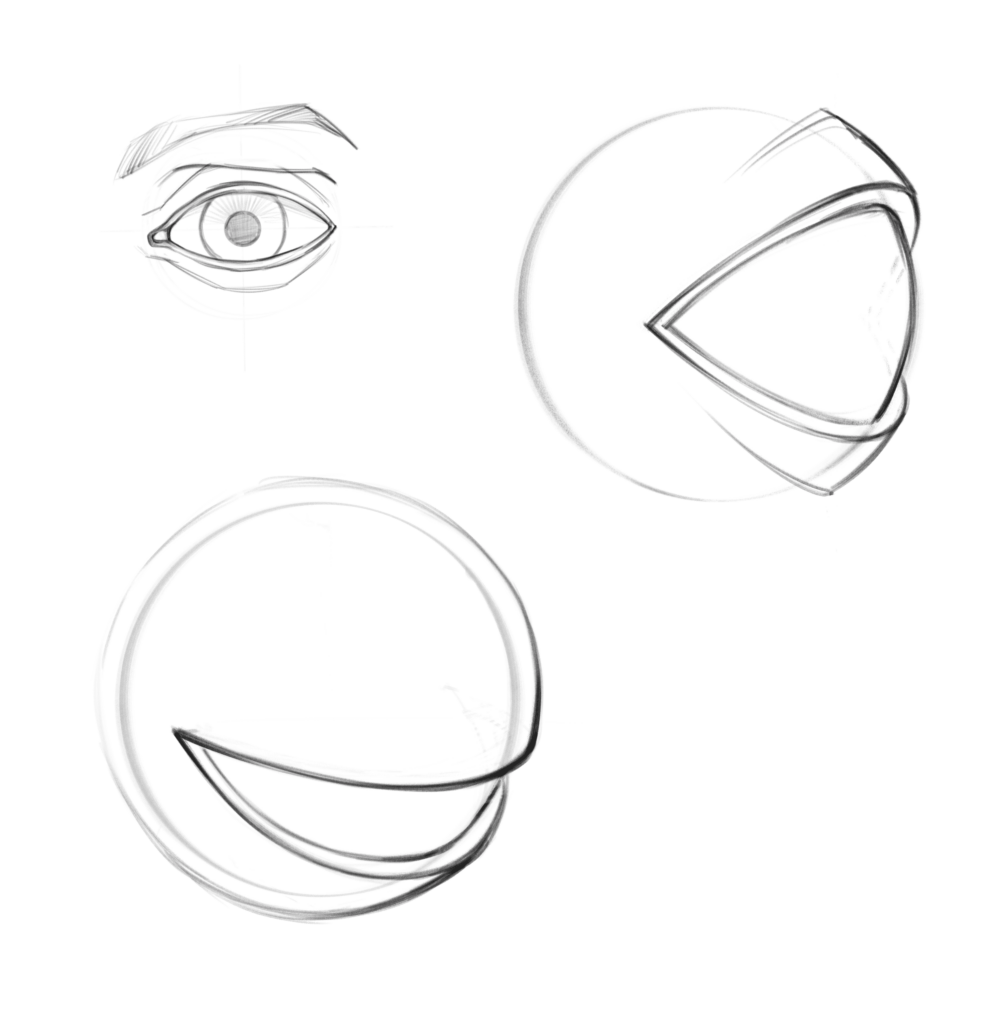
Today we’re going to dive into learning about one of the most amazing elements of the human face – the eye. Before we start drawing, let’s understand its structure. We will begin by exploring the schematic of the eye and its volumetric characteristics to eventually create a complete image of the eye, filling in all the nuances and details.
Let’s do it!
Considering the structure of the eye from a biological point of view, it can seem quite confusing, so we will list only those elements that will be useful to us in the process of drawing.
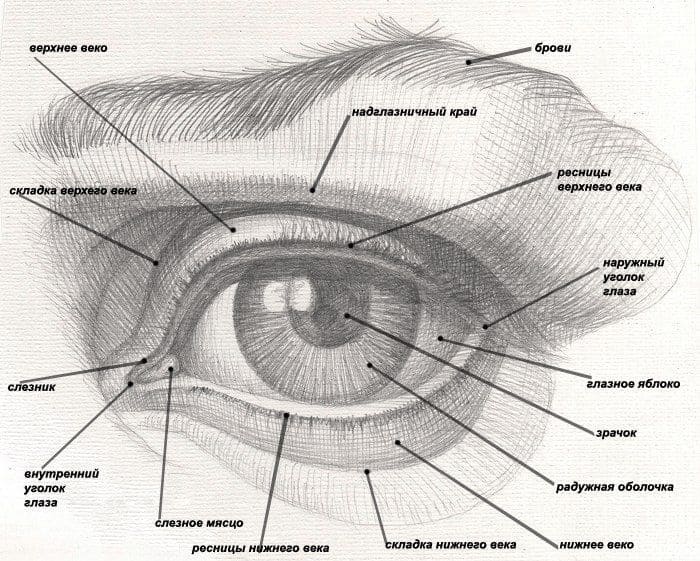
- The eyeball is the part that is a white-colored globular body located in the eye socket
- The iris is a slightly concave shape on the surface of the globular body, it is a kind of diaphragm that regulates the flow of light into the eyeball.
- The pupil is the black opening in the iris through which light enters the retina of the eye.
- The eyelids are movable folds of skin around the eyes with a thin muscular layer, due to which they close when a person blinks. The upper and lower eyelids form the ocular slit, and at the edges of the eyelids are attached to each other and to the eye socket.
- The lacrimal meatus (lacrimal meatus) is an eye element located in the inner corner of the eye incision. It is considered to have no direct function, but it is very important for us to make the pattern of the eye believable. It has a slightly elongated shape and it makes the inner corner of the eye look like a dolphin’s head in silhouette.
- The eyelashes are hairs growing from the upper and lower eyelids. The upper lashes are longer than the lower lashes and more in number.
- The eye socket is the cavity in which the eyeball is located. The eye can be planted deep or on the contrary extended to the edge. This is something to keep in mind when drawing a person’s face. Also, we often see a part of the eye socket overhanging the eye from above, sometimes the skin sags and lies folded right over the upper eyelid.
- The eyebrows are an arched band of hair above the eye socket. Have a protective function and also help to express emotions to a person. The shape of each person’s eyebrows is unique, so drawing them, you can emphasize the character and features of the character.
- Cornea – a transparent part of the eye covering the surface of the iris and has a curved shape, so when we draw the eyes, you need to take into account this feature.
Now let’s start drawing the schematic of the eye
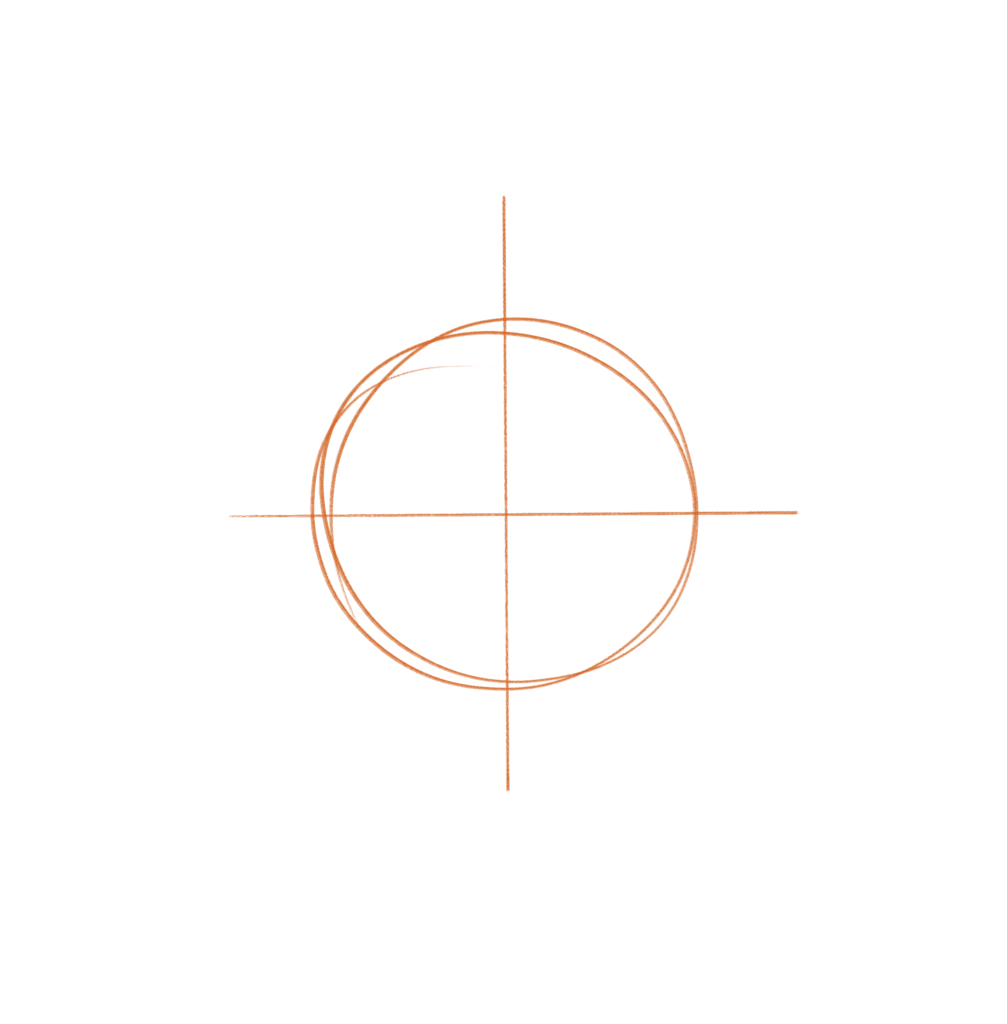
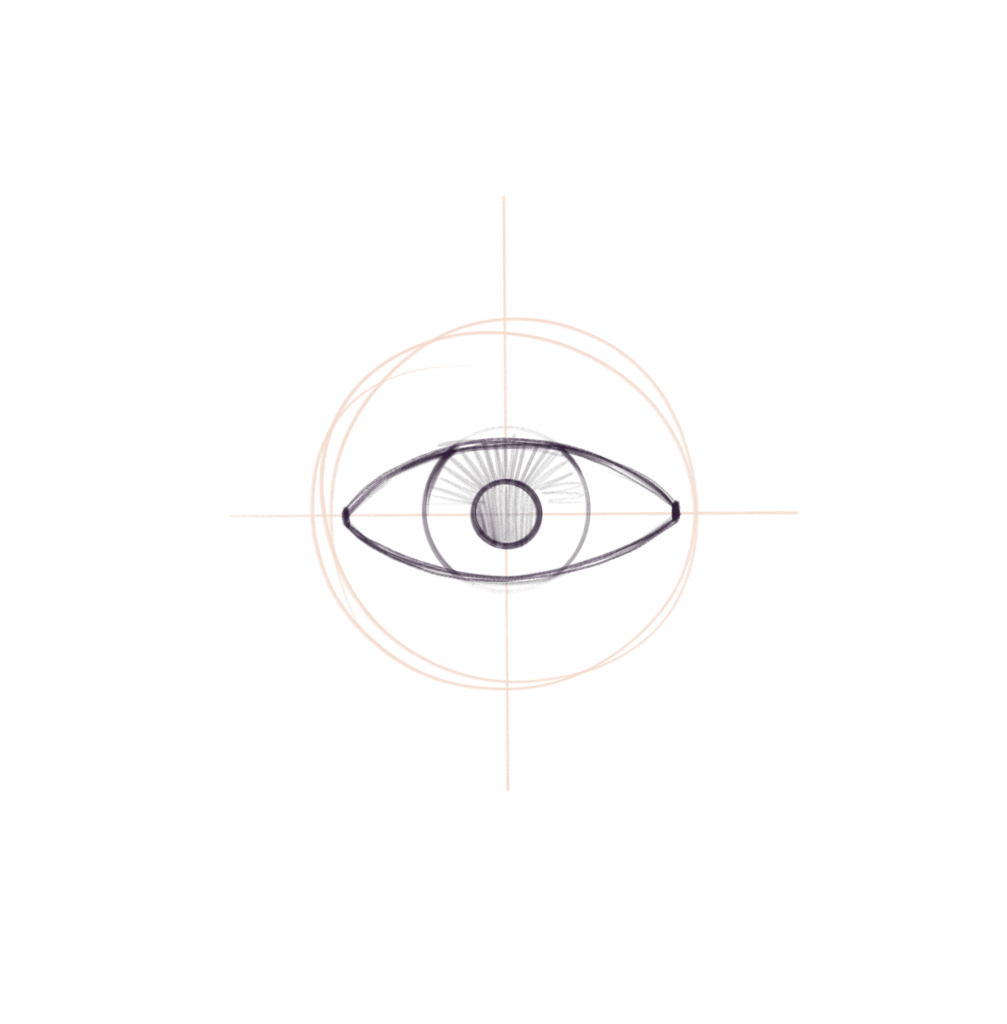
Mark the eyeball by drawing a circle (about 5-6 cm), then draw a horizontal and vertical line in the center.
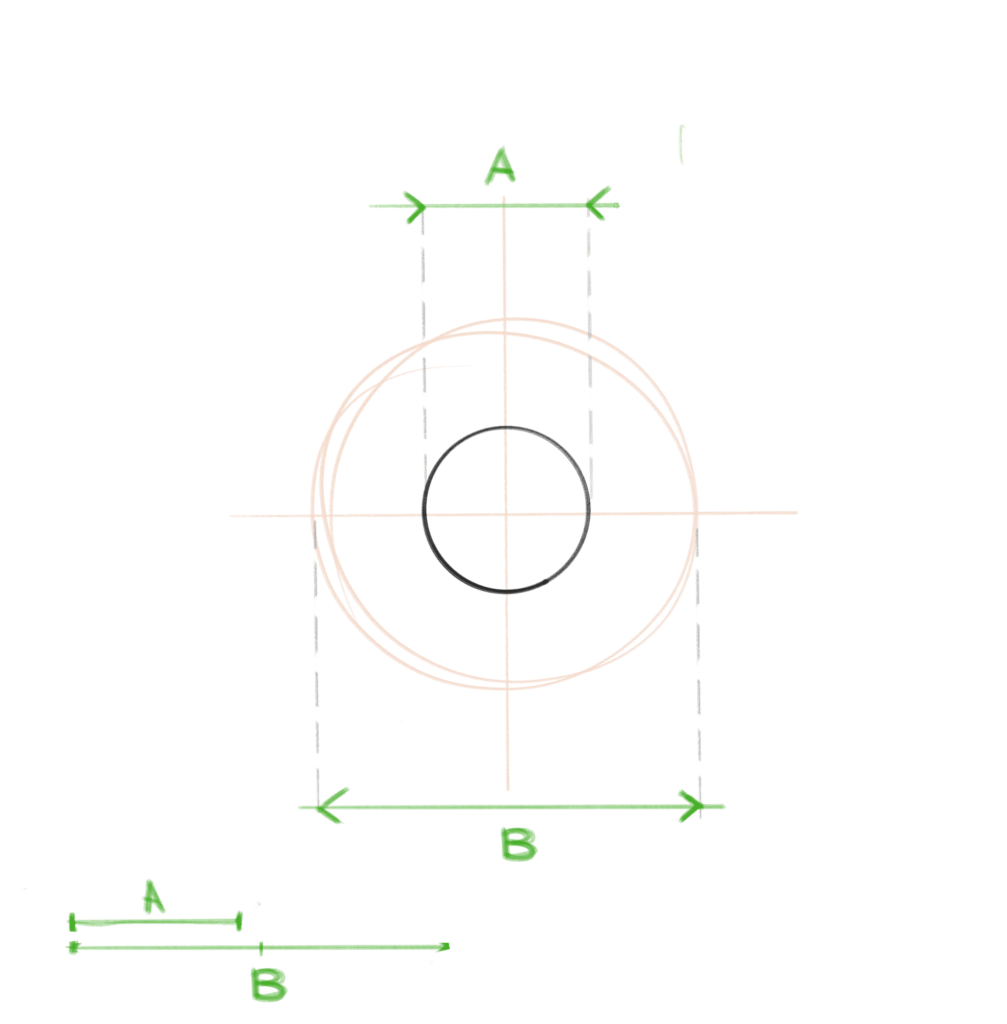
In the center, draw a smaller circle (about 2 cm) – this will be the iris, its diameter is half the size of the eyeball
Now along the horizontal line, draw an upper and lower arc to get the silhouette of the eye. The width of the eye incision is slightly less than the width of the eyeball and it is important that the eyelids overlap the iris slightly. At the same time, draw a pupil in the center of the iris.
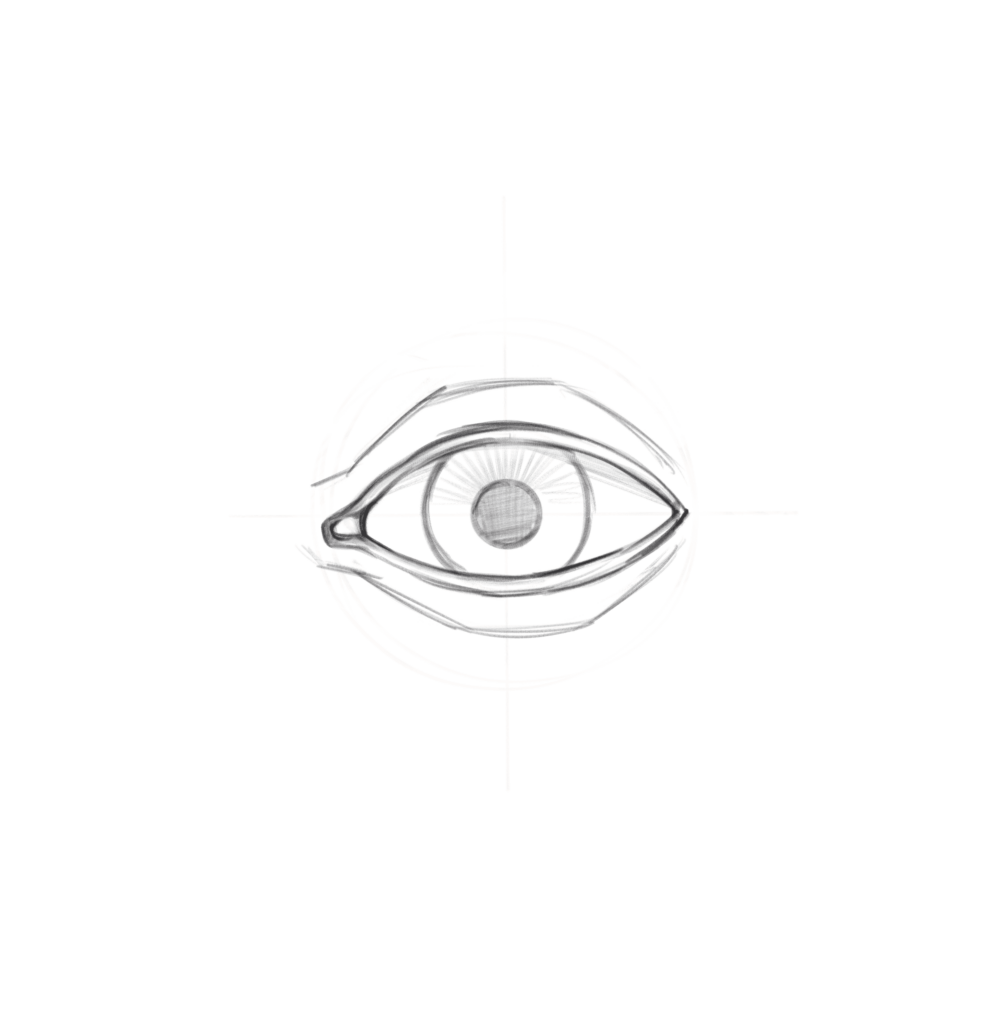
Now let’s add eyelid volume and tear drop. To do this, draw the thickness of the eyelids indenting a couple of millimeters from the cut lines of the eyes, at the same time you can outline a tear in the corner of the eye and encircle the line of eyelids it too. Then, 5-7mm down and up from the eye incision, you can mark the eyelid crease to indicate its height.
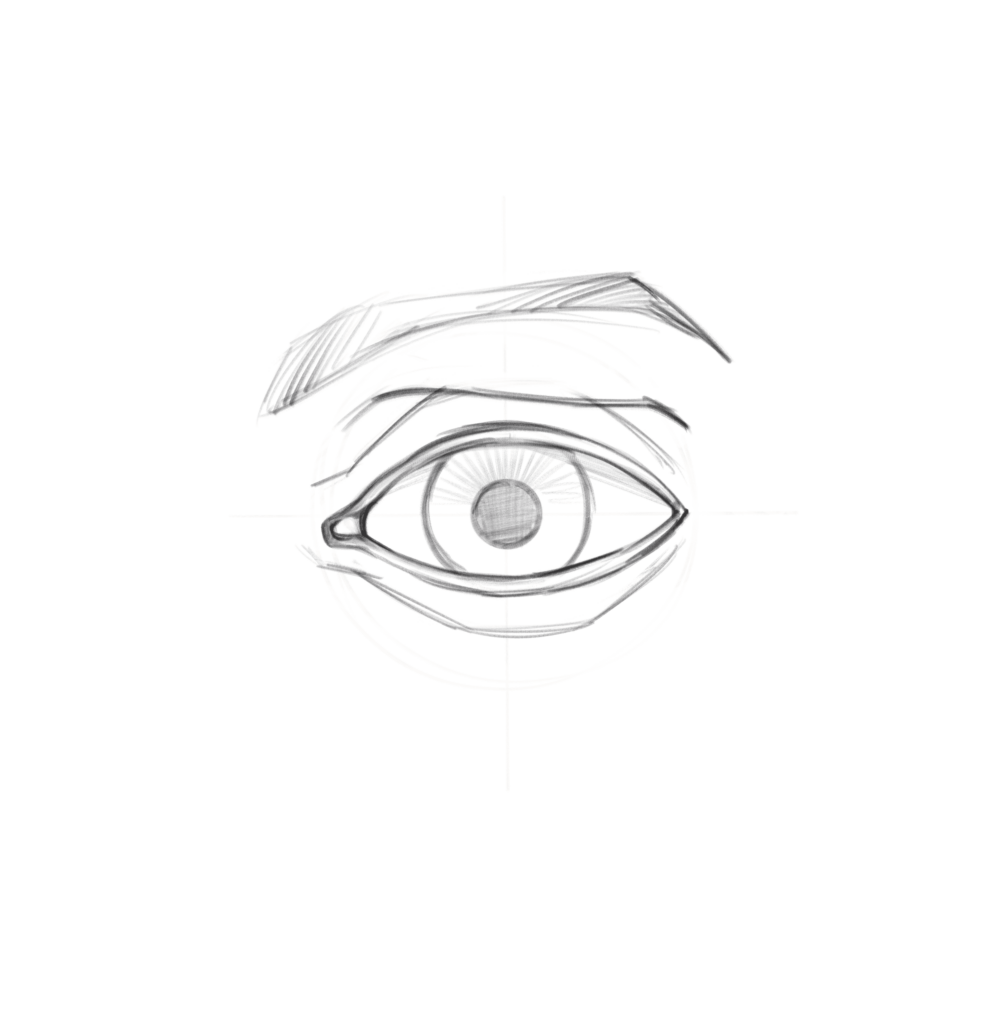
Now from above we can outline the outline of the eye socket, which will slightly overlap the surface of the upper eyelid. And completing the scheme of the eye we can draw the silhouette of the eyebrow above the eye socket. In length, the eyebrow is longer than the length of the eye incision, and the beginning of it, which is closer to the nose, is usually lower than the outer edge.
Eye shape
Next, let’s move directly to the shape of the eye, for this it is important to have the skills to draw basic shapes, in particular a ball. Understanding the structure of the eye as a spherical shape is key. You need to learn how to draw simple shapes like a ball, cube and cylinder, so don’t be lazy to practice this extra time.
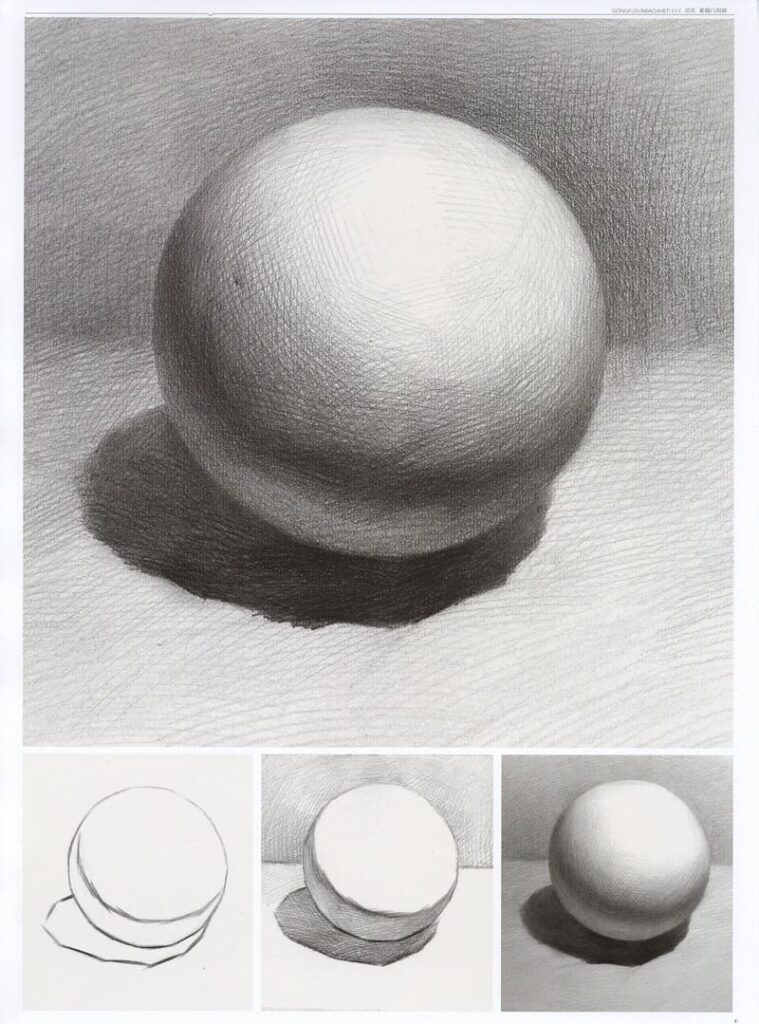
Yes, as you have already realized, the eye is actually approximated exactly to the shape of a ball, you need to deal with this and make some simplified sketches,
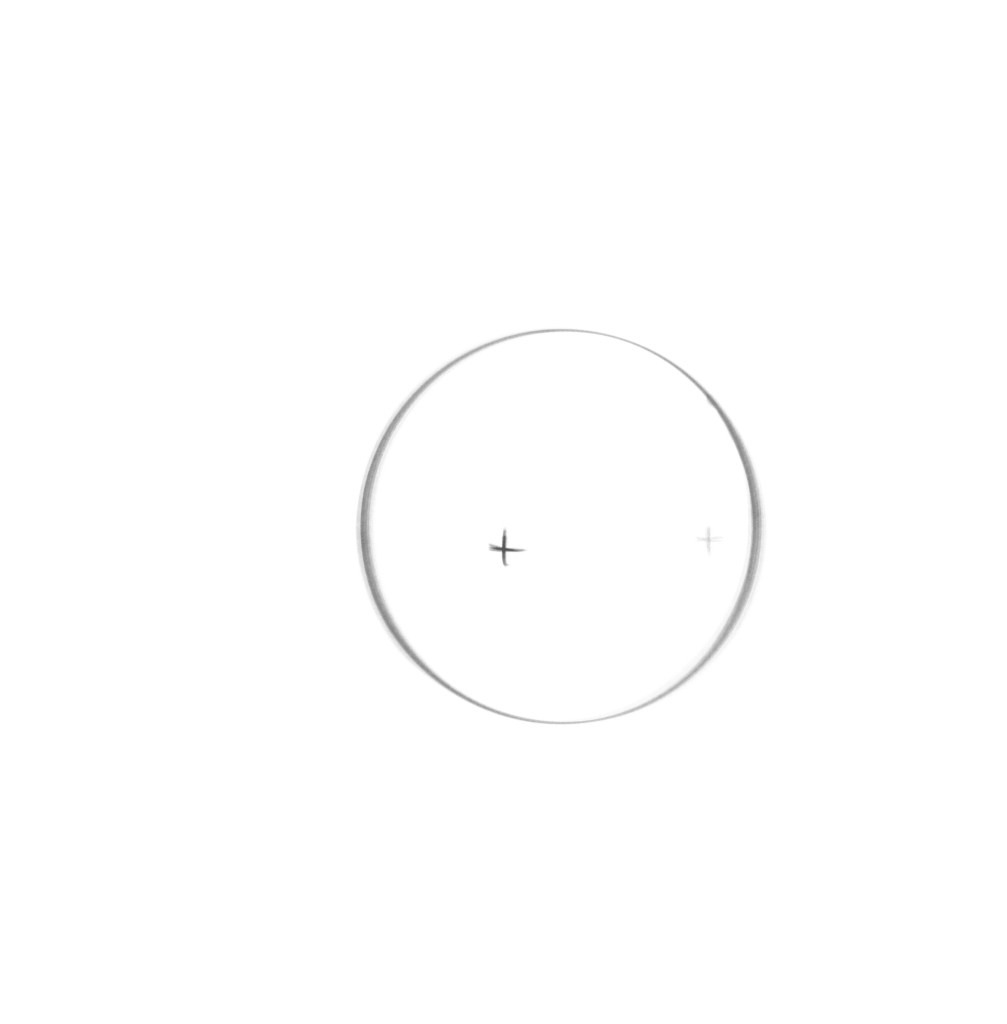
until we started to complicate the shape of the eye and started drawing the details. Let’s pretend that our balloon is an orange with the peel part cut out. And we’ll get something that looks like an eye slit. Now let’s practice drawing this figure in different angles.
First, draw a circle that will mark our eyeball and put two dots that mark the corners of the eye cut. We will only see one point on the surface of the ball, but we need to sketch the second point too in order to construct the lines of the eye incision.
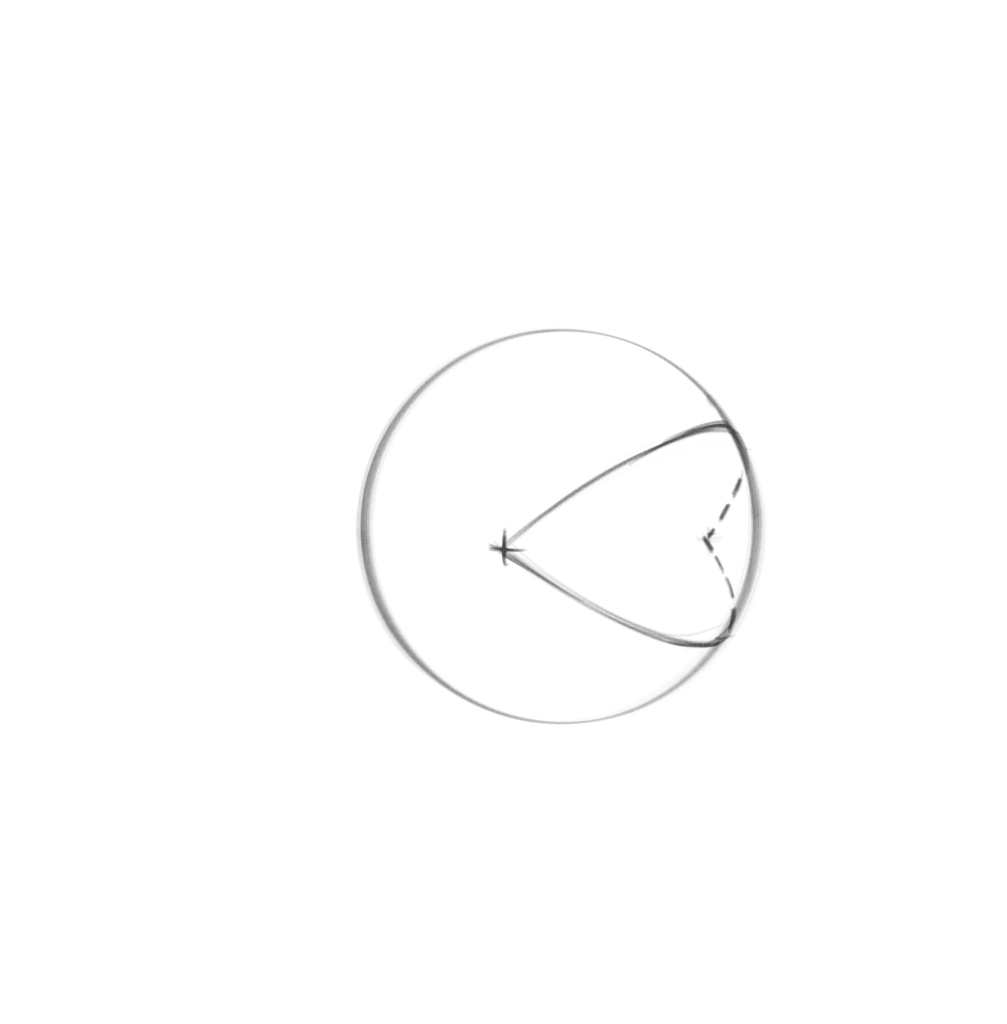
Then draw an upper and lower arc from one point to the other.
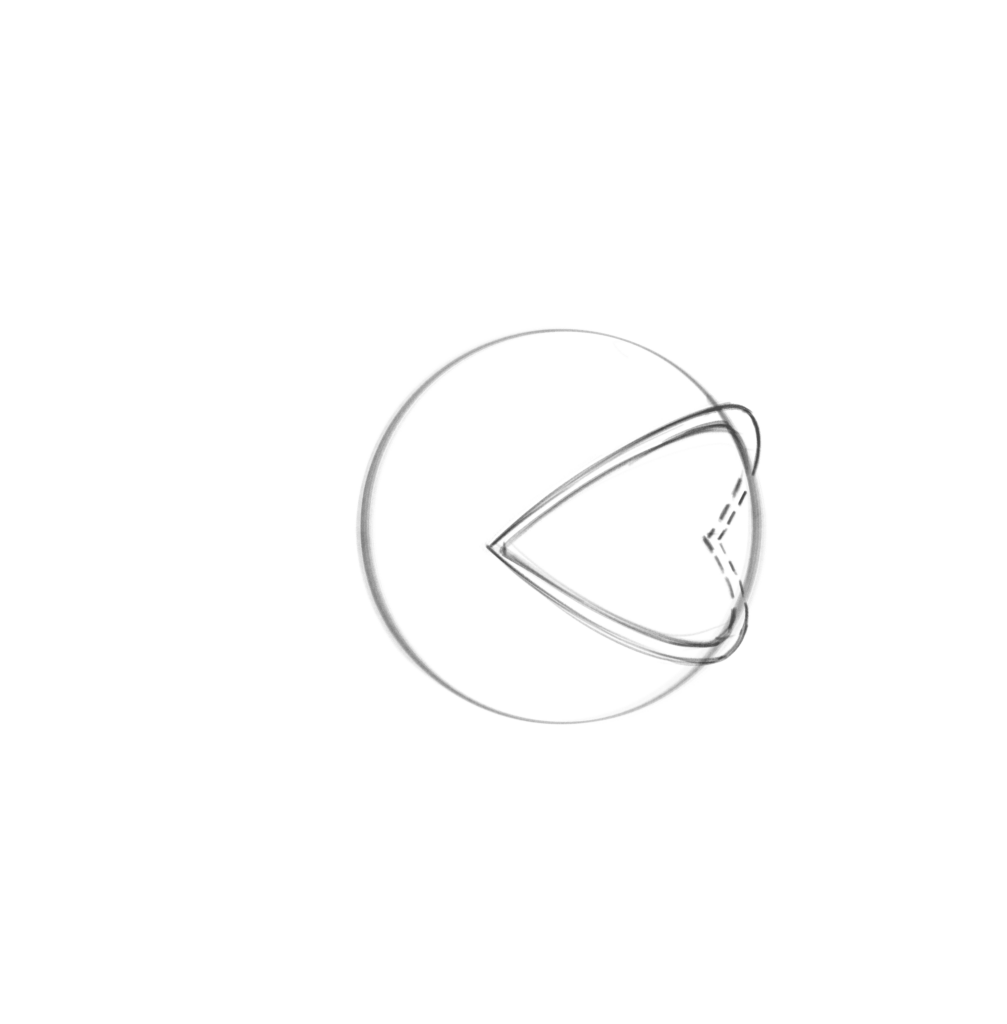
Next, immediately perform a second arch to show the thickness of the eyelids.
Now on the basis of this resulting scheme dore the “orange eye” by cleaning the drawing from excess lines.
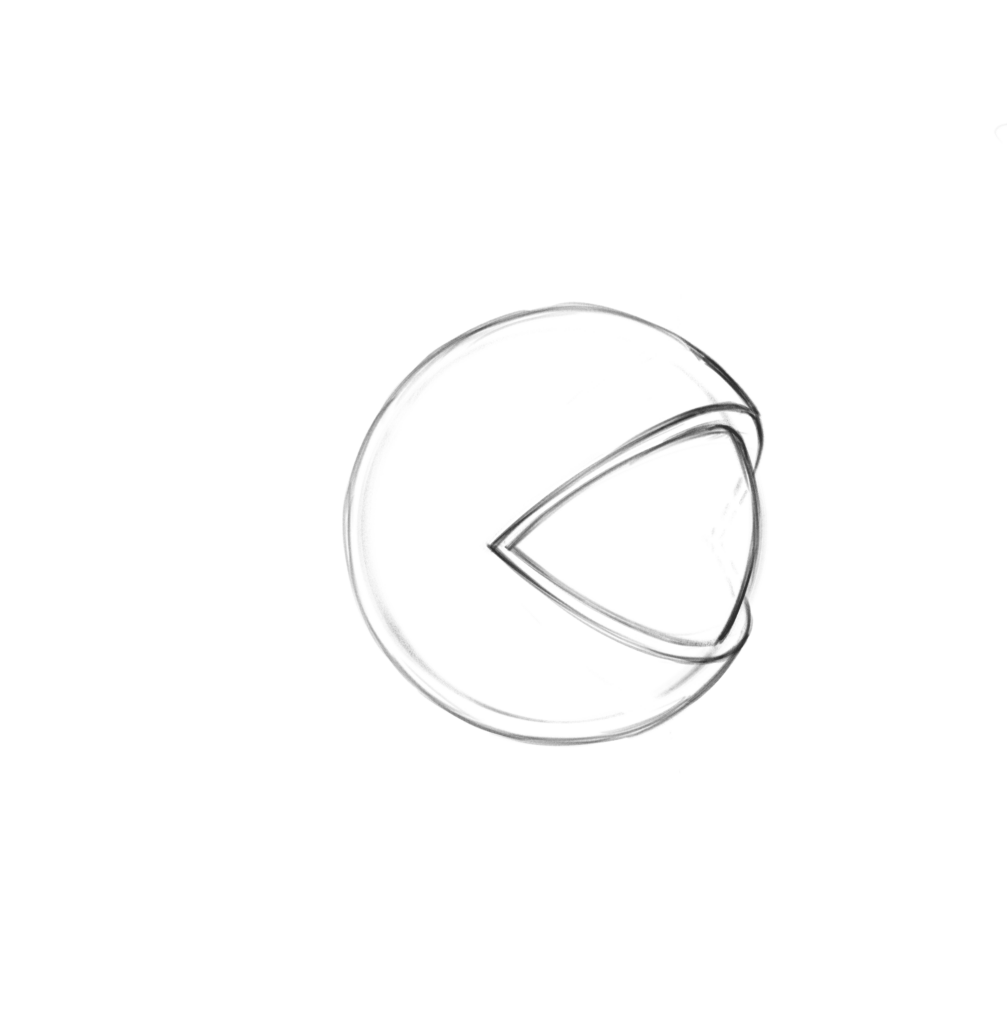
And do some more of these drawings yourself in different angles.
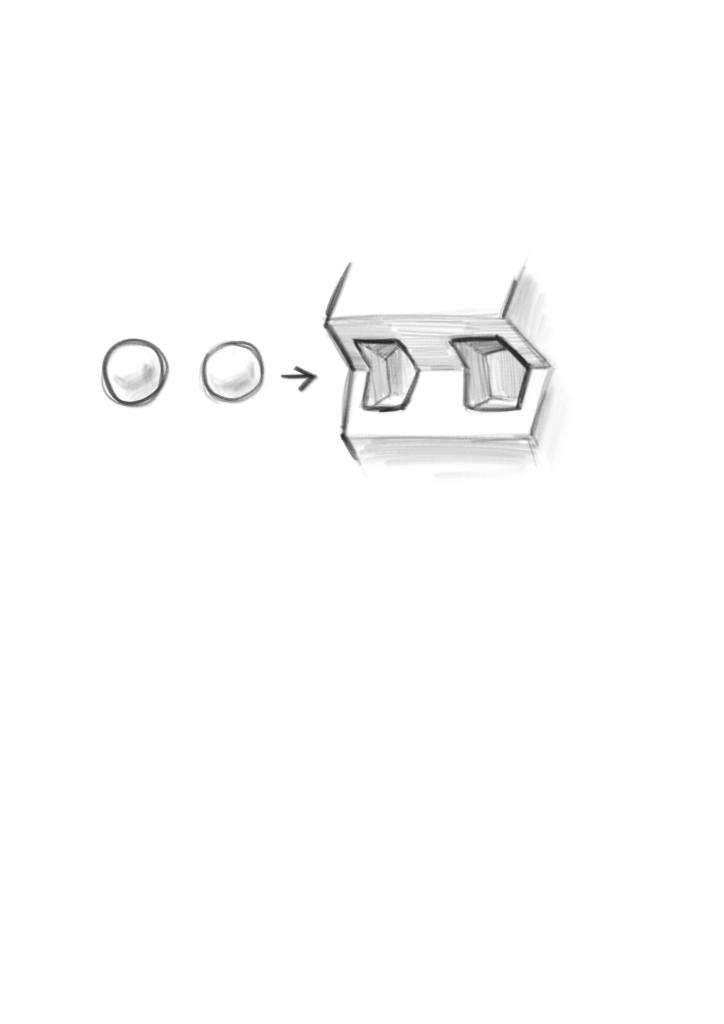
Eye sockets and eye spheres
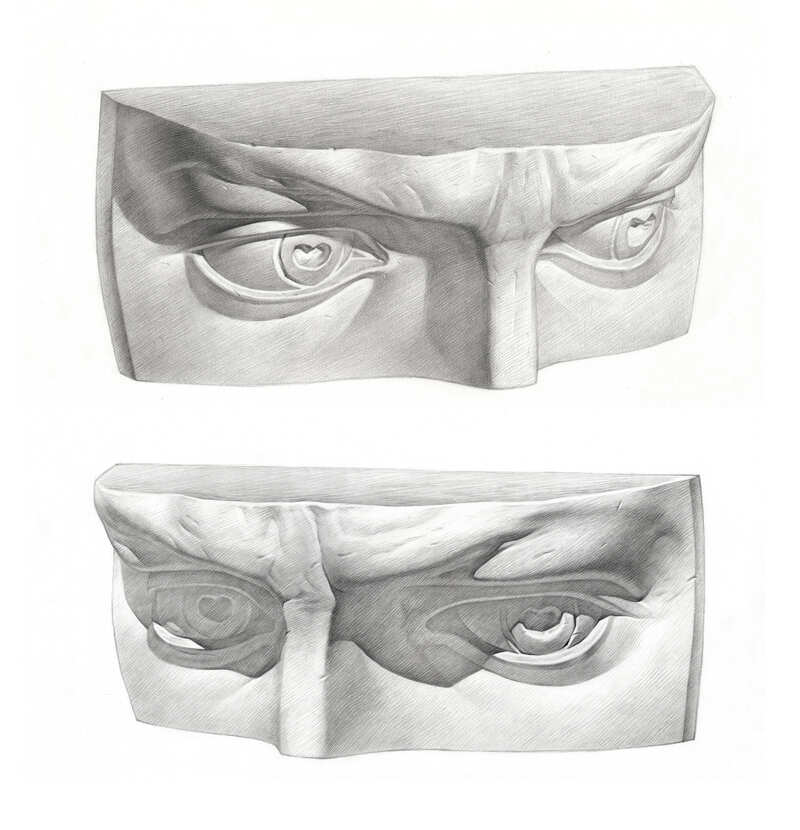
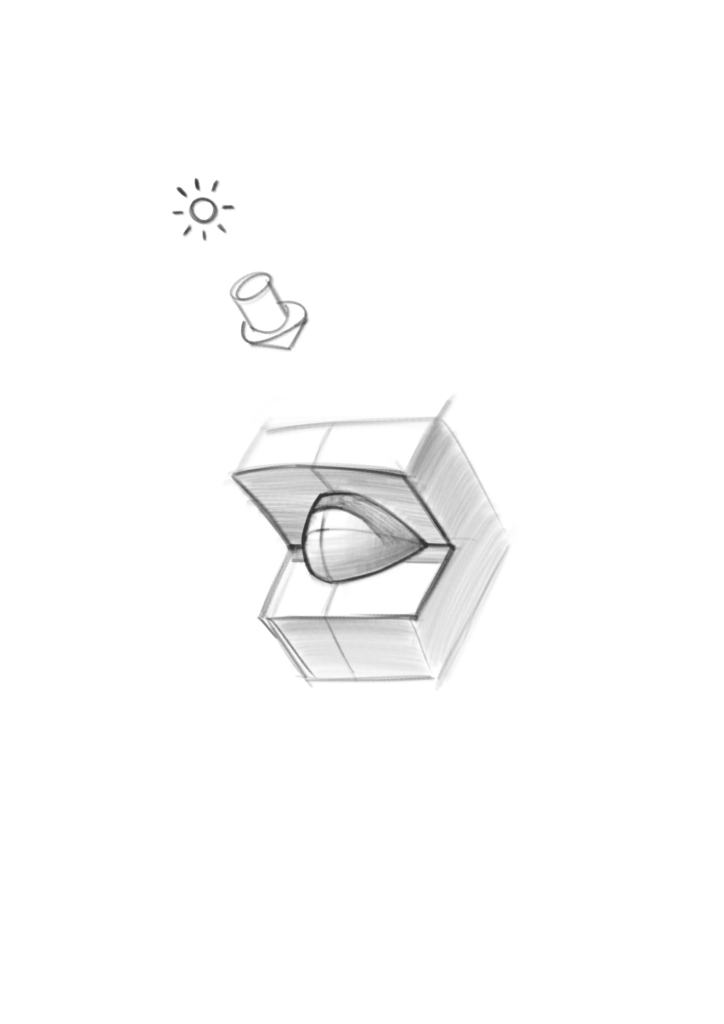
Now let’s put the eye spheres in the eye sockets and see how light falls on the shape. We see that the upper part of the eye socket is darkened and the lower part is illuminated. Light on the protruding part of the sphere, opposite from above. Also note the shadow of the eye socket falling on the sphere.
Additionally, you can look at a drawing of a plaster face in which the form is shown by light and shadow patterning.
Drawing eyes with a head stump
Now based on the diagrams we’ve gone over, let’s have a pair of eyes planted in the eye socket. We’ll need to draw a simplified head stump with eye sockets, and insert spheres into them. You can do the exact same head stump as shown or draw just eye sockets with spheres inside.
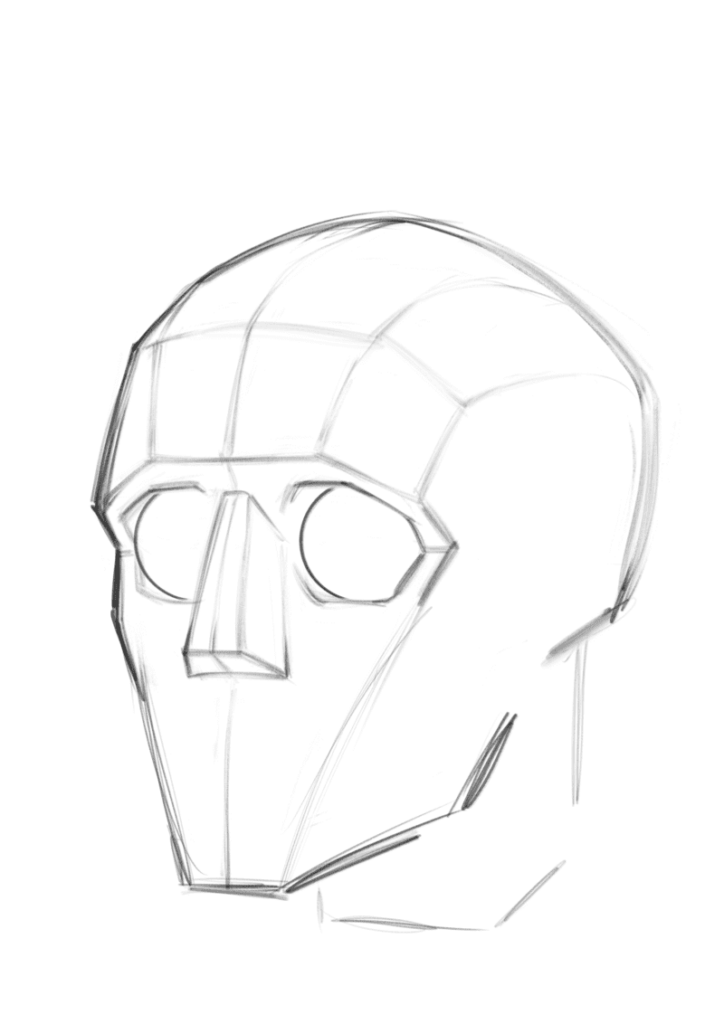
Next, on the spheres arc mark the cut of the eyes. And right down the middle you can outline the irises. The distance between the eyes of a person is equal to the length of one eye, but it can also change to a greater or lesser side, so when you draw a particular person take this moment into account.
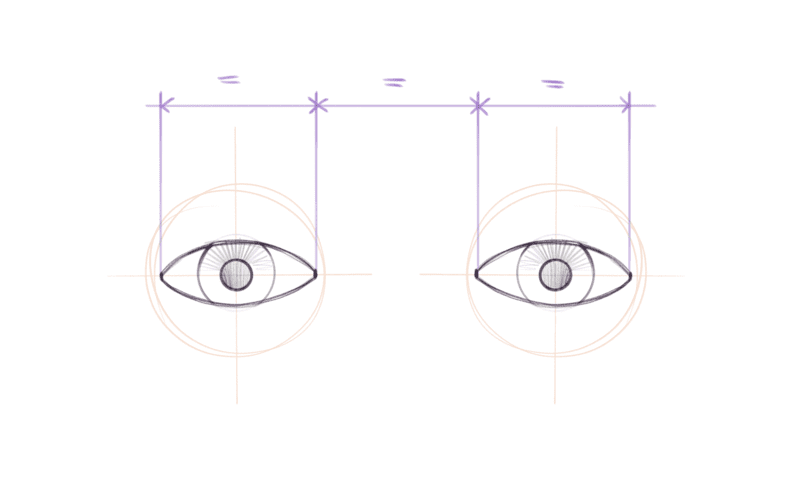
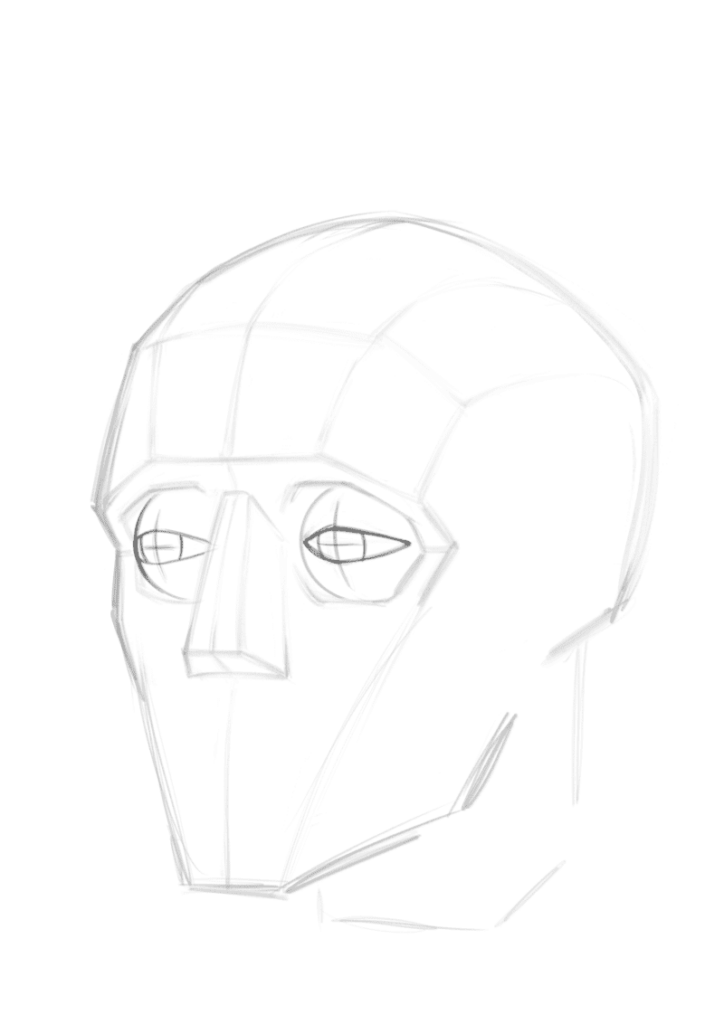
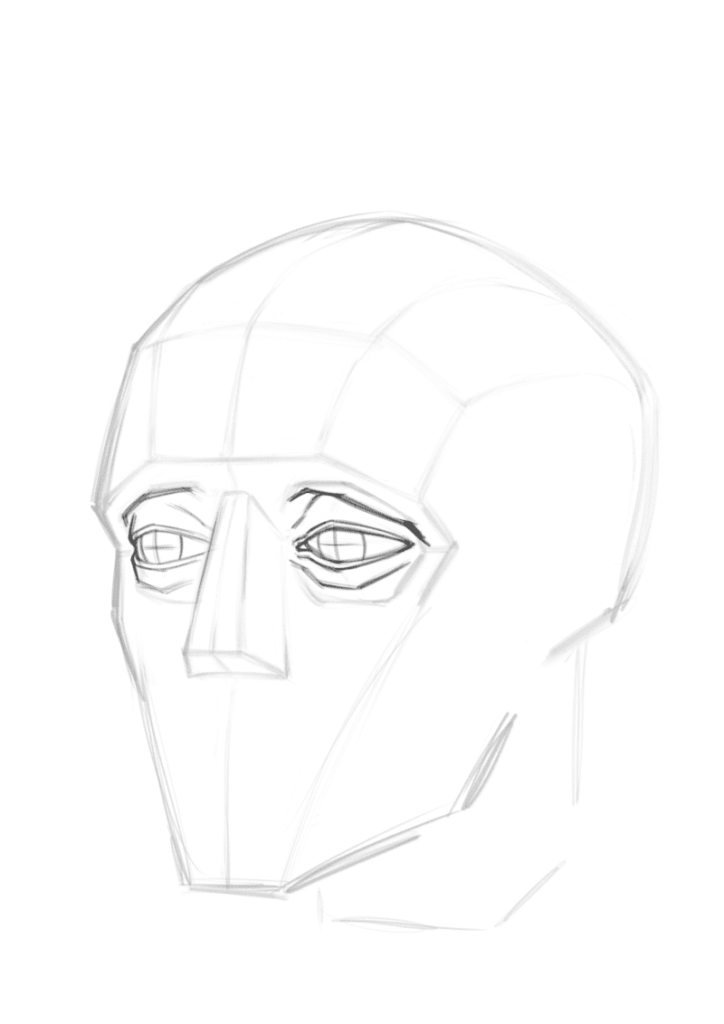
Draw the thickness of the eyelids and crease to show the height of the upper and lower eyelids. And you need to show that the eye socket overlaps part of the upper eyelid.
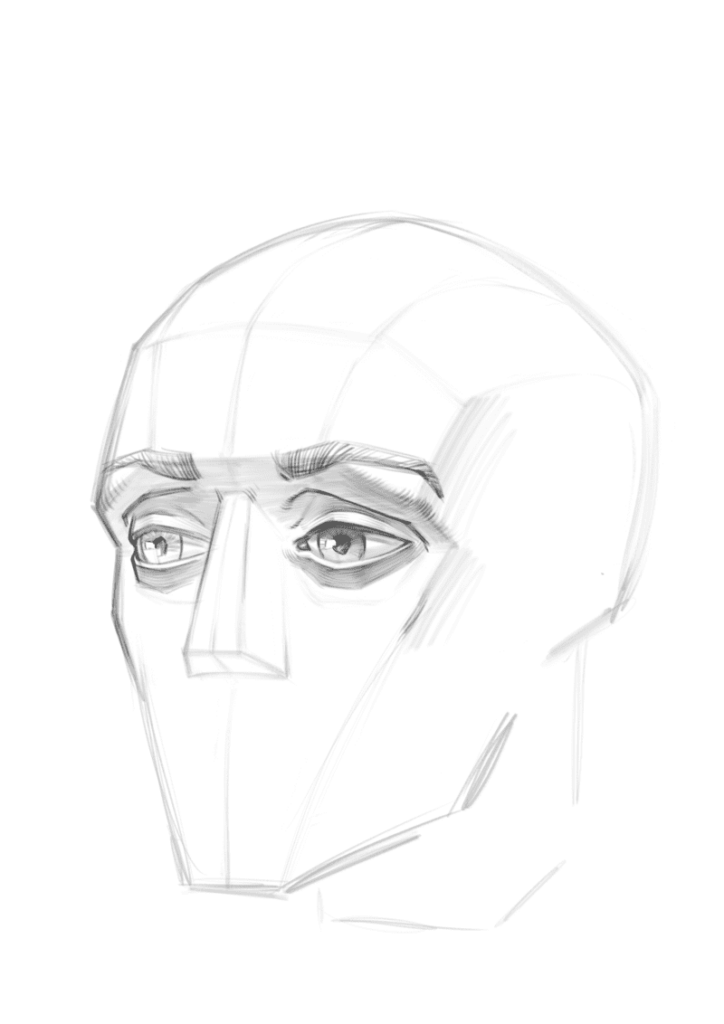
If everything worked out at this stage, you can now finish drawing the eyebrows, add shadows and show the modeling of the shape with a stroke. Also, don’t forget the drop shadows from the eye socket on the upper eyelid and from the upper eyelid on the eyeball. And also, if you want your eye drawing to look more realistic, you can darken the iris on top of the eye, then draw a glare on the cornea of the eye. A glare is a reflected light source, so it can be of different shapes, if the light source is a window, the glare is rectangular, if the light bulb is round).
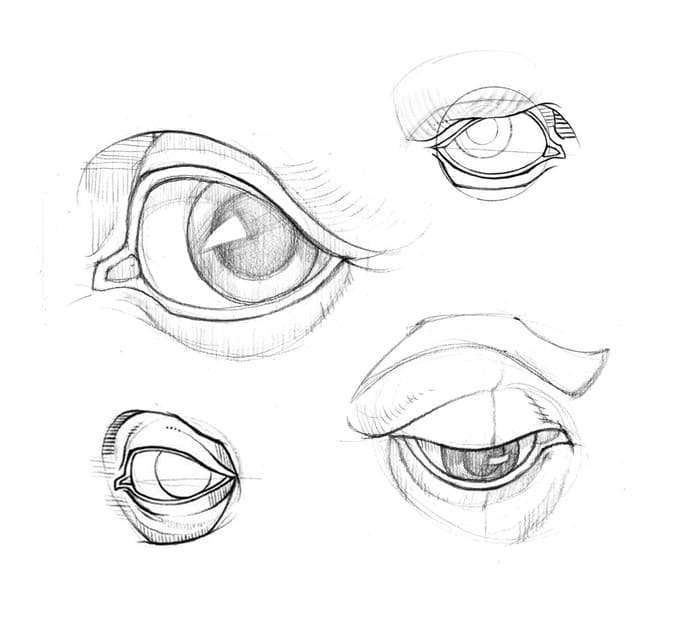
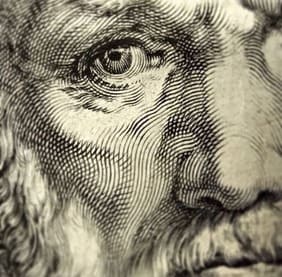
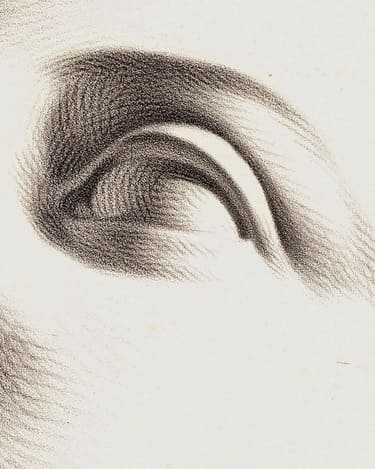
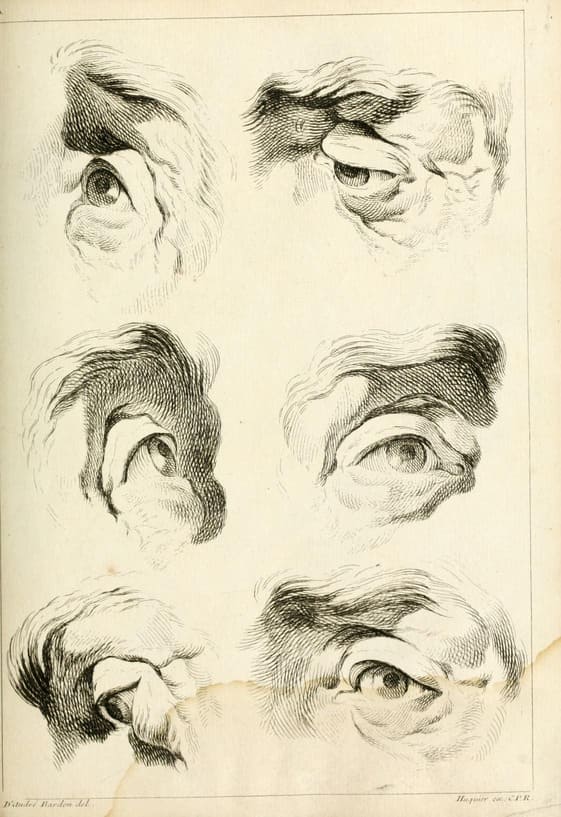
Continue practicing drawing eyes on your own. Look at how other artists do it, especially pay attention to the drawings of the old masters. It is very useful to make copies of such drawings, and it is not necessary to copy them completely, you can make a copy of just the eye (Fig. 6.0) (Fig. 6.1) (Fig. 6.2) (Fig. 6.3)
Remember, to master drawing a person’s eyes, you need to dedicate time to practicing. Drawing the eye requires attention to detail, nuances of light shading, form and expression, and the only way to achieve perfection is through constant practice. Don’t be afraid to experiment, learn new techniques and observe different styles.
You can also see a tutorial article about how to draw a human face on our website.
