Draw a compound object consisting of bodies of rotation!
In artistic parlance, it means drawing a kerosene lamp. We are inspired by retro aesthetics and at the same time pump up the construction, proportions, perspective, graphic technique.
The author of the tutorial is Ivan Skrynnikov, curator of the Drawing course at the Moscow branch of Skills Up School.
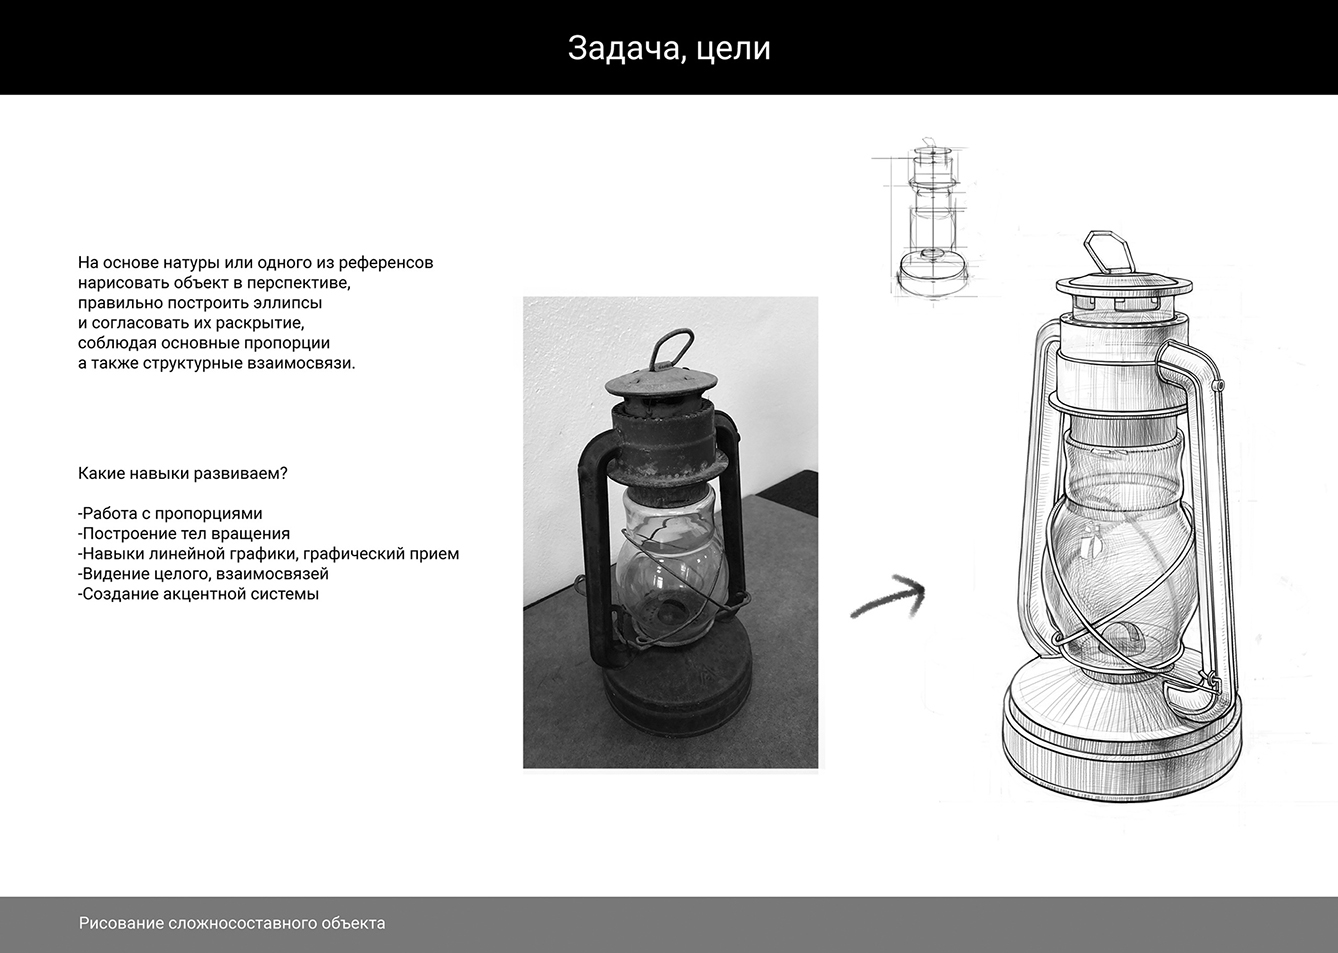
The task of the exercise is to draw an object in perspective on the basis of nature or a reference, to construct ellipses correctly and to coordinate their opening, observing proportions.
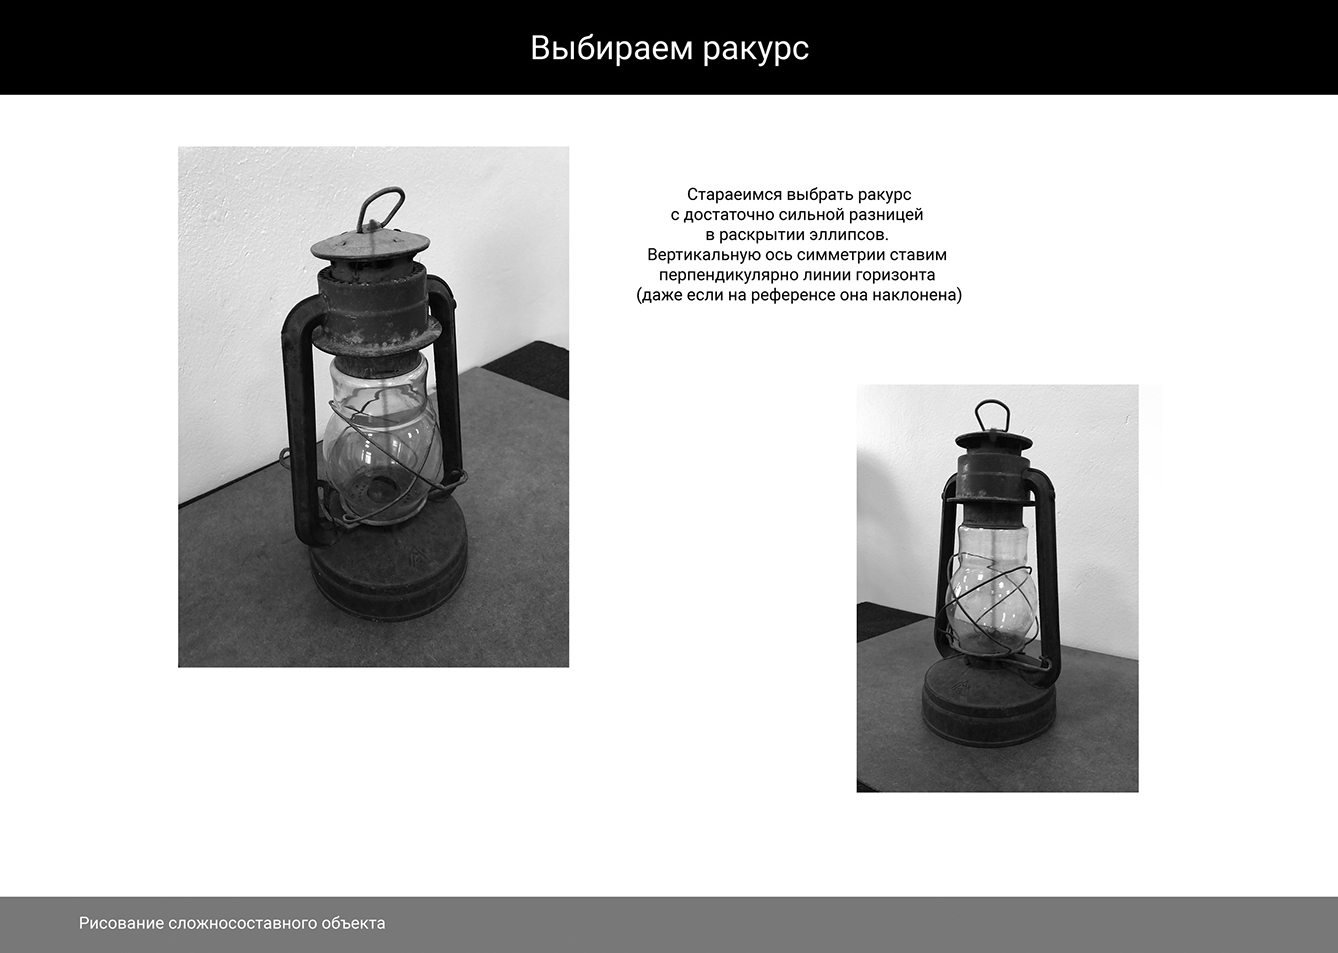
1. Choosing an angle. It is important to choose an angle with a strong difference in the opening of the ellipses. Place the vertical axis of symmetry perpendicular to the horizon line.
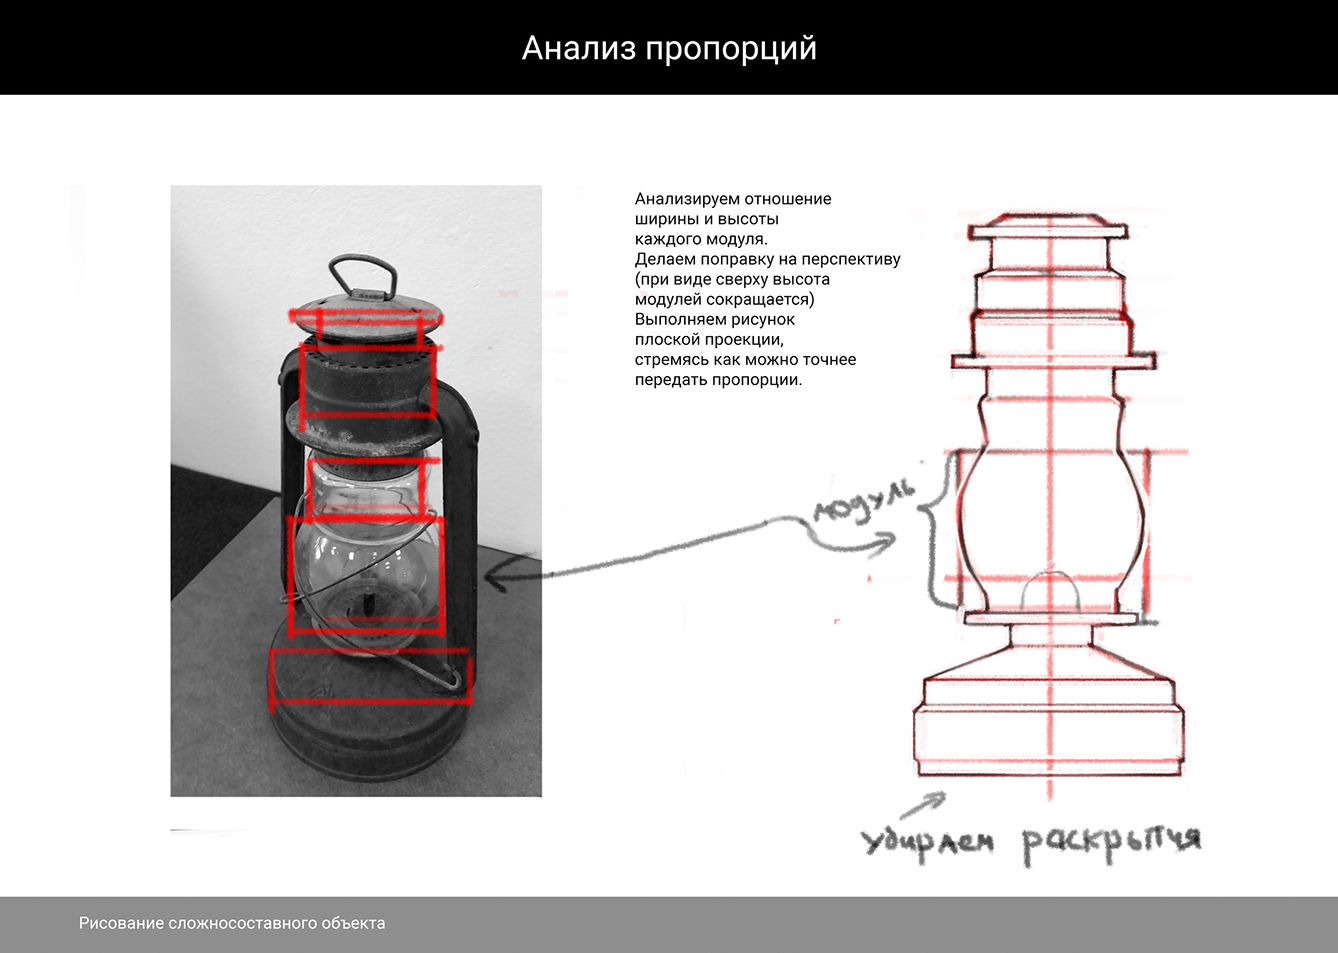
2- Analyze the proportions: the ratio of the width and height of each module. Putting it in perspective. We make a drawing of a flat projection, trying to accurately convey the proportions.
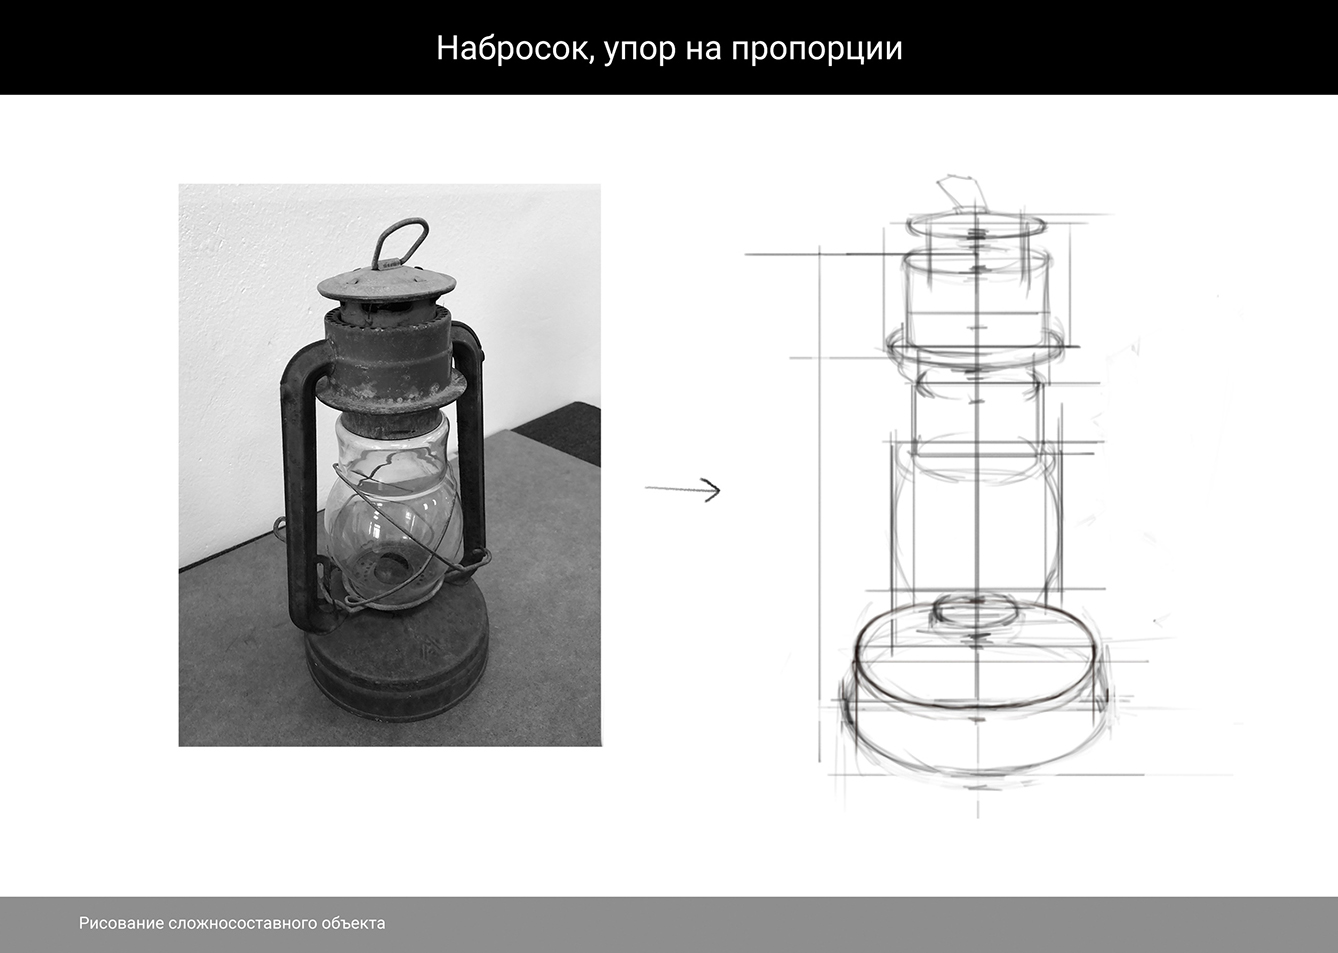
3. Make a sketch with emphasis on proportions.
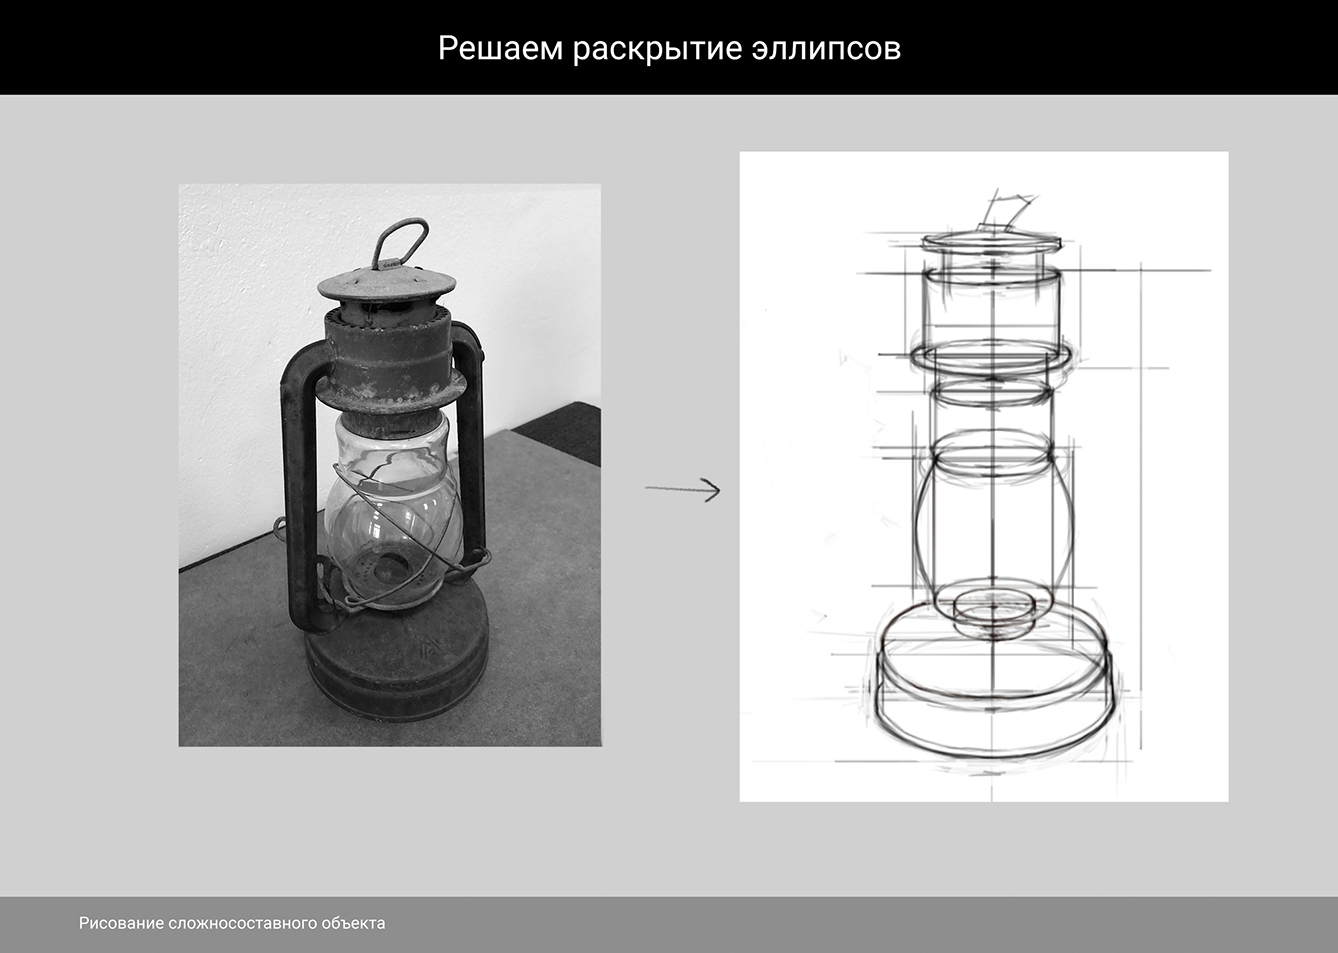
4. Adding ellipses disclosure.
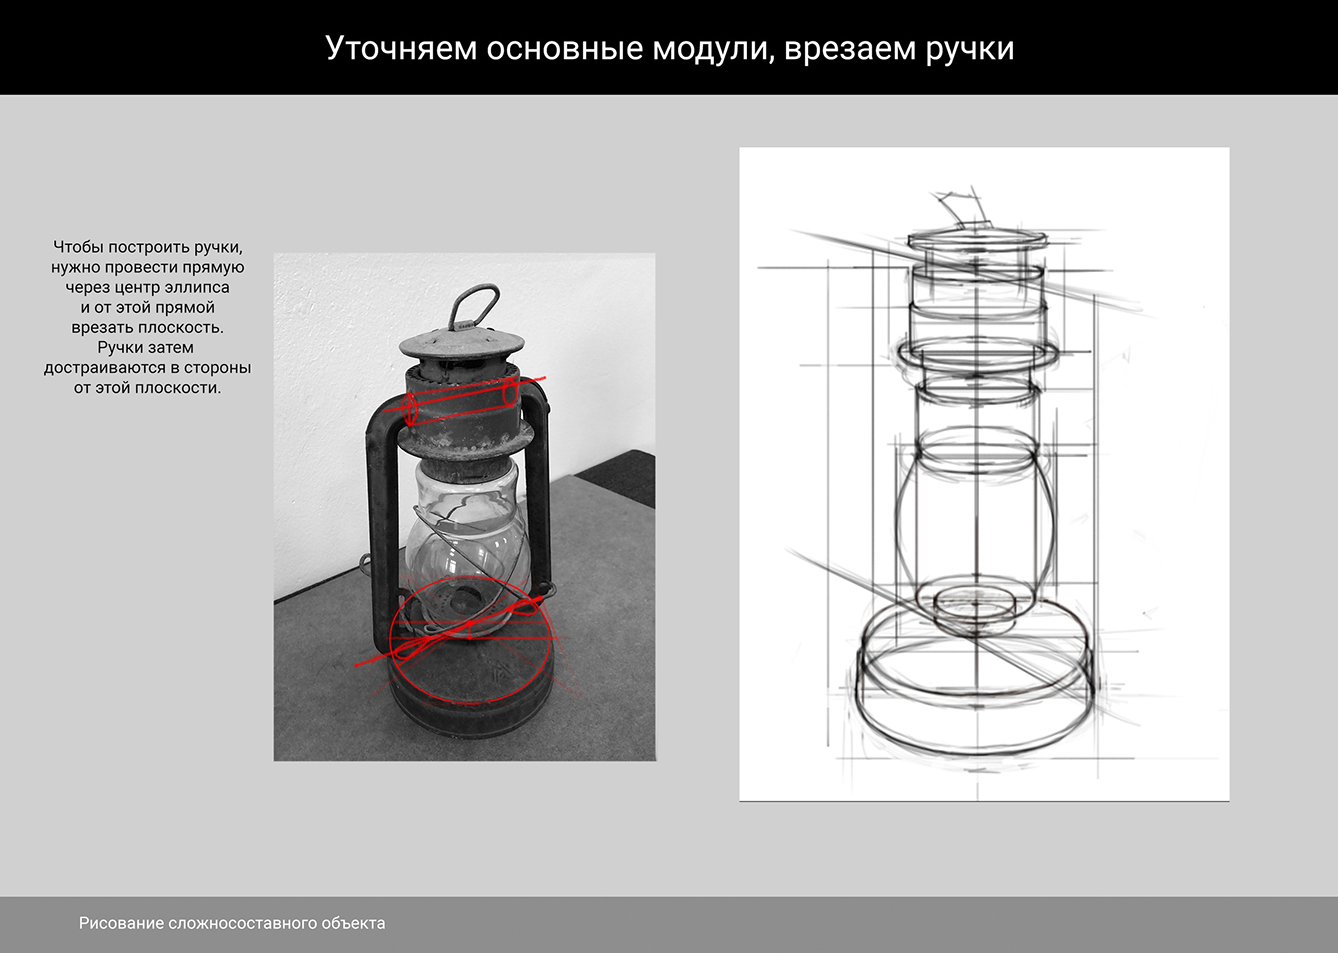
5. Refine the basic modules, cut in the handles. To construct the handles, we need to draw a straight line through the center of the ellipse and cut a plane from it. The handles are then finished to the sides of the plane.
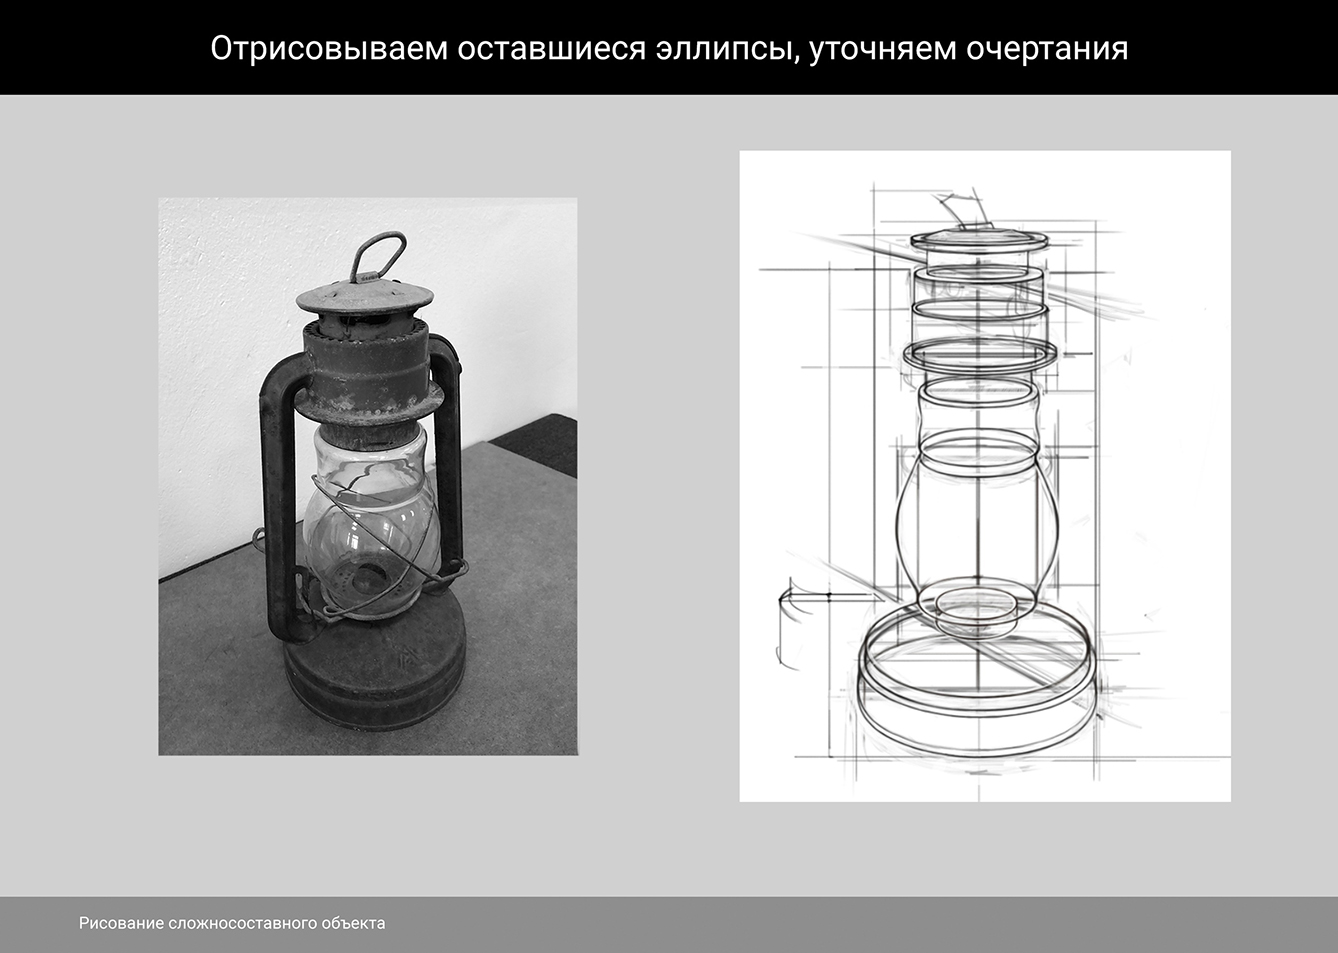
6. Draw the remaining ellipses, refine the outlines.
7. Emphasize, move from medium modules to small modules.
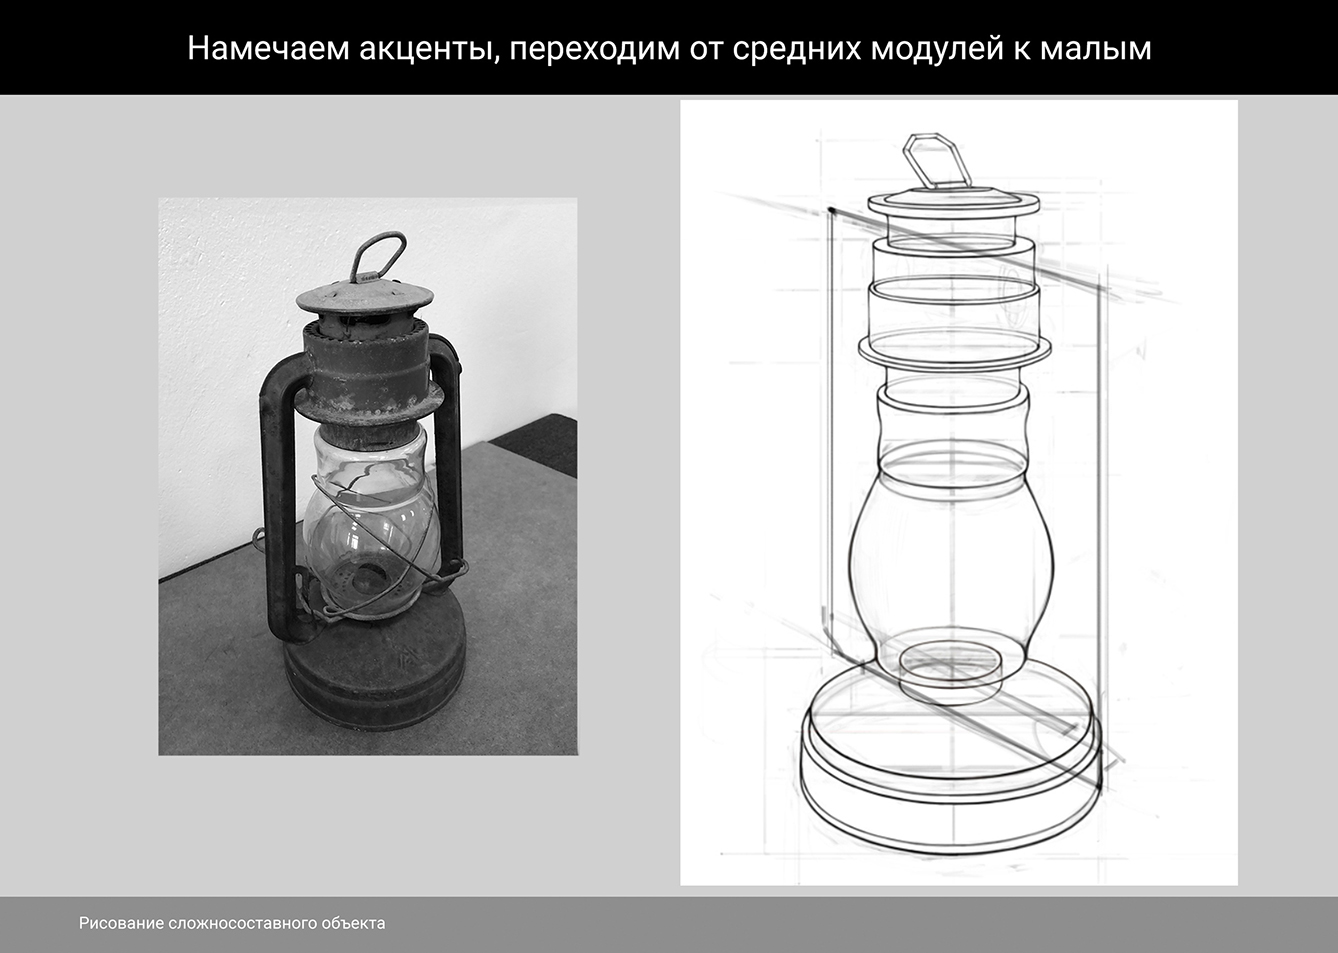
8. We continue to build the handles.
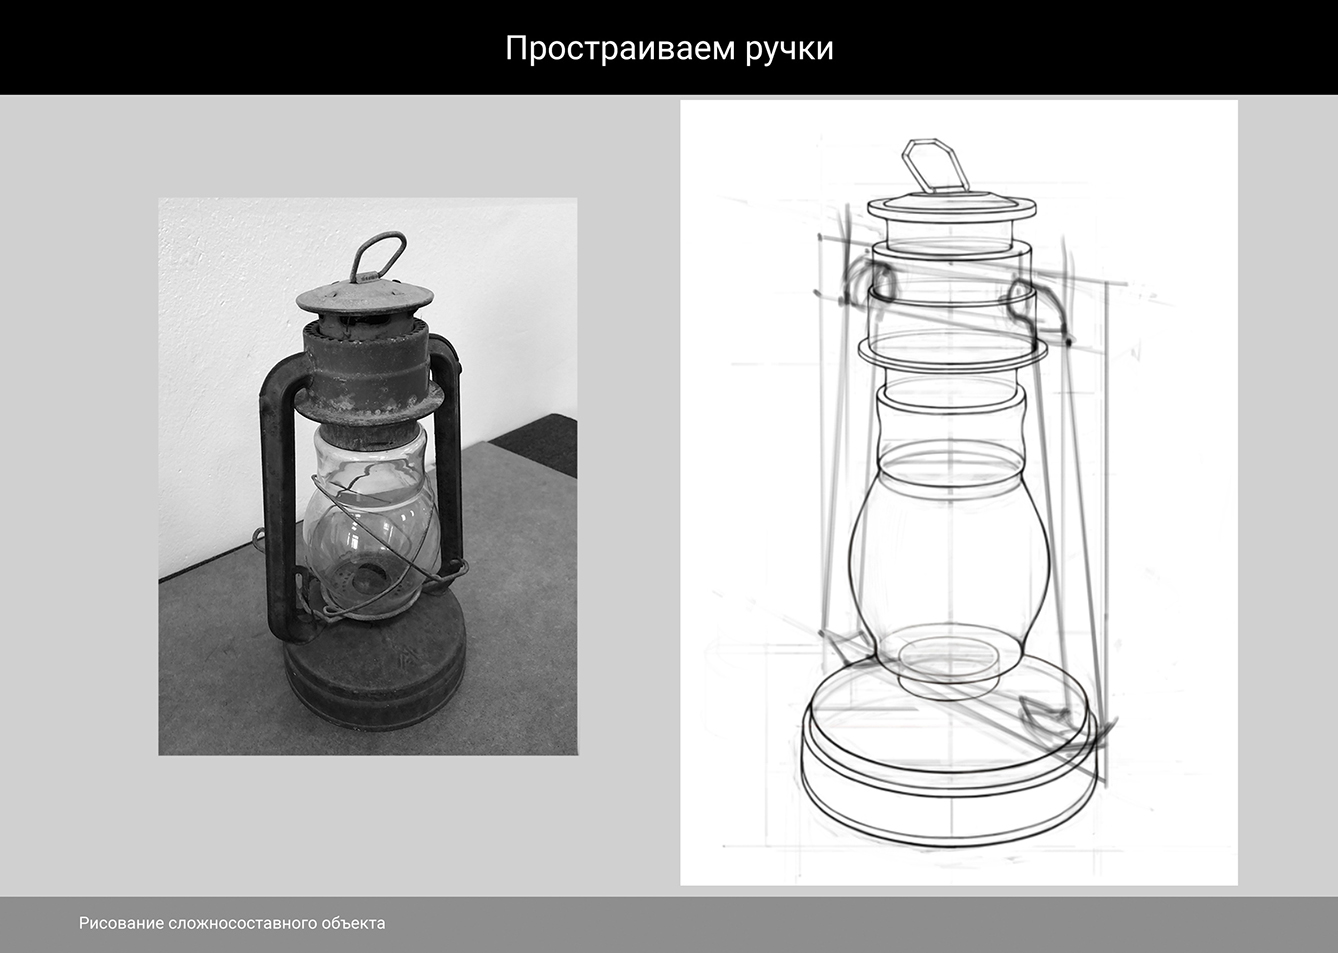
9. Sketching the details, move on to rendering.
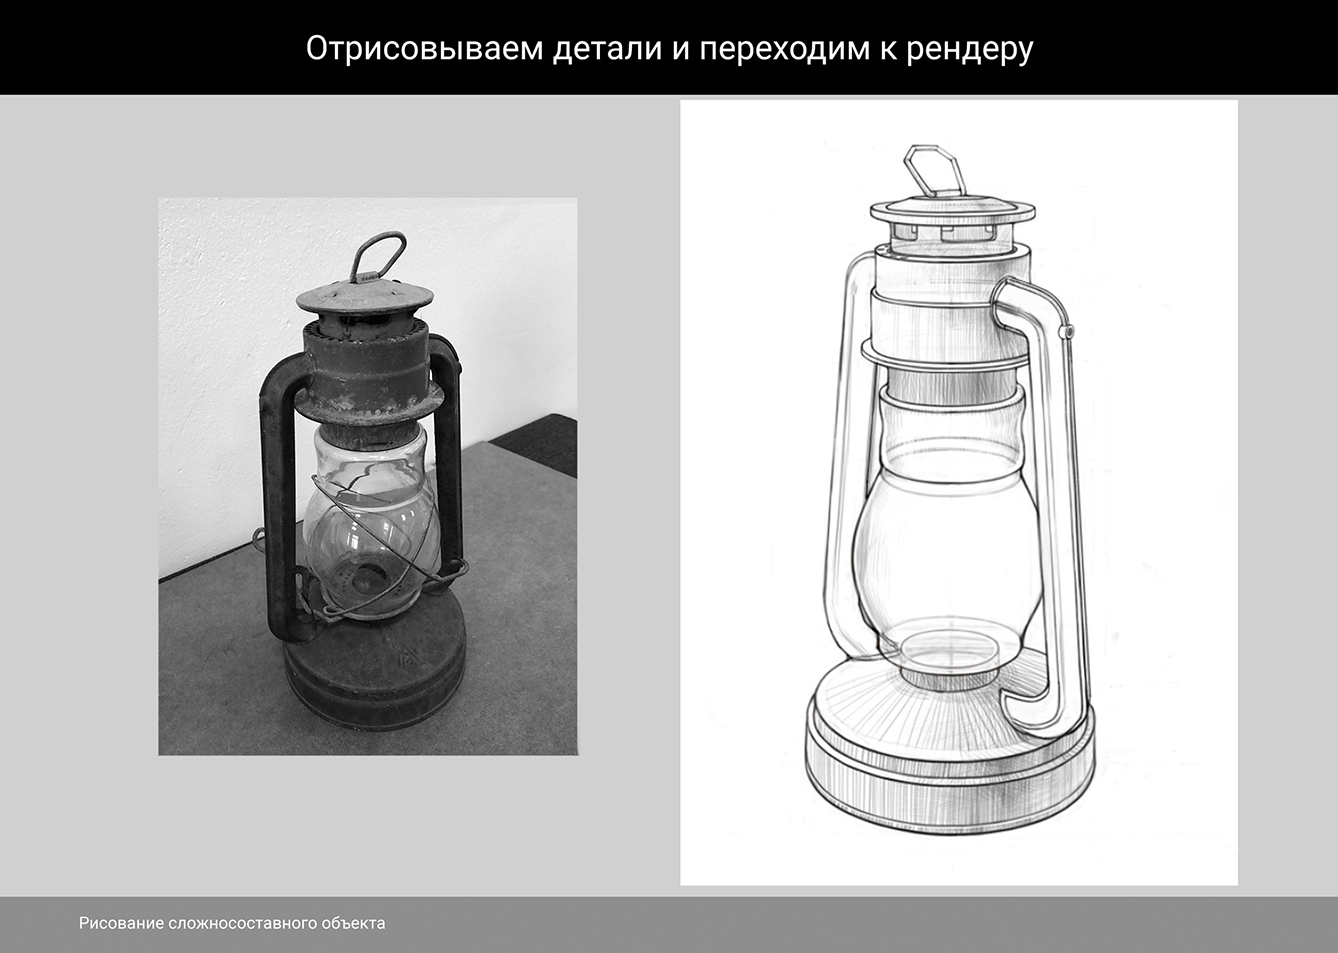
10. Refine the details and work out the drawing.
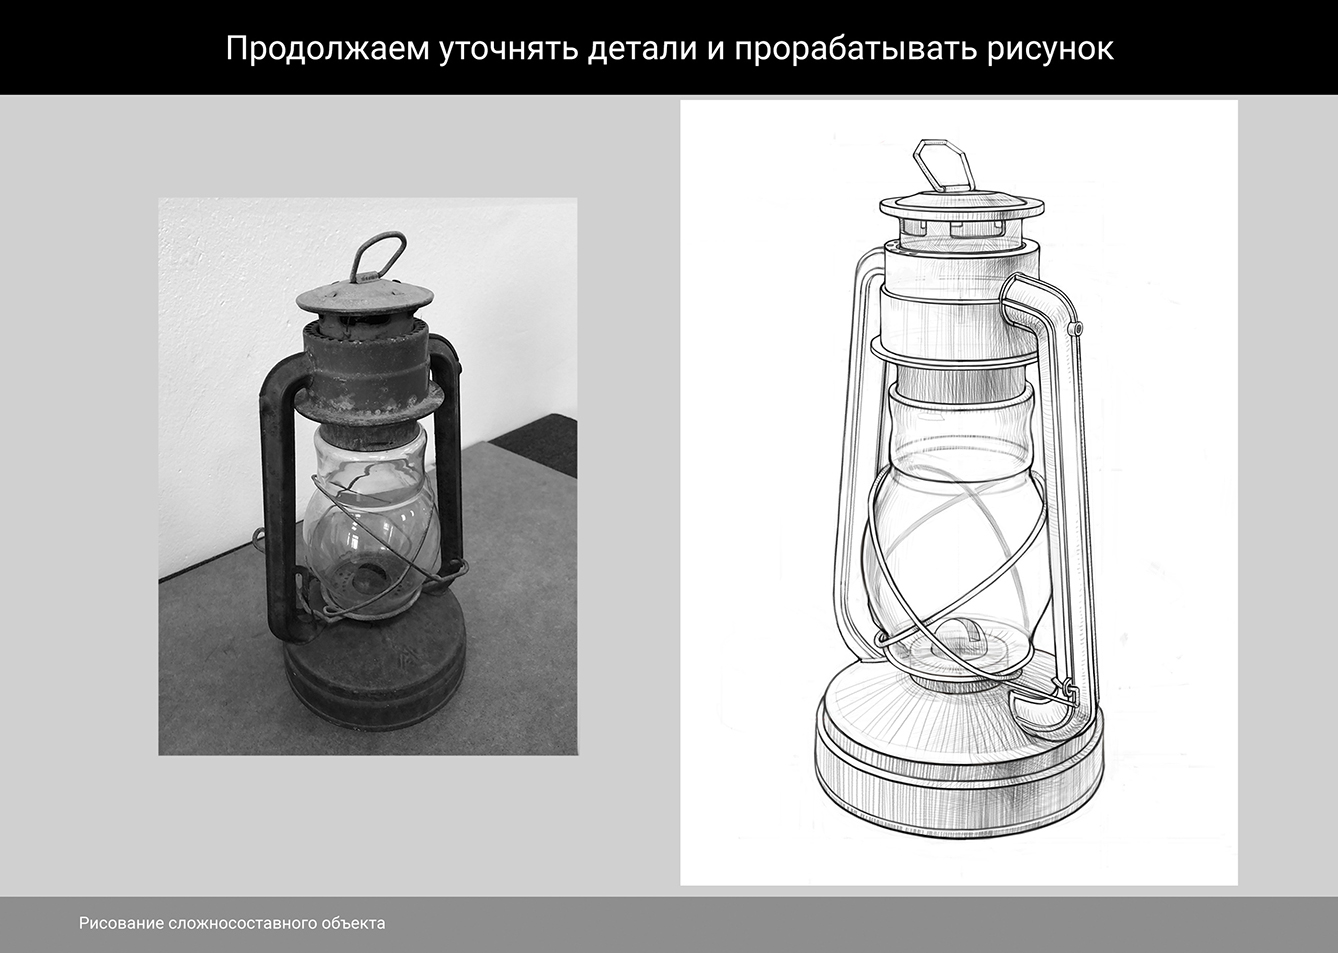
11. Work through materials and clarify tonal accents.
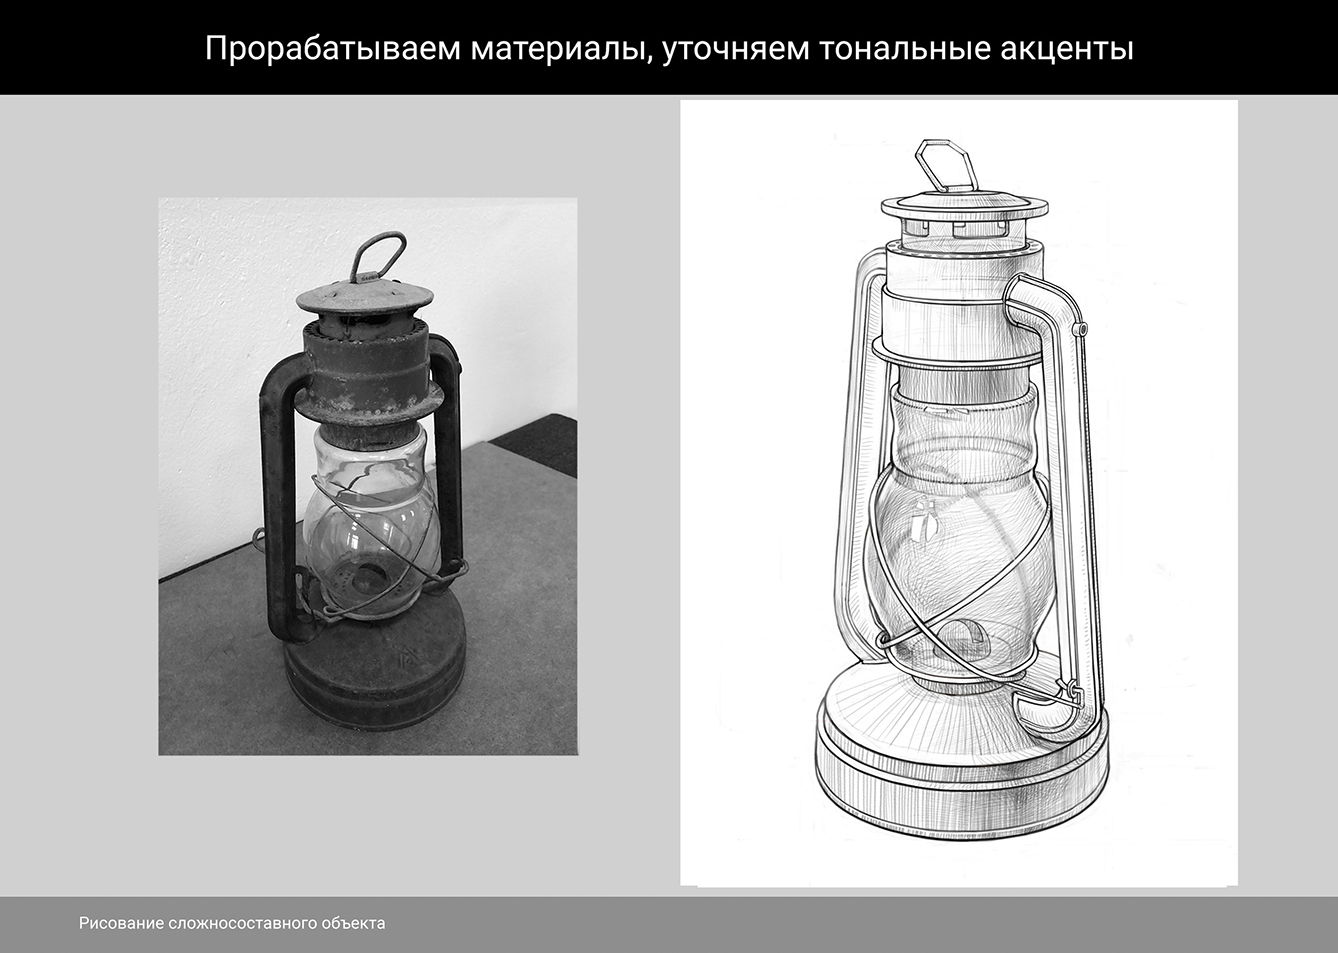
12. Adding the finishing touches.
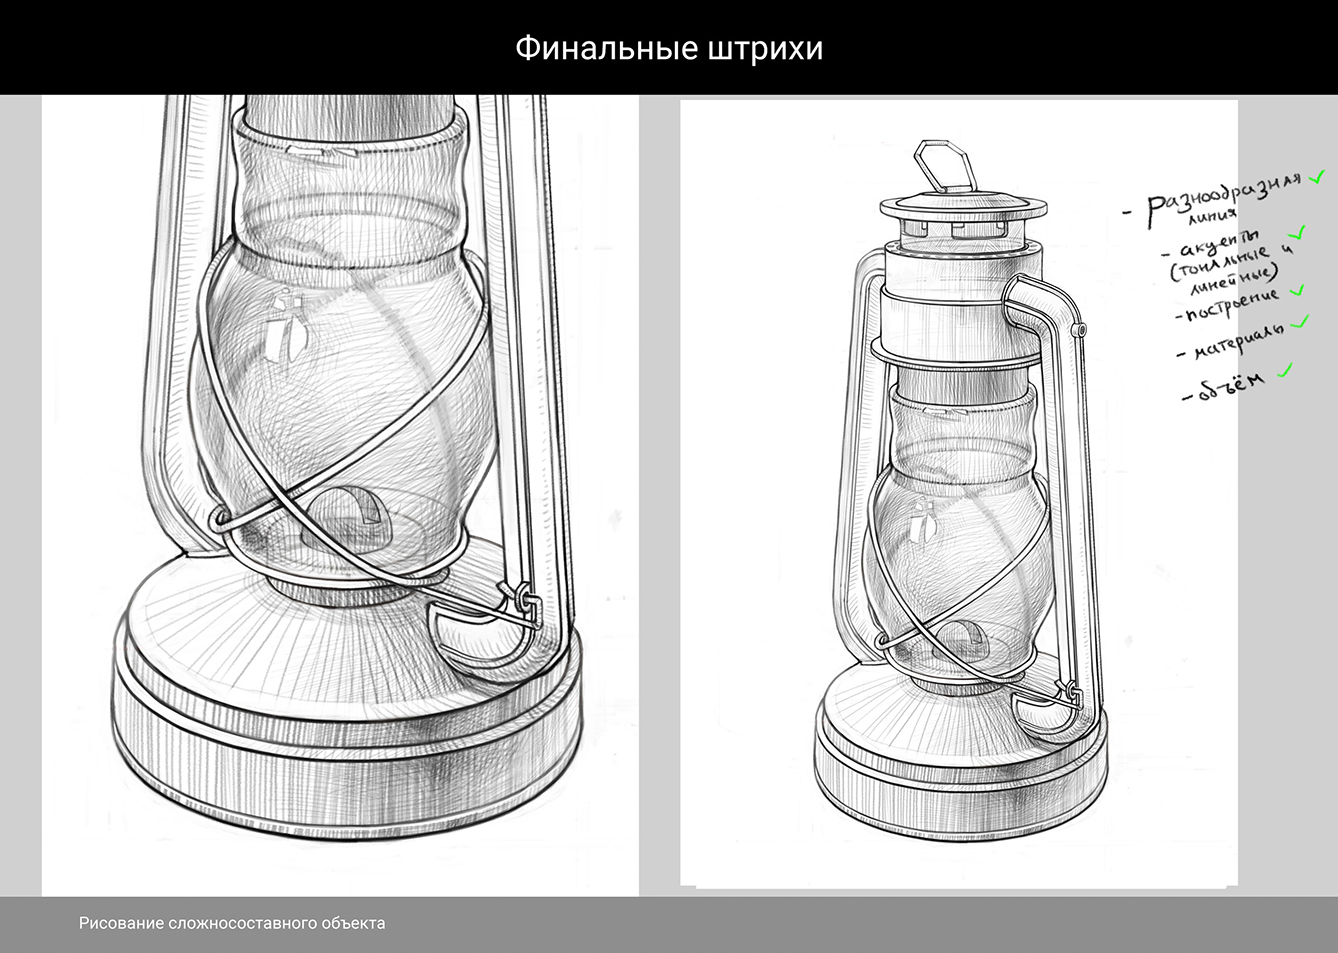
The job’s ready!
