TutorialUpdated: July 2, 2026
3D for 2D illustration: A comprehensive guide for artists
In short
Today we will dive into the topic of how to use 3D to improve 2D works. And yes, there will be practical examples and useful tips!
Skills Up School
Online school of drawing and CG
Did you know that 3D and 2D are like best friends who help each other look better? 3D gives structure and realism, while 2D adds expressiveness and soul. Today we will dive into the topic of how to use 3D to improve 2D works. And yes, there will be practical examples and useful tips!
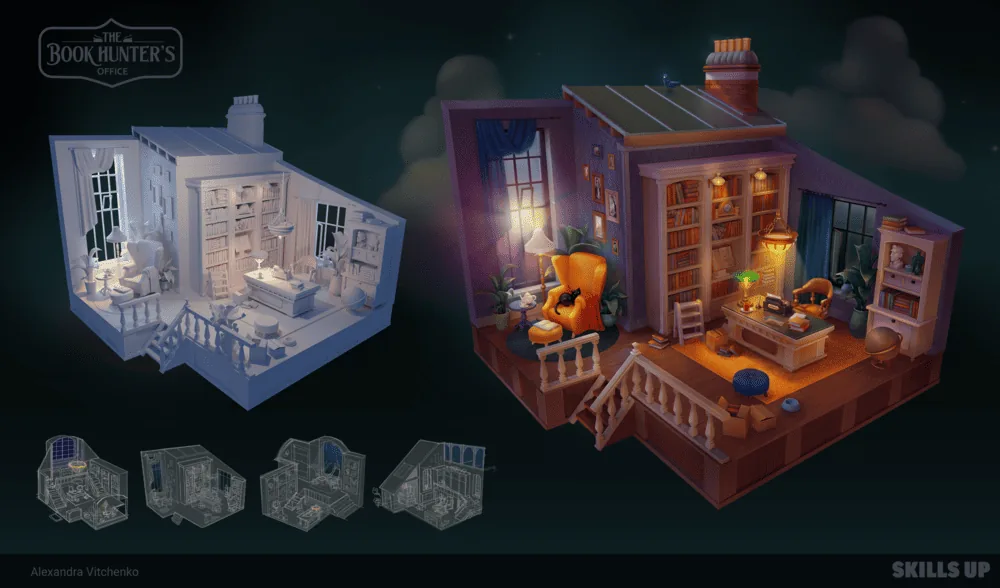 Author — Alexandra Vitchenko
 Blocking is like scaffolding for your picture. You create a base to see the composition, scale and perspective.
How to do it:
Blocking is like scaffolding for your picture. You create a base to see the composition, scale and perspective.
How to do it:
 Lighting in 3D is your main ally. It sets the mood and makes the scene come to life.
Main types of lighting:
Lighting in 3D is your main ally. It sets the mood and makes the scene come to life.
Main types of lighting:
 After creating the models, it's time to add materials. Even if your scene looks like a set of gray figures, materials will help set the mood.
How to do it:
After creating the models, it's time to add materials. Even if your scene looks like a set of gray figures, materials will help set the mood.
How to do it:
 Now the most interesting part is adding 2D elements on top of the 3D renderer.
Process:
Now the most interesting part is adding 2D elements on top of the 3D renderer.
Process:
Author — Alexandra Vitchenko
Why is 3D useful for a 2D artist?
Integrating 3D into 2D work helps artists solve many tasks, save time and, importantly, avoid laborious work with perspective. Note also that 3D does not replace 2D, but only makes the process more flexible and interesting. Main advantages:- Perspective: No need to spend hours building complex perspectives — 3D can do it in minutes.
- Light and shadow: Realistic lighting in 3D helps create a base on which you can build expressive shadows in 2D.
- Time savings: Create a basic model and then draw the details. Quick and efficient.
- Freedom of changes: Wanted to change the angle or add an object? In 3D, this is done in a couple of clicks.
Pipeline for using three-dimensional models for 2D works step by step
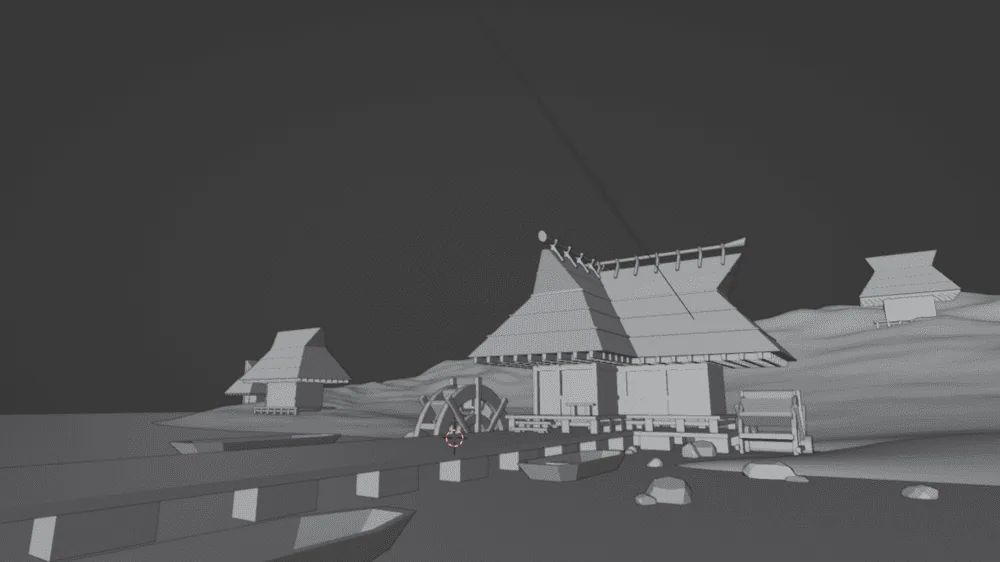
Let's break down the pipeline so that you can confidently implement these features in your work!Step 1: Quick blocking in 3D
Blocking is like scaffolding for your picture. You create a base to see the composition, scale and perspective.
How to do it:
- Create basic shapes. In Blender, Maya or another 3D program, use simple primitives: cubes, cylinders, balls. For example, a house can be built from a cube with a triangular roof.
- Arrange the objects. Imagine that you are assembling a scene with toys. Place them so that the composition looks interesting.
- Determine the angle. Play with the camera to choose the best viewing angle. It is also worth deciding on the degree of perspective distortion right away.
Step 2: Creating complex models
After blocking, you can proceed to detailing. Depending on the style of your illustration, you can either leave the models simple or add more details. Examples of objects for detailing:- Architecture: Add windows, doors, cornices.
- Transport: Divide the car into main parts: body, wheels, headlights.
- Characters: If you are drawing a figure, use a mannequin or a basic 3D model of a person.
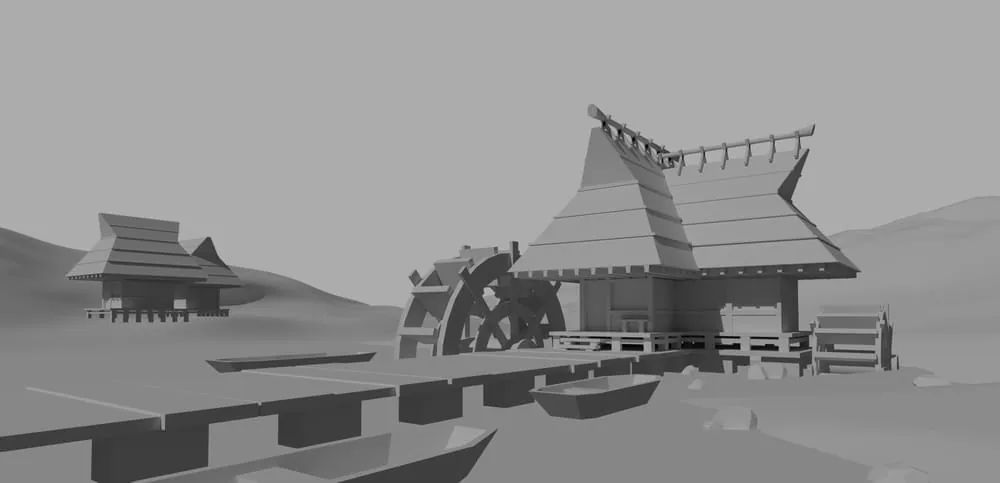
Step 3: Setting up lighting
Lighting in 3D is your main ally. It sets the mood and makes the scene come to life.
Main types of lighting:
- Point light: For creating accents.
- Diffuse light: Simulates daylight.
- Backlight: Adds drama by highlighting silhouettes.
- Arrange light sources in the scene.
- Adjust their intensity and color.
- Make sure that the shadows look realistic.
- Try experimenting with the types and arrangement of light sources. Thanks to the use of 3D, we can «play» with light sources, changing their direction, intensity and color.
- You can direct a light bulb at objects with materials that transmit light (Blender has a preset Glass material), then you will get diffused light at the output. This can be useful when creating windows and stained glass.
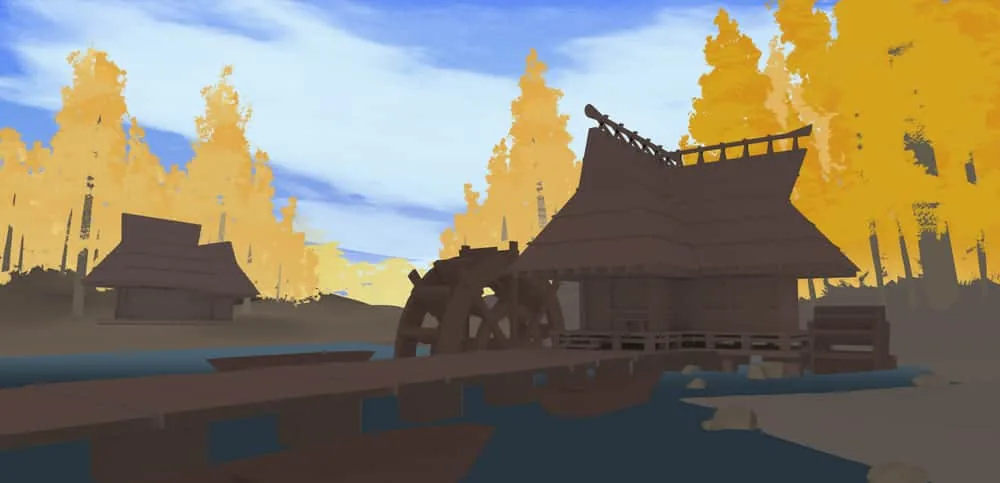
Step 4: Materials and textures
After creating the models, it's time to add materials. Even if your scene looks like a set of gray figures, materials will help set the mood.
How to do it:
- Assign basic colors. For example, green for grass, blue for water, brown for buildings.
- Add textures. If necessary, use free textures of wood, brick or metal.
- Experiment. Try adding reflective or matte materials to create interesting effects.
Step 5: Final rendering
When the scene is ready, make a rendering. This is like a photograph of your 3D work, which will become the basis for a 2D illustration. Rendering tips:- Use high resolution to keep details clear.
- Save the render with a transparent background if you plan to refine it in 2D.
- Check shadows and lighting to make sure they match your plan.
Step 6: Working in 2D
Now the most interesting part is adding 2D elements on top of the 3D renderer.
Process:
- Transfer the render to Photoshop or another editor.
- Add layers for details, textures and effects.
- Draw on top of the 3D base, adding your own style.
Additional tips
- Learn new techniques. Study lessons on Blender or Maya to expand your capabilities.
- Use free resources. For example, download ready-made 3D models to speed up your work.
- Experiment. Try using 3D for different styles — from cartoonish to realistic.
- Don't be afraid of mistakes. Each mistake is a lesson that will help you improve.
Conclusion
3D is a powerful tool that allows 2D artists to find new creative approaches, speed up the work process and create impressive compositions. Using 3D for perspective, lighting or details, you can not only improve the quality of your work, but also discover a new level of freedom in art. If you want to learn how to use 3D tools in your projects and become a sought-after specialist, our course «3D illustration in Blender» will be your guide. We will teach you how to combine 3D and 2D so that your works impress with realism, depth and expressiveness. What awaits you on the course:- Real projects for your portfolio so that you can immediately apply the skills in practice.
- Lessons from experts who know how to effectively integrate 3D into 2D graphics.
- Convenient schedule that allows you to study at your own pace.
- Support from a community of like-minded people.
Love digital painting of sky and nature? See how to draw clouds step by step, from composition to tone.
Related materials

Tutorial
How to draw a crystal. Step-by-step guide for artists
March 24, 2025

Article
Time management for an artist
September 18, 2023

Article
How to make a portfolio on ArtStation for an artist and illustrator
September 18, 2023

News
Художник по 3D-персонажам делится забавной моделью викинга с драконом, похожей на картину
June 13, 2026

Tutorial
Learning to draw glow
March 21, 2025

Tutorial
Drawing stones
March 10, 2025