TutorialUpdated: July 2, 2026
Free lesson in Blender. Part 1. The basis of the jug
In short
Free lesson and video lesson on modeling in Blender. Part 1. The base of the jug. We will make a jug right from a cube.
Skills Up School
Online school of drawing and CG
Part 1. The basis of the jug
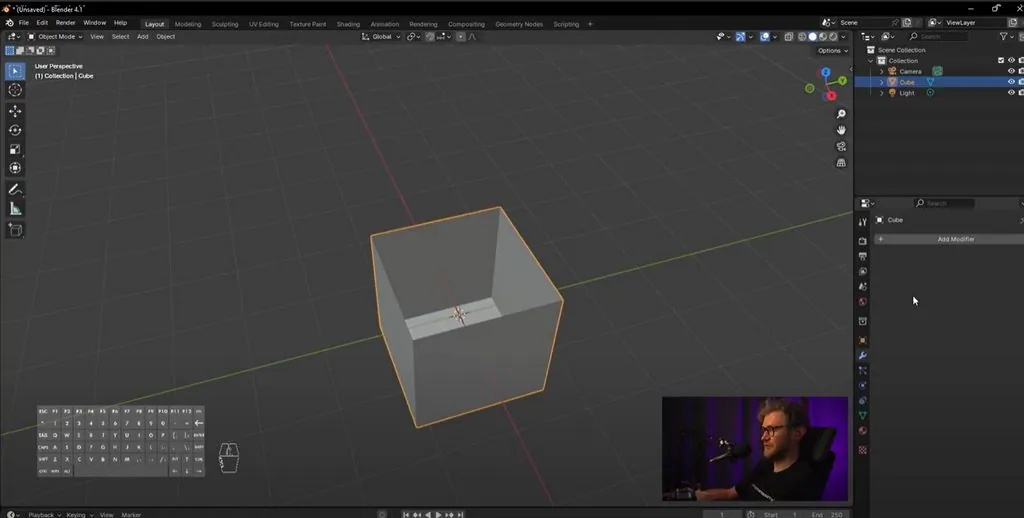
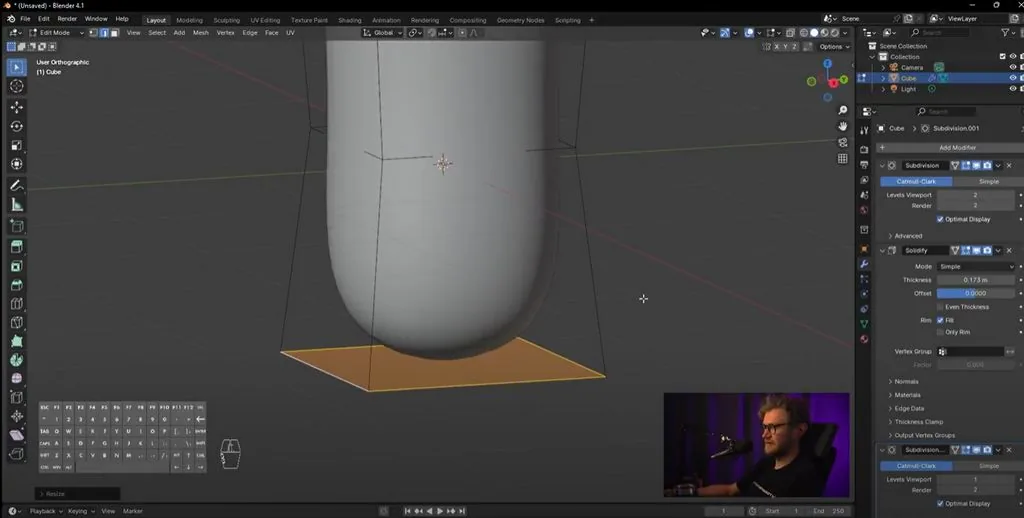
We launch Blender. We will make a jug from a cube: to do this, we turn on its editing and remove the top polygon. Select the polygon, press the X key, select Faces — and we got a simple box.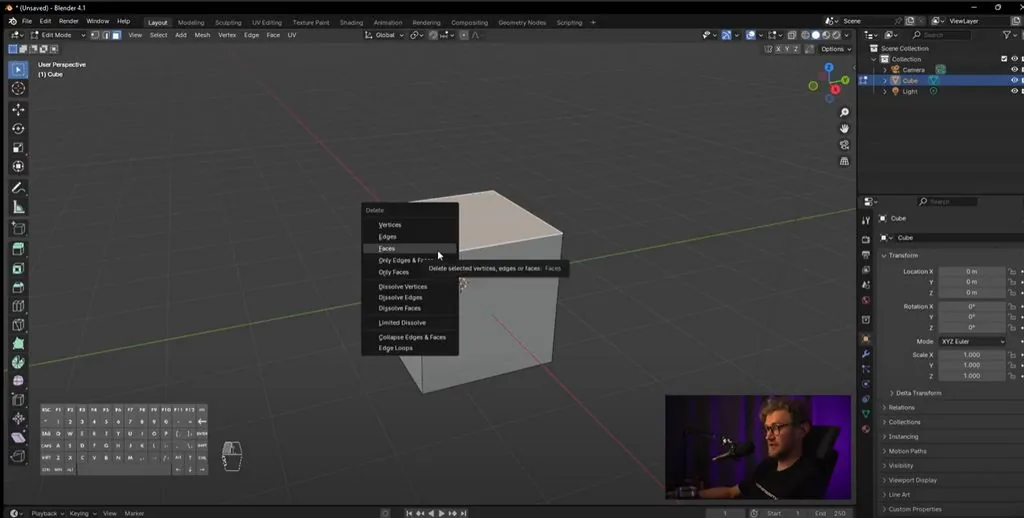
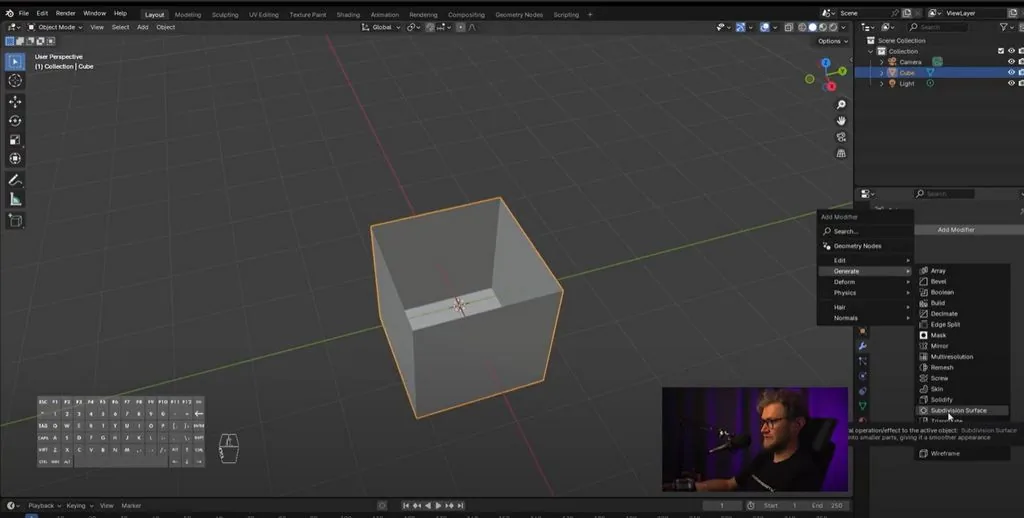
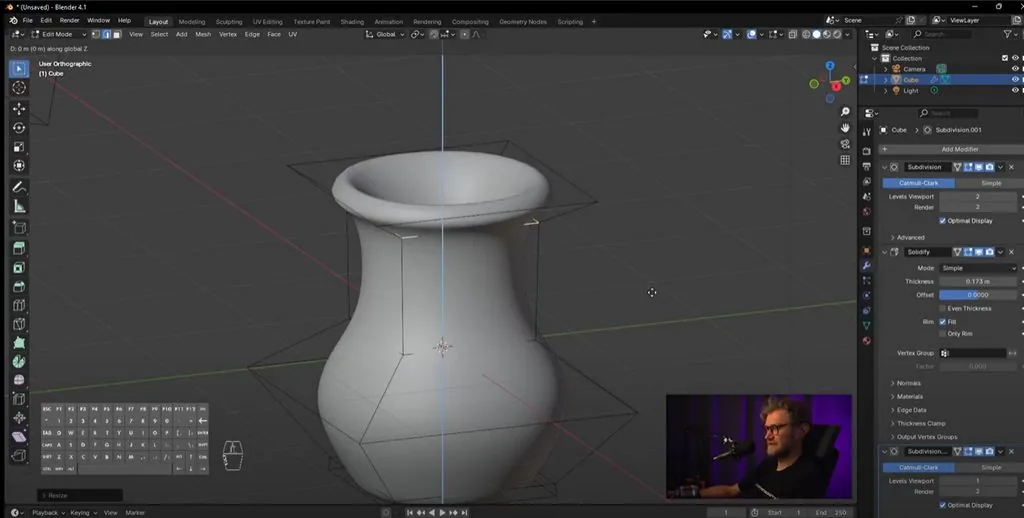
 We will turn off editing with the Tab key and immediately add a couple of modifiers. The first modifier is Subdivision Surface, it will round the shape a little. In the Levels Viewport window, put the value "2", that is, two levels of Subdivision.
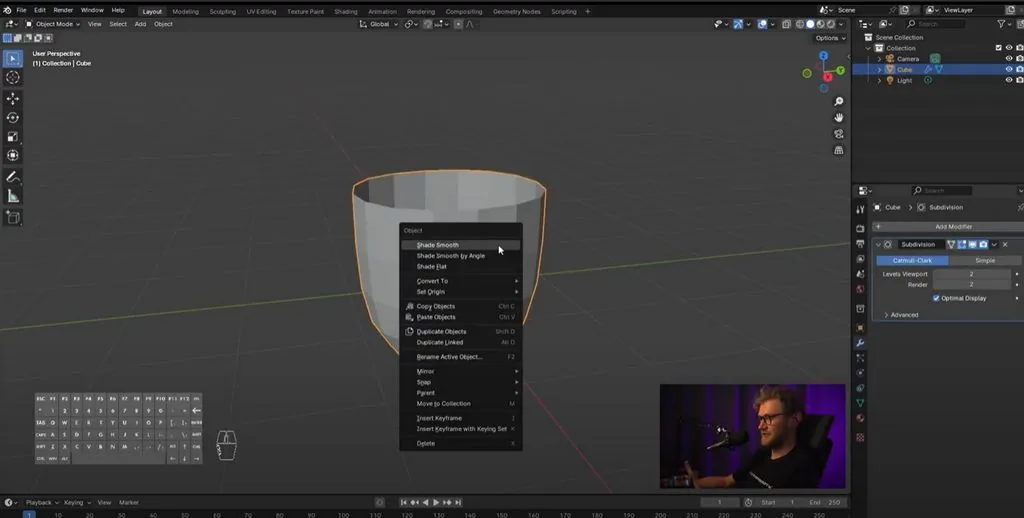
 Right-click on the object and select Shade Smooth so that the jug looks more rounded.
 We will also add another Solidify modifier, which will set the thickness. At the moment, the thickness can only be seen under a microscope, but let's increase it — increase the value in the Thickness column by holding down Shift so that it is neat.
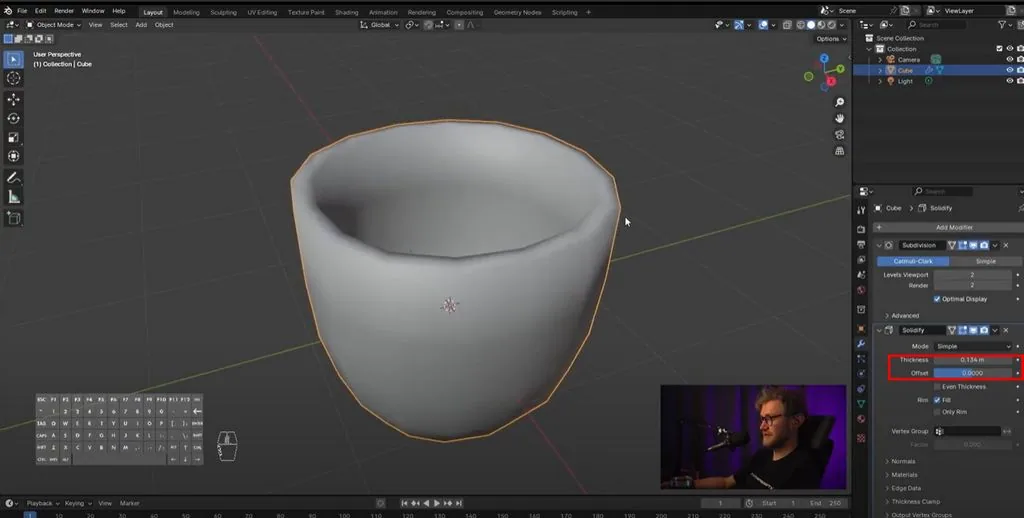 Change the Offset value to 0 and press Enter to apply the value. Now the jug has a visible thickness.
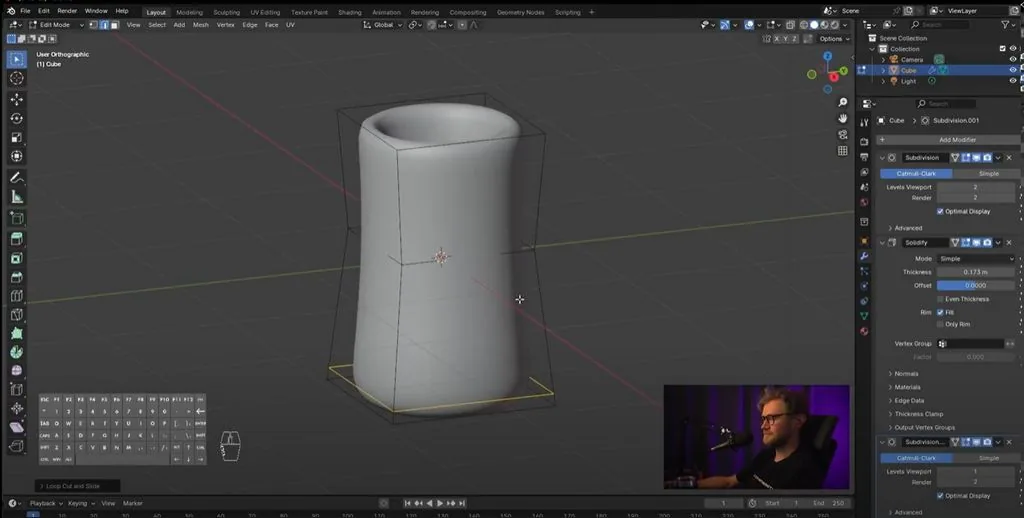
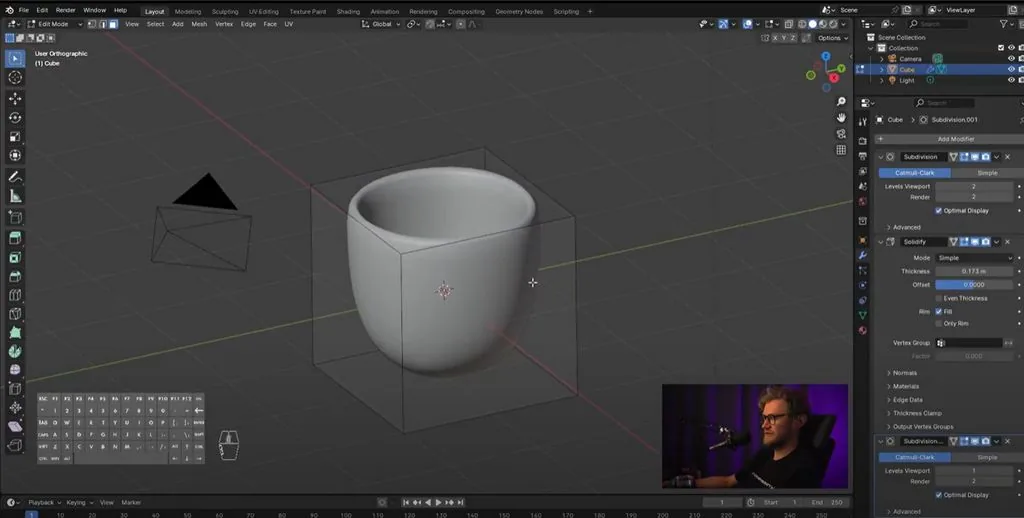 We will work with the jug, adding and removing loupes. Let's switch to isometric mode — it will be easier, and then to Edge mode.
With the Alt key, we select the edge — it will be selected completely. The S key will scale this entire edge from the center to the edges, thus you can change the radius of the Edge Loop.
We will work with the jug, adding and removing loupes. Let's switch to isometric mode — it will be easier, and then to Edge mode.
With the Alt key, we select the edge — it will be selected completely. The S key will scale this entire edge from the center to the edges, thus you can change the radius of the Edge Loop.
 With the Ctrl+R keys, add a Loop somewhere, it can also be reduced and enlarged with the S key.
 It turns out that you can edit a rounded shape with just a couple of polygons.
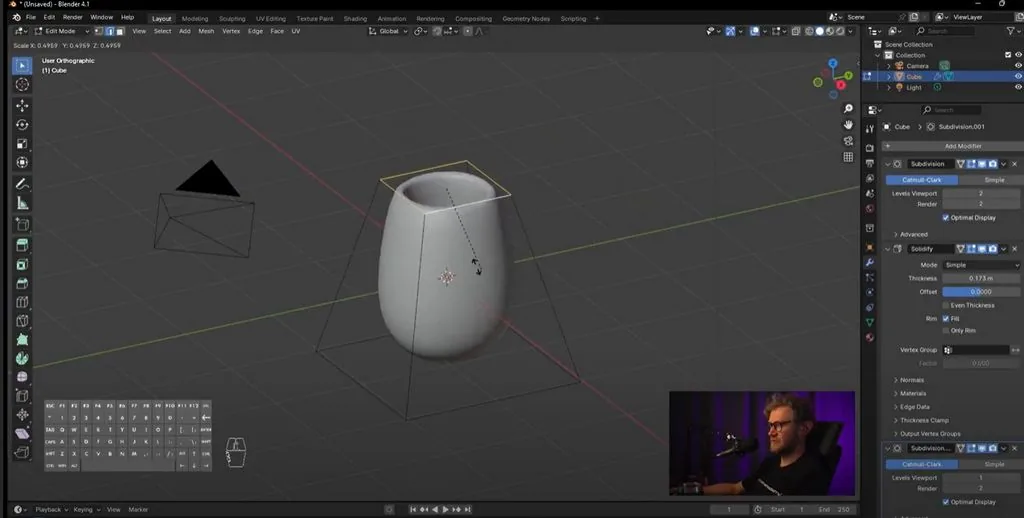
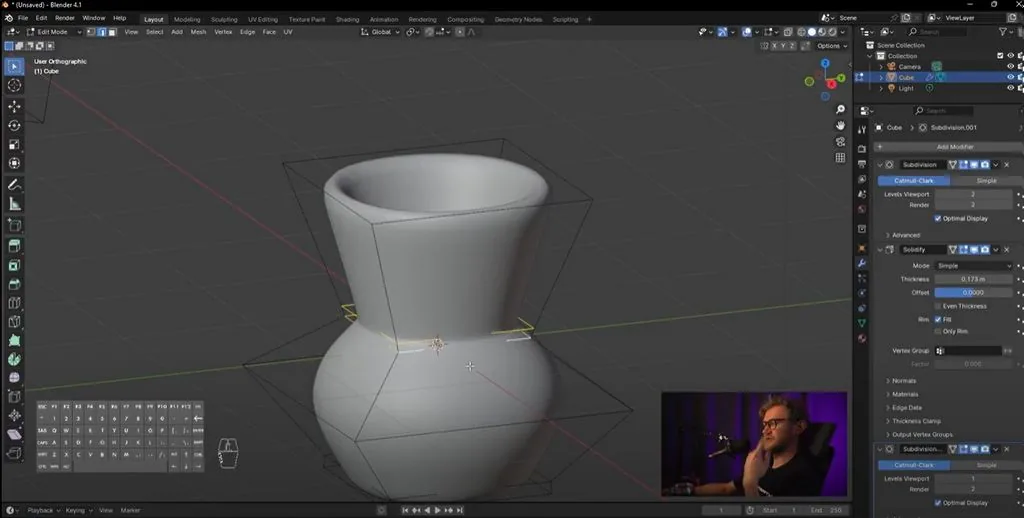
 Let's make the base of the jug a little smaller and a little stiffer so that it does not fall when it stands on the surface. With Shift, we select the four lower edges.
 And add another Edge Loop through Ctrl+R, but a little lower, so that the surface on which the jug stands is flatter.
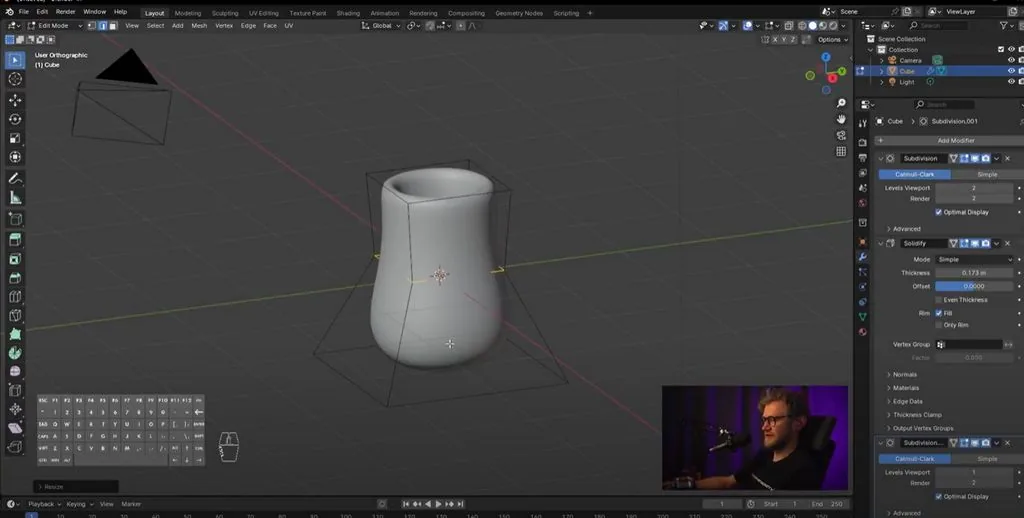
 With the Ctrl+R keys, add another Edge Loop and enlarge it to make the jug plumper.
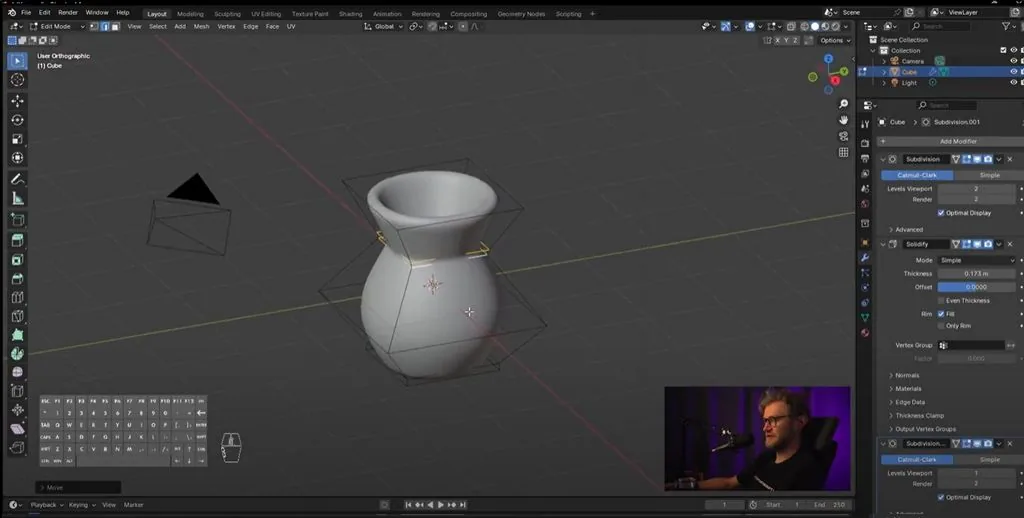
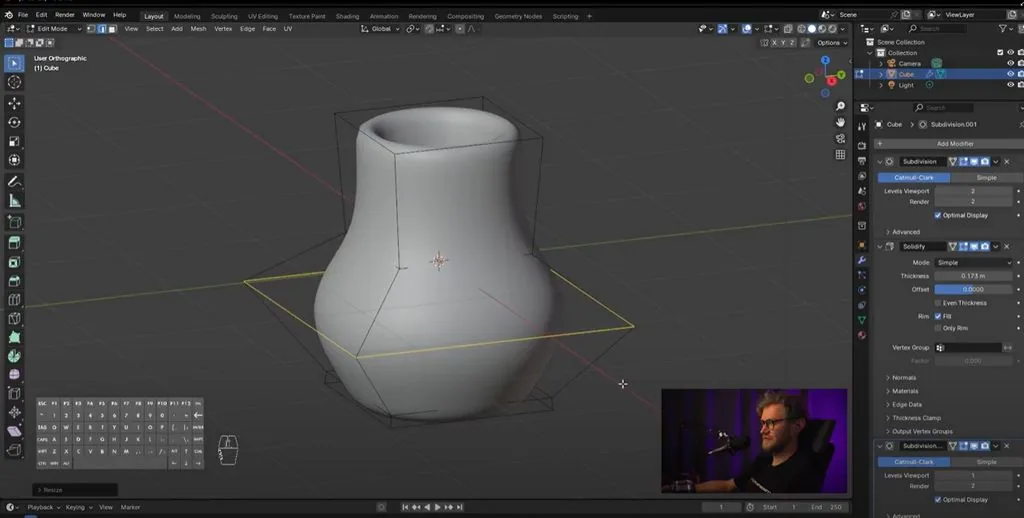 We will add another shape on top. Press E, but if we move points somewhere after clicking E, the shape will distort, so you need to move it by clicking on the Z key and stretch it up.
 We will slightly expand the shape of the jug's neck.
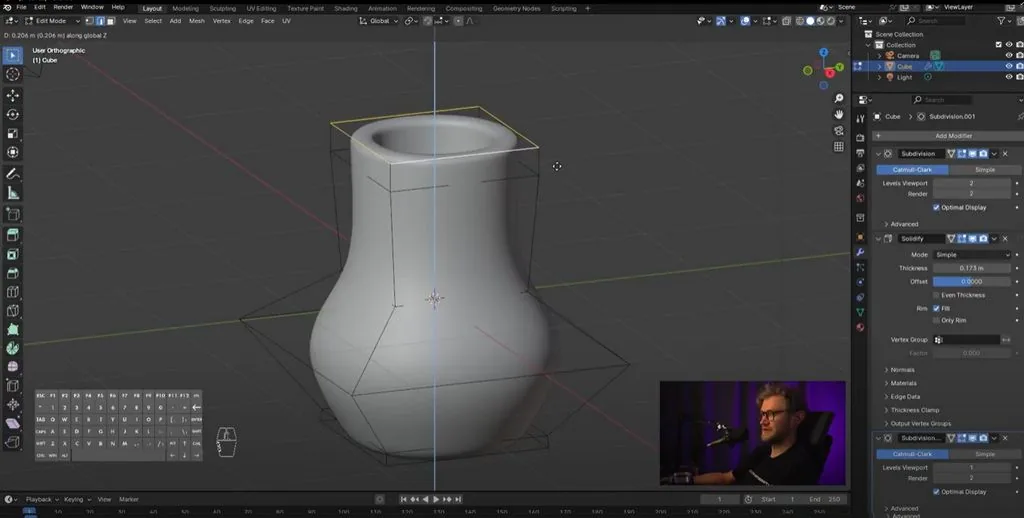
 You can also select other loops, also change their size or GZ, and move along the Z axis. If a couple of loops are located close to each other, they will give a more rigid boundary.
 Shift+Alt+click on the Edge will select another Edge Loop. And, accordingly, GZ is moving up and down. You can make these two loops a little higher.
This is the shape of the jug we got! In the second part of the lesson, we will make handles for the jug — go to the second part.
Shift+Alt+click on the Edge will select another Edge Loop. And, accordingly, GZ is moving up and down. You can make these two loops a little higher.
This is the shape of the jug we got! In the second part of the lesson, we will make handles for the jug — go to the second part.
Video lesson in Blender. Part 1. The basis of the jug
Related materials

Tutorial
Blender 3D lessons for beginners
December 27, 2024
Tutorial
How to draw a house
October 25, 2024

Tutorial
How to draw silhouettes: basics, tricks and step-by-step lesson
January 30, 2025

Tutorial
Zbrush lesson for beginners
December 23, 2024

Tutorial
Step-by-step lesson on VFX or visual effects
August 8, 2024

Article
What to start learning 3D modeling with
January 30, 2025

News
Как смоделировать концептуальный дизайн пещерной виверны в ZBrush и Blender
May 4, 2026