TutorialUpdated: June 22, 2026
Free lesson in Blender. Part 3. Jug label
In short
Free lesson and video lesson on modeling in Blender for beginner artists. Part 3. The label of the jug.
Skills Up School
Online school of drawing and CG
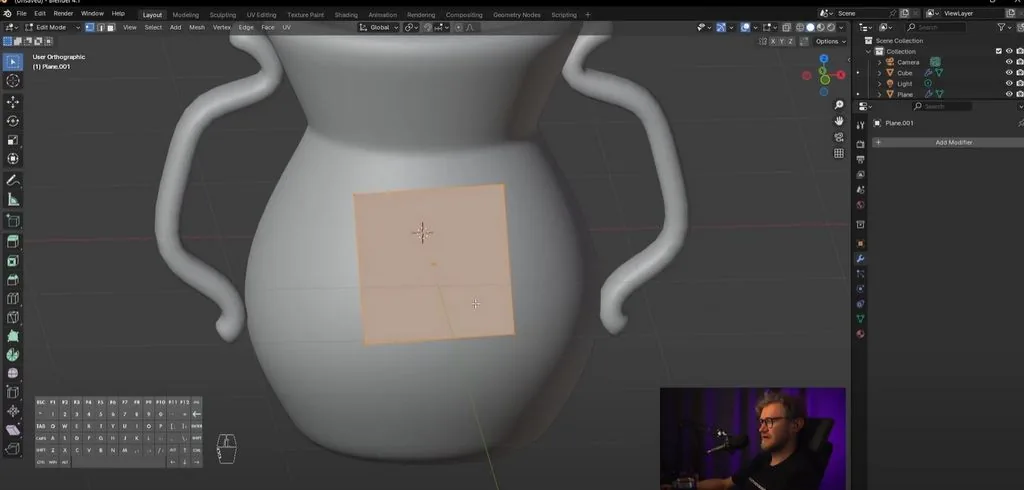
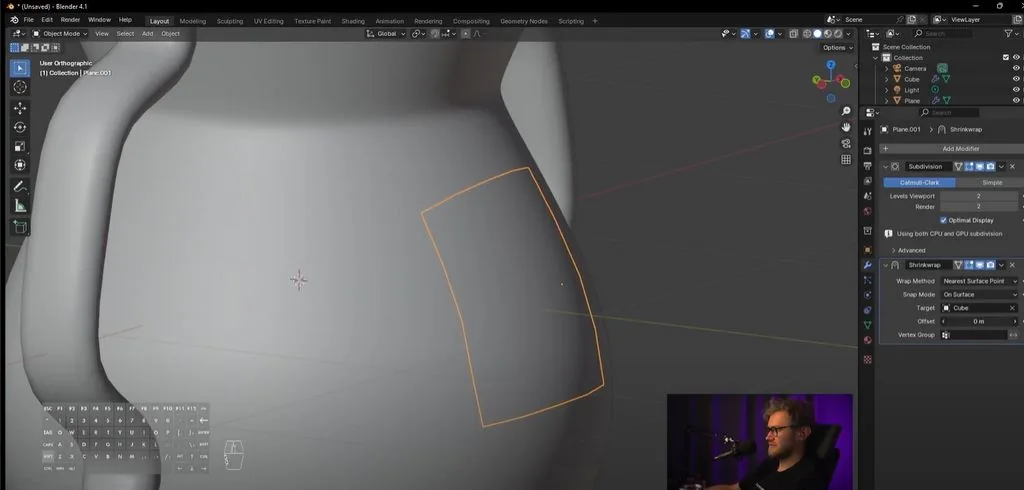
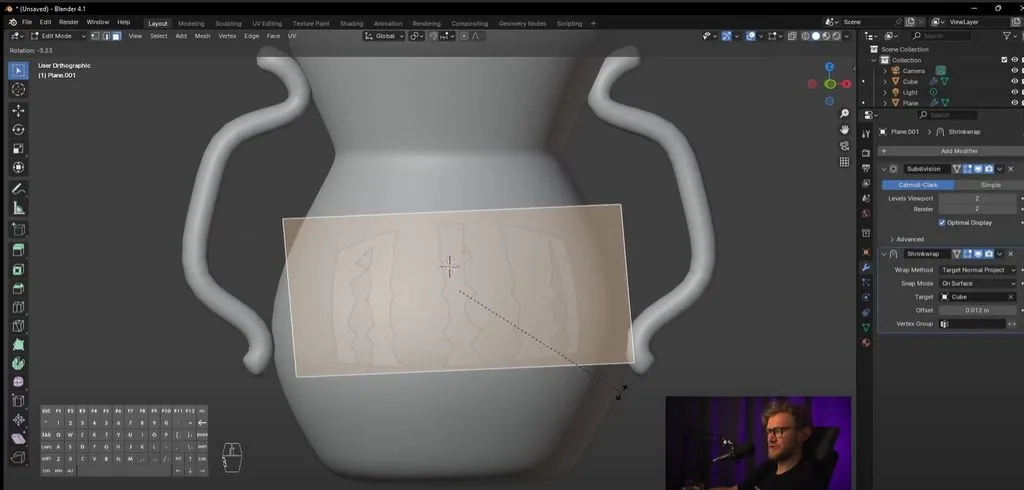
Let's add a label to the jug. We add a plane. Rotate it. It's not very important where exactly our plane will be located, the main thing is that it is located approximately where we will have the label, above the surface.
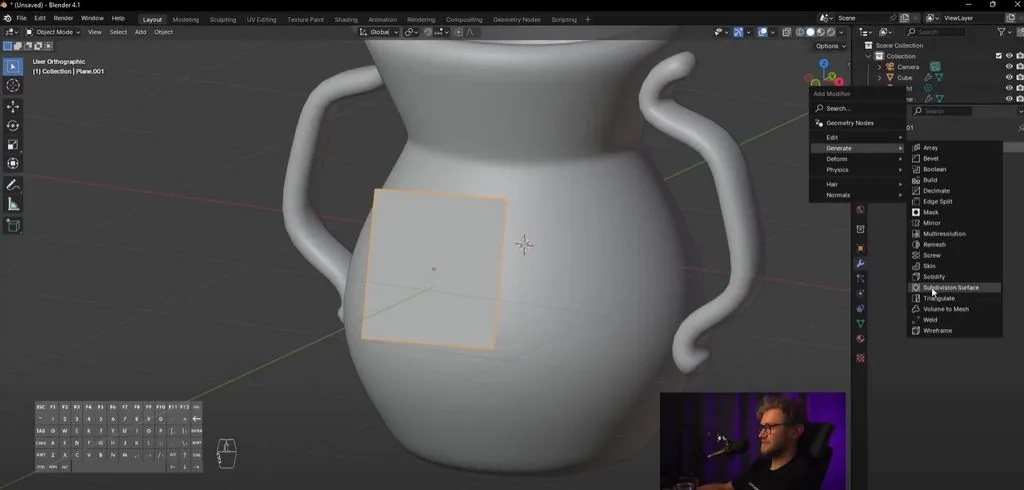
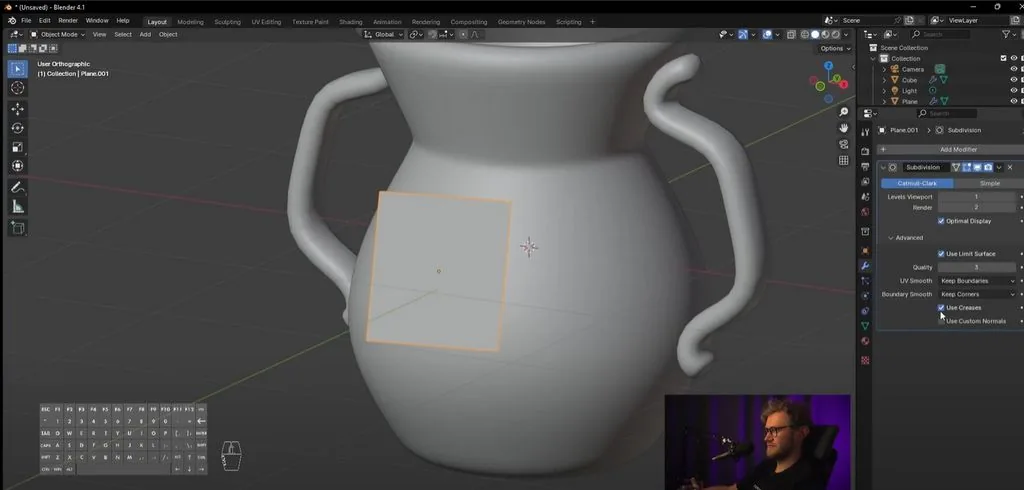
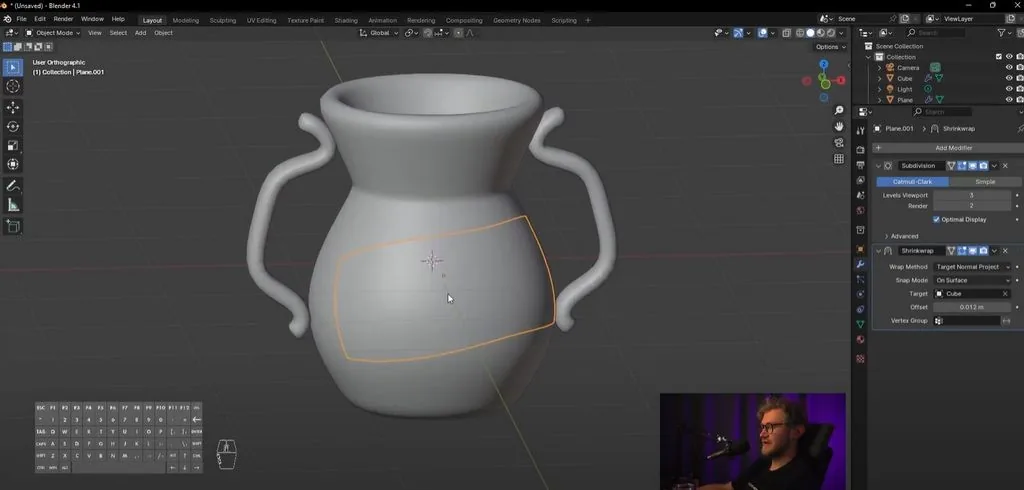
 Let's add a subdivision surface modifier and to make the sharper edges of the label, let's go to advanced and switch boundary smooth to keep corners so that it leaves us these corners and levels in the viewport. Let's add 2 levels of subdivisions.
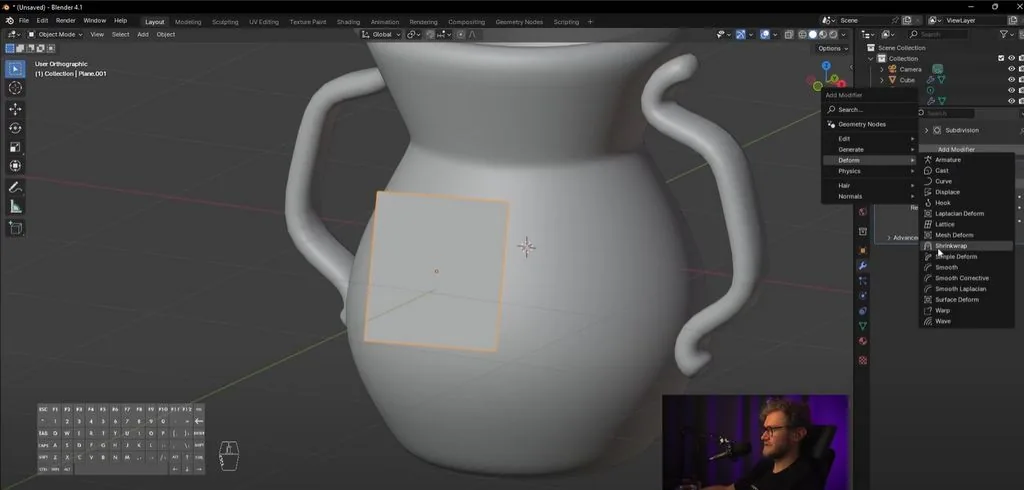
 Let's apply another modifier, not in generate, but in deform. It's called shrinkwrap. It has a red icon for now, because it hasn't been assigned to which object we will project this shape onto. Press the pipette, target, choose our object. You see that the plane we made has been projected onto our vessel. We can change the offset value to change the distance to which this geometry is projected. It's worth making it so that we have a small distance. Let's change the wrap method to target normal project, then it will project more evenly.
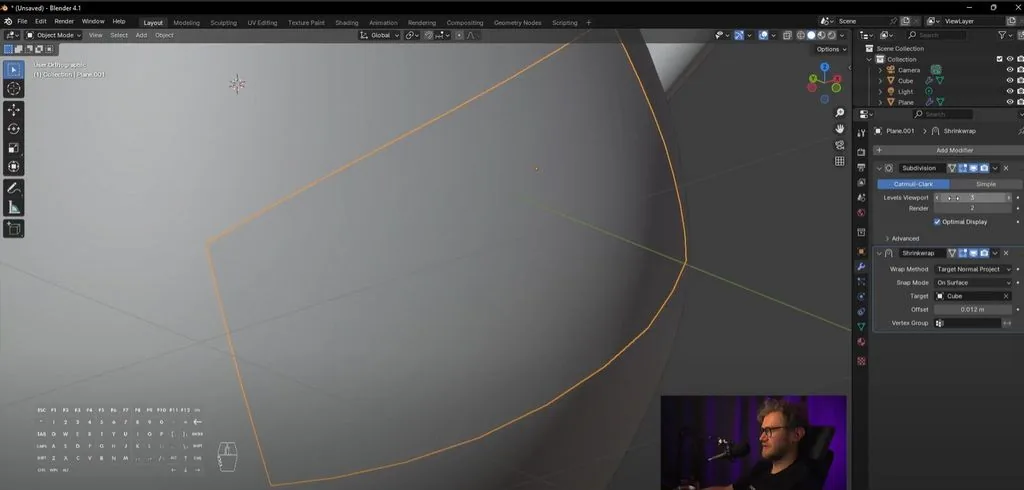
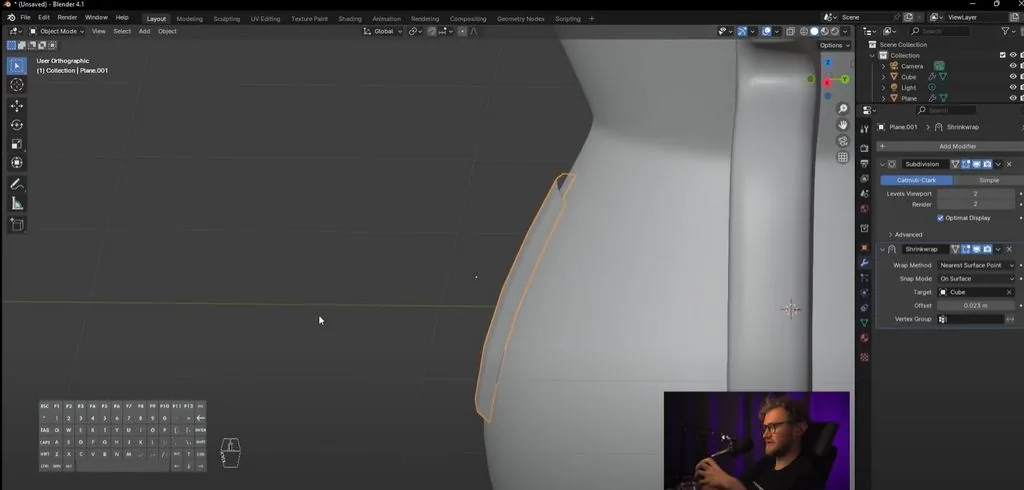 We will also make Shade Smooth and press Tab, we will see that our plane hangs in the air, but is projected onto our shape.
It will also be projected if we move this plane. It can be projected at a strong angle, specifically. Therefore, it should be placed as flat as possible.
We will also make Shade Smooth and press Tab, we will see that our plane hangs in the air, but is projected onto our shape.
It will also be projected if we move this plane. It can be projected at a strong angle, specifically. Therefore, it should be placed as flat as possible.
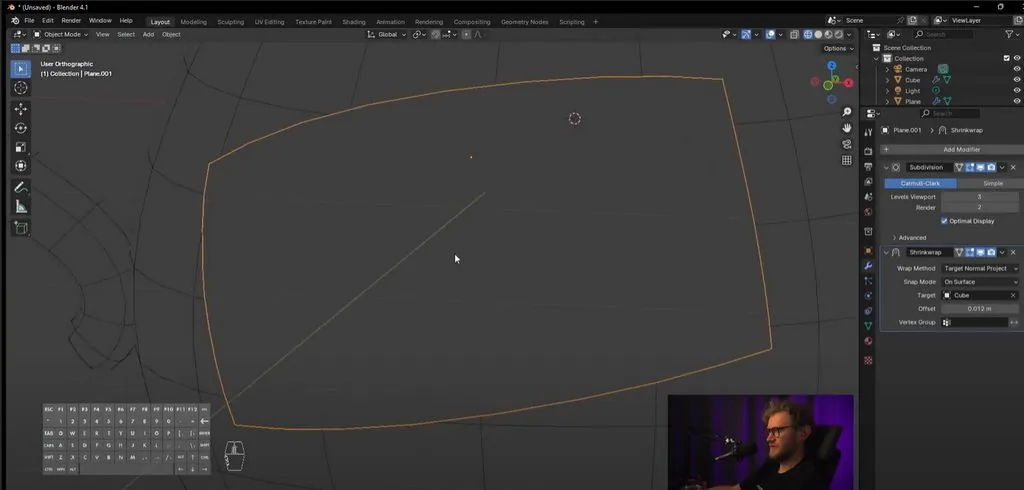
 Let's make it flatter so that the label is the right thickness.
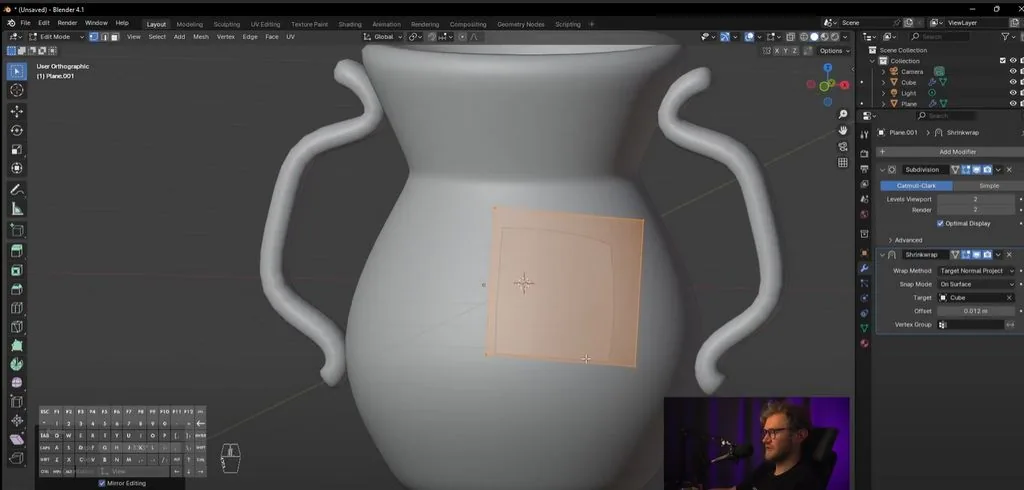
 Let's place the label in front. We use the rotation tool from different axes. It's okay if the label is uneven.
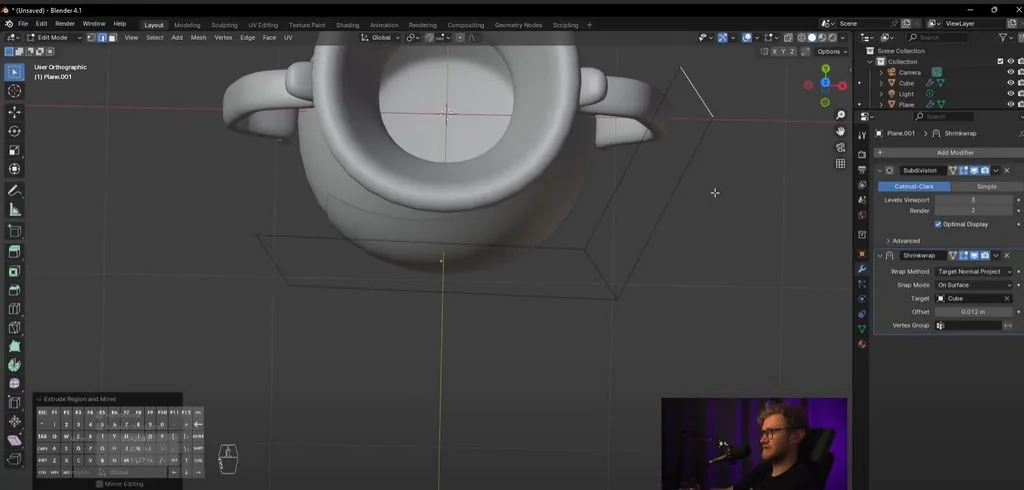
 You can see that the label partially falls into the shape of the jug. We press Z to look at the grid. We see where the polygons fall, it's worth increasing the Levels Viewport value. We go back to the grid and see that now everything is projected exactly.
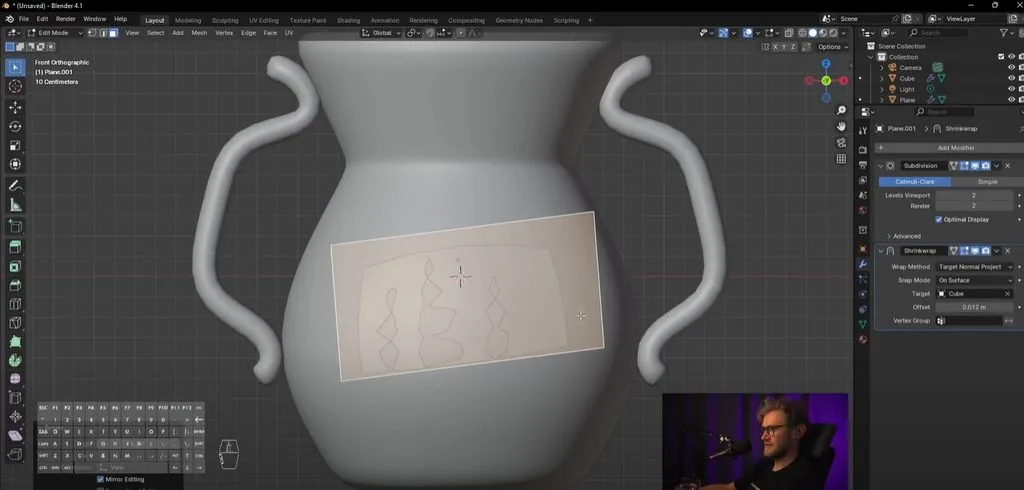
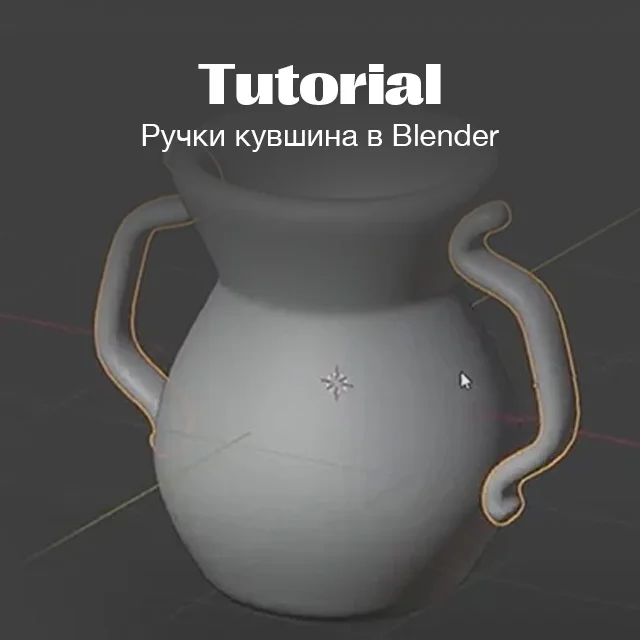
 If we want to make the label go around the object, we can add more surfaces through E and twist them around the jug. The shape may have artifacts, be careful.
We can play with how far our shape is from the geometry. Maybe add more loops so that some blocks are a little closer.
If we want to make the label go around the object, we can add more surfaces through E and twist them around the jug. The shape may have artifacts, be careful.
We can play with how far our shape is from the geometry. Maybe add more loops so that some blocks are a little closer.
 In the end, we should get a label like this!
Let's add a subdivision surface modifier and to make the sharper edges of the label, let's go to advanced and switch boundary smooth to keep corners so that it leaves us these corners and levels in the viewport. Let's add 2 levels of subdivisions.
Let's apply another modifier, not in generate, but in deform. It's called shrinkwrap. It has a red icon for now, because it hasn't been assigned to which object we will project this shape onto. Press the pipette, target, choose our object. You see that the plane we made has been projected onto our vessel. We can change the offset value to change the distance to which this geometry is projected. It's worth making it so that we have a small distance. Let's change the wrap method to target normal project, then it will project more evenly.
We will also make Shade Smooth and press Tab, we will see that our plane hangs in the air, but is projected onto our shape.
It will also be projected if we move this plane. It can be projected at a strong angle, specifically. Therefore, it should be placed as flat as possible.
Let's make it flatter so that the label is the right thickness.
Let's place the label in front. We use the rotation tool from different axes. It's okay if the label is uneven.
You can see that the label partially falls into the shape of the jug. We press Z to look at the grid. We see where the polygons fall, it's worth increasing the Levels Viewport value. We go back to the grid and see that now everything is projected exactly.
If we want to make the label go around the object, we can add more surfaces through E and twist them around the jug. The shape may have artifacts, be careful.
We can play with how far our shape is from the geometry. Maybe add more loops so that some blocks are a little closer.
In the end, we should get a label like this!
Video lesson in Blender. Part 3. Jug label
Related materials

Tutorial
Free lesson in Blender. Part 4. Materials and color of the jug
July 23, 2024

Article
Useful hotkeys in Photoshop
September 18, 2023

Tutorial
Free lesson in Blender. Part 1. The basis of the jug
July 23, 2024
Tutorial
Free lesson in Blender. Part 2. Handles
July 23, 2024

Tutorial
Blender 3D lessons for beginners
December 27, 2024

Article
References for the artist: hand references. Part 2
September 18, 2023
News
Взгляните на этот пасторальный пейзаж XIX века, созданный в Blender
June 22, 2026