TutorialUpdated: July 2, 2026
How to draw in Adobe Photoshop?
In short
Learn to draw in Photoshop: canvas setup, brush selection, working with layers. This lesson will help you create your first digital illustration step by step.
2D artist
Hello, friends! My name is Lera Fominykh, and I am an artist. Today I would like to share my thoughts and experience of working with one of the most famous drawing programs — Adobe Photoshop. I will tell you why I choose this program and how it helps in creativity. Together we will study its interface, but with a focus on drawing, of course.
Photoshop is an incredibly powerful tool for working with images. Professionals in various fields, such as graphic design, digital art, photography, and even web design, use it with pleasure, Google says.
And I will say that Photoshop is like a magic wand in the hands of an artist! I especially appreciate the ability to customize the program window to my liking, to create brushes as quickly and clearly as possible, the presence of masks, multiple layer styles, and packs of brushes, both those loaded into the program and those available on marketplaces. And most of the tutorials on the Internet are drawn in Photoshop (in English) — this is also an important point. I actively use the Photoshop Cloud: my laptop has little memory, so storing my pictures in the cloud relieves the load on the computer.
Now let's get acquainted with the program interface, and then let's draw!
 So, you have installed the program. I have a licensed version of 2024 — I will show everything step by step using its example.
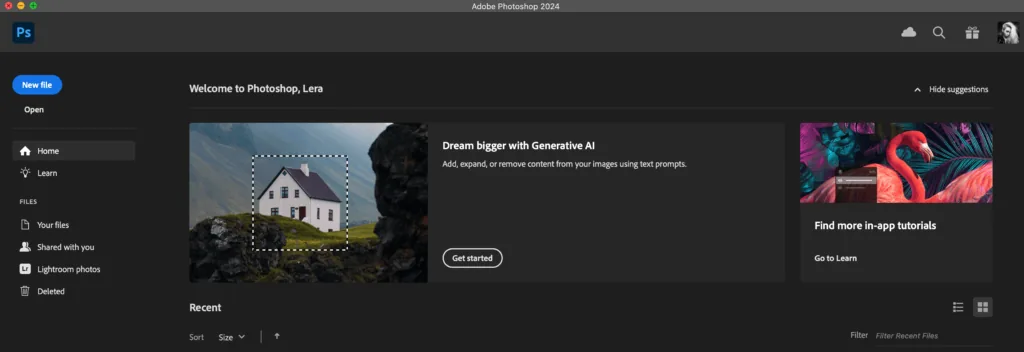
In the Home tab, you can see a gallery of your recent works. In the Your files tab, you can see pictures that you save to the Cloud.
Let's create a file!
So, you have installed the program. I have a licensed version of 2024 — I will show everything step by step using its example.
In the Home tab, you can see a gallery of your recent works. In the Your files tab, you can see pictures that you save to the Cloud.
Let's create a file!
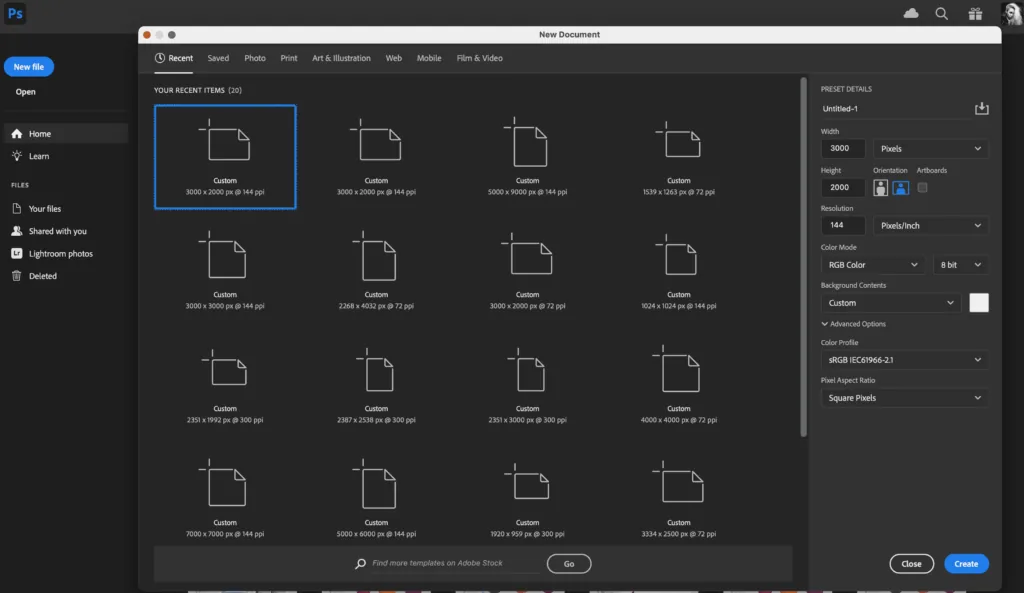 You can choose a ready-made size and resolution — here the history of recent templates will be stored.
 Done! We have a canvas!
 You can adjust the display of the necessary windows in the Window panel:
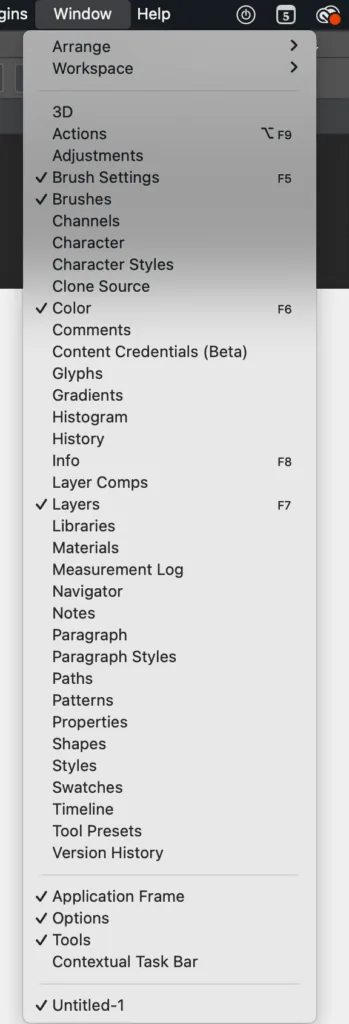 I have the windows enabled: Brush Settings (brush settings), Brushes (brushes), Color (color), Layers (layers). You can move the location of the windows as you like.
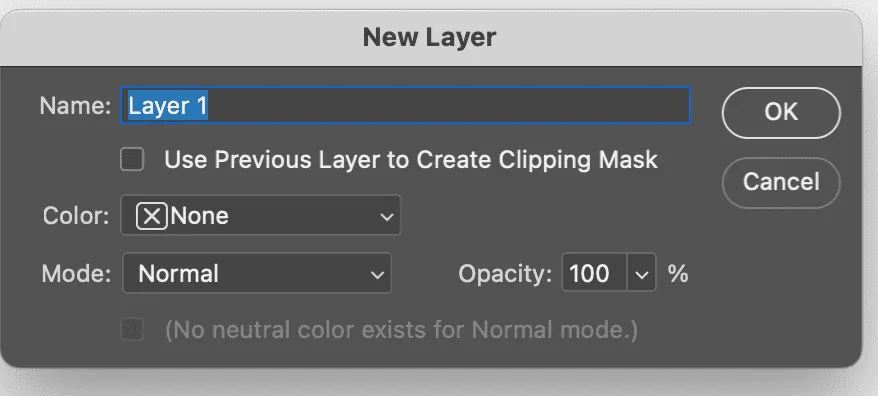
 We don't draw on it, but we create a new layer — for this we use hotkey control+shift+N.
We open a window like this, where we can give the layer a name, change the mode of overlay and transparency of the layer if required:
We don't draw on it, but we create a new layer — for this we use hotkey control+shift+N.
We open a window like this, where we can give the layer a name, change the mode of overlay and transparency of the layer if required:
 Done, we have a layer to draw on, hurray!
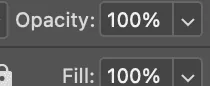
 Okay, what's here? If you need to make a texture more transparent that lies on a separate layer, adjust the Opacity or Fill parameter.
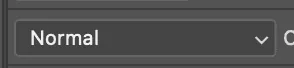
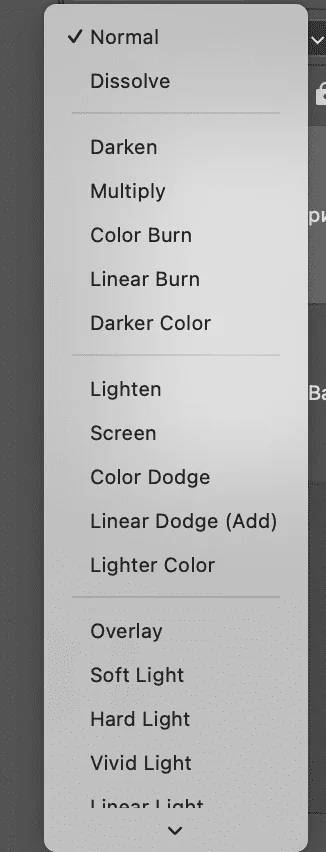
 Here are different modes of overlay for the layer. The layer is automatically created in the overlay mode, we will dwell on the most frequently used modes in more detail later.
 You can rename layers by clicking on the desired layer twice. For convenient organization, I highly recommend grouping layers and signing them. To select multiple layers, you need to select the first layer you need, hold down Shift, select the last of the layers you need and use the hotkey control+G.
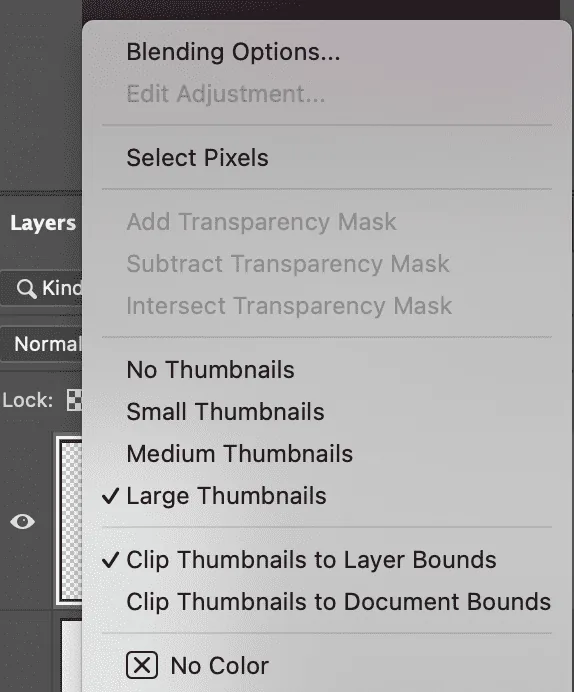
And one more important thing! I recommend setting the layer display mode to the parameters from the picture below.
To get to this menu, right-click on the canvas. Select the size of the layer icons: I have chosen the largest (Large), but medium (Medium) will do. Put a checkmark next to Clip Thumbnails to Layer Bounds — with this setting, we will see not the whole canvas in the layer icon, but only what is drawn directly on the layer itself.
You can rename layers by clicking on the desired layer twice. For convenient organization, I highly recommend grouping layers and signing them. To select multiple layers, you need to select the first layer you need, hold down Shift, select the last of the layers you need and use the hotkey control+G.
And one more important thing! I recommend setting the layer display mode to the parameters from the picture below.
To get to this menu, right-click on the canvas. Select the size of the layer icons: I have chosen the largest (Large), but medium (Medium) will do. Put a checkmark next to Clip Thumbnails to Layer Bounds — with this setting, we will see not the whole canvas in the layer icon, but only what is drawn directly on the layer itself.
You have the program on your device. What to do and where to start?
So, you have installed the program. I have a licensed version of 2024 — I will show everything step by step using its example.
In the Home tab, you can see a gallery of your recent works. In the Your files tab, you can see pictures that you save to the Cloud.
Let's create a file!
You can choose a ready-made size and resolution — here the history of recent templates will be stored.
Parameters
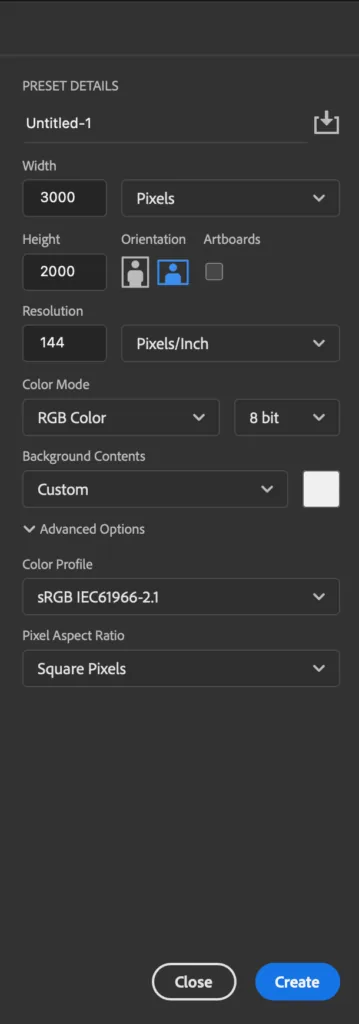
…or create a new canvas. Choose the size in pixels that we need: usually the minimum canvas size that allows you to draw comfortably is 2000x2000 pixels. The next parameter is resolution (Resolution). If you are not going to print the picture, then 72dpi will be enough, but for printing it is better to use 300dpi. Next — Color mode: set RGB. And the last but not least — Color profile: here we choose sRGB.
Done! We have a canvas!
Can we draw now?
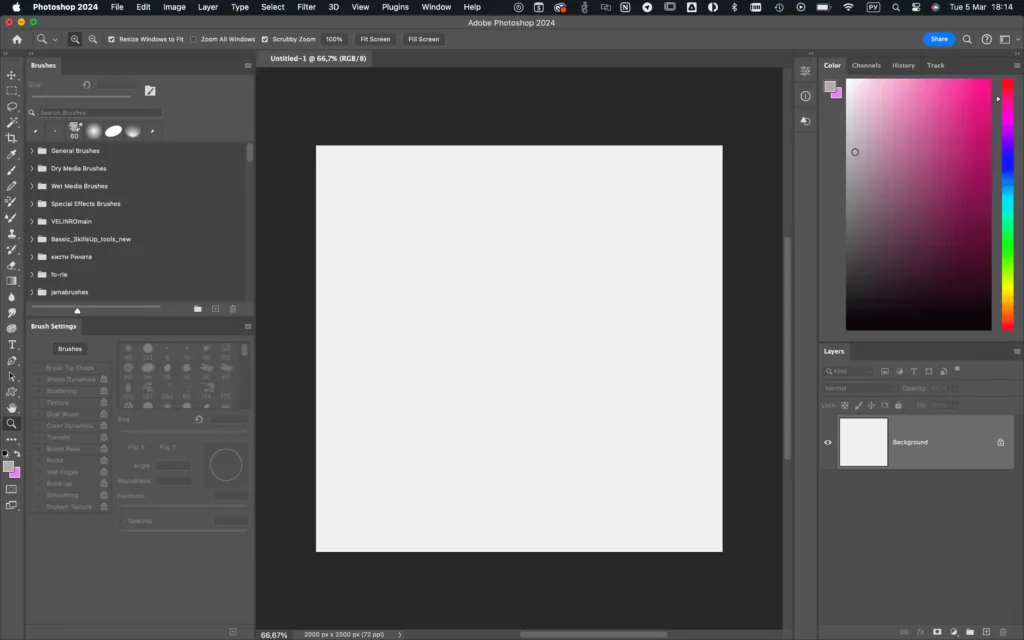
So, we have created a working file. My Photoshop window at this stage looks like this:
You can adjust the display of the necessary windows in the Window panel:
I have the windows enabled: Brush Settings (brush settings), Brushes (brushes), Color (color), Layers (layers). You can move the location of the windows as you like.
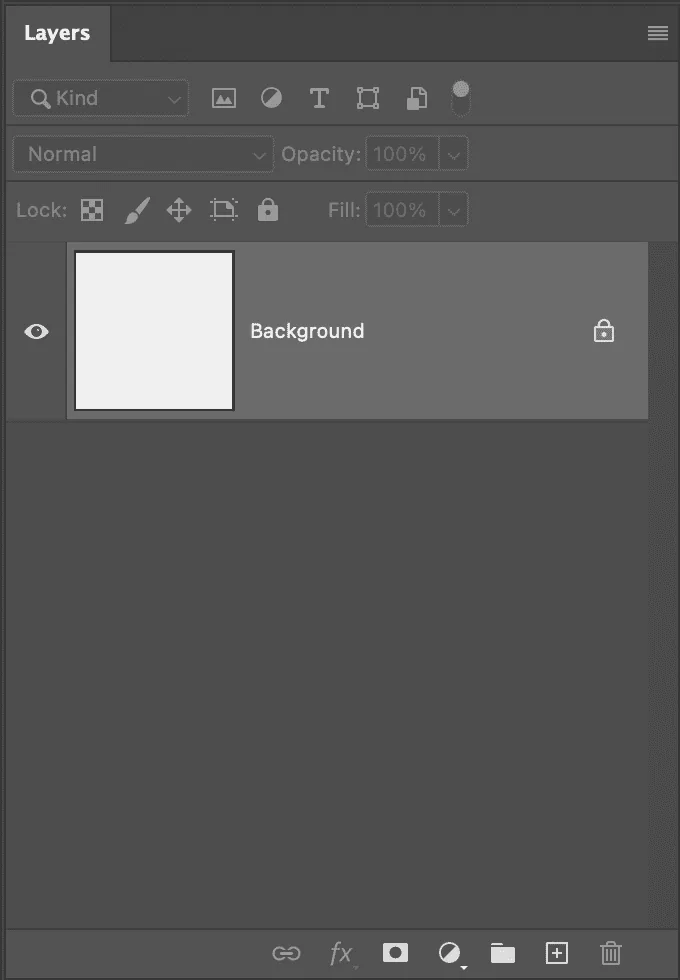
Now let's look at the block where our layers are
When creating a file in Photoshop, a background layer (Background) is automatically created. This layer is locked and it is already painted white.
We don't draw on it, but we create a new layer — for this we use hotkey control+shift+N.
We open a window like this, where we can give the layer a name, change the mode of overlay and transparency of the layer if required:
Done, we have a layer to draw on, hurray!
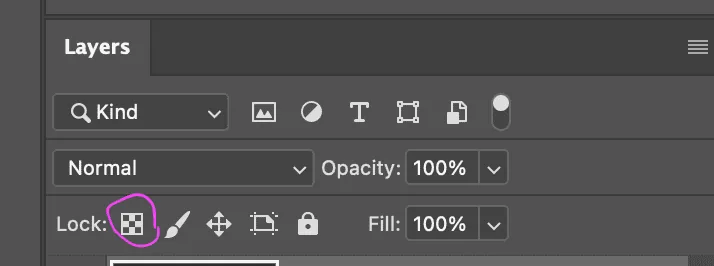
Let's figure it out further. Where to click and why?
Look, by clicking on this icon, we can lock free pixels. What does it give? By locking the layer, we can draw only where something is already drawn on it, that is, as if we cut out a stencil, we will not be able to go beyond its рамки.
Okay, what's here? If you need to make a texture more transparent that lies on a separate layer, adjust the Opacity or Fill parameter.
Here are different modes of overlay for the layer. The layer is automatically created in the overlay mode, we will dwell on the most frequently used modes in more detail later.
You can rename layers by clicking on the desired layer twice. For convenient organization, I highly recommend grouping layers and signing them. To select multiple layers, you need to select the first layer you need, hold down Shift, select the last of the layers you need and use the hotkey control+G.
And one more important thing! I recommend setting the layer display mode to the parameters from the picture below.
To get to this menu, right-click on the canvas. Select the size of the layer icons: I have chosen the largest (Large), but medium (Medium) will do. Put a checkmark next to Clip Thumbnails to Layer Bounds — with this setting, we will see not the whole canvas in the layer icon, but only what is drawn directly on the layer itself.
Masks
Related courses
All courses
from 4 000 ₽
-80%
Photoshop for the artist
20 000 ₽4 000 ₽
Learn more

Free
Free course "Diving into the magic of 2D artists"
Enroll

from 3 400 ₽
-80%
Game interface design
17 000 ₽3 400 ₽
Learn more
Let's talk about masks — this is what their icon looks like:
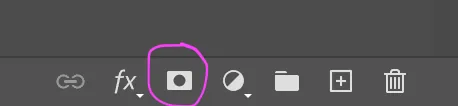 This is a masking mask, by clicking on it, the layer will look like this:
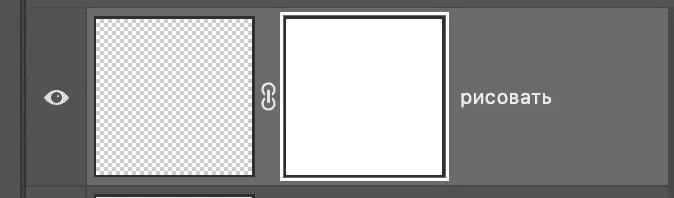 We see that the mask is not transparent, it is painted white. We can draw on this mask with black, white and gray tones — it has an eraser effect. Black erases, white returns. This mask is convenient when we are not completely sure about removing any objects, or when we need to limit the drawing area.
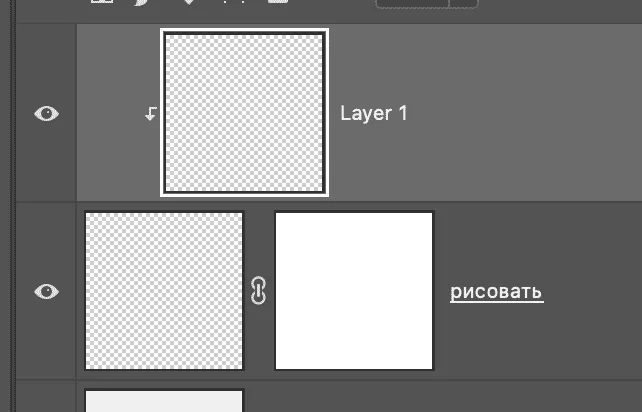
The next mask is an clipping mask. This is an ordinary layer that we can attach to the layer below, then our layer will become a clipping mask.
Why is it needed? For example, you need to save the beautiful silhouette of the object you have already drawn. And in order not to go beyond the boundaries of this silhouette, you can attach a new layer with such a mask. To do this, just hold down Alt and hover the stylus over the junction of the two layers — done!
We see that the mask is not transparent, it is painted white. We can draw on this mask with black, white and gray tones — it has an eraser effect. Black erases, white returns. This mask is convenient when we are not completely sure about removing any objects, or when we need to limit the drawing area.
The next mask is an clipping mask. This is an ordinary layer that we can attach to the layer below, then our layer will become a clipping mask.
Why is it needed? For example, you need to save the beautiful silhouette of the object you have already drawn. And in order not to go beyond the boundaries of this silhouette, you can attach a new layer with such a mask. To do this, just hold down Alt and hover the stylus over the junction of the two layers — done!
 And the last type of masks I use is quick masks. Hotkey for it — Q. When you press the hotkey, the layer turns red — do not be afraid, this is not a robot uprising!
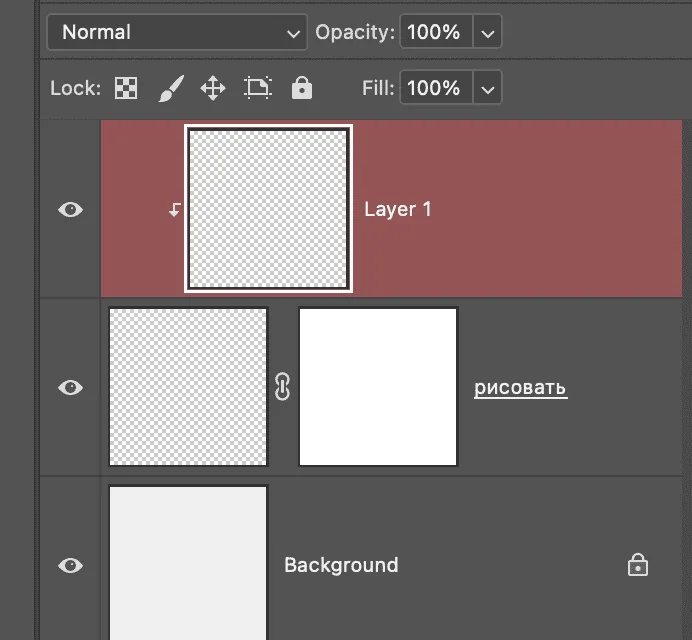 Now we can draw in black and white (black will erase, white will return).
To exit this mode, you need to press the hotkey Q again — done, we have a selection area, and everything except the areas we painted on the mask is currently selected. If we need to invert the selection, we have the hotkey Control+Shift+I.
The hotkey to deselect — Control+D.
Now we can draw in black and white (black will erase, white will return).
To exit this mode, you need to press the hotkey Q again — done, we have a selection area, and everything except the areas we painted on the mask is currently selected. If we need to invert the selection, we have the hotkey Control+Shift+I.
The hotkey to deselect — Control+D.
 In the menu bar, we see several parameters. We can choose the brush print we need here. Also, the brush, like the layers, has overlay mode parameters — I use this parameter when finalizing pictures by drawing in one layer.
And the opacity parameter — Opacity. I change it often if I need to achieve smooth transitions — it is convenient to do it with numbers on the keyboard, where 1 is 10%, 0 is 100%.
How to install brushes? Files with brushes for Photoshop have the extension abr, and to install them, just open the necessary brushes in the program.
Done, brushes are there!
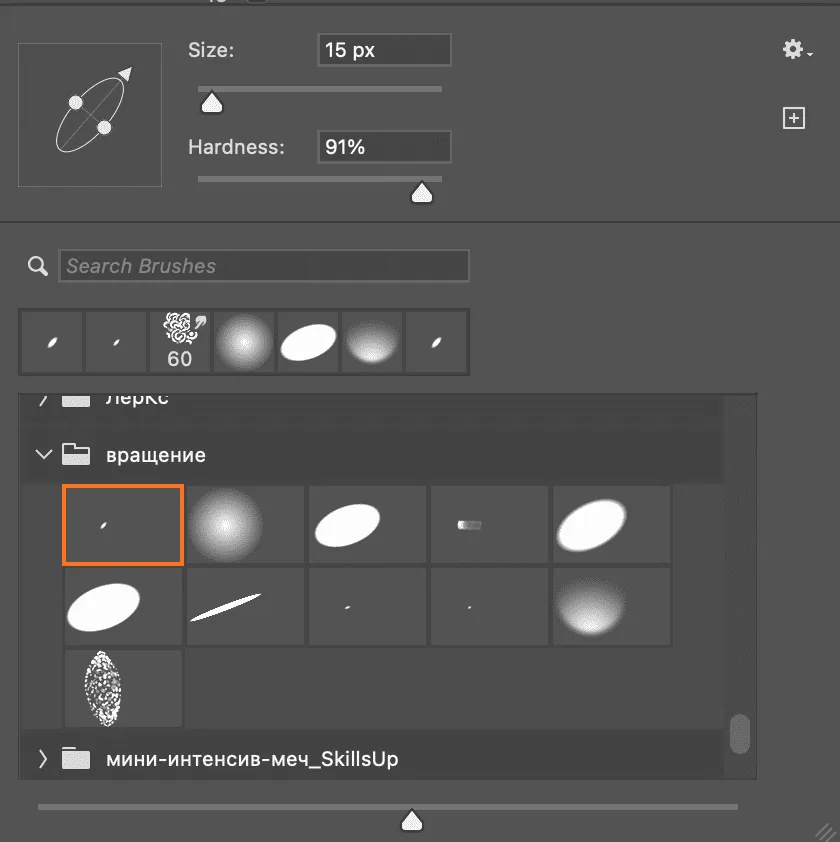
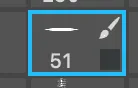
This is what my brush window looks like (they may differ). Here you can twist the direction of the brush, change the size (but I recommend changing the size with the help of hotkeys, where [ — less, ] — more), and change the brush hardness parameter. And, of course, choose a ready-made brush:
In the menu bar, we see several parameters. We can choose the brush print we need here. Also, the brush, like the layers, has overlay mode parameters — I use this parameter when finalizing pictures by drawing in one layer.
And the opacity parameter — Opacity. I change it often if I need to achieve smooth transitions — it is convenient to do it with numbers on the keyboard, where 1 is 10%, 0 is 100%.
How to install brushes? Files with brushes for Photoshop have the extension abr, and to install them, just open the necessary brushes in the program.
Done, brushes are there!
This is what my brush window looks like (they may differ). Here you can twist the direction of the brush, change the size (but I recommend changing the size with the help of hotkeys, where [ — less, ] — more), and change the brush hardness parameter. And, of course, choose a ready-made brush:
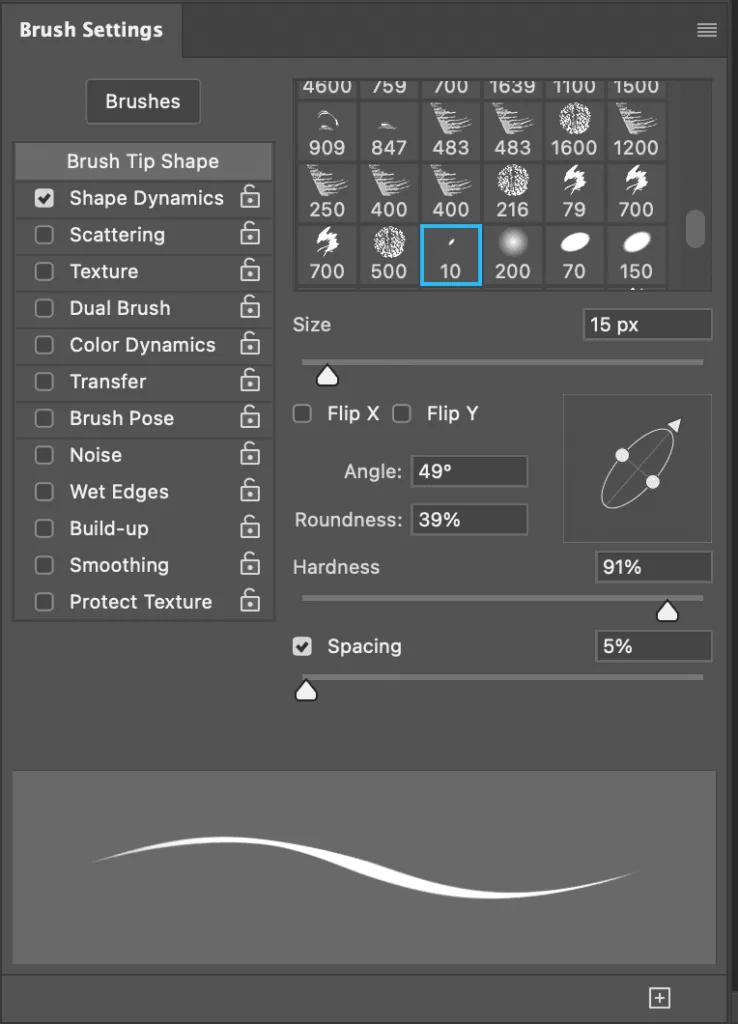
 Now let's look at another window that I always have open. This is the Brush Settings window — brush settings.
The very first tab is Brush Tip Shape — here you can choose a brush print from your library. There is a window with the shape of the brush — here you can change the direction of the brush (arrow) and flatten or развернуть the brush (knots).
Hardness — hardness parameter, allows us to change the softness of the brush.
Spacing — a parameter that helps to change the distance between brush prints. If you maximize this parameter, you can see that any brush is one repeating shape.
Now let's look at another window that I always have open. This is the Brush Settings window — brush settings.
The very first tab is Brush Tip Shape — here you can choose a brush print from your library. There is a window with the shape of the brush — here you can change the direction of the brush (arrow) and flatten or развернуть the brush (knots).
Hardness — hardness parameter, allows us to change the softness of the brush.
Spacing — a parameter that helps to change the distance between brush prints. If you maximize this parameter, you can see that any brush is one repeating shape.
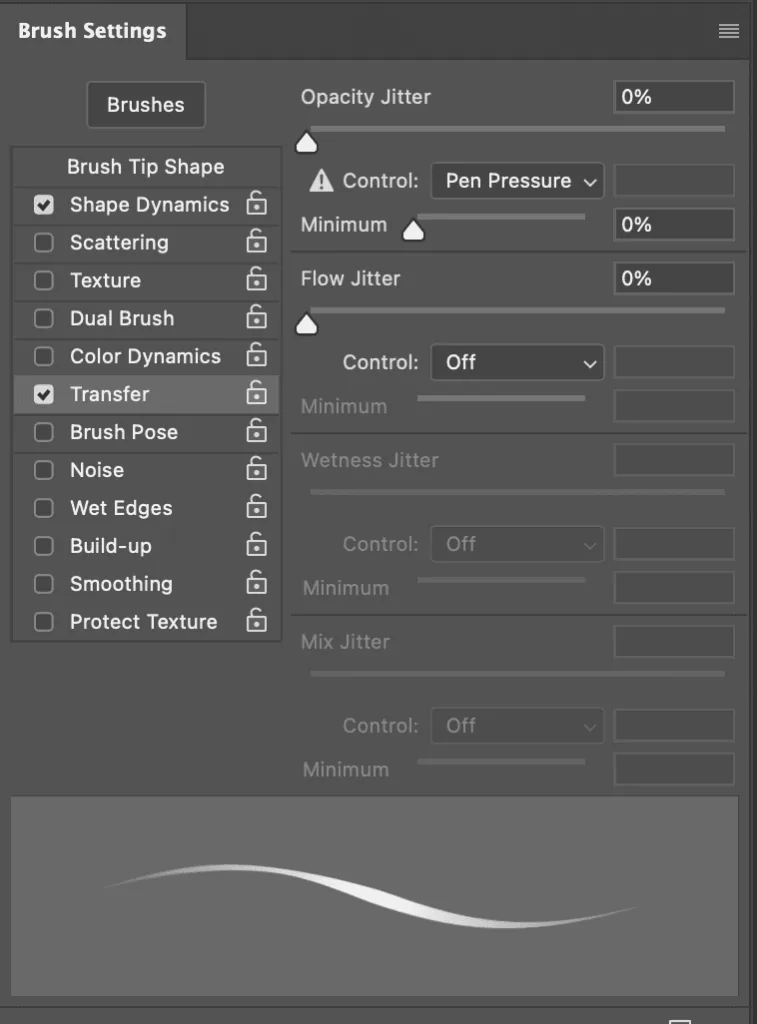
 Another important parameter is transfer. We can adjust the sensitivity of our brush to pressure.
 Color Dynamics — a parameter that includes color dynamics for the brush.
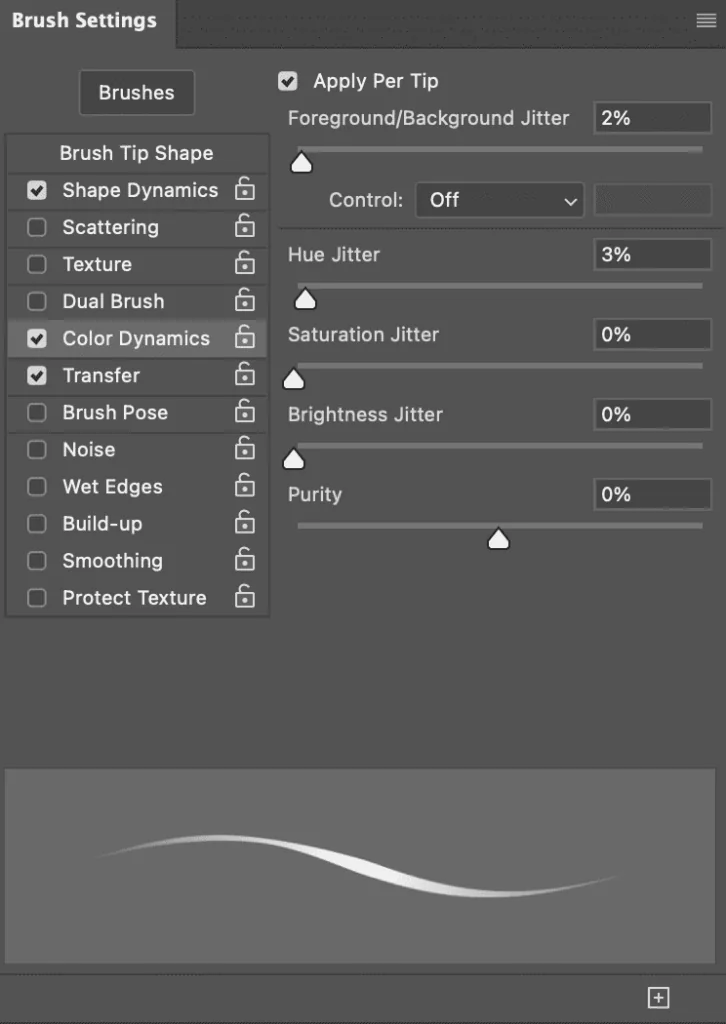 With the help of this window, you can create several different brushes from one brush print. I recommend pressing different parameters in this window during a closer acquaintance and see how the brush behaves.
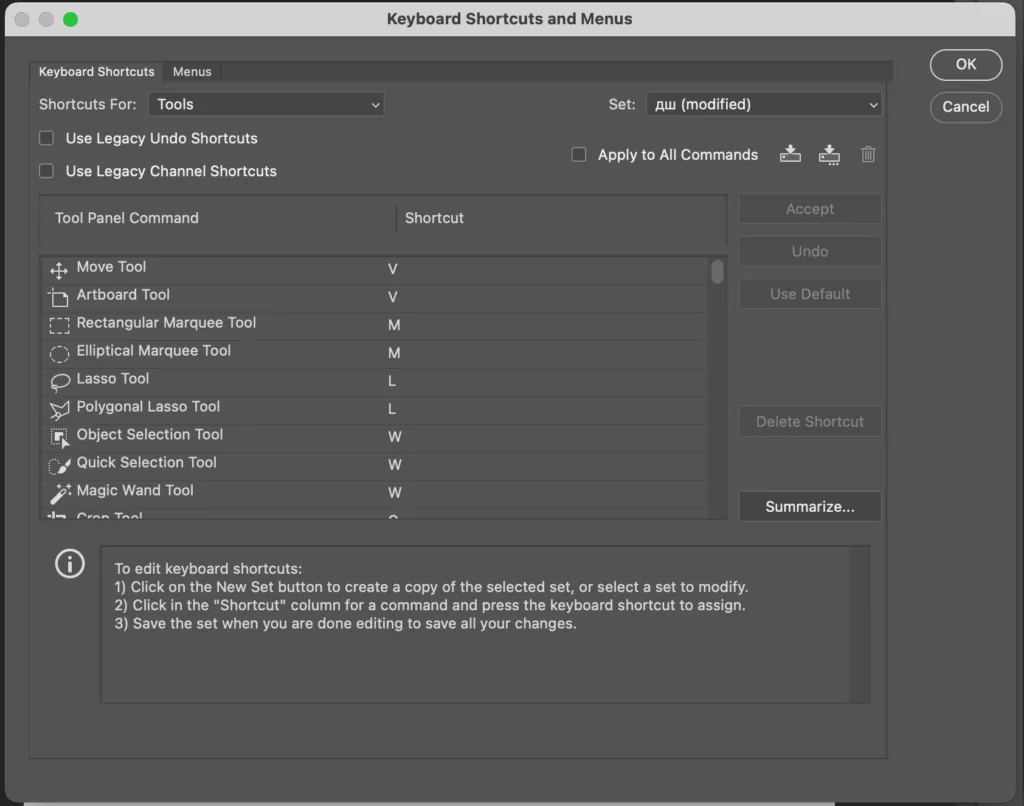
 The hotkey window opens, and here we need to choose Shortcuts For: Tools. Next, we choose the finger tool and put the hotkey S on it, press Accept and — done!
 The finger has its own parameters, let's look at a few of them: the first parameter is Strength, or the finger intensity parameter (I usually do not set it more than 20% so that the transitions are smooth), and the last parameter is Sample All Layers. If there is a checkmark next to it, then the tool will be active on the entire canvas, if there is no checkmark, then the finger will work only on the layer you are currently on.
When you are on a layer with any mode of overlay except Normal, you need to turn off the Sample All Layers checkmark.
The finger has its own parameters, let's look at a few of them: the first parameter is Strength, or the finger intensity parameter (I usually do not set it more than 20% so that the transitions are smooth), and the last parameter is Sample All Layers. If there is a checkmark next to it, then the tool will be active on the entire canvas, if there is no checkmark, then the finger will work only on the layer you are currently on.
When you are on a layer with any mode of overlay except Normal, you need to turn off the Sample All Layers checkmark.

 The magic wand selects one color and tone on the picture if we click on the area we need.
We can adjust the sensitivity to color/tone — the Tolerance parameter. Here we also see the already familiar Sample All Layers parameter — it works the same as with the finger.
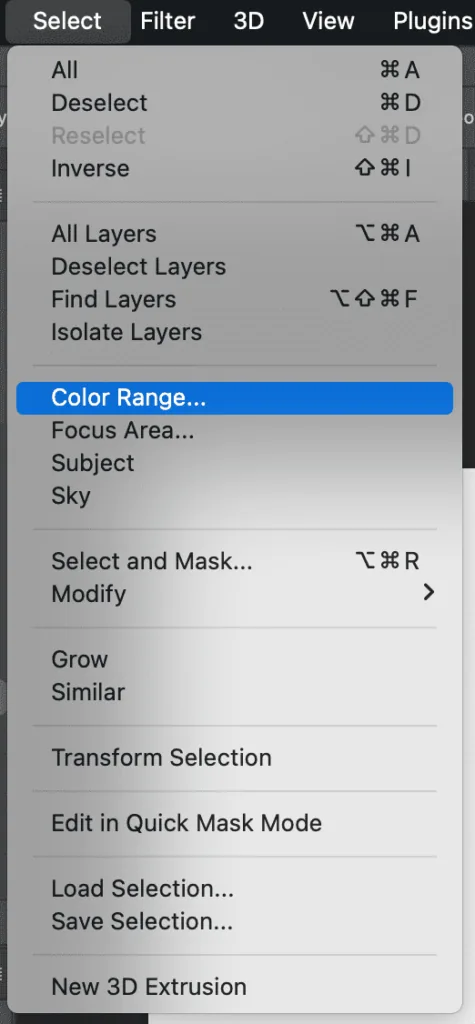
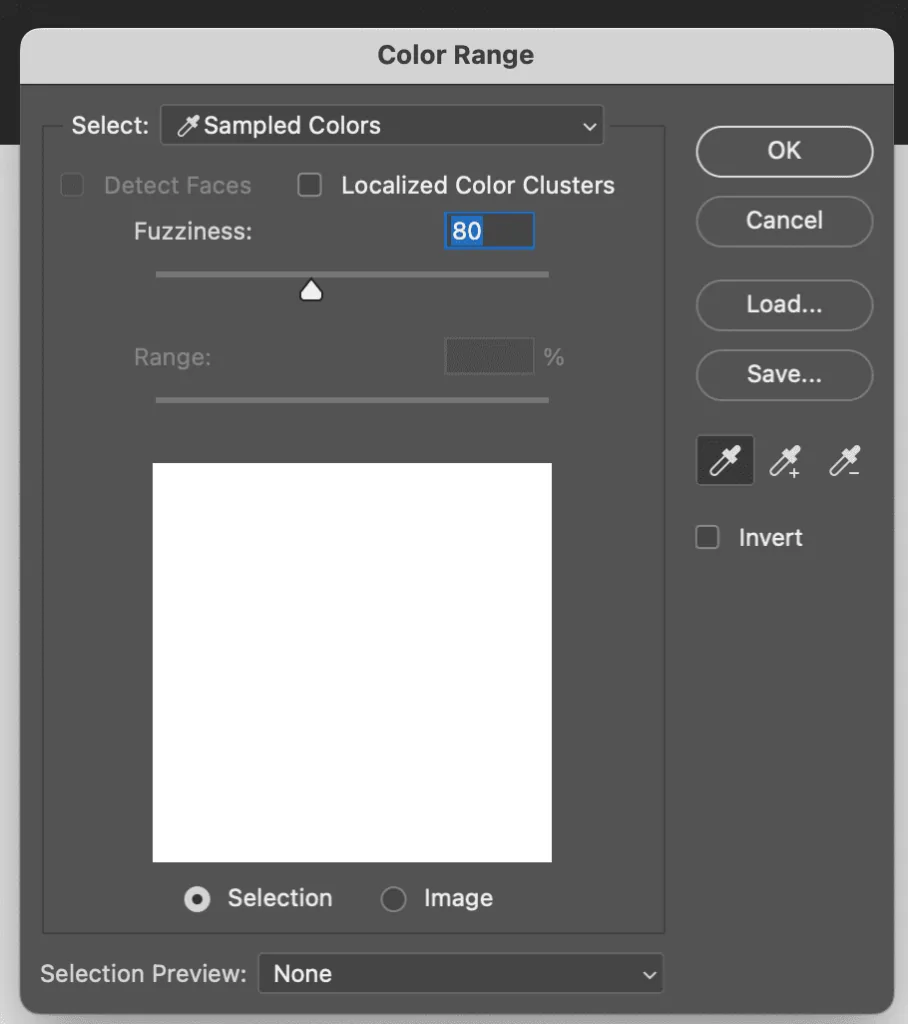
And if we need to select all the red color on the picture, and our objects are far apart, do we need to click with the magic wand each time? No, not necessarily. We have the Color Range function — you can select the desired color on the canvas with the pipette and adjust the sensitivity to it.
The magic wand selects one color and tone on the picture if we click on the area we need.
We can adjust the sensitivity to color/tone — the Tolerance parameter. Here we also see the already familiar Sample All Layers parameter — it works the same as with the finger.
And if we need to select all the red color on the picture, and our objects are far apart, do we need to click with the magic wand each time? No, not necessarily. We have the Color Range function — you can select the desired color on the canvas with the pipette and adjust the sensitivity to it.
 We also have square/oval selections — hotkey M. To move between them, use the hotkey Control+M.
Linear осветлитель (Linear Dodge — Add) — this mode is similar to Color Dodge, but can produce softer results.
Soft Light is designed to create soft, gentle effects, such as non-contrasting textures or adding highlights and reflections.
Hard Light — this mode is usually used to create brighter and more contrasting effects, I personally love drawing rust in this blending mode.


This is a masking mask, by clicking on it, the layer will look like this:
We see that the mask is not transparent, it is painted white. We can draw on this mask with black, white and gray tones — it has an eraser effect. Black erases, white returns. This mask is convenient when we are not completely sure about removing any objects, or when we need to limit the drawing area.
The next mask is an clipping mask. This is an ordinary layer that we can attach to the layer below, then our layer will become a clipping mask.
Why is it needed? For example, you need to save the beautiful silhouette of the object you have already drawn. And in order not to go beyond the boundaries of this silhouette, you can attach a new layer with such a mask. To do this, just hold down Alt and hover the stylus over the junction of the two layers — done!
And the last type of masks I use is quick masks. Hotkey for it — Q. When you press the hotkey, the layer turns red — do not be afraid, this is not a robot uprising!
Now we can draw in black and white (black will erase, white will return).
To exit this mode, you need to press the hotkey Q again — done, we have a selection area, and everything except the areas we painted on the mask is currently selected. If we need to invert the selection, we have the hotkey Control+Shift+I.
The hotkey to deselect — Control+D.
What to draw with?
We figured out where to draw, now let's see where the brushes are! Hotkey to select the brush tool — B:
Now let's look at another window that I always have open. This is the Brush Settings window — brush settings.
The very first tab is Brush Tip Shape — here you can choose a brush print from your library. There is a window with the shape of the brush — here you can change the direction of the brush (arrow) and flatten or развернуть the brush (knots).
Hardness — hardness parameter, allows us to change the softness of the brush.
Spacing — a parameter that helps to change the distance between brush prints. If you maximize this parameter, you can see that any brush is one repeating shape.
Another important parameter is transfer. We can adjust the sensitivity of our brush to pressure.
Color Dynamics — a parameter that includes color dynamics for the brush.
With the help of this window, you can create several different brushes from one brush print. I recommend pressing different parameters in this window during a closer acquaintance and see how the brush behaves.
Eraser
Hotkey for eraser — E. For the eraser, you can use the same brush prints as for the brush itself, except for brushes that already have a brush tool assigned when they are saved.
Finger
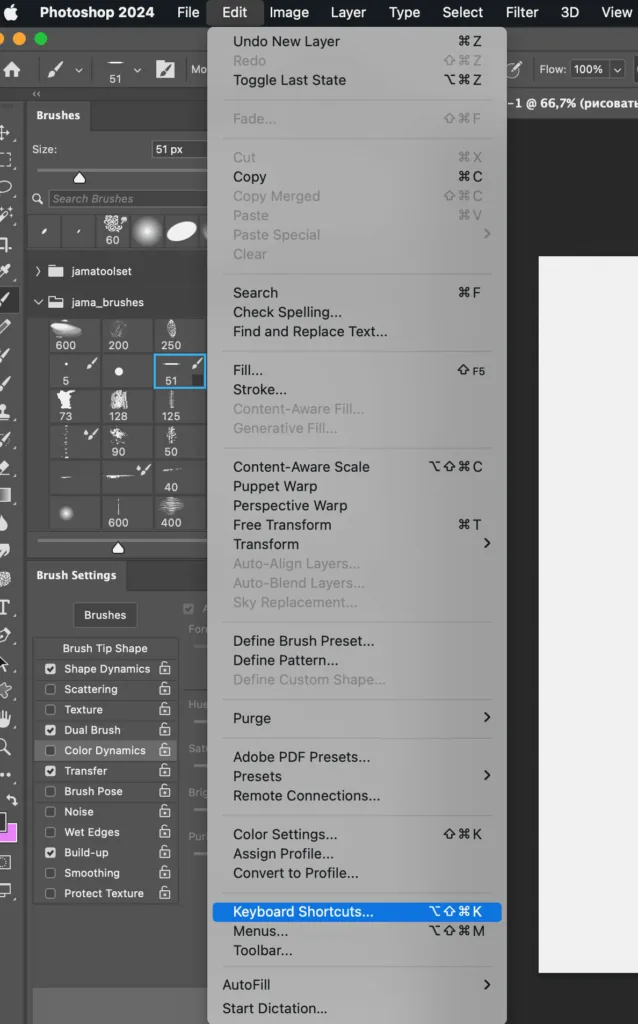
I have the hotkey S for the finger tool. You may not have it set up, and to set it up, you need to go to the Edit tab and select Keyboard Shortcuts.
The hotkey window opens, and here we need to choose Shortcuts For: Tools. Next, we choose the finger tool and put the hotkey S on it, press Accept and — done!
The finger has its own parameters, let's look at a few of them: the first parameter is Strength, or the finger intensity parameter (I usually do not set it more than 20% so that the transitions are smooth), and the last parameter is Sample All Layers. If there is a checkmark next to it, then the tool will be active on the entire canvas, if there is no checkmark, then the finger will work only on the layer you are currently on.
When you are on a layer with any mode of overlay except Normal, you need to turn off the Sample All Layers checkmark.
Lasso
To enable the lasso, use the hotkey L. The lasso has several modes, you can switch between them with the hotkey Shift+L. The first mode is free editing mode, you draw and get a selection area. The second mode is a straight lasso, you put points and, closing the chain, get a ready-made selection. And the last mode is a magnetic lasso, it puts points for you, reacting to the tone of the picture. What does the selection give? You limit the drawing area and cannot go beyond the boundaries of the selected area. If the running ants bother you, you can hide them with the hotkey Control+H. To deselect any selection, press the hotkey Control+D.Magic Wand
To enable the magic wand, use the hotkey W.
The magic wand selects one color and tone on the picture if we click on the area we need.
We can adjust the sensitivity to color/tone — the Tolerance parameter. Here we also see the already familiar Sample All Layers parameter — it works the same as with the finger.
And if we need to select all the red color on the picture, and our objects are far apart, do we need to click with the magic wand each time? No, not necessarily. We have the Color Range function — you can select the desired color on the canvas with the pipette and adjust the sensitivity to it.
We also have square/oval selections — hotkey M. To move between them, use the hotkey Control+M.
Lesson for beginners — candle
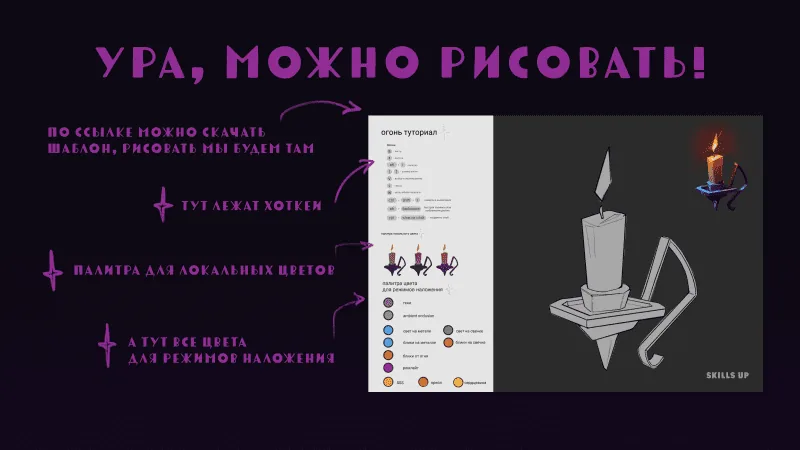
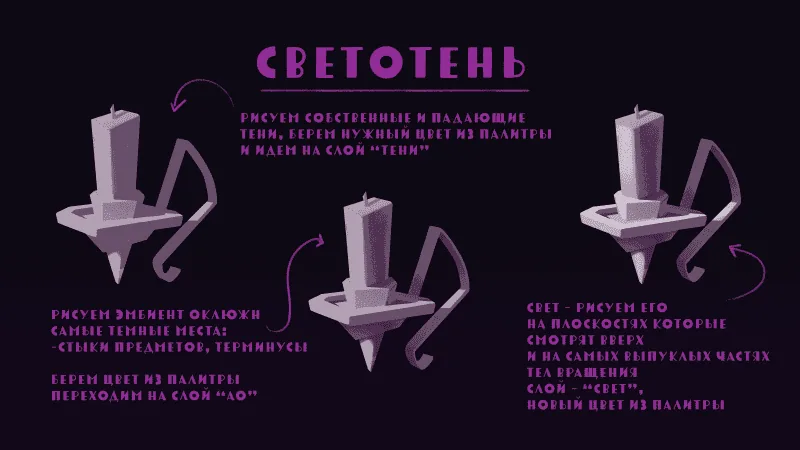
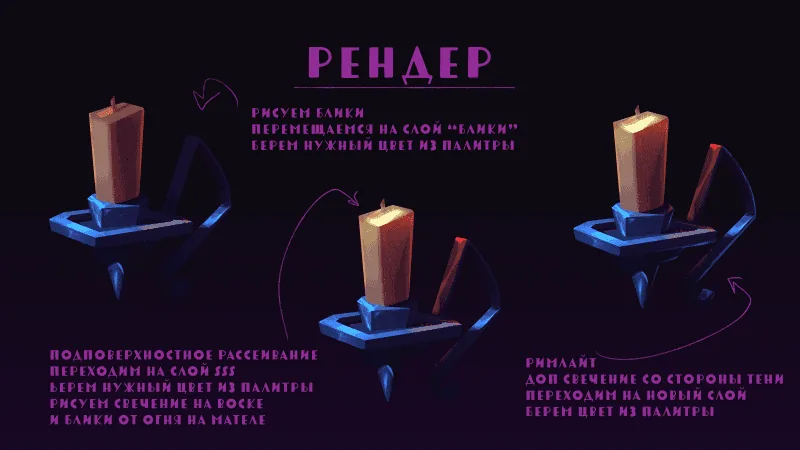
And now let's finally start drawing! In order for everything to work out, you need to move along the tutorial pictures with me and repeat each step. Do not forget to download a drawing template and brushes.
How to draw on your own?
So, our mini-introduction to Photoshop has come to an end. If you want to get closer to the program, come to my express course Photoshop for beginners. On the express course we will have four weeks of theory and interesting practice to consolidate all the hotkeys and the most useful things for painless drawing in the program. And what is even more important: I am the group coordinator, so I am always in touch with you, especially in moments when "I pressed something and everything broke." We will also get acquainted with the pipeline of the Skills Up school, and with each other, of course! And a little parting words from me: it is important to remember that Photoshop is a tool, so, like any tool, it requires practice and patience to master. But gradually you will be able to create more complex and beautiful works. Do not forget to experiment with brushes and blending modes — it's a lot of fun! And most importantly: enjoy the process!Several cool video lessons on how to draw in Photoshop
How to draw fur in 2D in Photoshop
The text version of the lesson is also available in the free lesson "how to draw fur in Photoshop".How to draw a mushroom in Photoshop
The text version of the lesson is also available in the free lesson "how to draw a mushroom in Photoshop".Related materials

Tutorial
How to draw a mushroom in Photoshop
March 6, 2024
Tutorial
How to draw lips
August 15, 2024

Tutorial
How to draw a crystal. Step-by-step guide for artists
March 24, 2025

Tutorial
Learning to draw glow
March 21, 2025

Tutorial
Drawing stones
March 10, 2025

Article
How to draw armor
December 27, 2024

News
Эта уютная игра-рисовалка позволяет исследовать созданные вами пейзажи
May 22, 2026