TutorialUpdated: July 2, 2026
How to draw in Procreate?
In short
Explore the basics of drawing in Procreate: canvas setup, gestures, brushes, and layers. The lesson will help you create your first digital illustration on iPad.
2D artist
Hello! My name is Lera Fominykh, I am an artist and a curator of courses on 2D graphics at Skills Up school.
And I draw on the iPad. It sounds like a frank admission, but that's the truth 🙂
I've tried many different drawing apps and eventually settled on Procreate. Here's why I like it the most:
Screen (Screen) — in this mode, the colors of the top layer pixels are displayed against the image background as if they were illuminated by bright light. It is convenient for drawing highlights.
Color Dodge — this mode is often used to lighten an image or to create specific effects. You can draw glows with it.
Linear Dodge — the mode is similar to Color Dodge, but gives softer results.
Soft Light — the mode is designed to create soft, gentle effects, such as non-contrast texture or adding highlights and reflections.
Hard Light — this mode is usually used to create brighter and more contrasting effects. Personally, I love drawing rust in this blending mode.
 The first one is a 2D grid.
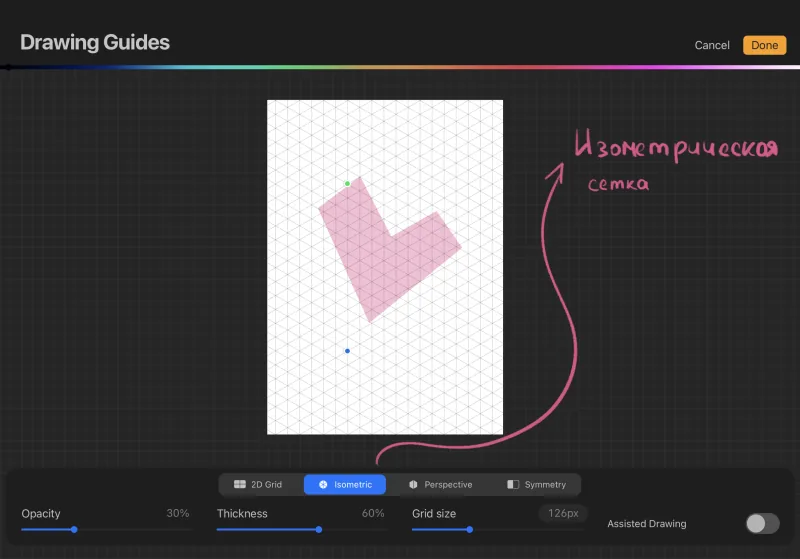
 The second one is an isometric grid.
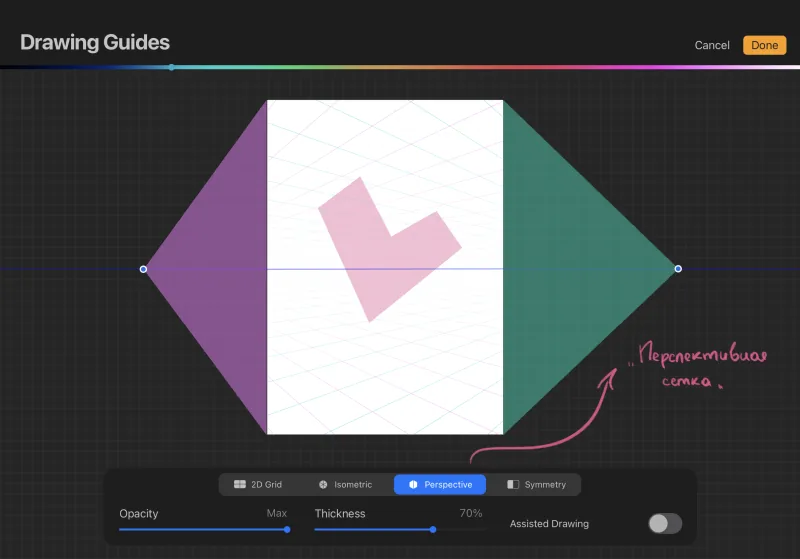
 The third one is a perspective (you can put several points).
 And the last grid is symmetry.
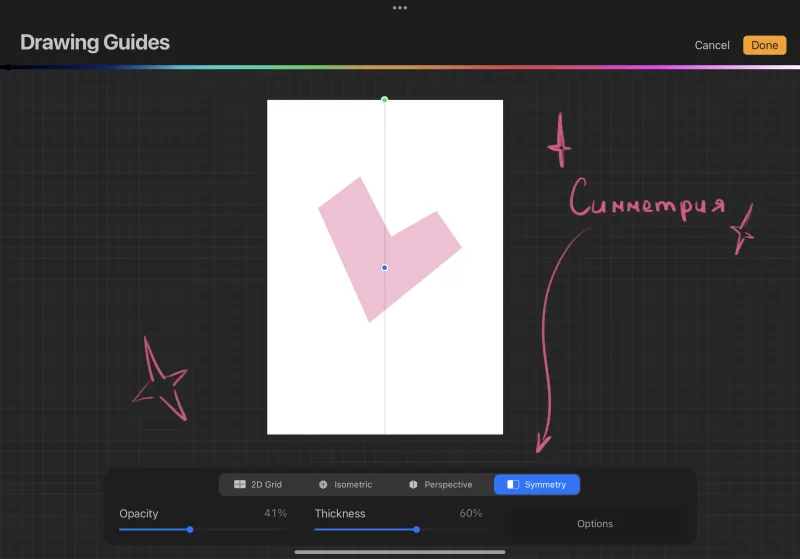 For each grid you can change the color, transparency and parameters.
 This is the end of our mini-introduction to Procreate. If you want to quickly and permanently make friends with the program, come to the express course Procreate for beginners.
You will find four weeks of entertaining theory and practice, we will learn together to fix all the gestures, create brushes, use blending modes and other tools of the program. In general, it will be fun and eventful!
The curator and coordinator of the group is always in touch with you, especially in moments when “I clicked somewhere and everything broke.”
Also on the course you will get acquainted with the school pipeline, and with each other, of course! Only cool guys study with us, so the acquaintance will definitely be interesting and important.
And a little parting words from me, Lera Fominykh: any program — just a tool, a little patience, and it's in your pocket! Don't be afraid to experiment in all directions and try to have fun in the process 🙂
This is the end of our mini-introduction to Procreate. If you want to quickly and permanently make friends with the program, come to the express course Procreate for beginners.
You will find four weeks of entertaining theory and practice, we will learn together to fix all the gestures, create brushes, use blending modes and other tools of the program. In general, it will be fun and eventful!
The curator and coordinator of the group is always in touch with you, especially in moments when “I clicked somewhere and everything broke.”
Also on the course you will get acquainted with the school pipeline, and with each other, of course! Only cool guys study with us, so the acquaintance will definitely be interesting and important.
And a little parting words from me, Lera Fominykh: any program — just a tool, a little patience, and it's in your pocket! Don't be afraid to experiment in all directions and try to have fun in the process 🙂
- The user interface is simple and clear — this is especially convenient if you have a tablet with a small screen;
- It has a huge number of preset brushes , and you can even buy brushes from your favorite artists. And the coolest thing: Procreate supports brushes from the Photoshop library;
- Working with layers? Yes! Overlay modes? Yes, and they are the same as in Photoshop;
- And you can record a timelapse of drawing a picture . Cool, right?
First acquaintance with Procreate: creating a new canvas
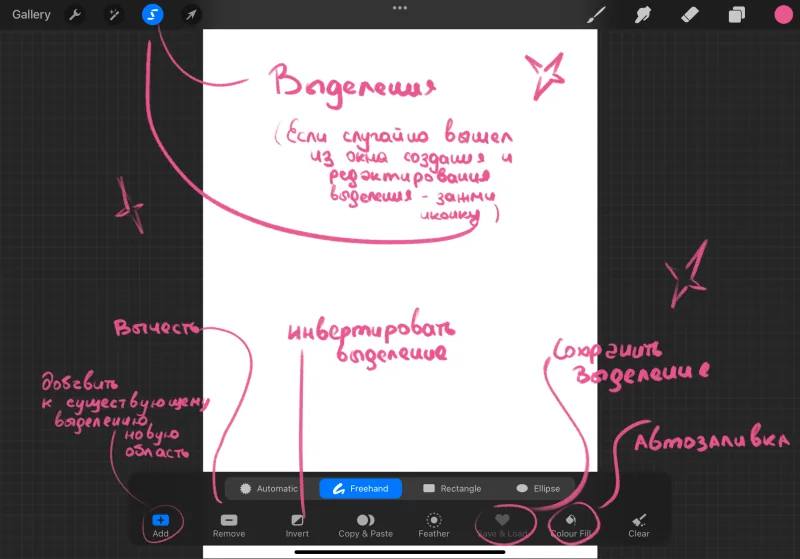
So, you've installed the program. What do we do next? This is what your window looks like at the first launch of the program, the gallery already has preset pictures from Procreate, but you can delete them. The gallery will contain all your pictures — it's quick and easy to open them!Selection methods. In Photoshop we have a lasso, what about here?
Also a lasso! The third icon on the left side of the workspace — this is the window for creating and editing the selection. We can select the desired part of the canvas, limiting the drawing area.
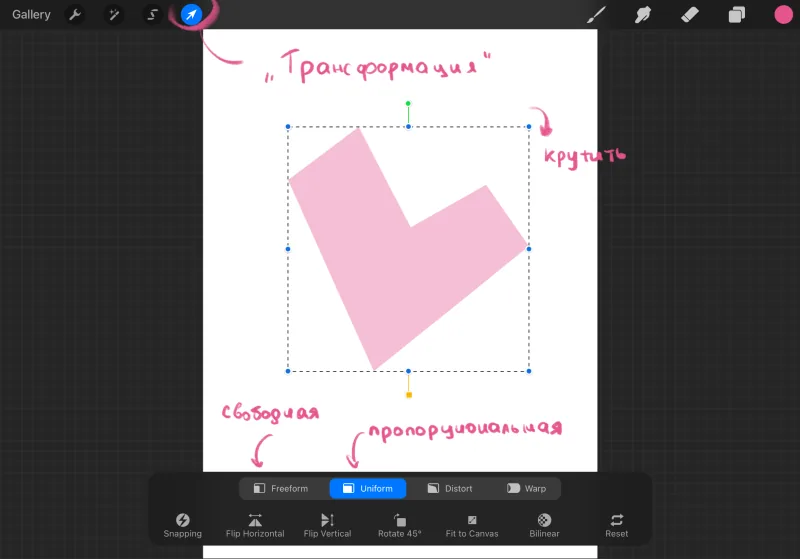
Transformation
In Procreate we can transform the picture — for this you need the fourth icon on the left side of the workspace.
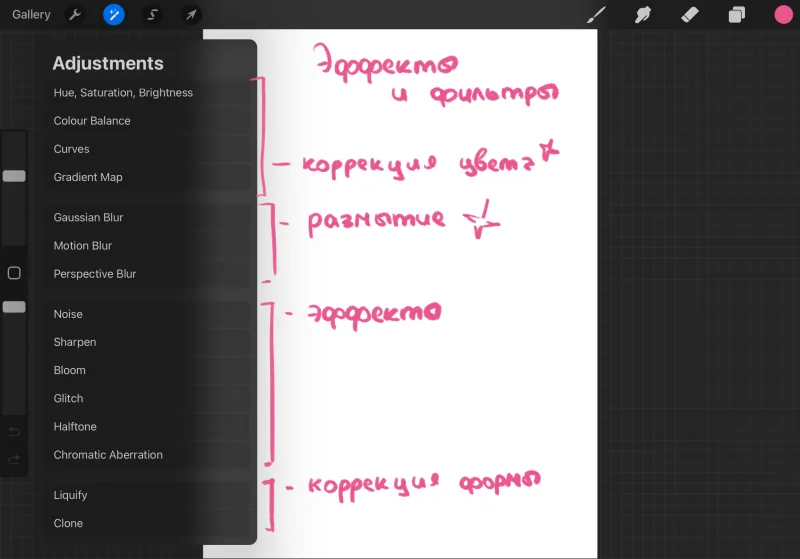
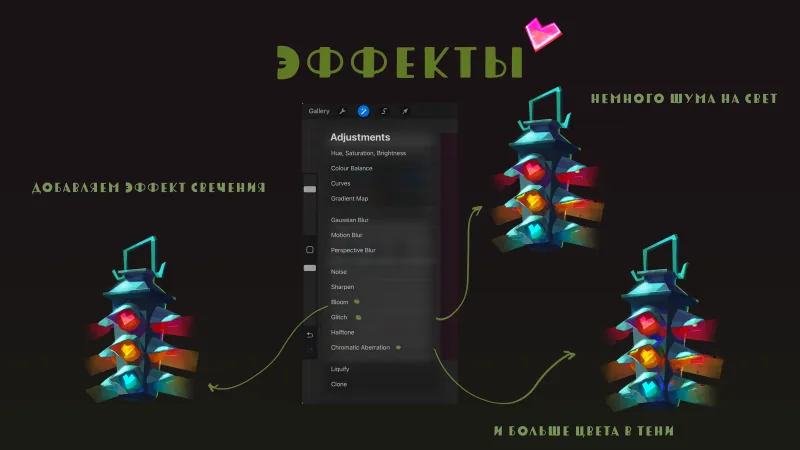
And one of the most fun things — effects!
The second icon on the left side of the workspace — this is the menu of effects and filters. The first part of the menu — color correction of the finished picture or just colors or shadows, the next block — blur, then — effects: you can, for example, add noise or glow. Experiment!
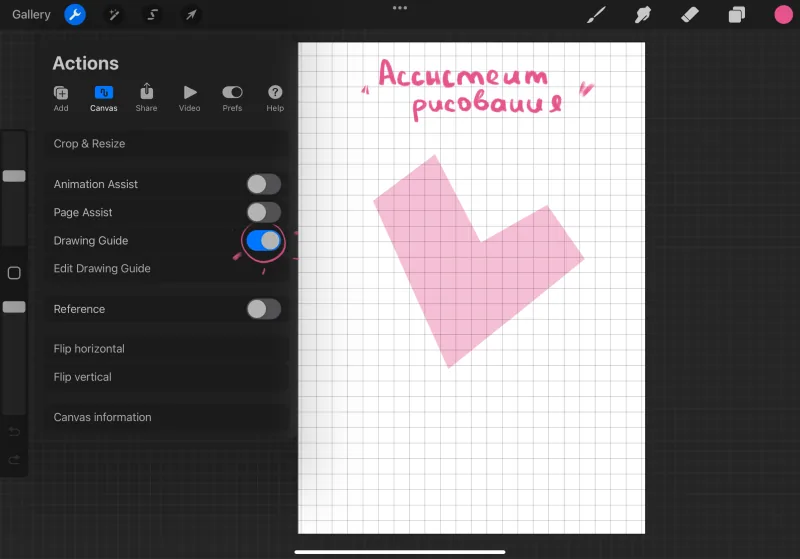
Drawing assistant
We've already talked a little about the drawing assistant, but who is he? And no, we're not talking about the Skills Up curator 😀 By activating the slider, we will see a grid (it may differ for you and me). By clicking on Edit Drawing Guide, we can edit it.
The first one is a 2D grid.
The second one is an isometric grid.
The third one is a perspective (you can put several points).
And the last grid is symmetry.
For each grid you can change the color, transparency and parameters.
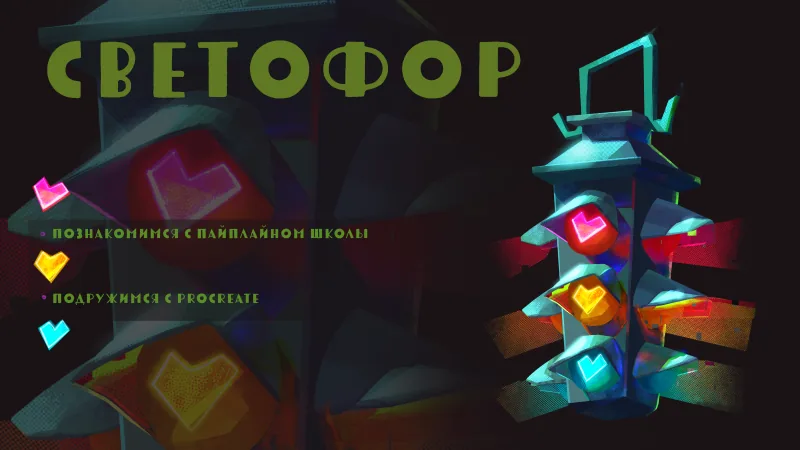
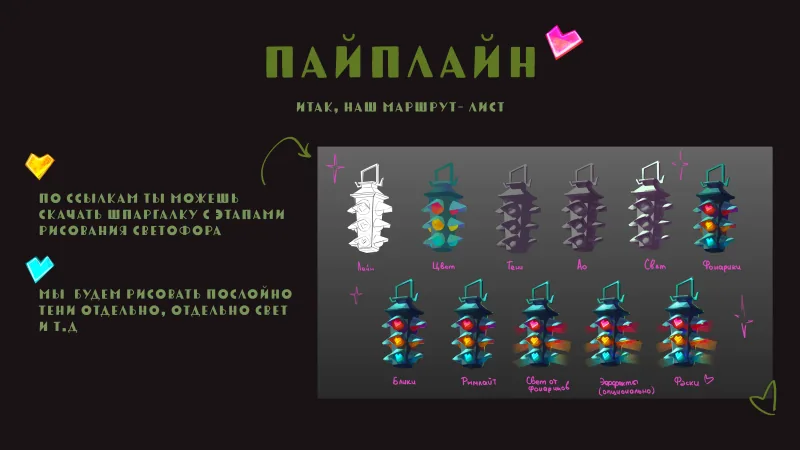
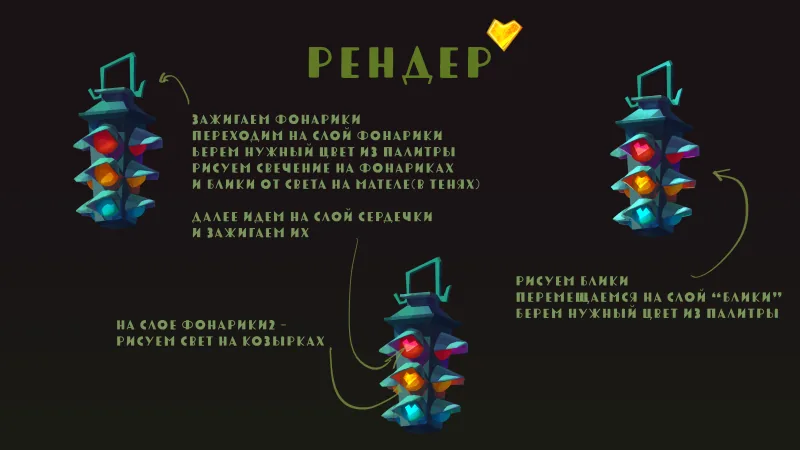
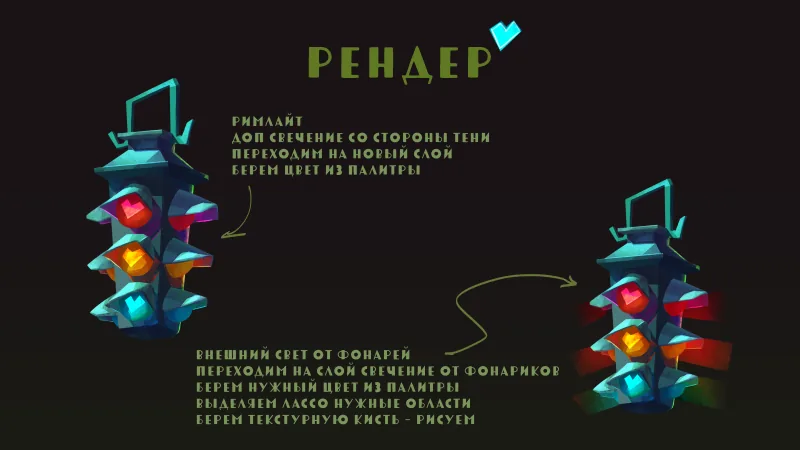
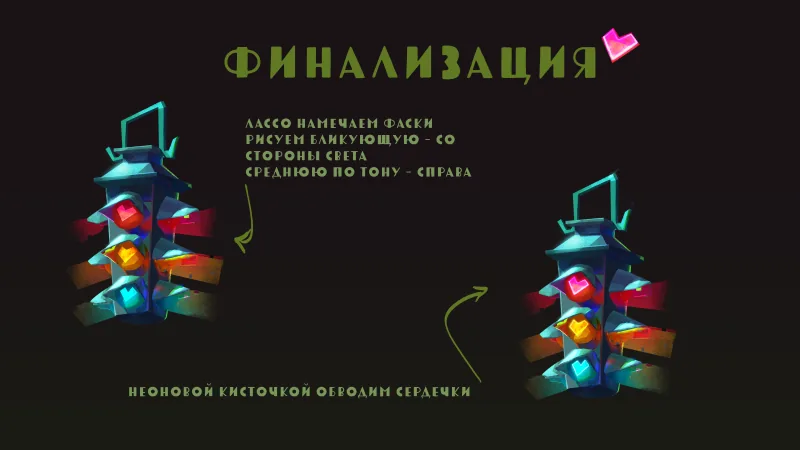
Lesson for beginners. Drawing a traffic light in Procreate
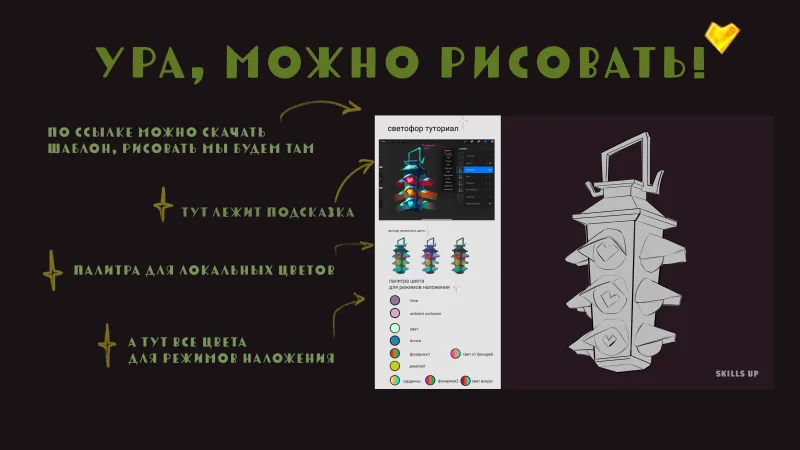
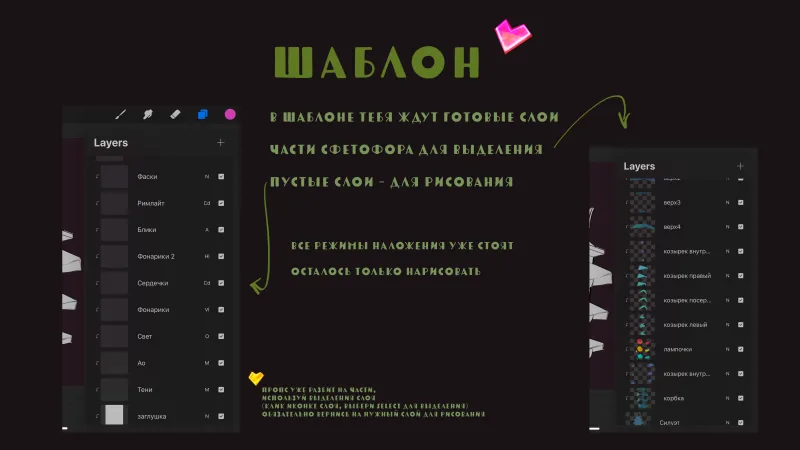
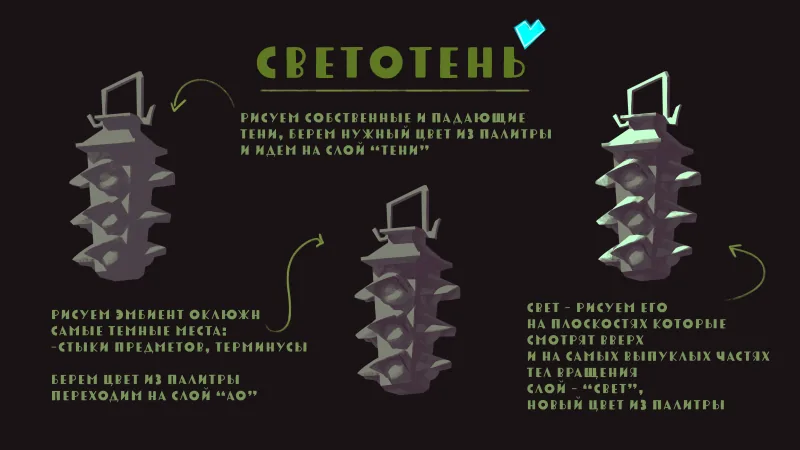
And now let's draw! We will draw a traffic light — this is a simple exercise will help you get even closer to Procreate and hone all the knowledge obtained in the first, theoretical part. In order for everything to work out, you need to move with me through the pictures of the tutorial and repeat each of the stages. And don't forget to download the drawing template and brushes!
This is the end of our mini-introduction to Procreate. If you want to quickly and permanently make friends with the program, come to the express course Procreate for beginners.
You will find four weeks of entertaining theory and practice, we will learn together to fix all the gestures, create brushes, use blending modes and other tools of the program. In general, it will be fun and eventful!
The curator and coordinator of the group is always in touch with you, especially in moments when “I clicked somewhere and everything broke.”
Also on the course you will get acquainted with the school pipeline, and with each other, of course! Only cool guys study with us, so the acquaintance will definitely be interesting and important.
And a little parting words from me, Lera Fominykh: any program — just a tool, a little patience, and it's in your pocket! Don't be afraid to experiment in all directions and try to have fun in the process 🙂
Ready to paint for real? Walk through, step by step, how to draw a landscape in a cool, close palette.
Related materials

Tutorial
How to draw a crystal. Step-by-step guide for artists
March 24, 2025
Tutorial
How to draw a kerosene lamp
September 18, 2023

Tutorial
Learning to draw glow
March 21, 2025

Tutorial
Drawing stones
March 10, 2025

Tutorial
How to draw basic emotions
February 12, 2025

Article
How to draw armor
December 27, 2024

News
Эта уютная игра-рисовалка позволяет исследовать созданные вами пейзажи
May 22, 2026