TutorialUpdated: July 2, 2026
How to draw a kerosene lamp
In short
Learn how to draw a kerosene lamp by following our step-by-step lesson. Master construction, proportions and perspective to create a realistic drawing.
2D artist
Drawing complex objects, such as a kerosene lamp, is a real challenge for an artist. But with the help of simple techniques, tricks and tips, we can cope with this task. Let's turn on creativity and get started!
Steps for creating a kerosene lamp
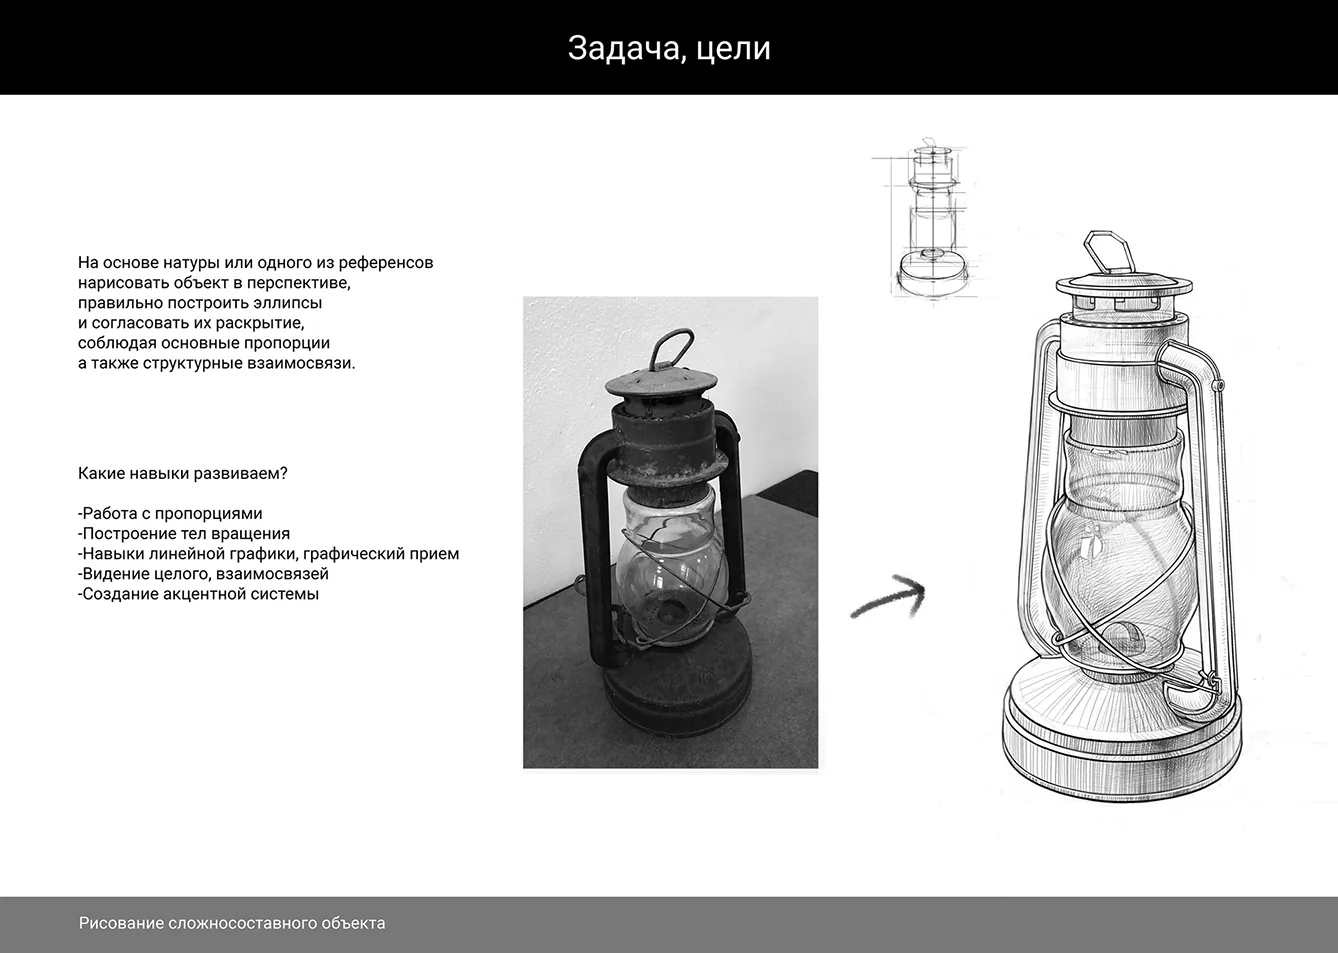
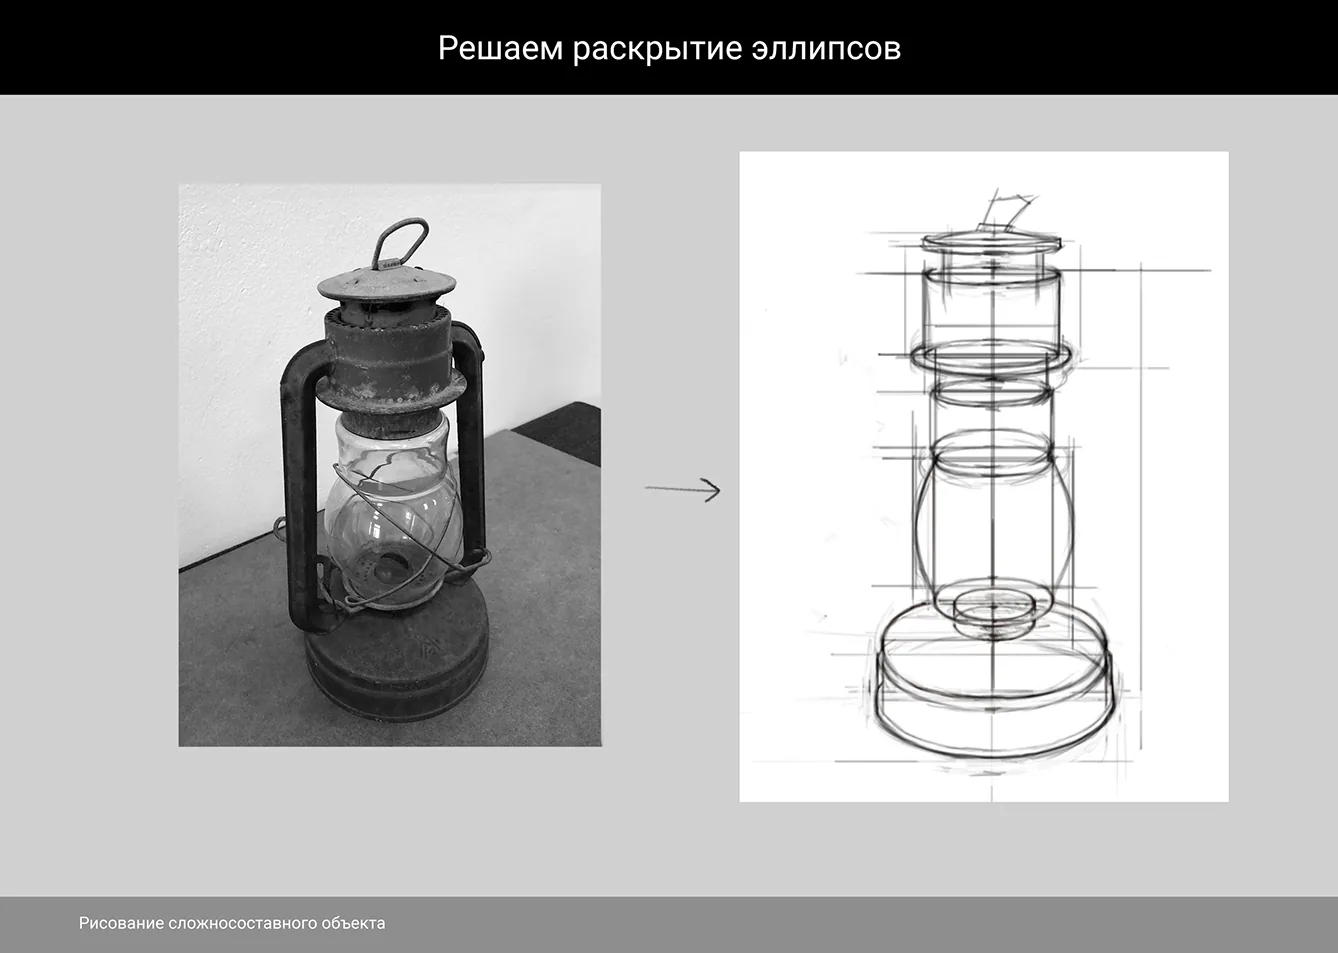
Task of the exercise: based on the nature or reference, draw an object in perspective, correctly build ellipses and coordinate their disclosure, observing the proportions.
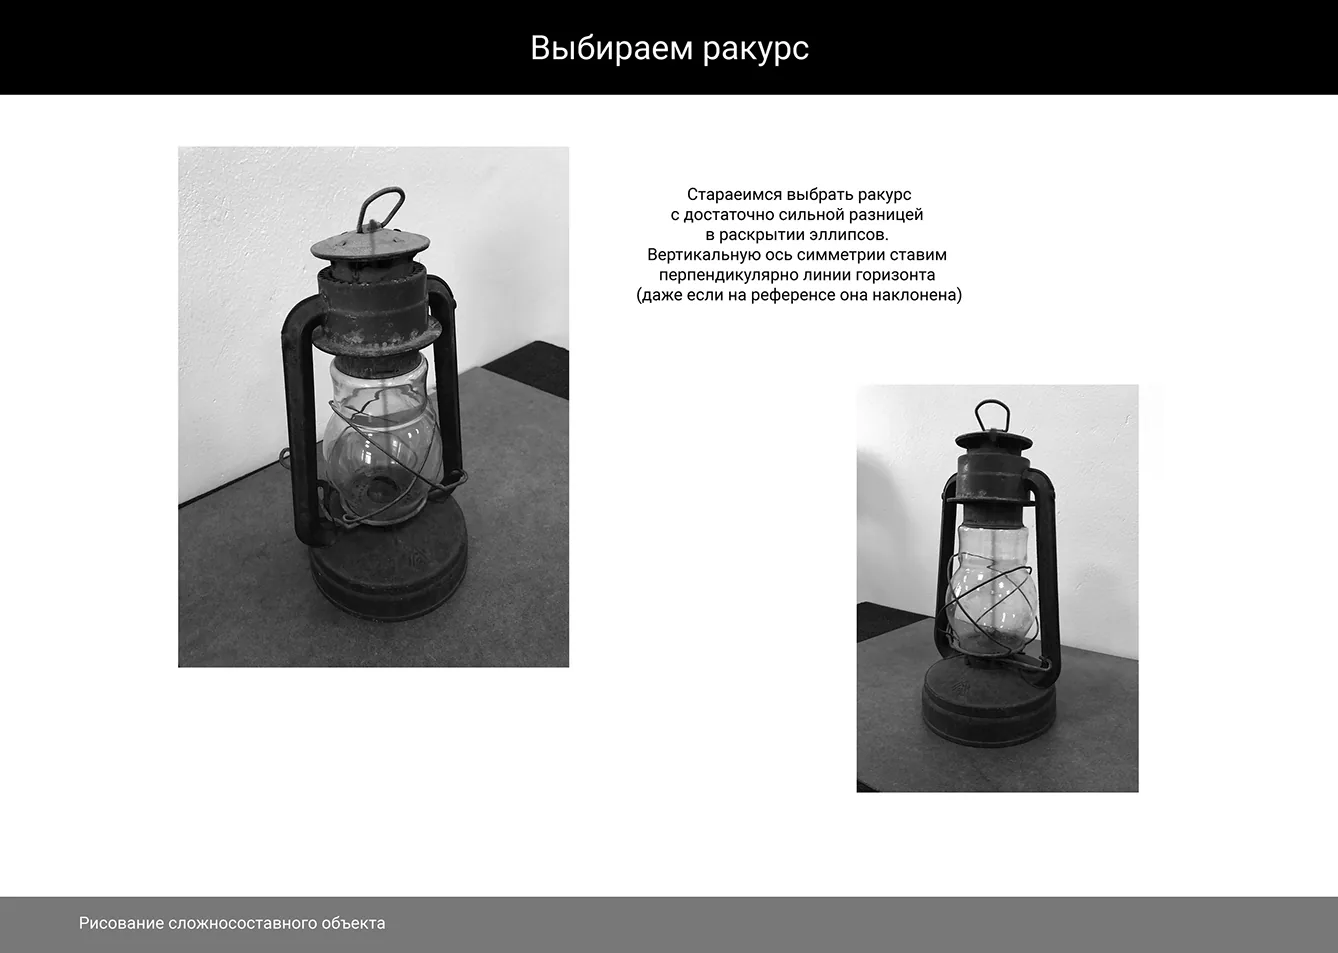
1. Determine the angle and axis of symmetry
- Choose an interesting angle where the lamp is not just standing upright, but slightly tilted or turned.
- Draw a vertical axis of symmetry to maintain proper proportions.
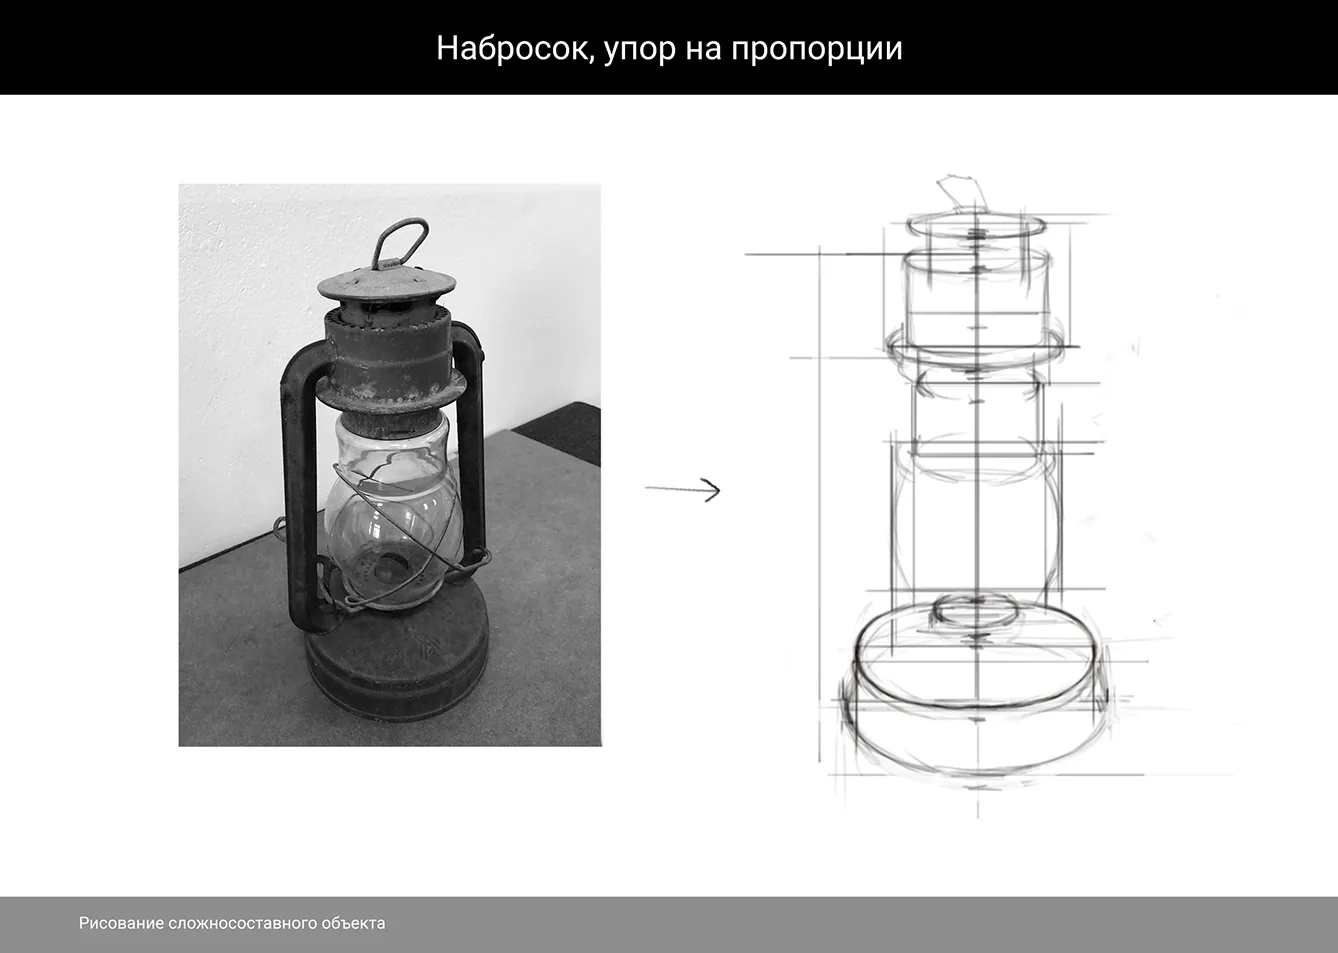
2. Create a general shape
- Build the lamp using simple shapes: an oval for the base, a cylinder for the body and a circle for the glass part.
- Add ellipses to define the boundaries of the cylindrical parts.
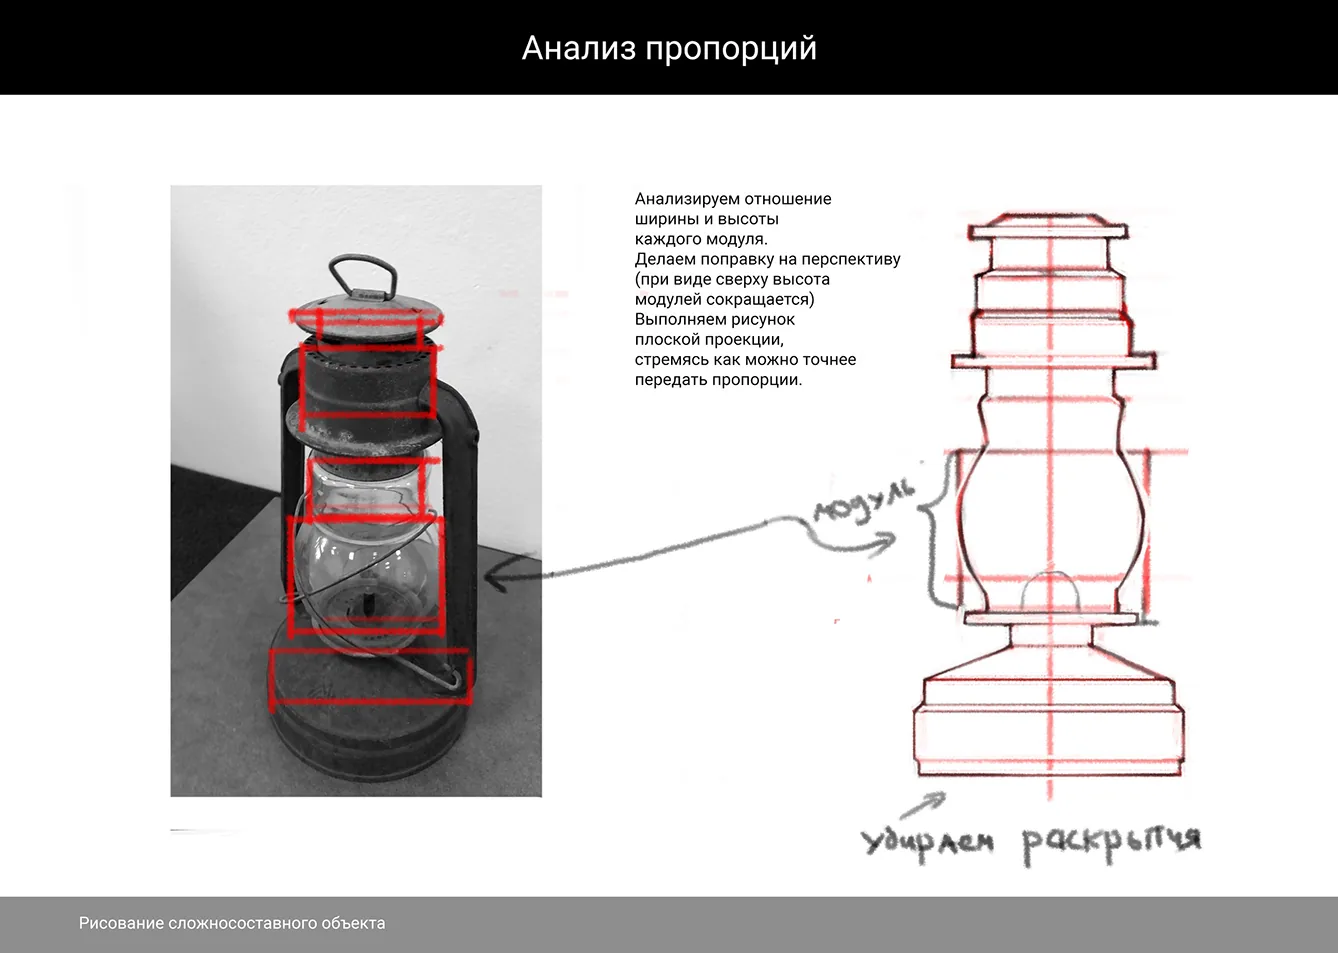
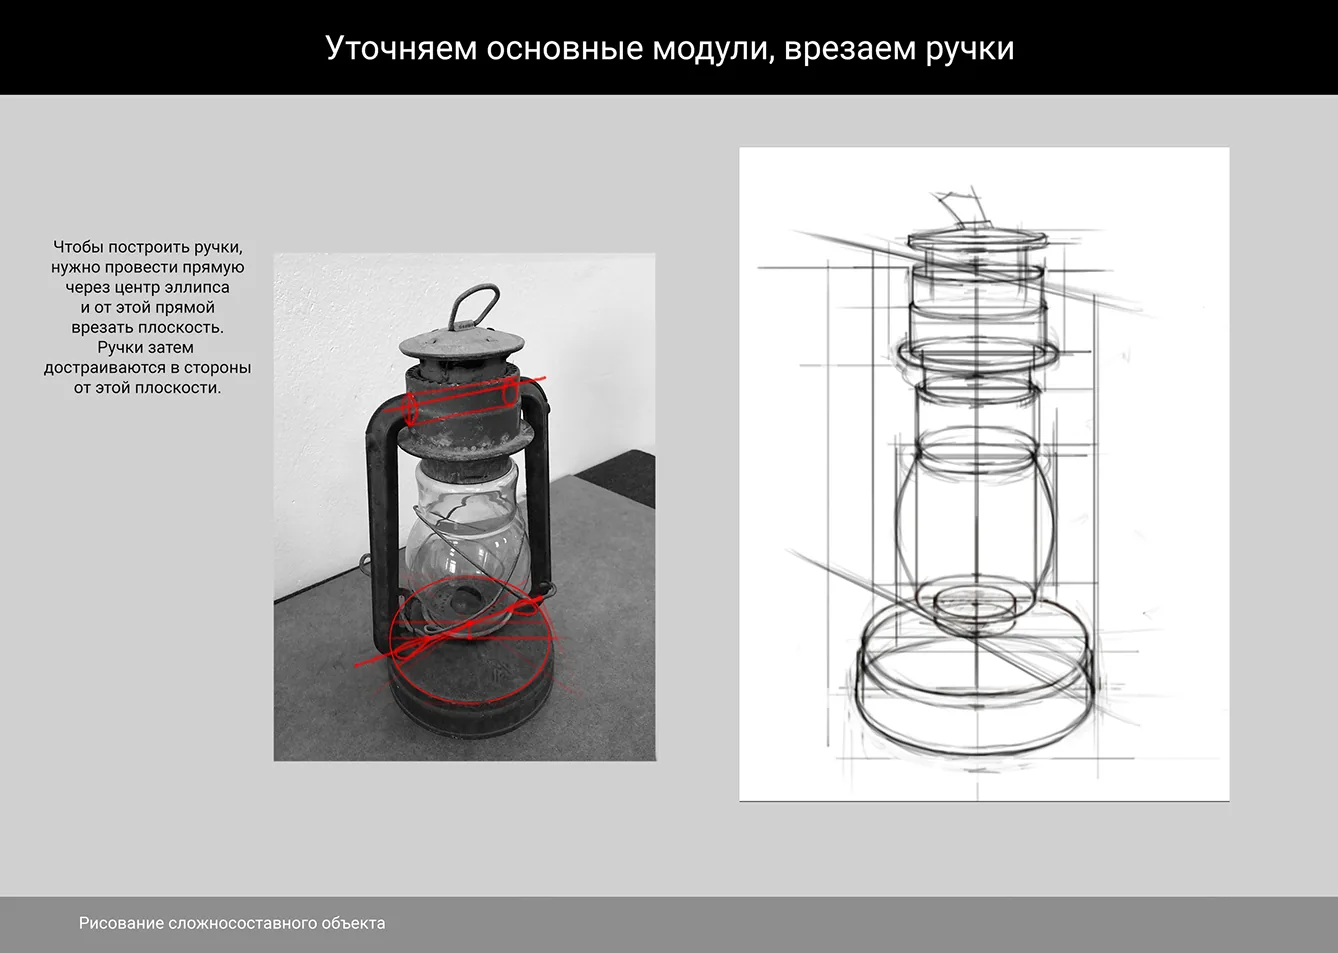
3. Work with proportions
- Use the measurement method to check the proportions: for example, the height of the glass should be equal to the height of the body.
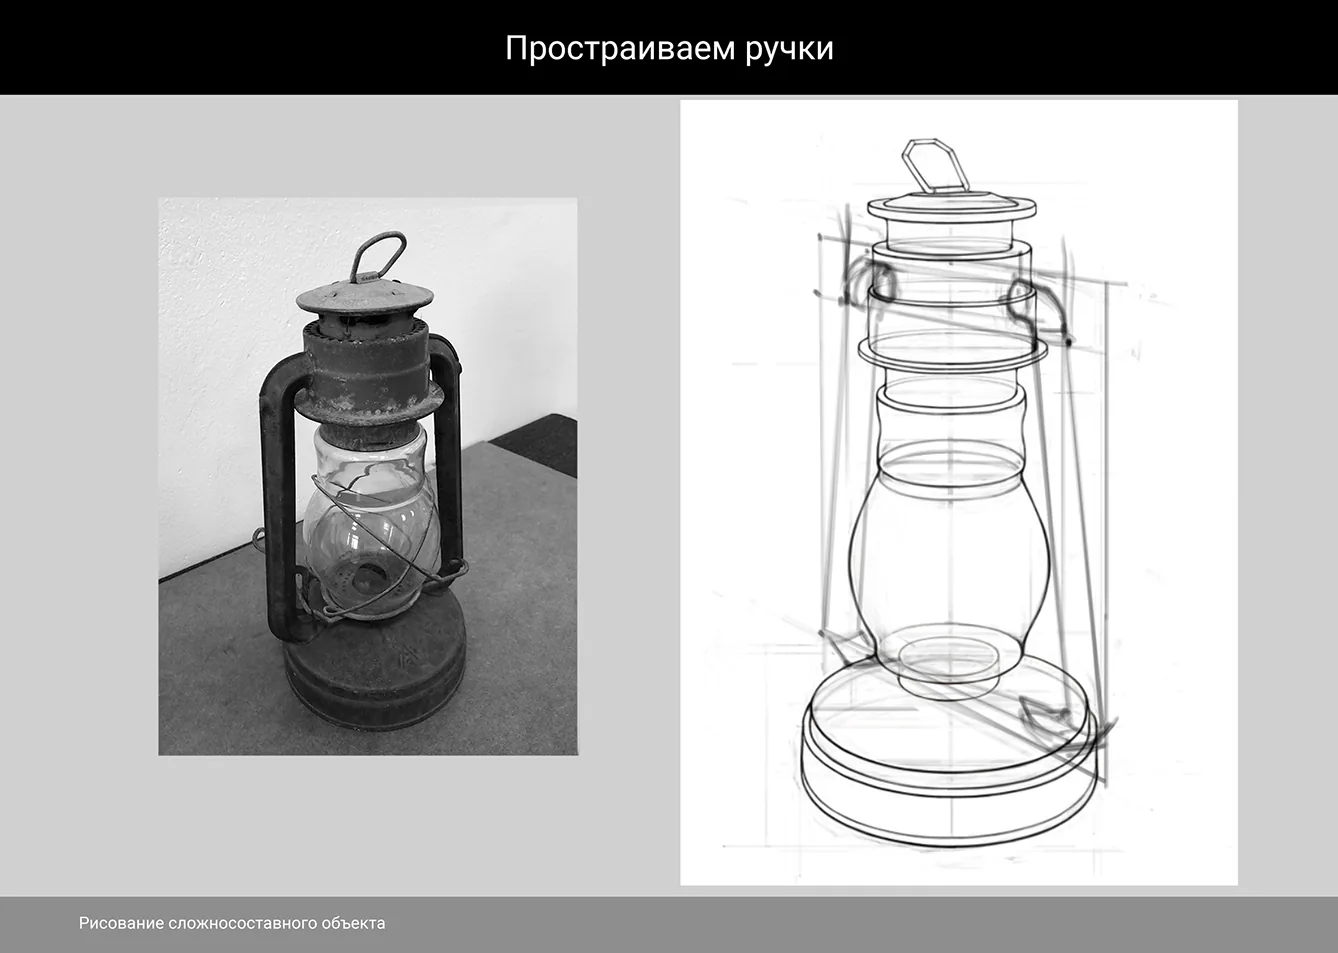
- Outline large elements such as handles and a burner.
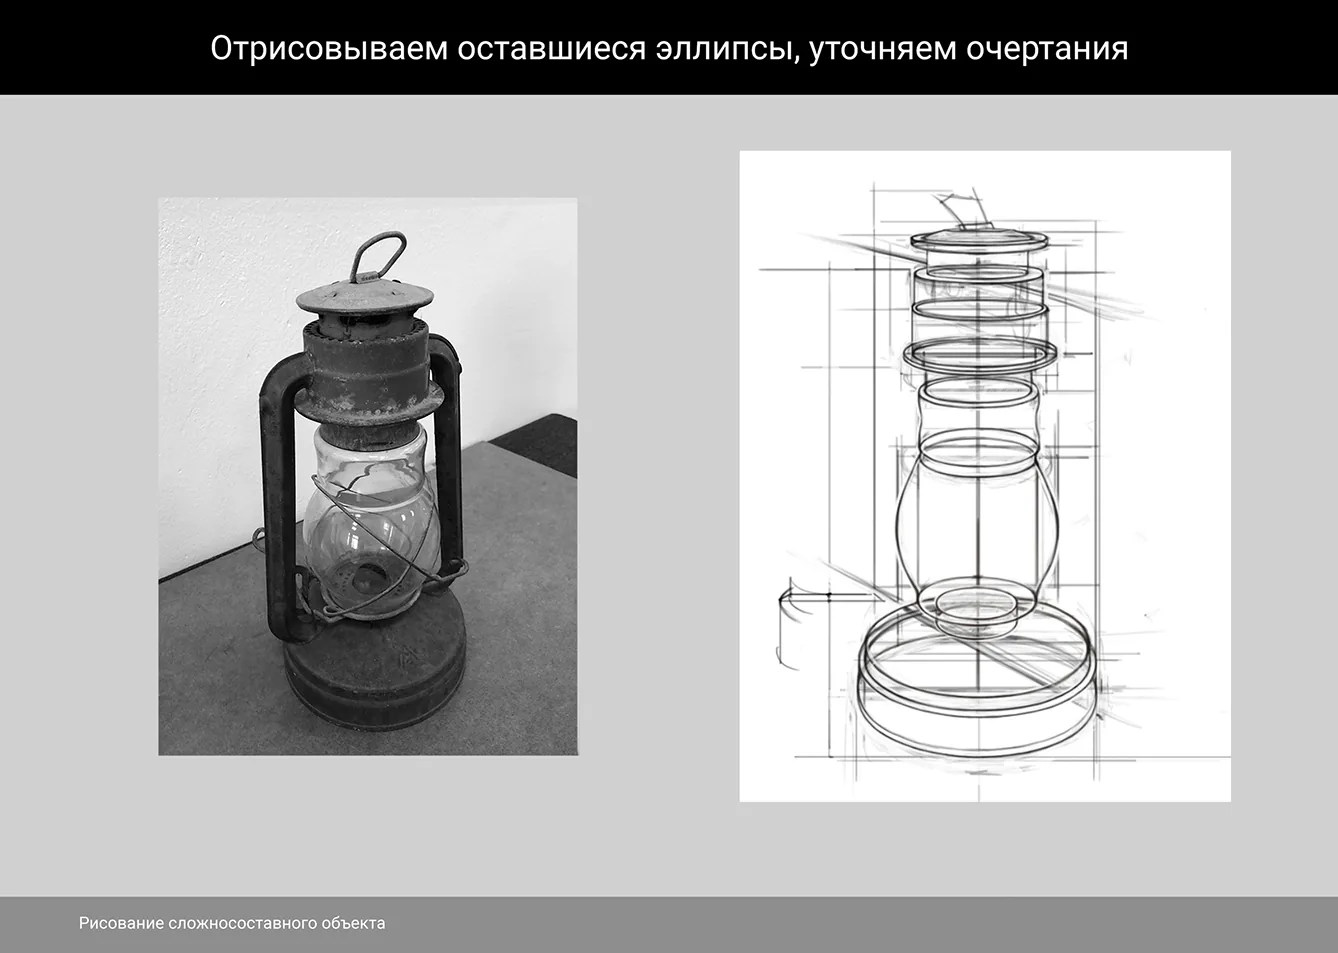
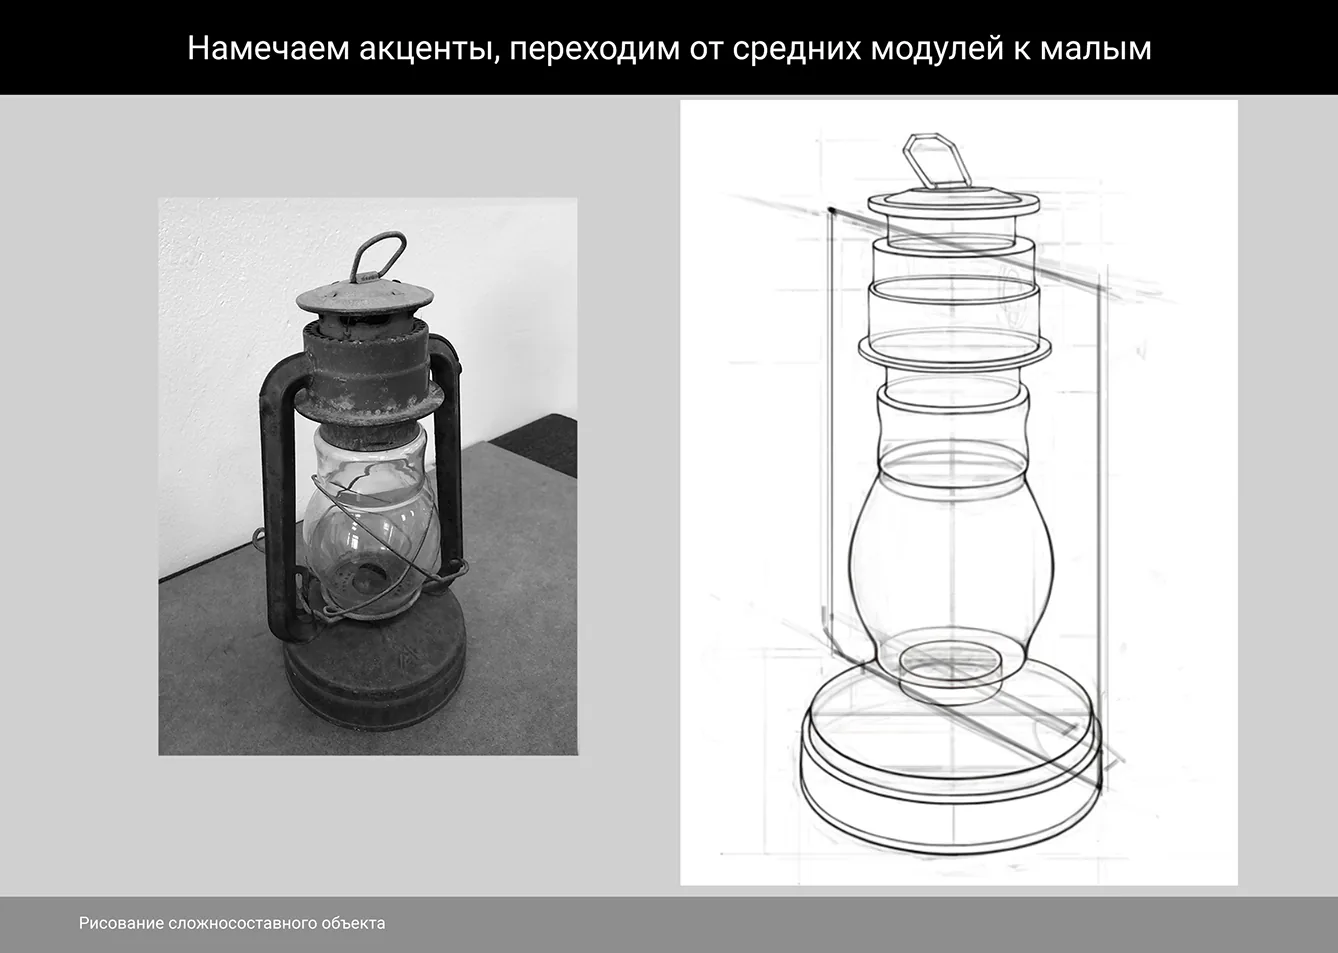
4. Add details
- Draw small elements such as handles, screws, and connections.
- Clarify the lines of the glass part by adding bends and edges.
Related courses
All courses
from 3 900 ₽
-57%
Book illustration: The first page page
9 000 ₽3 900 ₽
Learn more

from 12 000 ₽
-20%
Векторная иллюстрация для начинающих
15 000 ₽12 000 ₽
Learn more

from 4 500 ₽
-55%
Character Concept: My First Hero
10 000 ₽4 500 ₽
Learn more
Trick: To make the glass look realistic, draw light reflections and highlights.

 The work is done!
5. Working with light and shadow
- Determine the light source (for example, from the top left) and add the main shadows on the metal and glass parts.
- Use a soft brush to create smooth transitions.
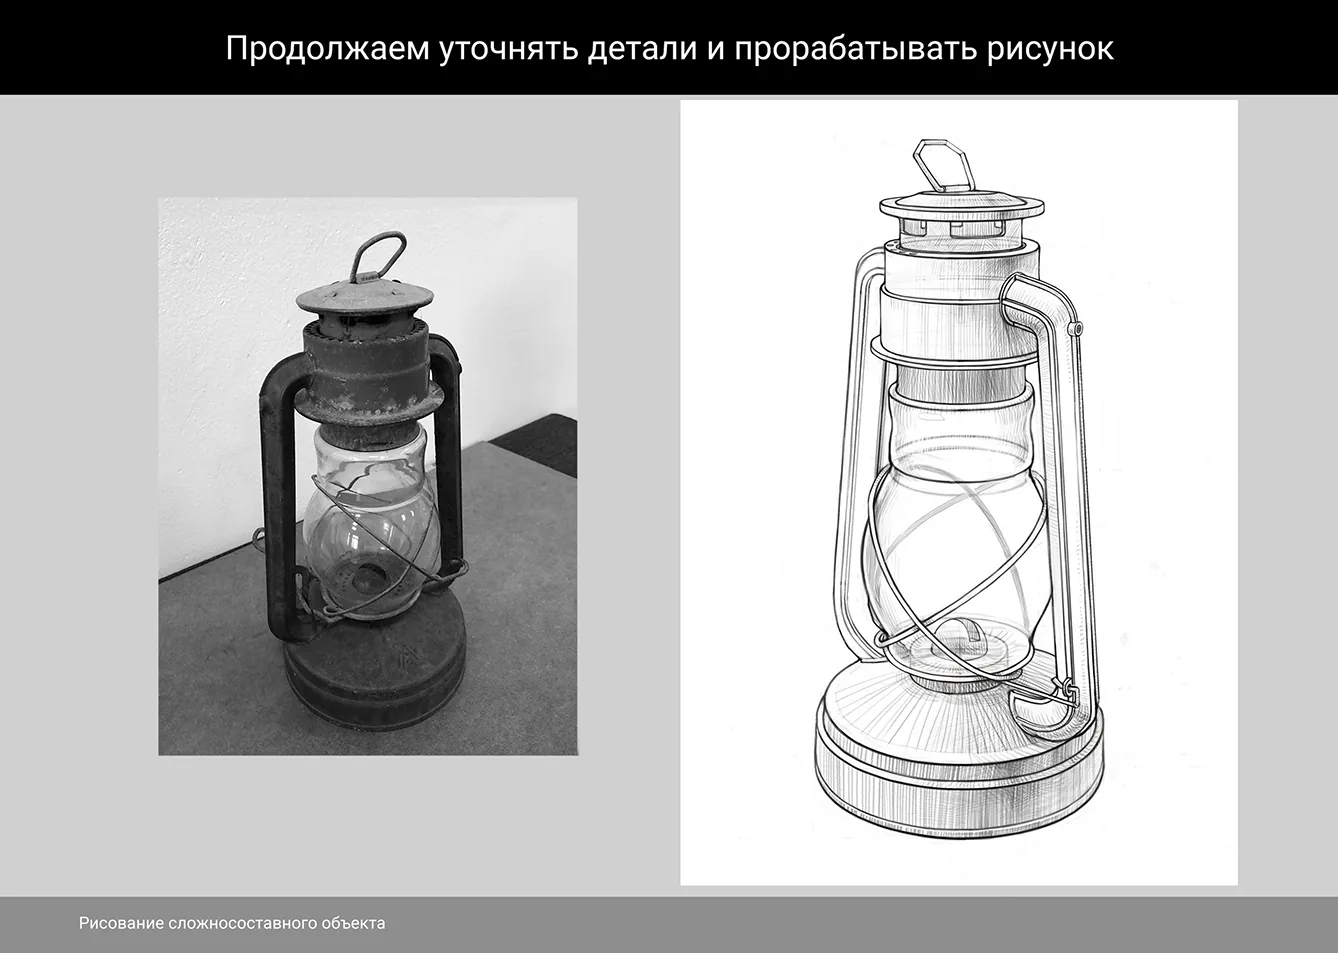
6. Texture detailing
- Work on the metal details of the lamp using soft and hard shadows.
- Add scratches, abrasions and shine for the effect of an antique item.
7. Working with glass
- On the glass part, add soft lines imitating highlights and reflections.
- For realism, draw light distortions through the glass.
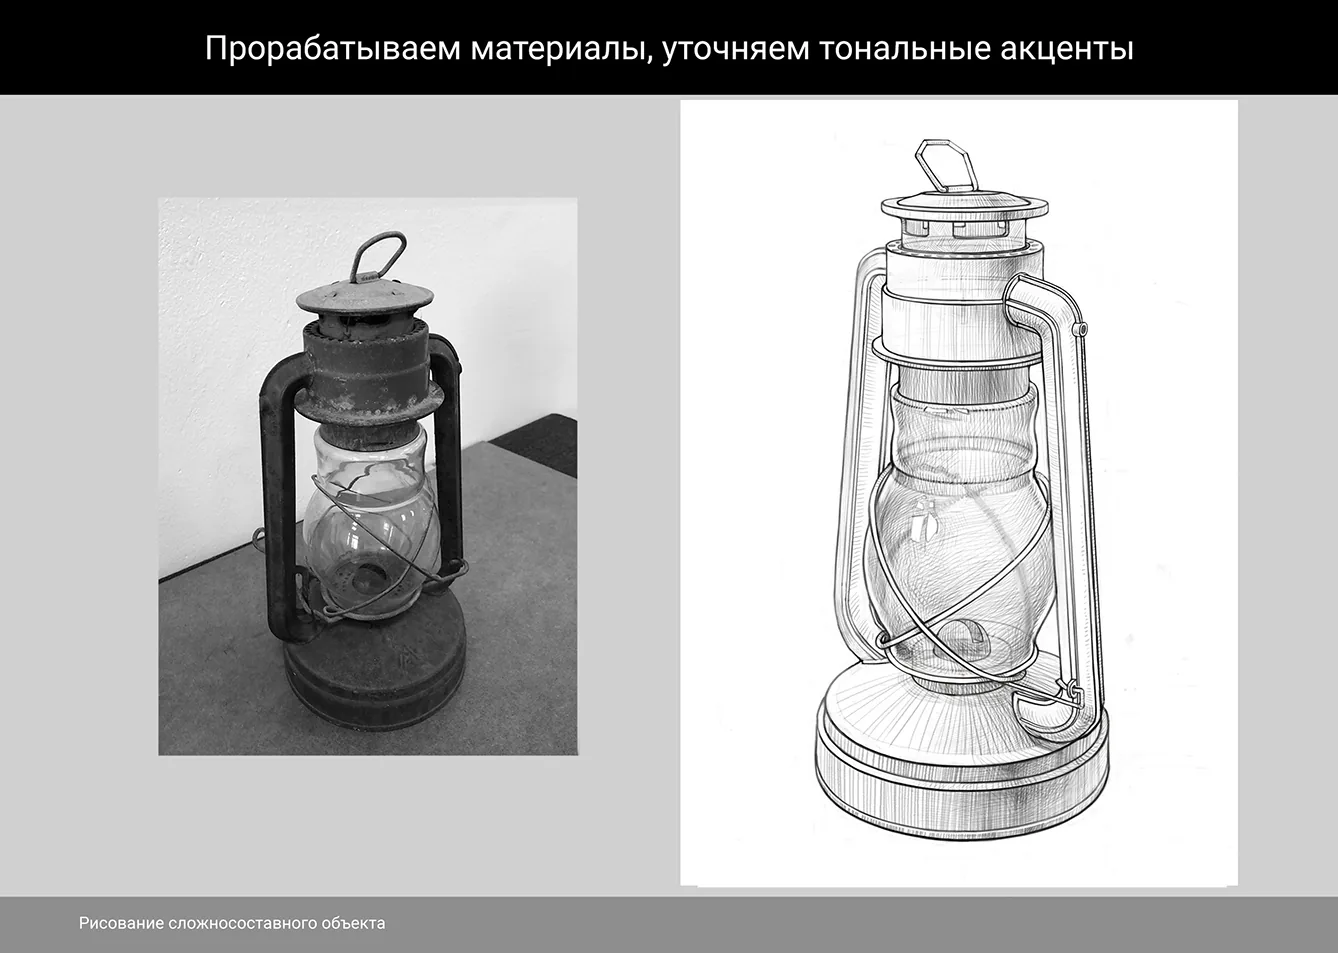
8. Final touches
- Trace the main contours to give the lamp a complete look.
- Add a light shadow to the surface where the lamp stands to make it look "alive".
Step 9: Adding internal elements of the lamp
A kerosene lamp consists of several layers and structural parts, such as a wick, burner and kerosene reservoir.- Draw the wick inside the glass part. You can make it slightly wavy to show the naturalness of the material.
- Add burner details (small screws, rings and nozzles).
Step 10: Working with reflections
Metal and glass surfaces always contain a lot of highlights and reflections.- On the glass, draw reflections of surrounding objects (for example, windows, curtains or even figures).
- The metal parts of the lamp should have clear light stripes, creating the effect of a polished material.
Step 11: Adding a glow effect
If you want to show a burning wick:- Draw a light source inside the lamp in the form of a bright yellow or orange spot.
- Add a light glow around it using a brush with a blurred edge and the "Soft Light" or "Overlay" mode.
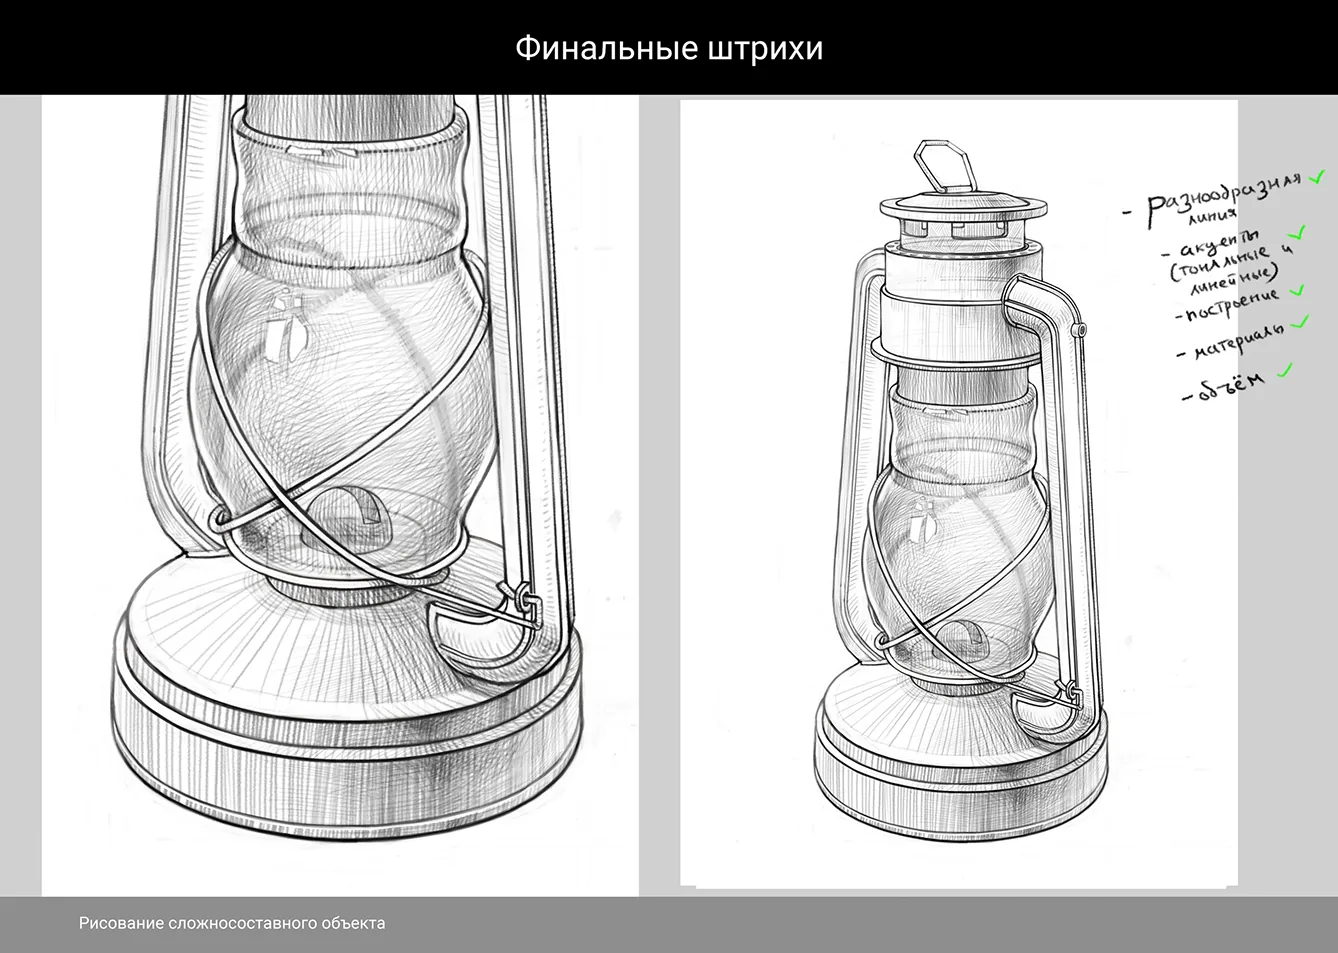
Step 12: Final check and adjustments
- Check the overall balance of light and shadow so that the lamp looks harmonious.
- Make sure that glass and metal have different degrees of contrast and transparency.
- Add small "dust" accents on the glass surface and metal base to create a used effect.
The work is done!
Tricks and tips
- Working with perspective: If the lamp has a complex angle, divide it into geometric shapes and work with each part separately.
- Glass transparency: Use "Soft Light" modes for highlights and "Multiply" for shadows to emphasize the texture of the glass.
- Detailing: Add small screws, rivets and abrasions to make the lamp look more realistic.
- Glow: Experiment with glow colors: classic yellow, magical blue or even flashing green.
Related materials

Tutorial
Drawing stones
March 10, 2025
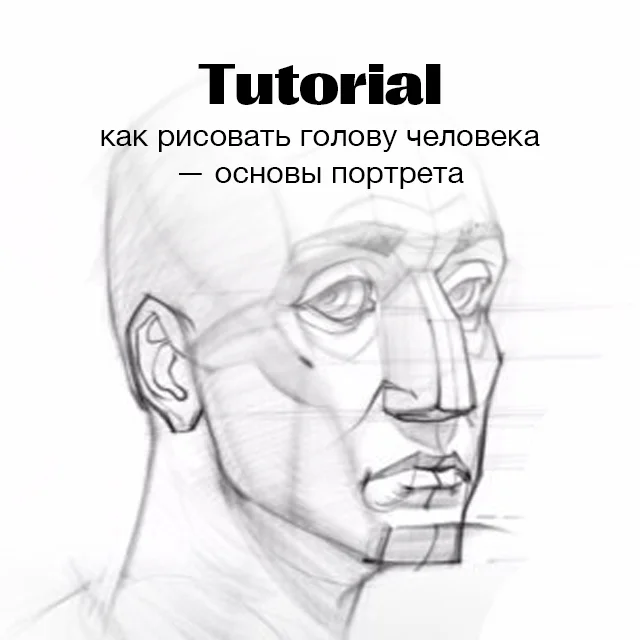
Tutorial
How to draw a human head
September 18, 2023

Tutorial
How to draw a child?
January 13, 2025

Tutorial
How to draw a torso
December 18, 2024

Tutorial
How to draw highlights
December 17, 2024

Article
3 tips for a beginner character artist. How to draw emotions
September 18, 2023

News
Прекрасные цветы в стиле аркейн, нарисованные вручную и воплощённые в 3D
May 15, 2026