TutorialUpdated: July 2, 2026
How to draw a shell
In short
Learn how to draw a shell from scratch. Follow our step-by-step lesson to master the technique of drawing and convey the structure and plasticity of a natural object.
2D artist
Drawing a shell is a fascinating process that allows you to hone your skills in working with form, texture, and details. By following these steps and applying the tips provided, you can create a realistic image of a shell.
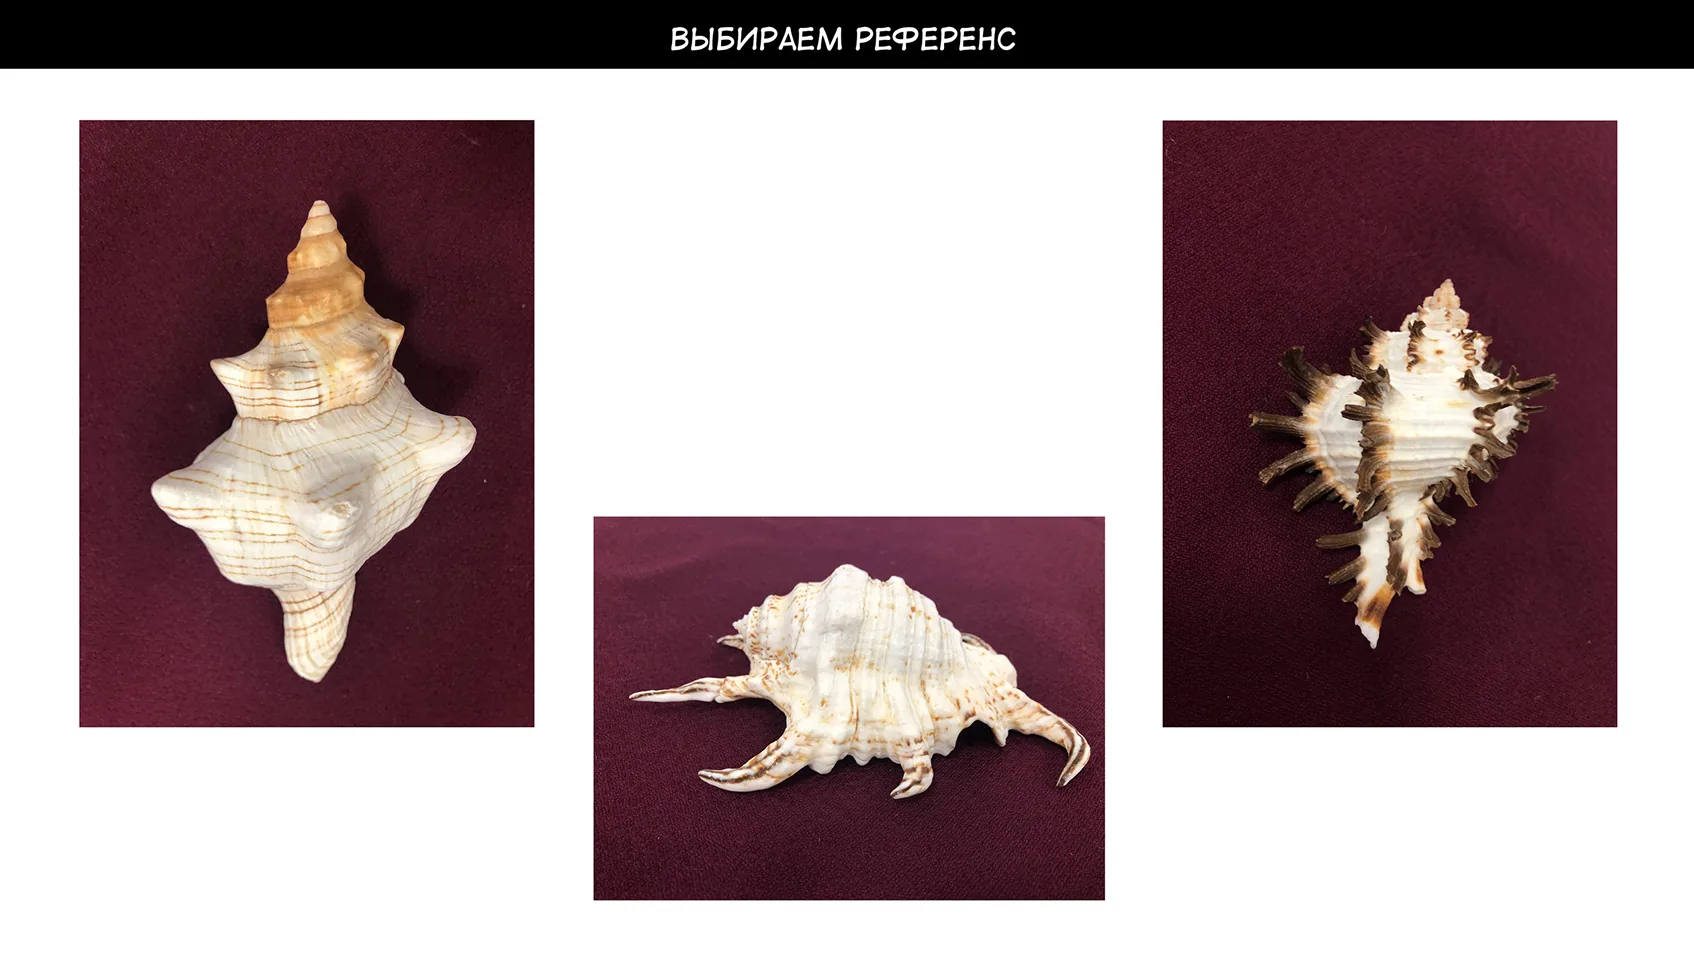
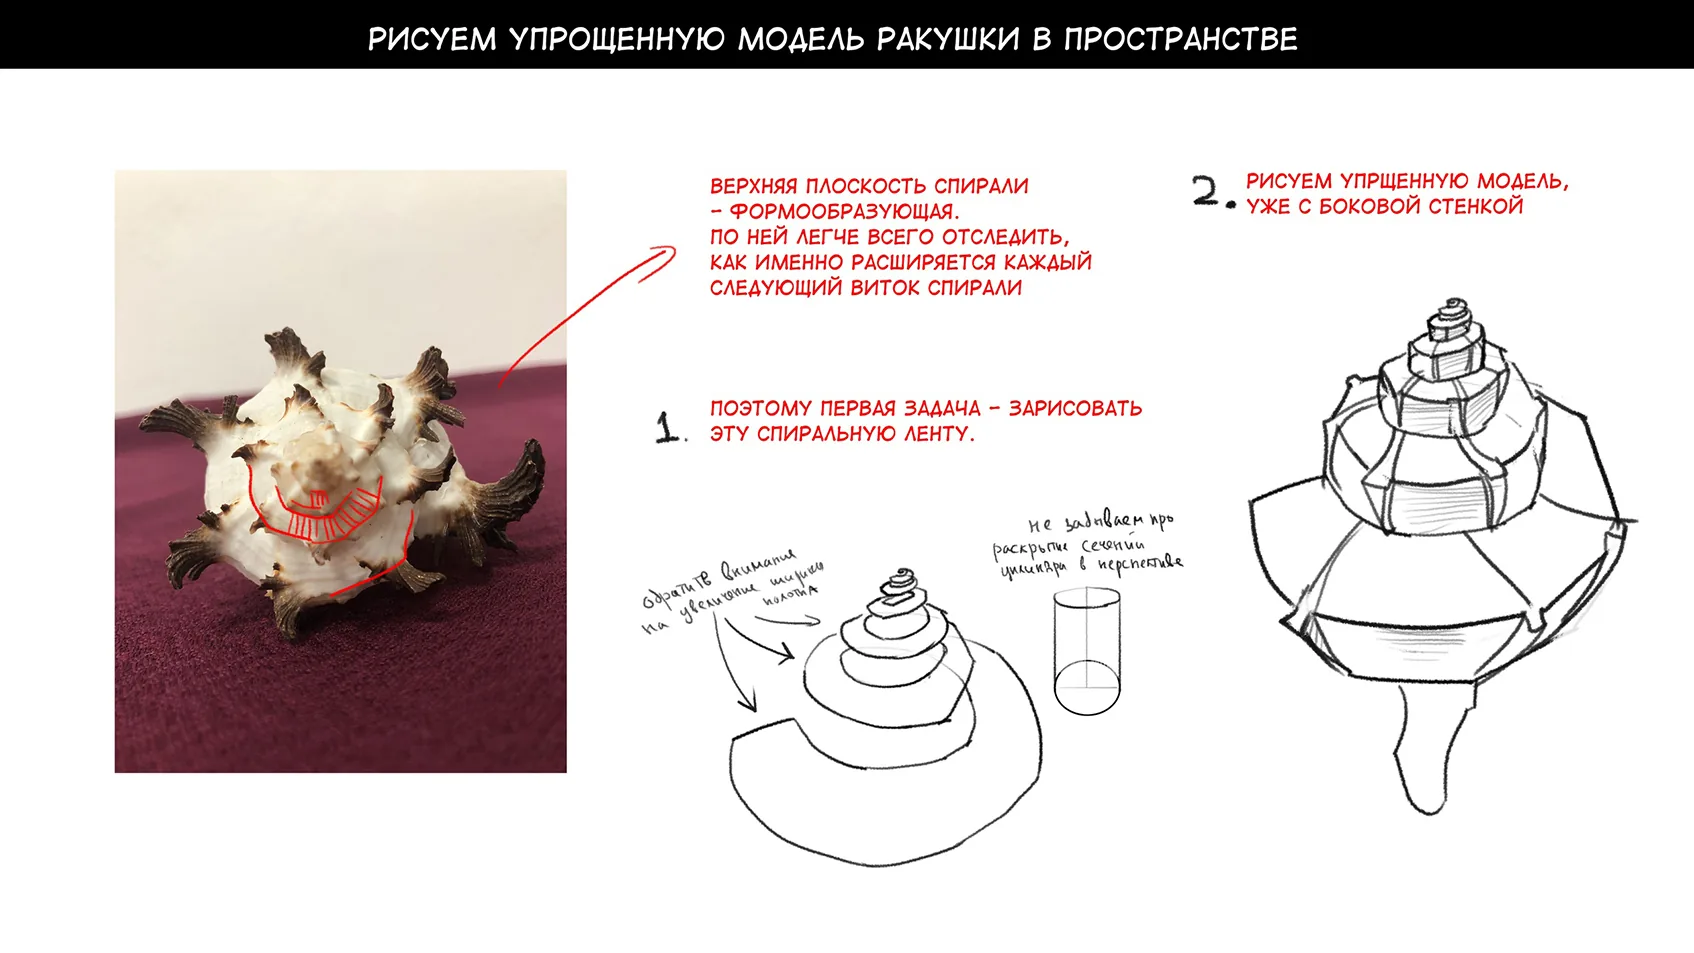
Step 1: Studying the shape and structure
Before you start drawing, carefully examine the shell or its image. Pay attention to its overall shape, spiral structure, and surface features. Tip: Use real specimens or high-quality photographs to better understand the shape and texture of the shell.
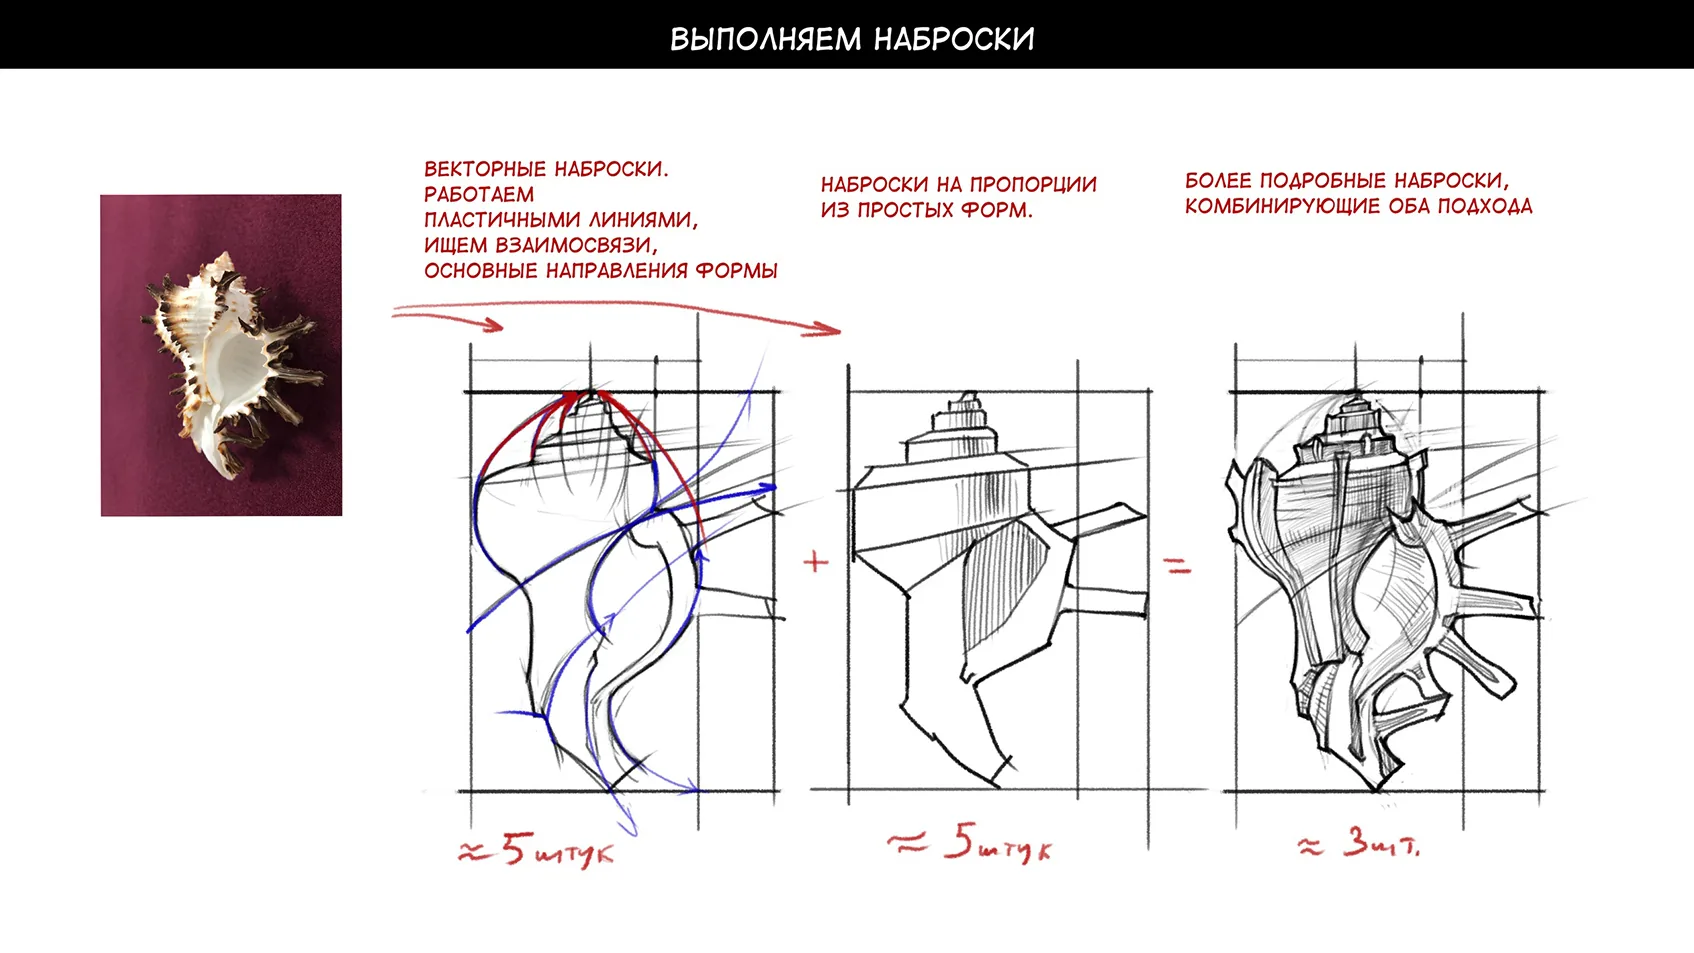
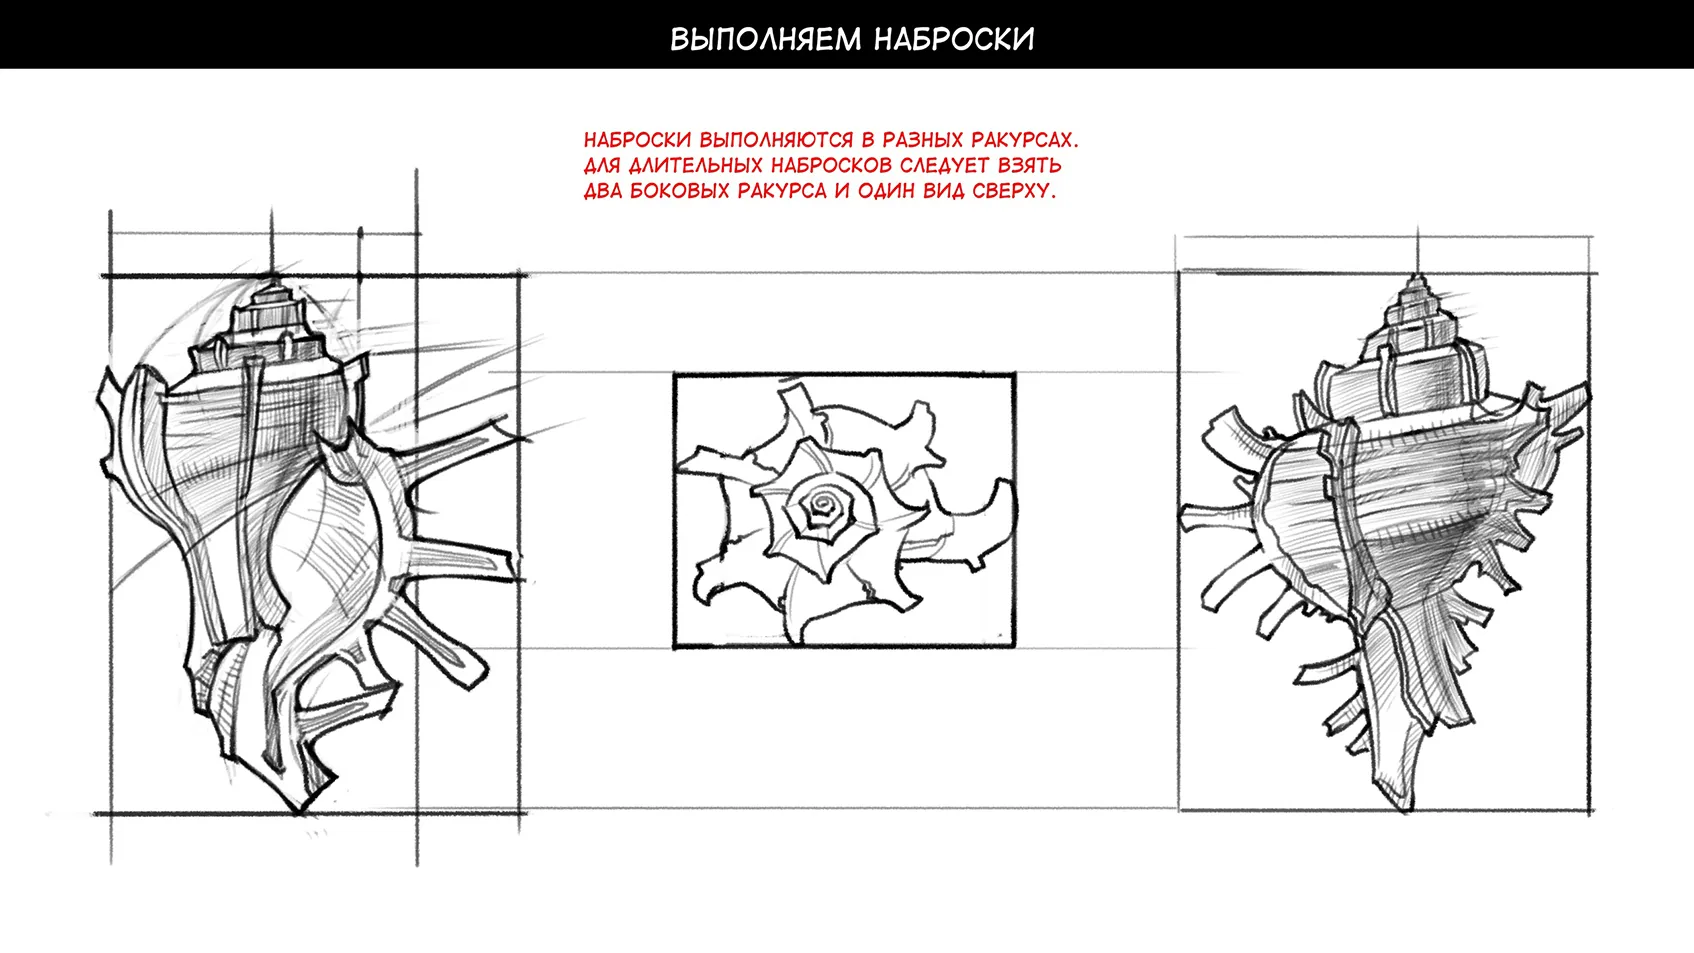
Step 2: Sketching the main shapes
Start with a light sketch of the main shapes of the shell using simple geometric shapes. This will help establish the proportions and overall composition. Lifehack: Use light strokes to easily adjust the drawing in the early stages.
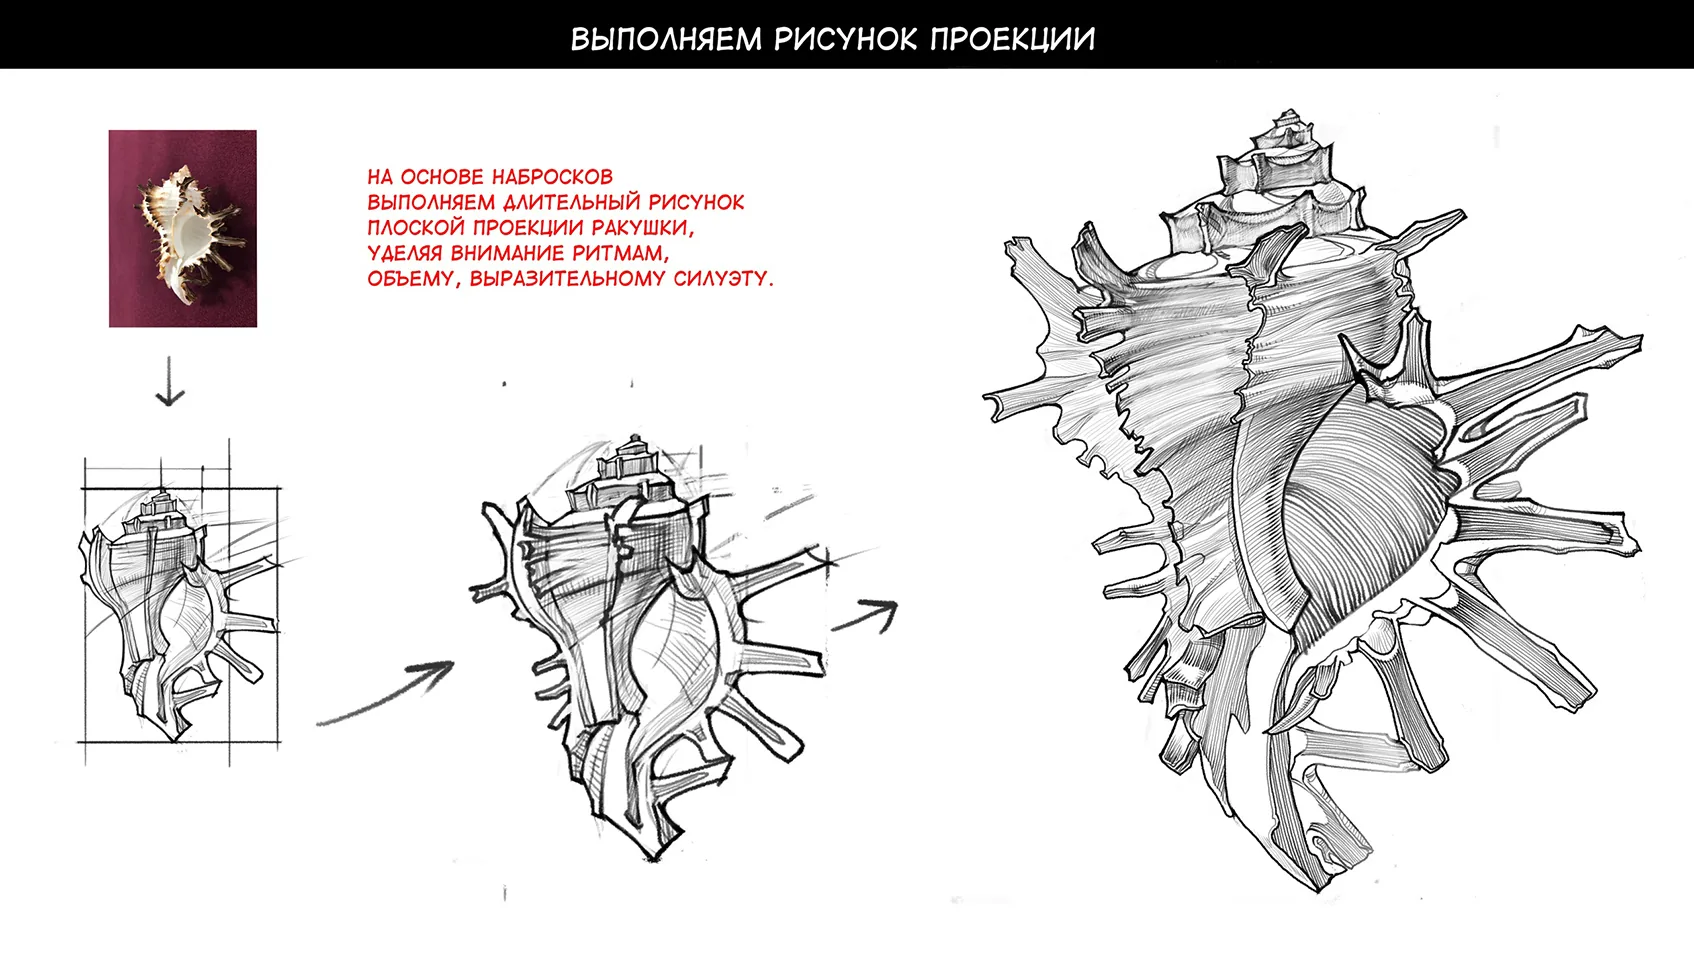
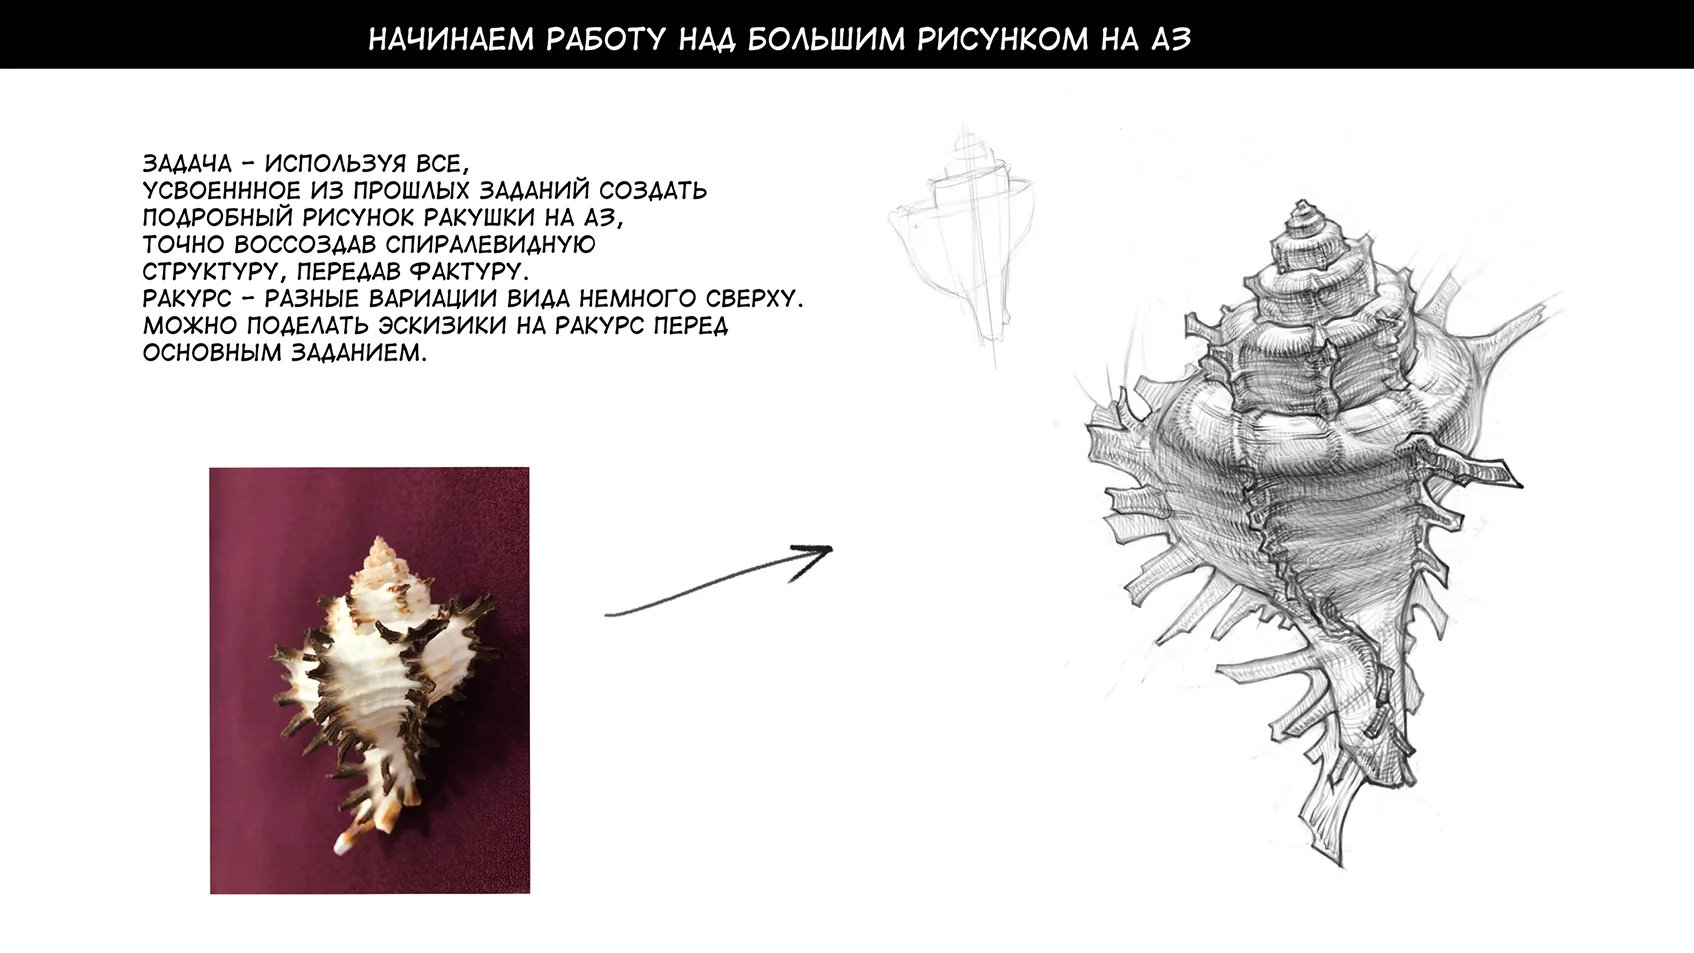
Step 3: Detailing the spiral
Related courses
All courses
from 3 900 ₽
-57%
Book illustration: The first page page
9 000 ₽3 900 ₽
Learn more

from 12 000 ₽
-20%
Векторная иллюстрация для начинающих
15 000 ₽12 000 ₽
Learn more

from 4 500 ₽
-55%
Character Concept: My First Hero
10 000 ₽4 500 ₽
Learn more
Work on the spiral structure of the shell, adding turns and refining their shape. Pay attention to the uniformity and smoothness of the lines.
Feature: Use a compass or handy round objects to create smooth spiral turns.
 The shell is ready!
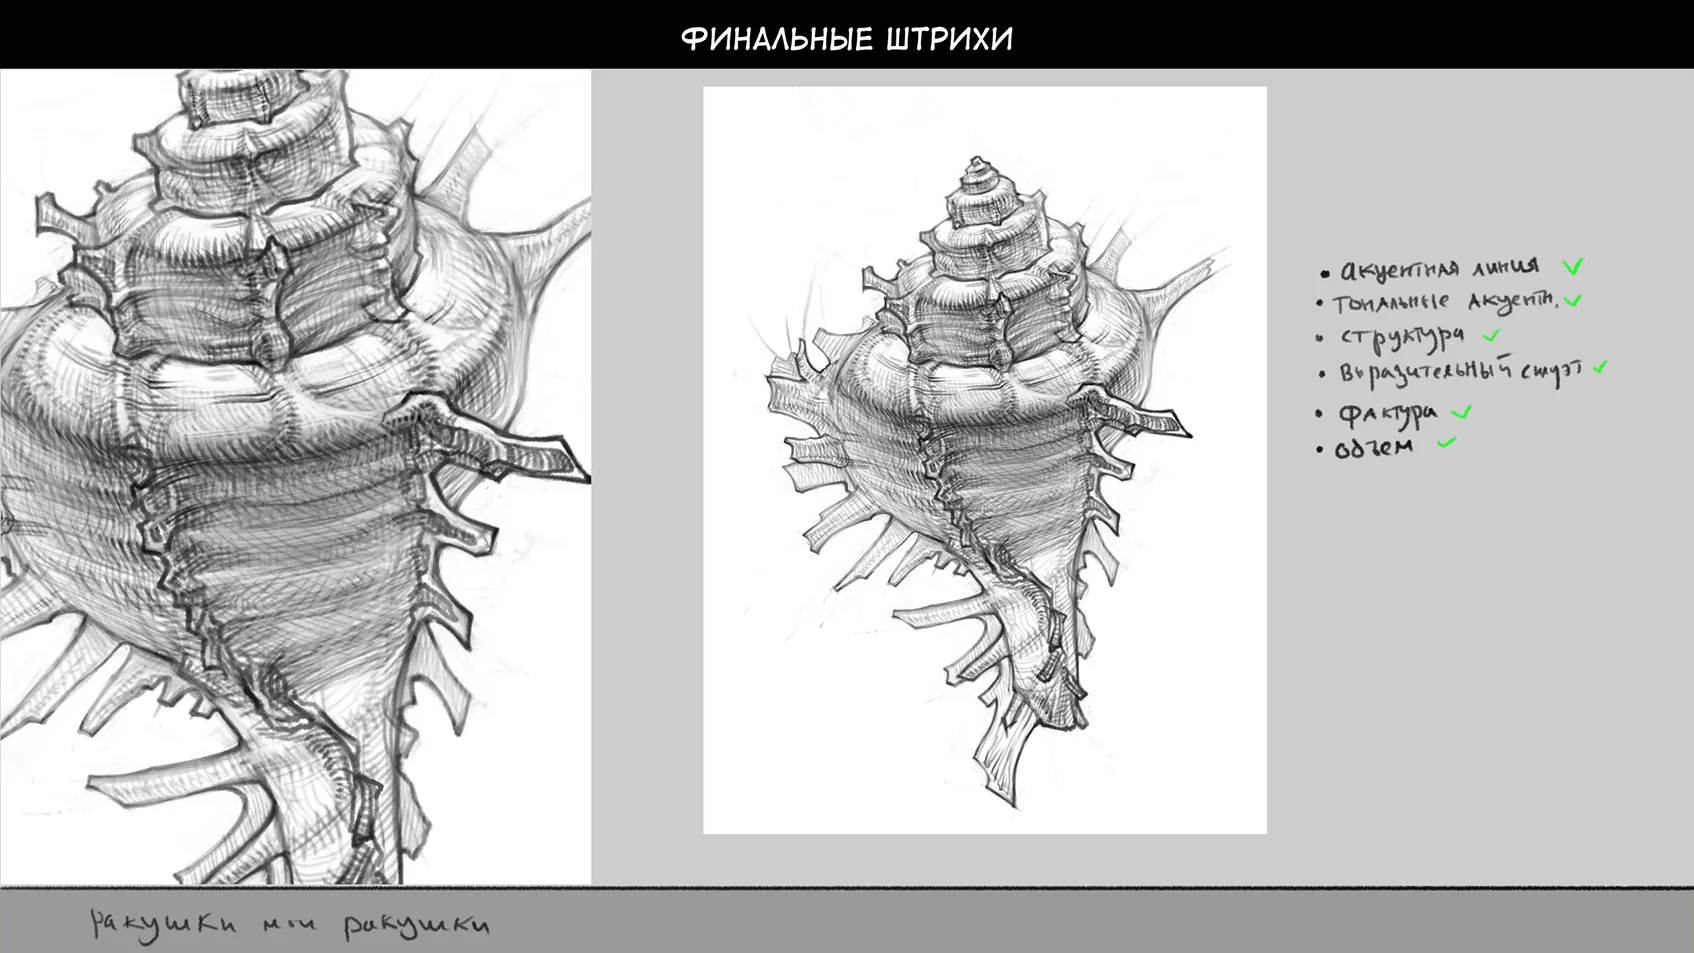
Step 4: Adding edges and texture
Draw the edges and grooves on the surface of the shell to convey its texture. Pay attention to their arrangement and depth. Tip: To convey texture, use a variety of strokes and lines of different thicknesses.
Step 5: Applying shadows and highlights
Determine the light source and add shadows to the shell to give it volume. Use soft transitions between light and dark areas. Lifehack: Use blending or a soft pencil to create smooth gradations of shadows.
Step 6: Working on details and accents
Refine small details such as cracks, chips, or stains on the surface of the shell. This will add realism to your drawing. Feature: Use an eraser-pencil to lighten areas and create highlights.
Step 7: Final touches and adjustments
Check the drawing for inaccuracies and make the necessary corrections. Add final touches to complete the work. Tip: Put the drawing aside for a while, and then look at it with a fresh eye to identify possible improvements.
The shell is ready!Related materials

Tutorial
Drawing stones
March 10, 2025
Tutorial
How to draw a palm tree
September 18, 2023

Tutorial
How to draw a child?
January 13, 2025

Tutorial
How to draw a torso
December 18, 2024

Tutorial
How to draw highlights
December 17, 2024

Article
3 tips for a beginner character artist. How to draw emotions
September 18, 2023

News
Прекрасные цветы в стиле аркейн, нарисованные вручную и воплощённые в 3D
May 15, 2026