How to Draw Shoulders and the Shoulder Girdle
Learning to draw shoulders and the shoulder girdle: I analyze the set of the neck, shoulder masses, clavicles and scapulas, deltoid, trapezius, sternocleidomastoid and pectoral muscles. Constructing the shoulder girdle step by step with Azat Nurgaleev in Procreate.
The shoulder girdle is where many drawings start to fall apart: the arm, neck, and ribcage seem to be there, but the connections between them are missing. In this lesson, I assemble the shoulder girdle the way I always do: I go from general volumes to bones and muscles, not the other way around. We'll look at the clavicles, scapulas, deltoids, trapezius, sternocleidomastoid, and pectoral muscles, the set of the neck, and how to fit all this into a single form. I draw in Procreate, but the method works just as well with a pencil.
Where it all begins: the neck enters the ribcage
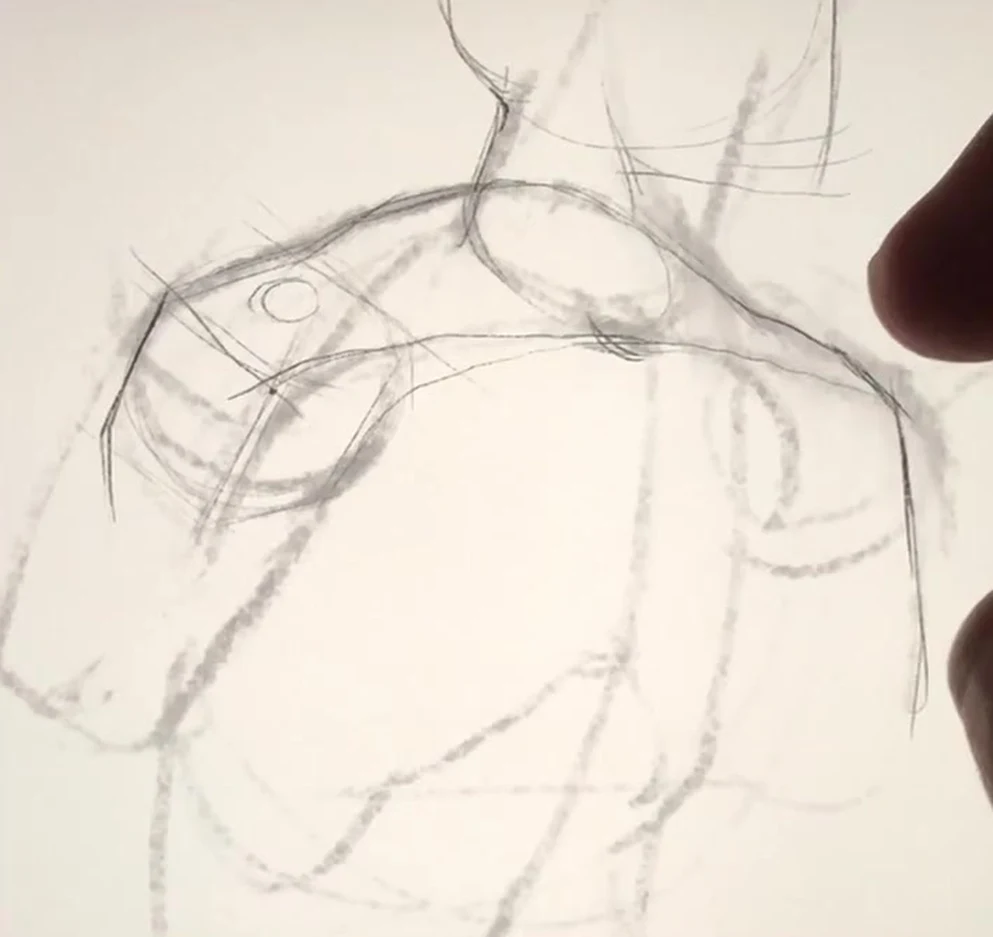
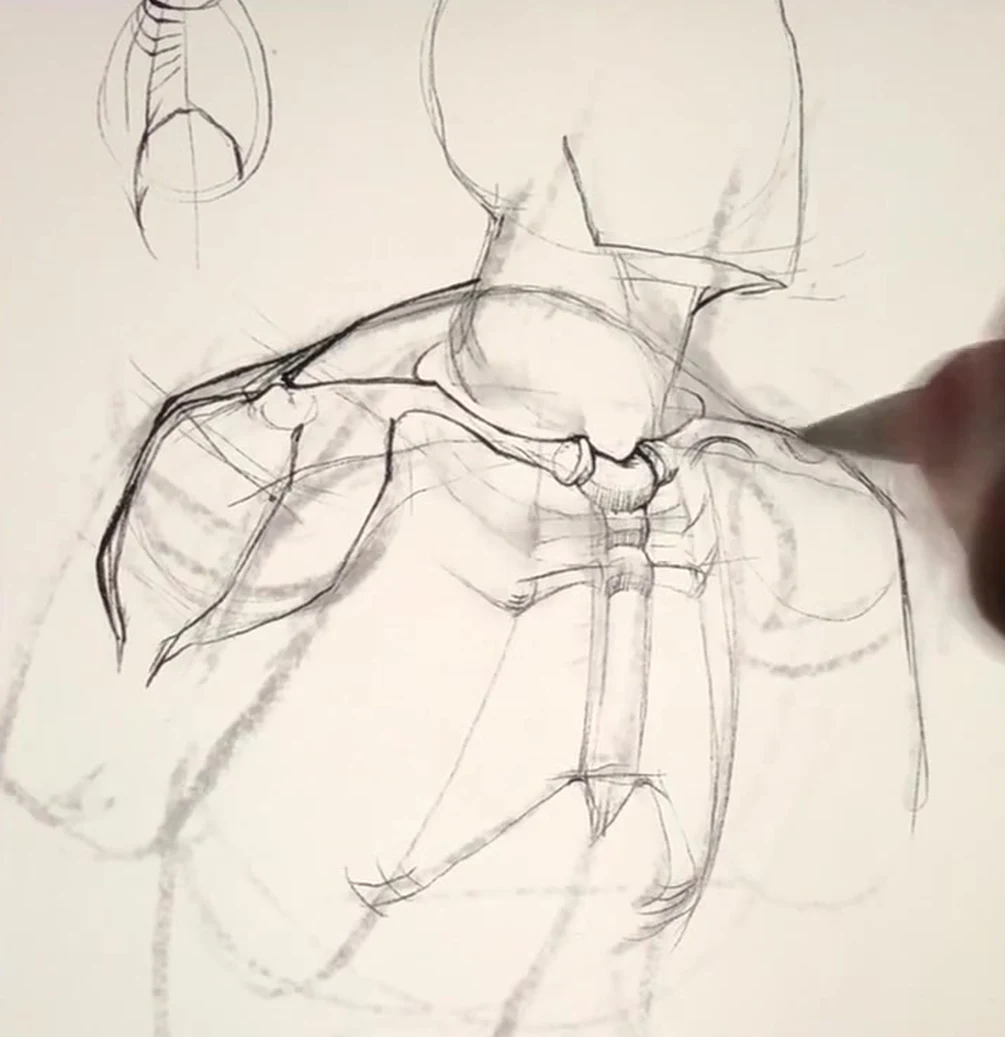
I start not with the shoulders, but with the set of the neck. I look at how the neck fits into the ribcage and immediately decide what position I have: the person is either slightly slouching or, on the contrary, bending in the other direction. Most often, it's a slight slouch, and then the pelvis is also slightly rotated, and a soft fold runs along the figure. At this stage, I don't need either the pelvis or the legs, I only need the shoulder girdle, so I take it and enlarge it to work on a large scale.
Next, I outline the shoulder masses. These are the same balls on the sides to which the arms are attached. For now, they are just two volumes in space, but they already show the slope of the shoulders and the general character of the pose.
Shoulder masses: not balls, but box forms
The mistake I see most often is that the shoulder mass is drawn as a flat circle. In fact, it's not only a ball, but also a box form. The mass has a front plane, a side, a back that we can't see, and a top surface on top. As soon as I set these faces, the deltoid stops being a pancake and gets volume.
At the same stage, I keep the ribcage like an egg. I don't care about individual ribs yet, I care about the larger form: where it's tilted, how it turns in space. First, volumes, and only then I fit bones and muscles inside them. If you skip this step and dive straight into anatomy, the form will fall apart.
Clavicles like a handlebar and fossae
Approximately in the center of the top surface, closer to the back, I have a clavicular block. I outline the clavicles with two arcs: one common arc, then a transition to the same arc, only convex in the other direction. Together, it looks like a bicycle handlebar, and this image helps not to draw the clavicles as a straight stick.
Related courses
All courses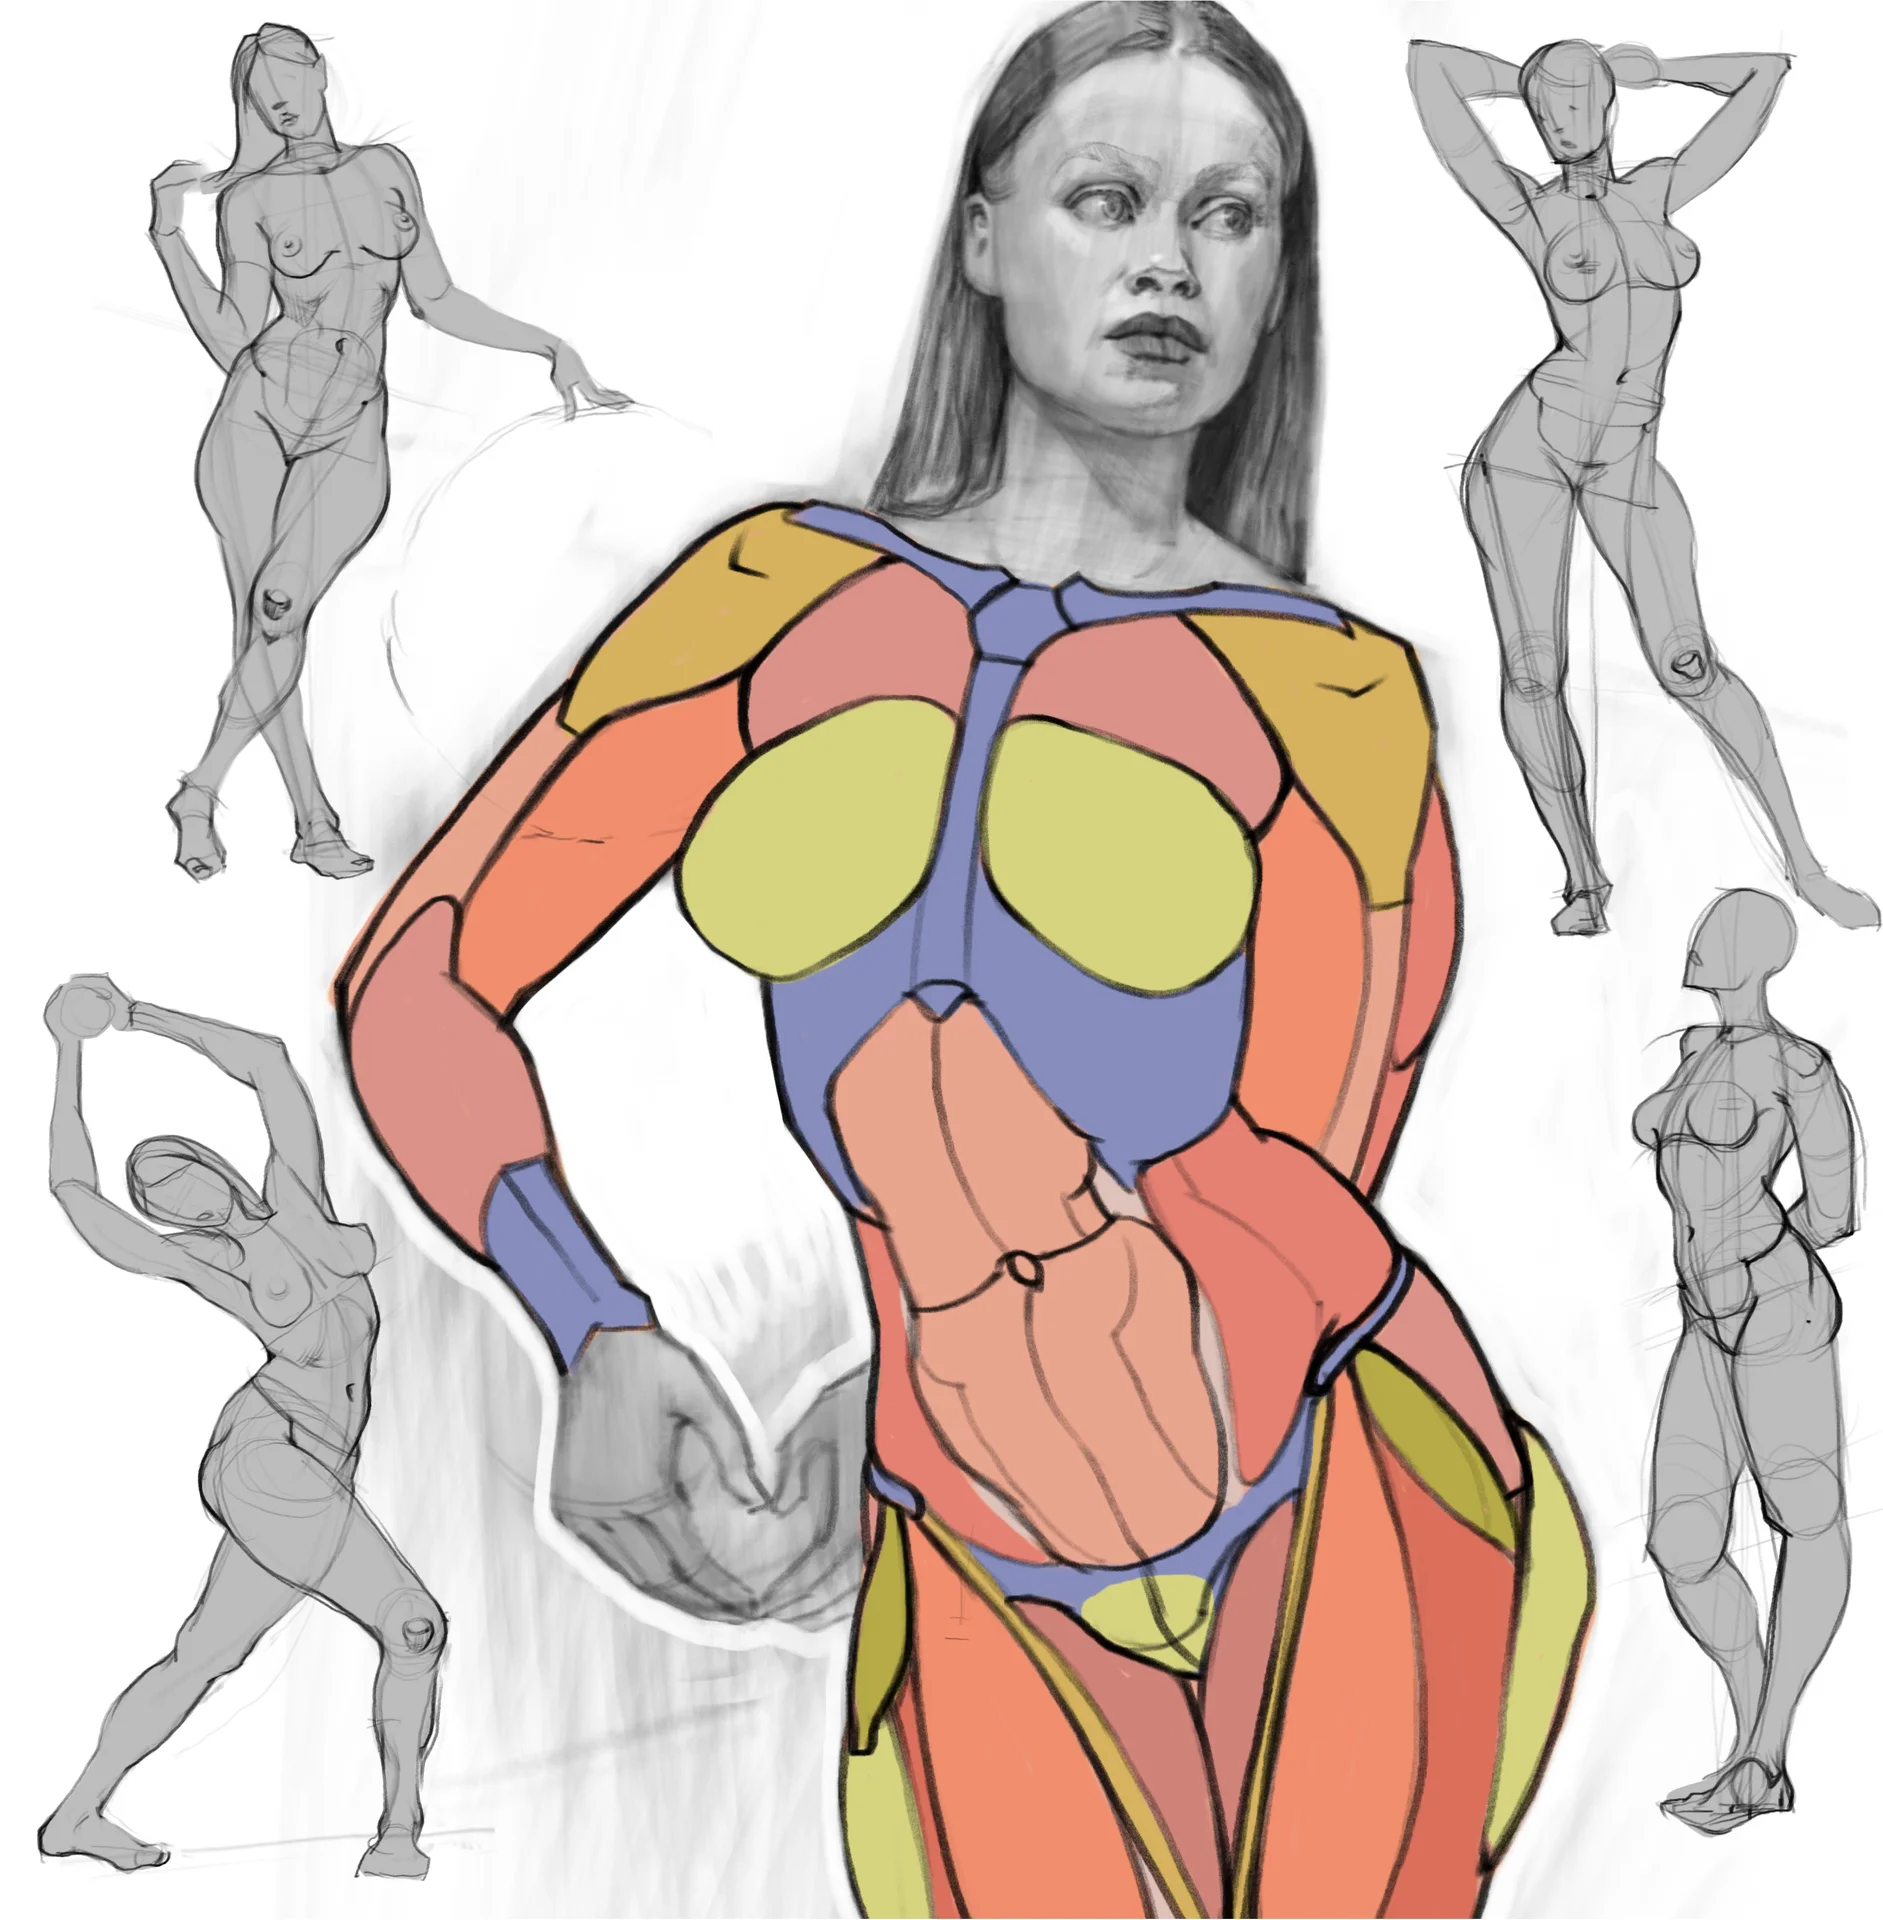
Моя первая фигура
5 000 ₽2 500 ₽

Prop concept: render and atmosphere
9 000 ₽3 900 ₽

Book illustration: The first page page
9 000 ₽3 900 ₽
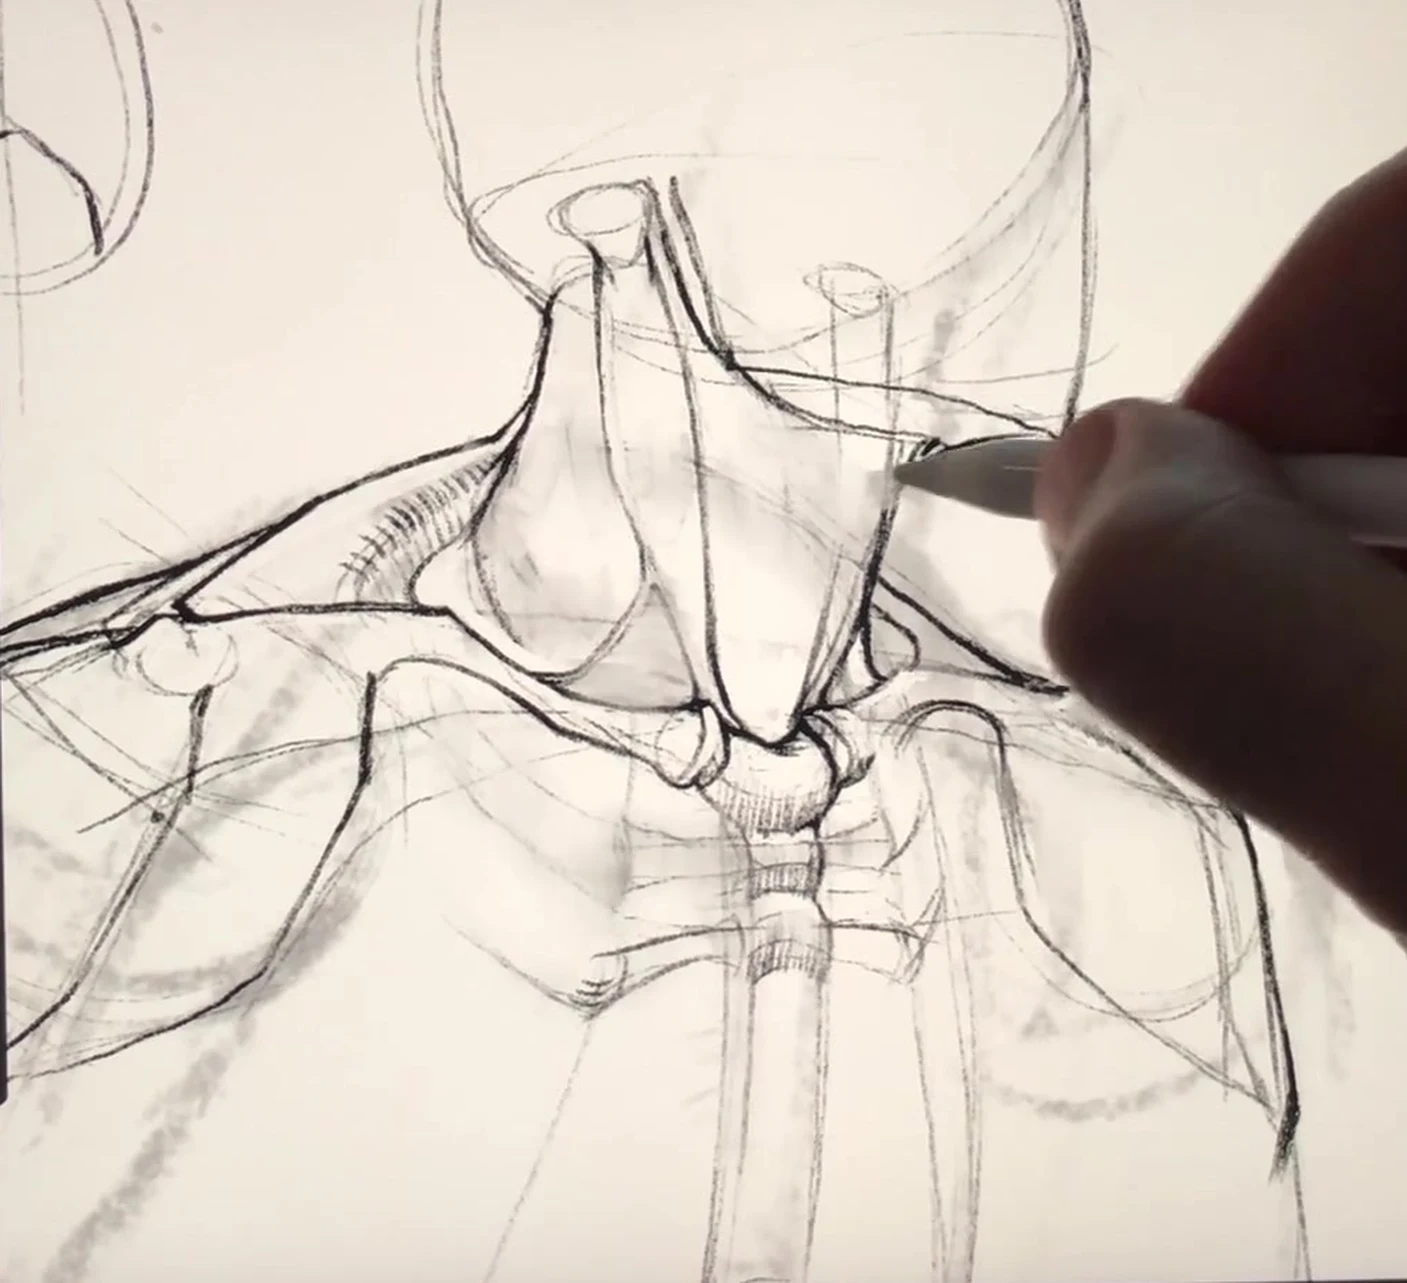
I immediately estimate the fossae. Below the clavicles will be the infraclavicular fossae, above the supraclavicular fossae, they're called that. The clavicles have heads, but to place them, I need the sternum. And another important point: the clavicles shouldn't be equally thick along their entire length. Their shape is alive, somewhere they thin out, somewhere, especially at the breaks, a little thicker. Here, a measure is needed so that the clavicle doesn't become either a matchstick or a log.
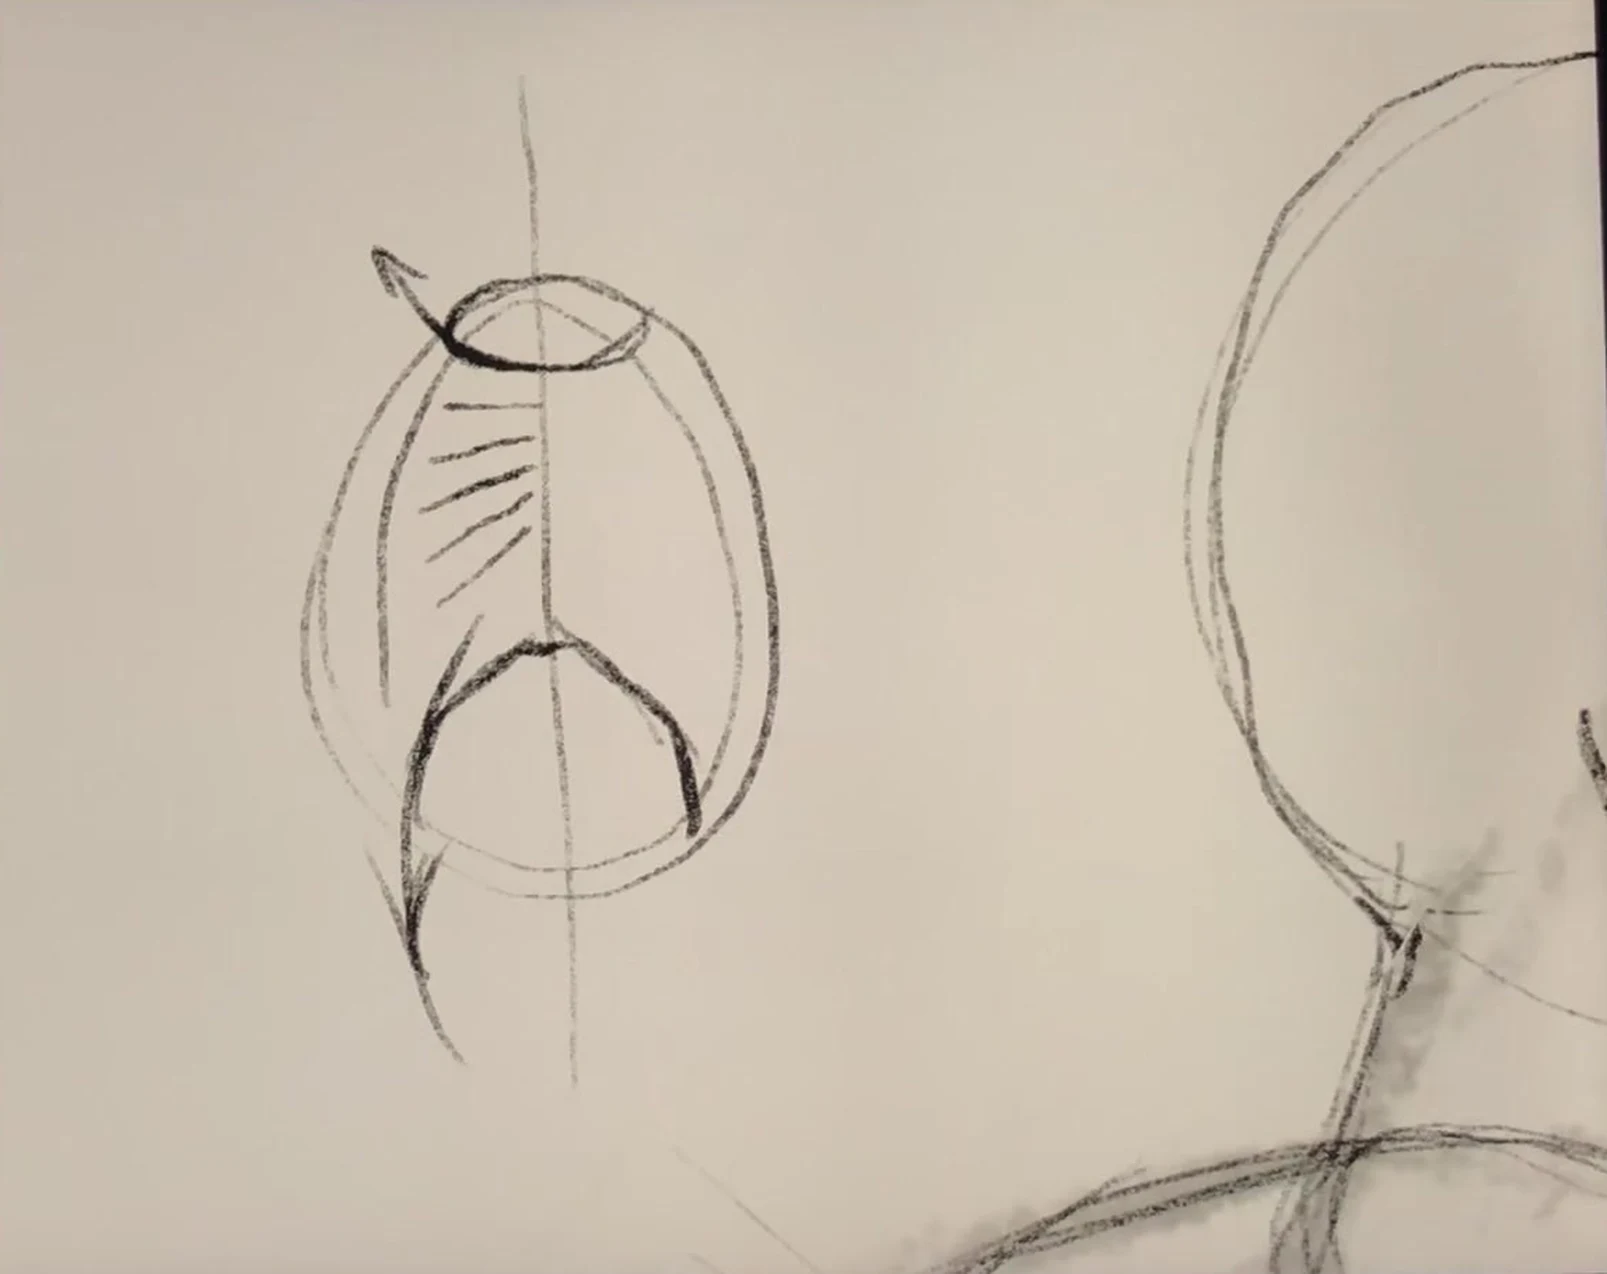
Sternum, manubrium, and ribs like a fan
The heads of the clavicles sit on the sternum, so I draw the sternum itself and its manubrium on top. At the bottom of the sternum is the xiphoid process, on the sides are the costal margins. From these angles to the manubrium, two lines go, along them I see where the ribcage breaks from the frontal plane to the inclined and lateral.
I place the ribs like a fan. The first rib looks almost horizontal and gives the projection of the neck cut, the last one goes down, and the middle ones go between them, and the lower they are, the stronger the incline. I make sure that there are no identical ribs: identical slopes and identical intervals kill liveliness. I make the distance between the ribs a little more than the rib itself. On a living person, all this is covered with skin and muscles, so I gently mask the ribs, leaving only the frontal part open.
Deltoid, trapezius, and scapular spine
Now I hang muscles on the skeleton. The front deltoid comes to the clavicle in front, then the middle one, and the back one twists a little. Where the clavicle meets the node, the acromion comes out, and the scapular spine goes behind it. Between the clavicle and the scapular spine, something like a harbor is formed, and the trapezius enters it and attaches along the edge.
I repeat the same thing in the background, for the second shoulder, only softer, because it's further from us. I model the deltoid more gently than the bones: it has its own small volume, but I always lead the bones and bone nodes more actively, and the muscles are a little calmer. This way, the drawing doesn't turn into a mess of equally rigid lines.
Sternocleidomastoid muscle
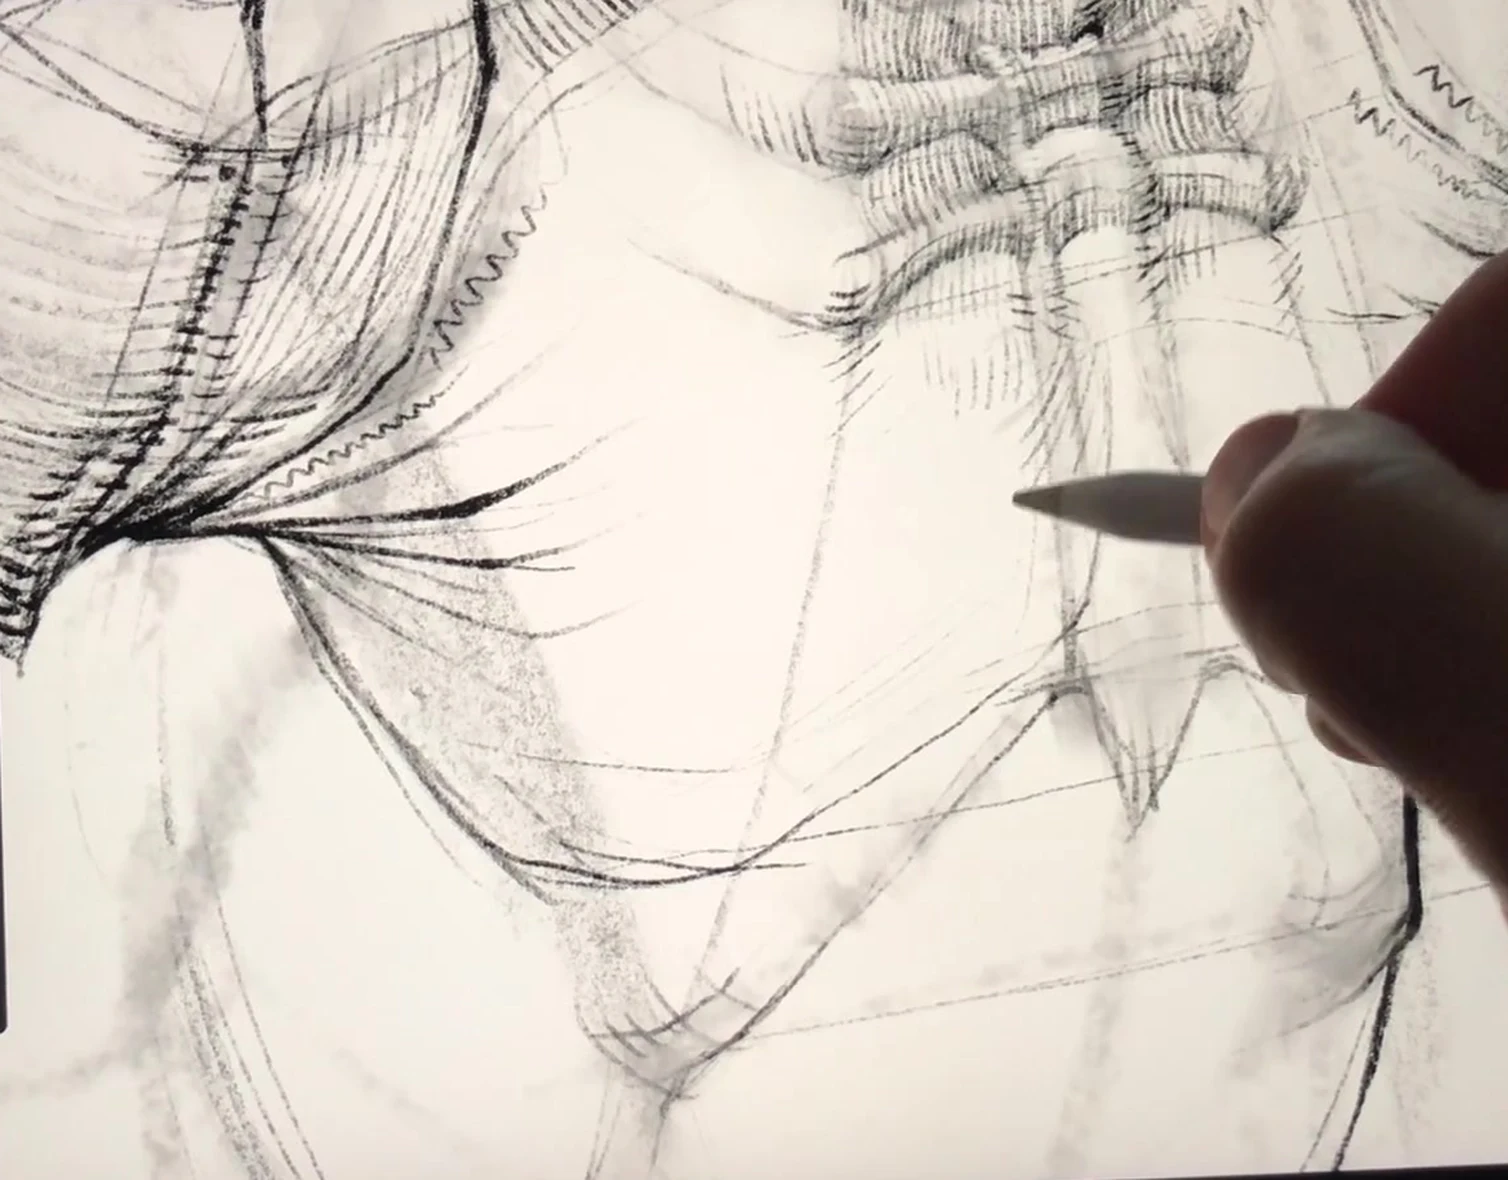
The neck is held by the sternocleidomastoid muscle. I start it from the mastoid process on the skull and lead it down to the clavicle and sternum. At the beginning, near the mastoid process, it's quite thick, it widens towards the center, and narrows again towards the bottom. When the neck is turned, the muscle twists, and this must be shown.
Soft tissues from the lower jaw and Adam's apple lie nearby. In the center of the neck, this muscle is slightly blurred and enters the general cylinder, and closer to the top and bottom, it stands out in relief and is read as a separate form. I also keep the neck not just as a cylinder: it has a slight box form, frontal and lateral planes, even if they're very soft.
Pectoral muscles and lateral plane
The pectoral muscles go under the deltoid. To understand where their lateral border passes, there's a simple trick: I take the point of the form break on the shoulder and the costal margin and draw an arc between them. This arc shows the break from the inclined plane to the lateral one, beyond which the pectoral muscle goes to the side.
I attach the pectoral muscle to the clavicle and sternum on top and lead it down. The muscle is most active in the lower part, and I gently close and prescribe the upper layer. When the figure is toned, I can outline the muscle fibers themselves along the break, they go in bunches in one direction and the other. Here, it's important not to overload: the fibers are an ornament, not a basis.
Light, shadow, and the finale
Towards the end, I set the light. Let it fall slightly from the front, from above and from the left. Then the lateral planes of the nodes and the clavicle on one side go into the shadow, and on the other they catch the light. I show the volume of the ribs and the sternum, the sternum itself is like a washing board.
The most difficult thing at the end is to put everything together. I combine the clavicles and the sternal manubrium into one large plane, because on a living person, everything is covered with skin and there are no clear lines. I fit the ribs into the overall shape with a soft wave: here, slightly up, down, a bend again, and I take the edge to nothing, as if it were dissolving. It's this transition that convinces the viewer that they're looking at a living body, not a scheme of bones.
How the shoulder girdle moves
Even when I draw a static pose, I keep in mind that the shoulder girdle is movable. The clavicles and scapulas don't live separately: they're connected to each other and to the humerus and move together. As long as the arm is lowered or raised no higher than the shoulder, up to about ninety degrees, the clavicle and scapula hardly change position. As soon as the arm goes higher, they begin to turn up, and the higher the arm, the more the scapula rises.
That's why, when I draw a raised arm, I don't leave the shoulder in place, but lead the whole node after it. If this is not done, the arm will look glued, and the shoulder girdle will lose its liveliness and truth of movement.
Common mistakes
I've collected what people stumble on most often.
- Flat shoulder mass. Remember about the box form: the ball has faces, otherwise the deltoid looks like a pancake.
- Identical clavicles. A straight stick of the same thickness is immediately read as a mistake, lead a living arc.
- Ribs copied. Identical slopes and intervals make the ribcage dead.
- Bones and muscles of the same rigidity. I lead the bones more actively, the muscles softer, then the form breathes.
- Rigid edges at the end. If you don't take the form to nothing, the body will look carved out of cardboard.