How to draw hair with a pencil
Hair is drawn in large masses and strands that follow the direction of growth and the shape of the skull. First the overall mass of the hairstyle, then a mid tone, then light and shadow, then the architecture of the strands — and only at the end the individual locks where the form breaks.

In short: hair is not drawn strand by strand, but in large masses and locks that follow the direction of growth and repeat the shape of the skull. First, the general mass of the hairstyle is outlined, then it is covered with a medium tone, light and shadow are distributed, the "architecture" of the locks is built up, and only at the end are individual curls detailed at the breaks in the shape.
Hairstyle is a powerful tool for an artist in creating an image. It completes the shape of the head, makes the silhouette cohesive and sets the character of the character. Smooth, slicked-back hair suggests discipline and coldness, soft waves and disheveled strands suggest romance and freedom, and sharp, jagged curls suggest rebellion and anxiety. Hairstyle indicates the era, fashion, and social status, and it's also movement: strands caught by the wind or a sudden turn of the head add life and dynamics to the drawing.
In class, we encourage students to abandon drawing individual "hairs" and move to the architecture and modeling of the large form. This approach does not complicate, but simplifies the task: you stop drowning in details and begin to control the volume. Next, we will step by step analyze the method used by the curators of Skills Up School, so that the hairstyle in the portrait takes on a beautiful shape and artistic appearance.
How to draw hair step by step: the Skills Up School method
Step 1. Outline the general mass of the hair
At the very beginning, we outline the general mass of the hair and the shape of the hairstyle with one large spot. We don't think about strands — we define the silhouette and how the hairstyle sits on the head.
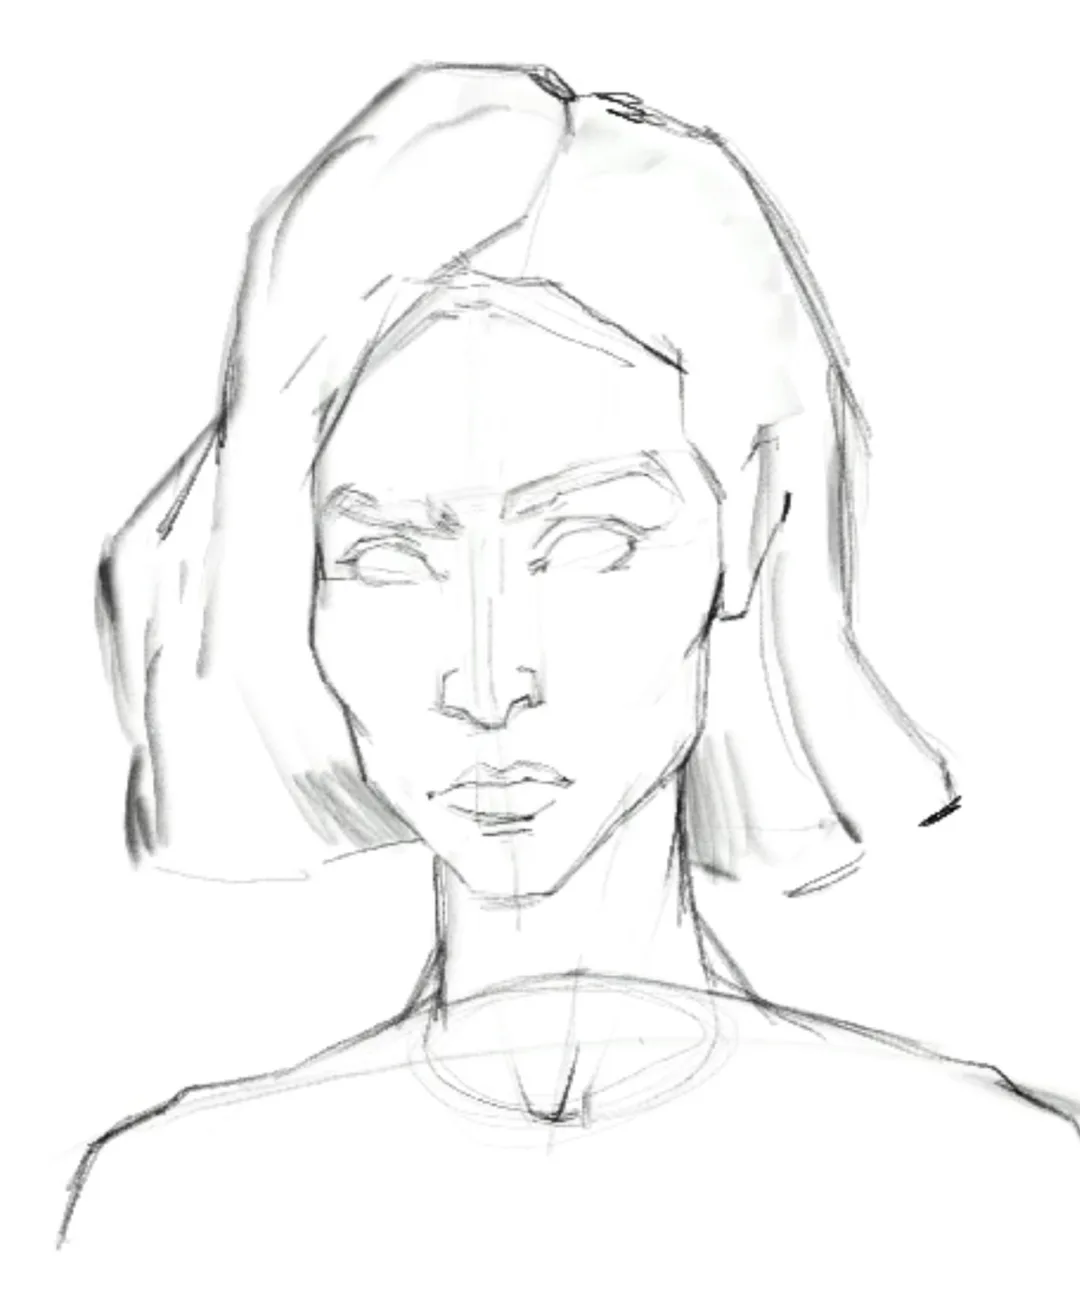
Step 2. Cover with a medium tone
Cover the entire mass of hair with a medium tone using a non-emphasized stroke. This way, you create a smooth base on which you can later apply graphics and analyze the chiaroscuro.
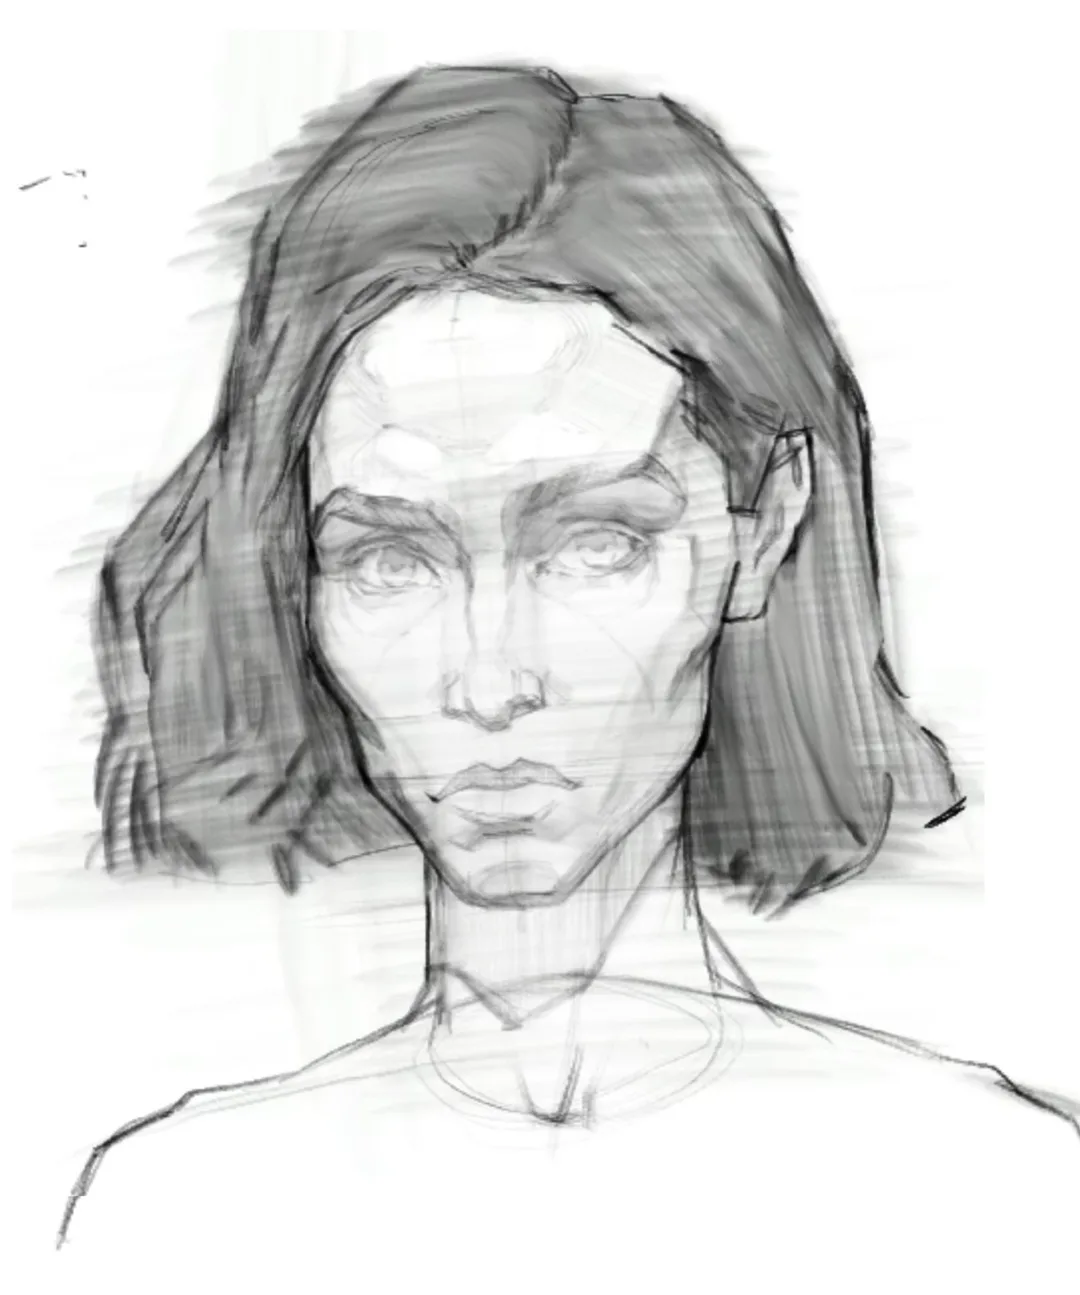
Step 3. Outline the light and shadow
Now outline the lightest and darkest areas. Add deep shadows where the strands go inward. Please note: we do not draw the hair growth area clearly — it almost always remains slightly in the shade, so this thickening, the "shadow pit," can be darkened and smudged. We have a separate lesson on how light works and how to place highlights and chiaroscuro in a drawing.
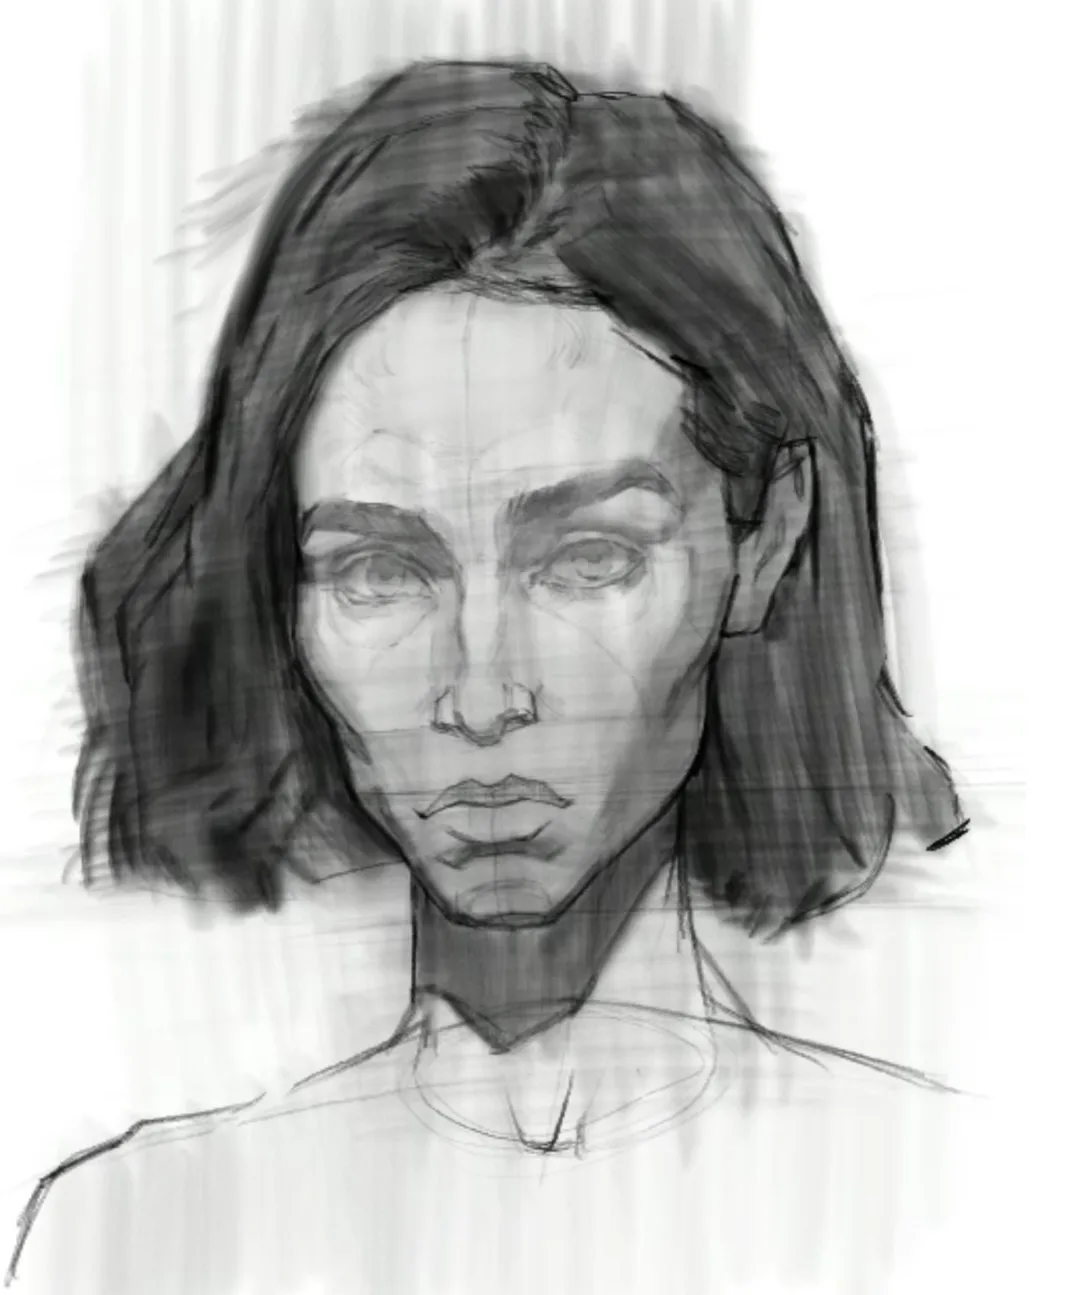
Step 4. Building the architecture of the hairstyle
At this stage, you need to understand how the volumes and shapes are distributed, where the turns and main fractures are — what the hairstyle architecture consists of. Outline the base and directions of hair growth. Strands always follow the shape of the skull, so it's useful to remember the structure of the head.
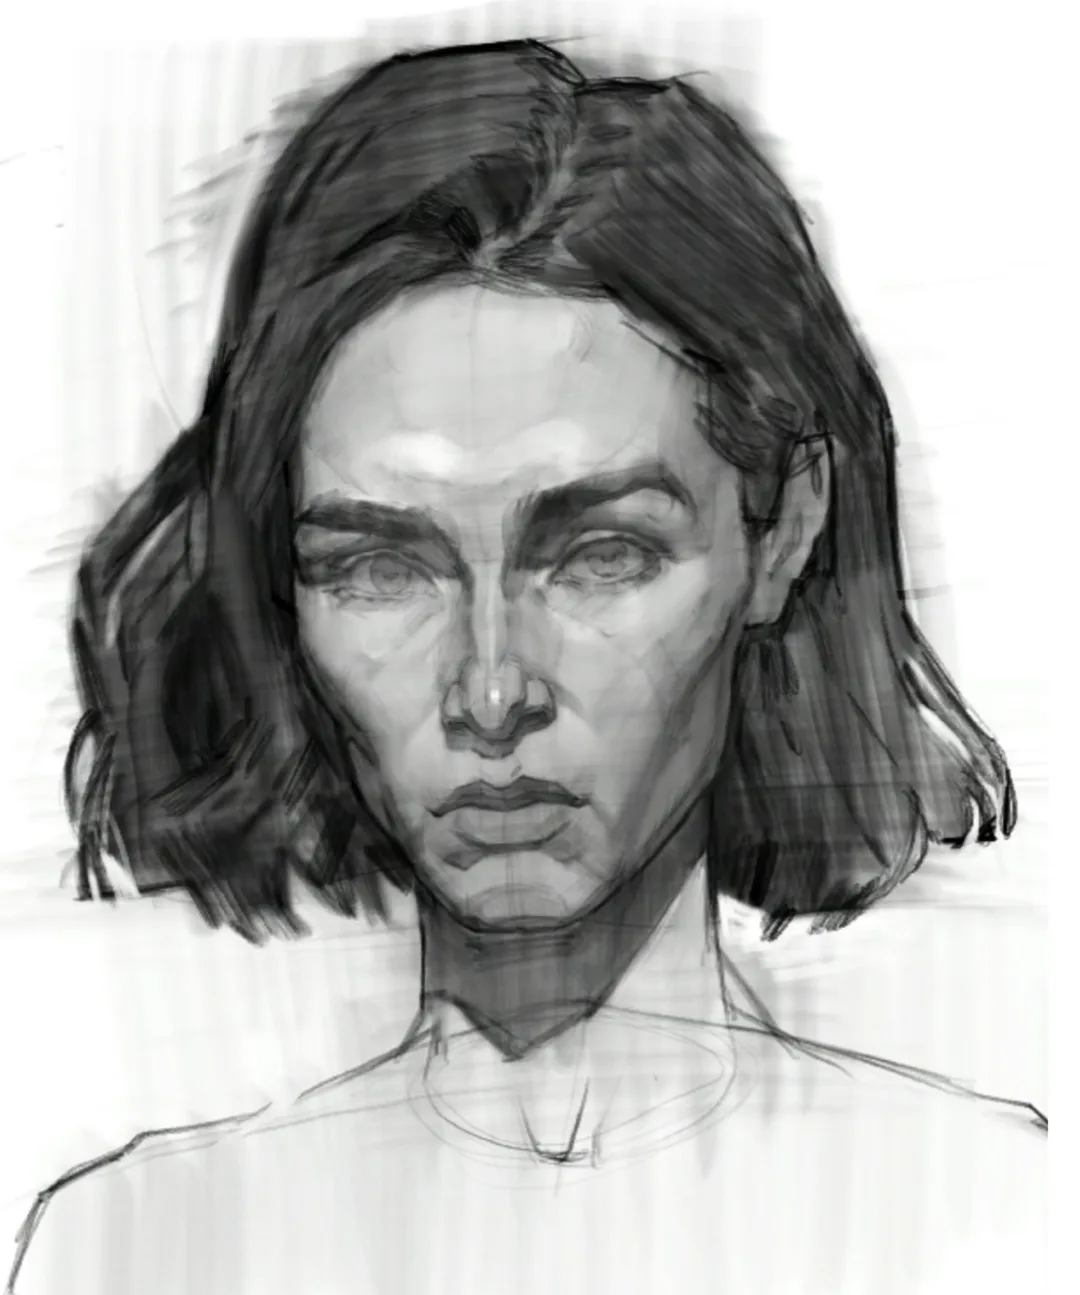
Step 5. Detailing curls at breaks
Additionally, you can show the strands and curls that have detached from the main mass. It's important to remember: the strands follow the breaks of the skull. There's no need to draw every single strand in detail — aim to create a rhythmic composition and an interesting spot. Detail only the areas where the form breaks.
Related courses
All courses
My first figure
5 000 ₽3 750 ₽

Book illustration: The first page
9 000 ₽4 950 ₽

Prop concept: render and atmosphere
9 000 ₽4 950 ₽
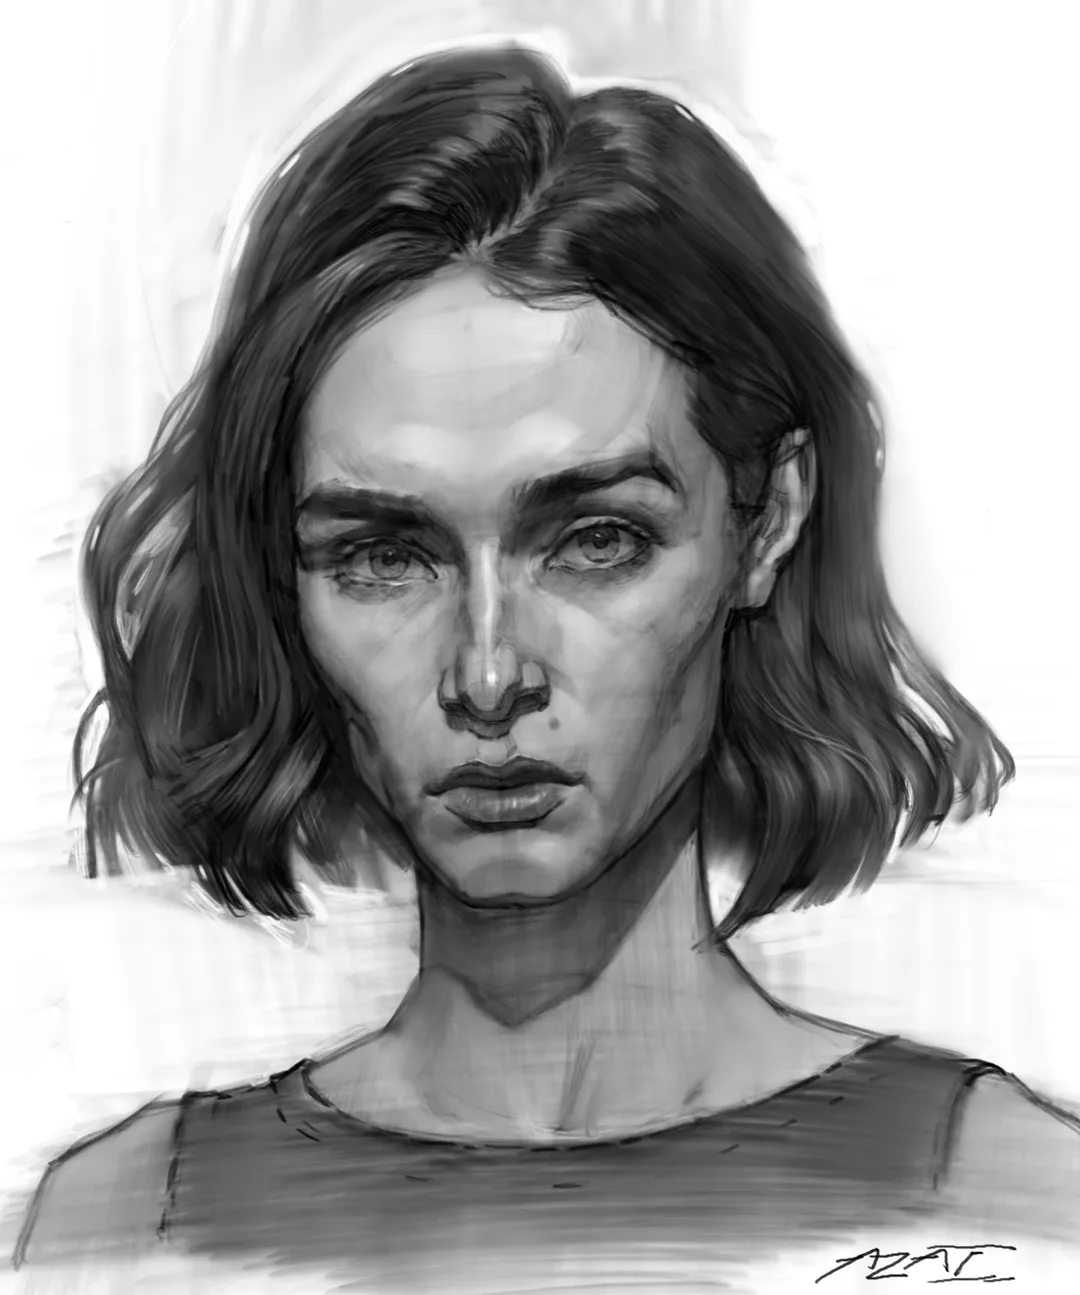
How hairstyle works for the artistic task
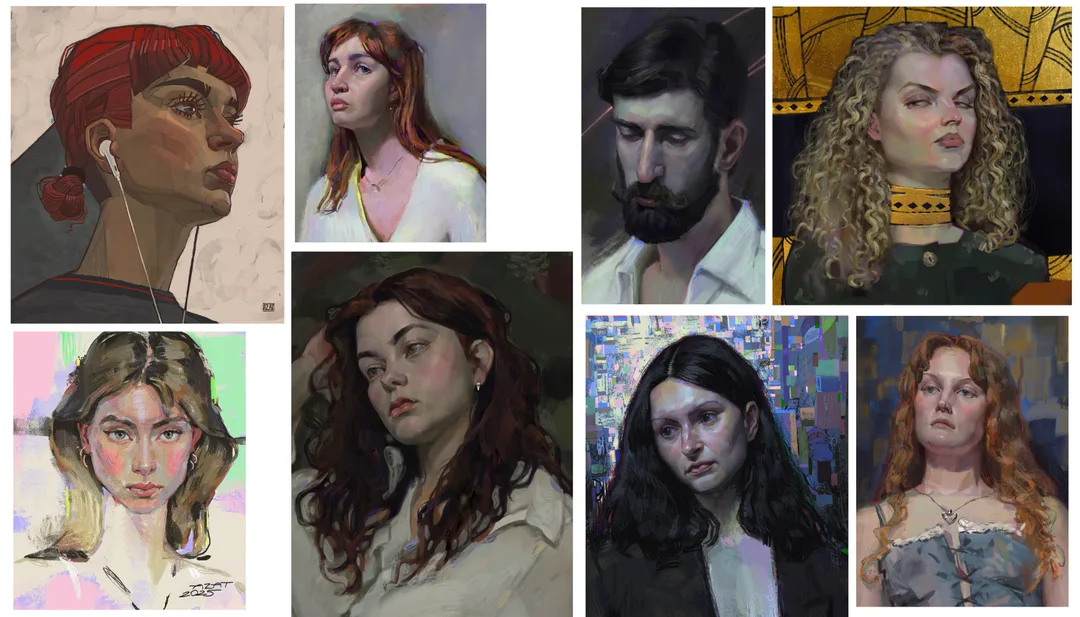
Below are a few examples that show how diverse a hairstyle can be and how it solves the artistic task. These are graphic and painting works by Azat Nurgaleev, the founder and curator of Skills Up School.
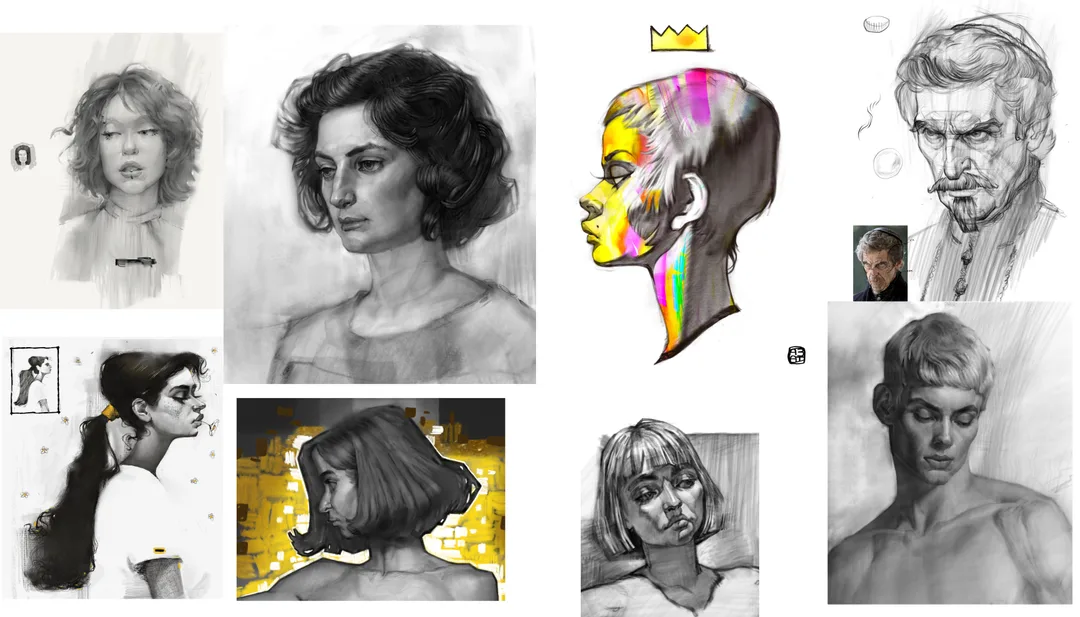
How great artists drew hair
Each artist solved the problem in their own way, and in each solution you can find something new for yourself. Let's see how masters from different eras and movements approached their work.
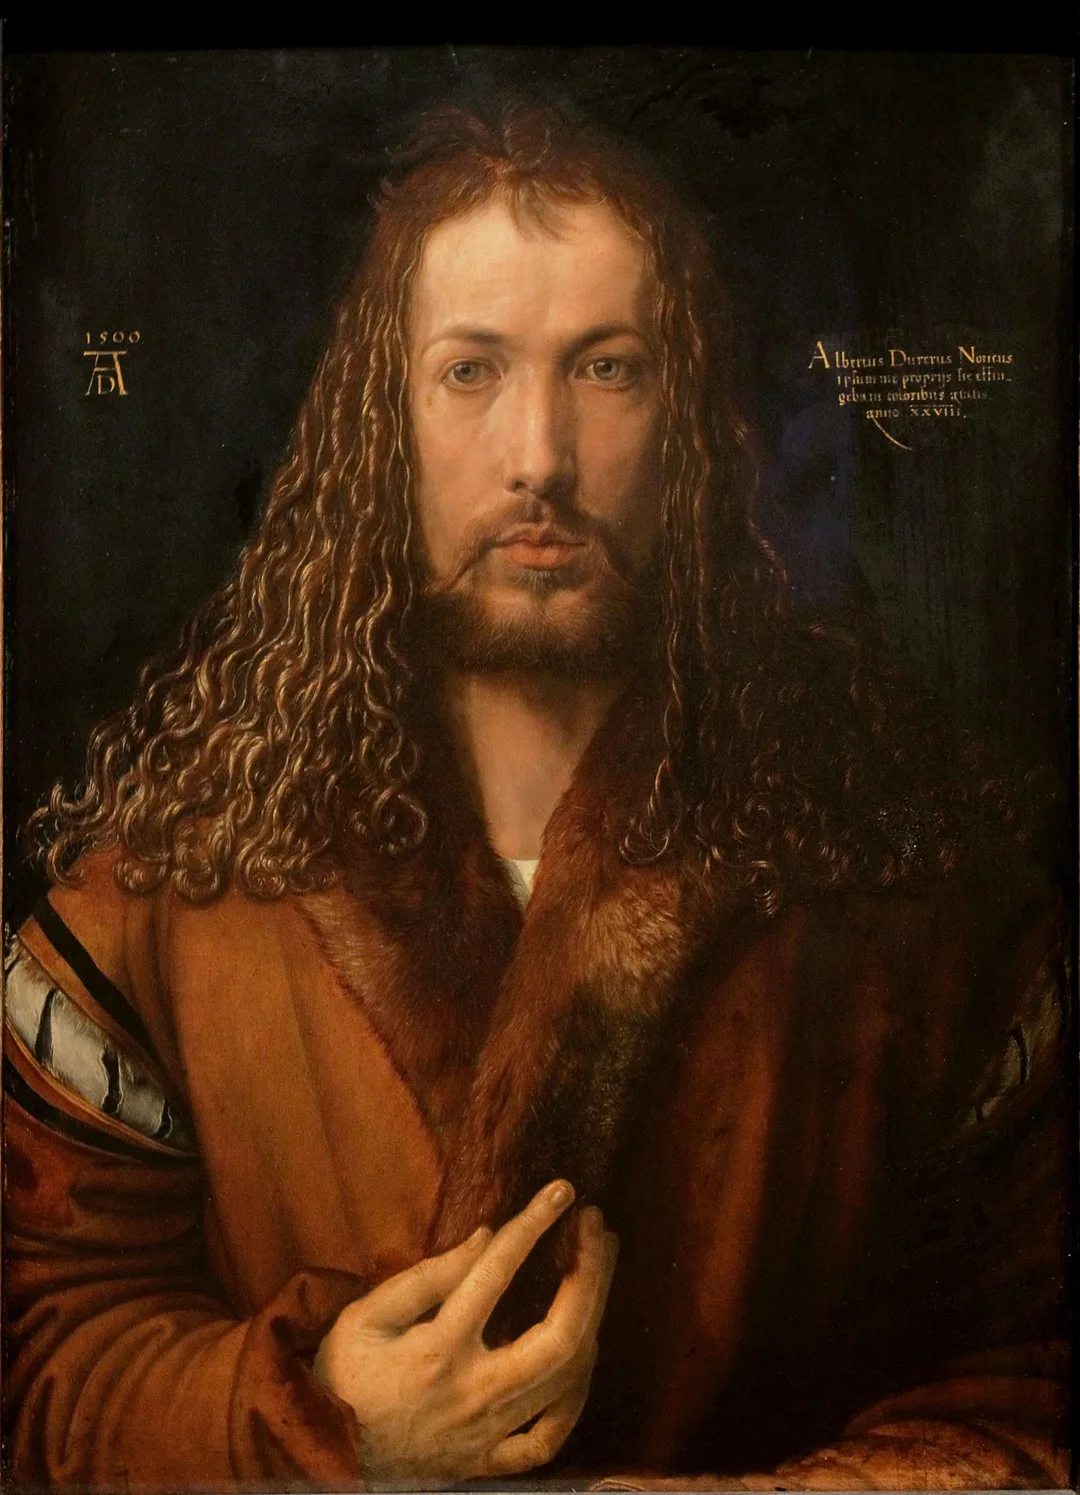
Albrecht Dürer
Dürer is a pedant among artists. Thanks to his engraving skills, he honed lines and silhouettes to jeweller-fine precision. His works show not only the overall masses of hair but also individual strands that are subordinate to the overall rhythm and support the structure of the locks.
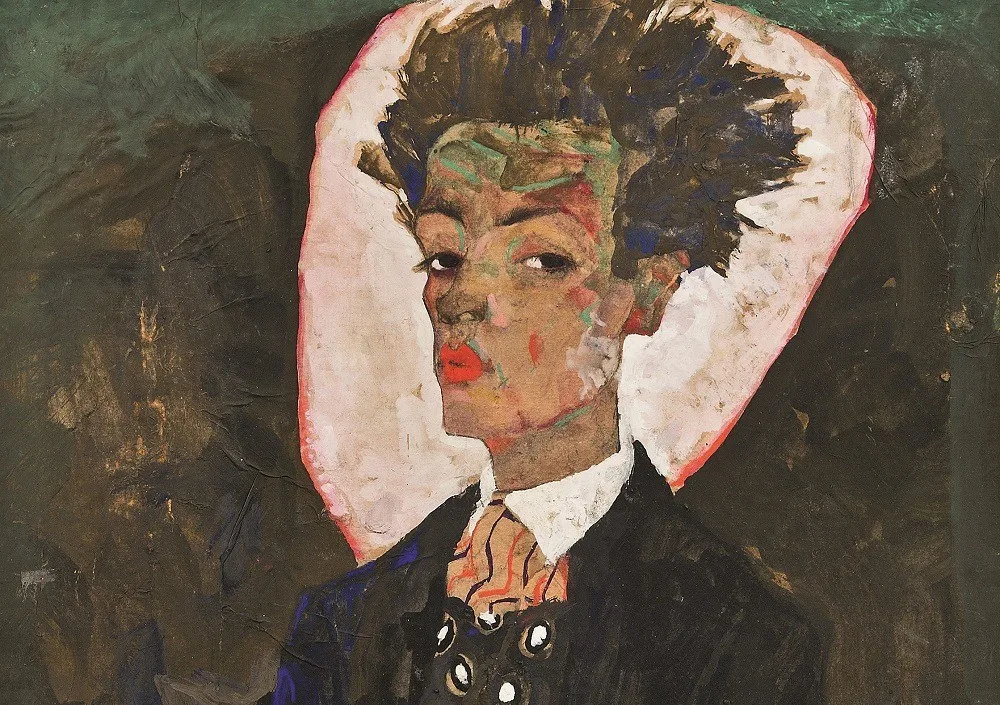
Egon Schiele
Schiele approaches work differently: his goal is not just to draw hair, but to express emotions and feelings. In expressionist portraits, the hair is disheveled, angular, sticking up, and painted with a sharp, quick, emotional stroke.
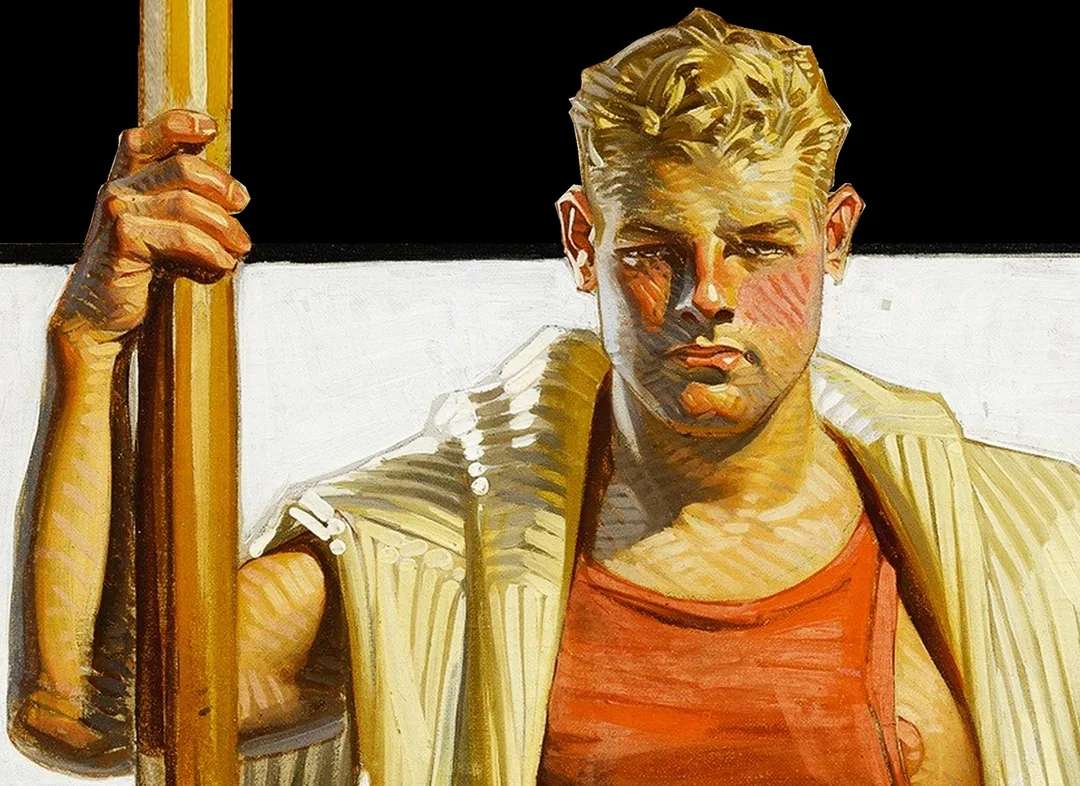
Joseph Christian Leyendecker
Leyendecker is an icon for modern artists of the applied genre: illustrators and animators. He influenced the art of the 20th–21st centuries by combining simplification of form and subtle emotionality. Hairstyles in his portraits are decoratively generalized, but they always have the individuality and character of the model's hair.
Andrew Wyeth
Wyeth is a master of harsh, restrained realism. He combines the drama and magic of images with pedantic execution. In his work, the artist outlines a solid patch of hair and then delicately refines the details at the breaks in the forms.
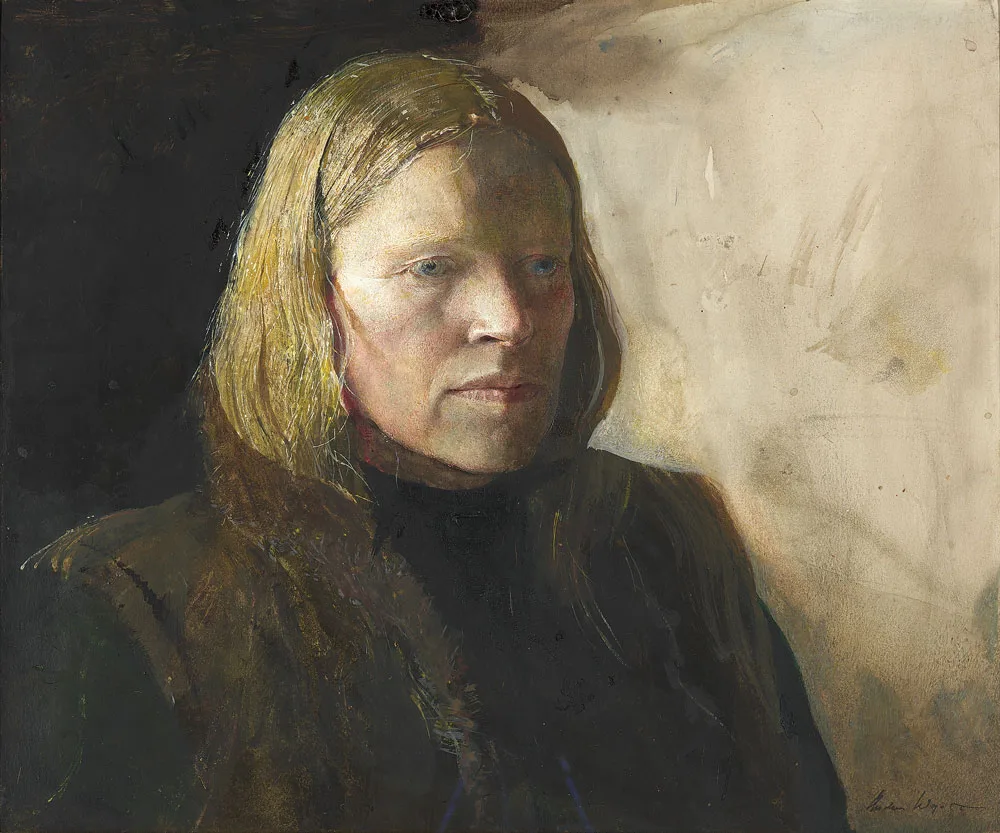
Hair is not thousands of individual lines, but a large form subordinate to one rhythm, movement, and the author's intent. Having learned to see the architecture in hair, you will be able to easily create finished, expressive portraits.
How to draw hair with a pencil: practice in 4 steps
To get started right away, we suggest making a few quick sketches with us. You will need paper, a pencil, an eraser, and a bit of enthusiasm. Let's begin!
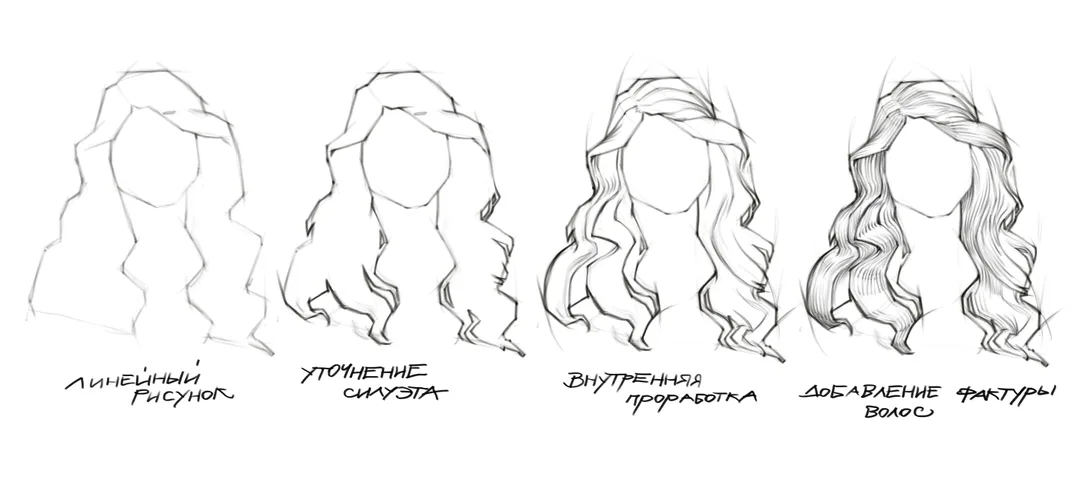
- Linear sketch. Lightly touching the paper with the pencil, we outline the character's head and hair contours. No detailing is needed here — it's enough to define the overall mass of the hair.
- Refining the silhouette. Moving on to the silhouette and strands: we draw curls and individual locks that emphasize the thickness of the hair.
- Internal development. We study the movement of curls inside the hairstyle. Try not to draw the strands the same — alternate their width and spacing to add dynamics to the drawing. Some strands can be left unrefined, leaving it up to the viewer to imagine them.
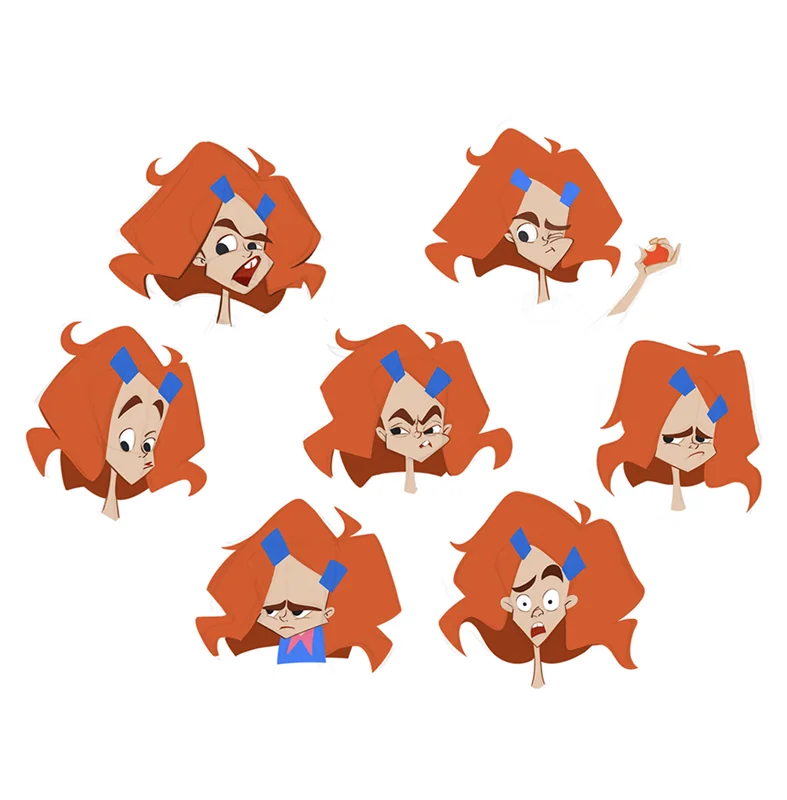
- Texture and highlights. The final touch — we add texture. Even in a linear drawing, hatching can indicate the direction of light and small highlights. Alternate dense and light strokes, slightly darken the beginning of hair growth, add accessories — hairpins or rubber bands. Any interesting detail will improve the drawing.
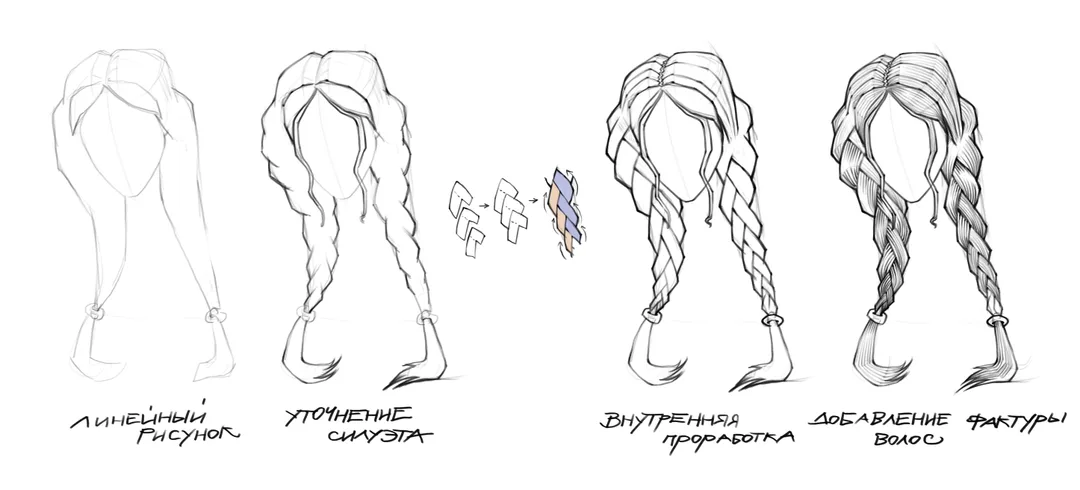
On a child's head, the hair even more so appears as a patch: the shape is soft, and stiff strands immediately make the face look older. Analysis on a live portrait in the master class How to draw a child's portrait.
How to draw hair so that it does not look flat?
Think in terms of volume, not lines. First, cover the entire mass with a medium tone, then analyze the light and shadow: add deep shadows where the strands go inward, and leave light areas on the protruding volumes. It is the contrast of light and shadow that creates the feeling of thickness and form.
In which direction should you draw the strands?
The strands follow the direction of hair growth and repeat the shape of the skull. Find the base — the point of growth — and draw the strands from it, repeating the breaks of the skull. Then the hairstyle will «sit» on the head and not lie flat like a wig.
How to draw highlights on hair?
A highlight appears on the most protruding part of the shape, turned towards the light source. Do not scatter highlights all over the hairstyle — identify one or two main areas and leave them lighter than the surroundings. More details can be found in the lesson about chiaroscuro and highlights.
How to draw different hairstyles — straight hair, curls, ponytail?
The principle is the same for all: first, the overall mass, then the direction of the strands. Straight hair has long and calm strands, curls have short rhythmic curls repeating the cylindrical shape of the curl, and a tied ponytail has the mass pulled up to the attachment point, from where the strands fan out. The pattern of the strands changes, but the logic remains the same: mass → direction → details at the breaks.
Is it necessary to draw each individual hair?
No. On the contrary, detailed drawing of each hair often harms the drawing. Detail only the breaks in the shape and a few stray strands — the viewer will fill in the rest.
Do you want to learn how to draw a portrait in its entirety?
Hair is just a part of the portrait. If you want to confidently draw the head, facial features, and hairstyle, and bring your work to a finished artistic result, come to the course «Realistic Portrait». The curators of Skills Up School will analyze your work and help you improve your skills. You can start with free lessons — how to draw a human face and how to draw human eyes.
We hope this lesson for beginners has been the beginning of your artistic journey and has helped you a little in understanding how to draw hair. Grab a pencil and give it a try!
Related materials
Drawing stones
How to draw a palm tree
How to draw a child?
How to draw a torso
How to draw highlights